Fullmetalsam
Active Member
I've been working on this one for quite a while now.
This was a challenge in many ways - using foam to come up with a lot of "round" shapes and making this costume for someone who I only had approximate measurement from (since this was to be a surprise gift for the guy I was making it for).
The whole suit was done with EVA anti-fatigue mats (the same ones EvilFX made popular with his Mass Effect Armor build and that everyone is now using). I've been using craft foam for a while now and I completely fell in love with this type of foam. It's stiff enough to hold it's shape and flexible enough not to have to run for the heat gun all the time. It's sandable, "dremel-able", and you can do wonders with just a soldering iron.
I also "designed" it all by myself - no pepakura involved
This is one project I have a bit more progress pics, because I was reporting every few days to the guy's girlfriend (who contacted me to make this costume).
I started with the chest and arms armor:
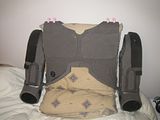
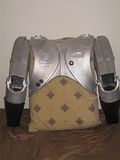
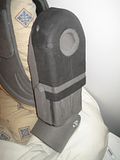
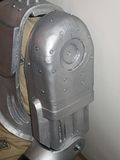
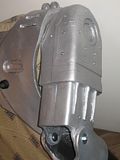
The both parts of the arm (biceps/shoulder & forearm) are attached together (and flex on a hinge) at the elbow. I've reinforced this part of the foam with a little bit of plastic and hot glue (dremelled the foam from the inside to fit the plastic sheet in - so the guy would not feel the plastic once it's arm inside the costume).
I don't have any pics of the inside, but here is what the outside looks like
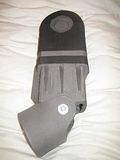
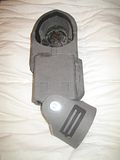
Then I went on with the legs:
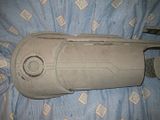
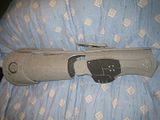
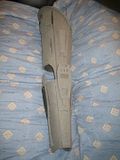
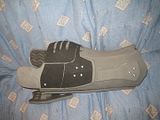
There is nothing much to say on those - a lot of design work and patterning and headaches during assembly time and that what came out of it :lol
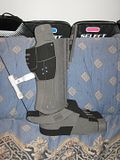
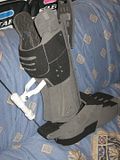
Then the feet and the "calve piston".
The "piston" part is attached to the lower leg armor with a strip of plastic - heat formed to the correct shape. The actual piston is just a 1/2" PVC pipe with 2 end cap... and the metal part (coming from the foot) is a BBQ skewer :lol
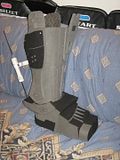
I've done the "ab armor" in foam as well - just haven't taken any pictures yet. so... coming soon
Oh - the only part I haven't mentionned now is the helmet.
When I accepted this commission, I told the client I would not be able to do the helmet in foam... doing this would require heat forming to keep an even and seamless look and I wasn't equipped to be able to do it on this scale. So I told her they would be responsible for the helmet and they picked the rubies Robocop helmet (which is a total disappointement)... but after a repaint a a bit of tweaking here and there, it's not so bad after all. I still need to get a tinted visor in there and then I'll take pics of the helmet and post them here.
I'm nearing completion at this point - a bit of tweaking and painting and I'm done. My client wants to go with the original Robocop look - so a more silver silver look than a blueish hue we see in Robocop 2. He also like a bit of grime on his armor to make it look used. So that's what I'll be shooting for.
Let me know what you think!
This was a challenge in many ways - using foam to come up with a lot of "round" shapes and making this costume for someone who I only had approximate measurement from (since this was to be a surprise gift for the guy I was making it for).
The whole suit was done with EVA anti-fatigue mats (the same ones EvilFX made popular with his Mass Effect Armor build and that everyone is now using). I've been using craft foam for a while now and I completely fell in love with this type of foam. It's stiff enough to hold it's shape and flexible enough not to have to run for the heat gun all the time. It's sandable, "dremel-able", and you can do wonders with just a soldering iron.
I also "designed" it all by myself - no pepakura involved
This is one project I have a bit more progress pics, because I was reporting every few days to the guy's girlfriend (who contacted me to make this costume).
I started with the chest and arms armor:


The both parts of the arm (biceps/shoulder & forearm) are attached together (and flex on a hinge) at the elbow. I've reinforced this part of the foam with a little bit of plastic and hot glue (dremelled the foam from the inside to fit the plastic sheet in - so the guy would not feel the plastic once it's arm inside the costume).
I don't have any pics of the inside, but here is what the outside looks like


Then I went on with the legs:


There is nothing much to say on those - a lot of design work and patterning and headaches during assembly time and that what came out of it :lol
Then the feet and the "calve piston".
The "piston" part is attached to the lower leg armor with a strip of plastic - heat formed to the correct shape. The actual piston is just a 1/2" PVC pipe with 2 end cap... and the metal part (coming from the foot) is a BBQ skewer :lol


I've done the "ab armor" in foam as well - just haven't taken any pictures yet. so... coming soon
Oh - the only part I haven't mentionned now is the helmet.
When I accepted this commission, I told the client I would not be able to do the helmet in foam... doing this would require heat forming to keep an even and seamless look and I wasn't equipped to be able to do it on this scale. So I told her they would be responsible for the helmet and they picked the rubies Robocop helmet (which is a total disappointement)... but after a repaint a a bit of tweaking here and there, it's not so bad after all. I still need to get a tinted visor in there and then I'll take pics of the helmet and post them here.
I'm nearing completion at this point - a bit of tweaking and painting and I'm done. My client wants to go with the original Robocop look - so a more silver silver look than a blueish hue we see in Robocop 2. He also like a bit of grime on his armor to make it look used. So that's what I'll be shooting for.
Let me know what you think!
Last edited:
