Gimpdiggity
Master Member
Hi guys.
My wife thinks she wants to go as Rick Sanchez from "Rick and Morty" for Halloween. I'm okay with this, as I love the show and it's a pretty easy costume build. Our plan is to go as alternate dimension Ricks, with her actually going as a female Rick.
So, to get started on the costumes I decided to build us a couple of Portal Guns.
They're going to be pretty basic props, 3D printed, with MAYBE one LED light, but no sounds. I've seen some of these on other sites that play a bunch of sounds, have a good 6-7 LEDs on them, and have a working LCD numeric display that the dial changes. Very, very cool...but also quite a bit more than what I want to put into one, primarily because the party we'll be going to can get a bit busy and I'd rather not have them get damaged, lost, or stolen if I put too much effort into them...where if I just build basic ones and something happens I won't be very upset.
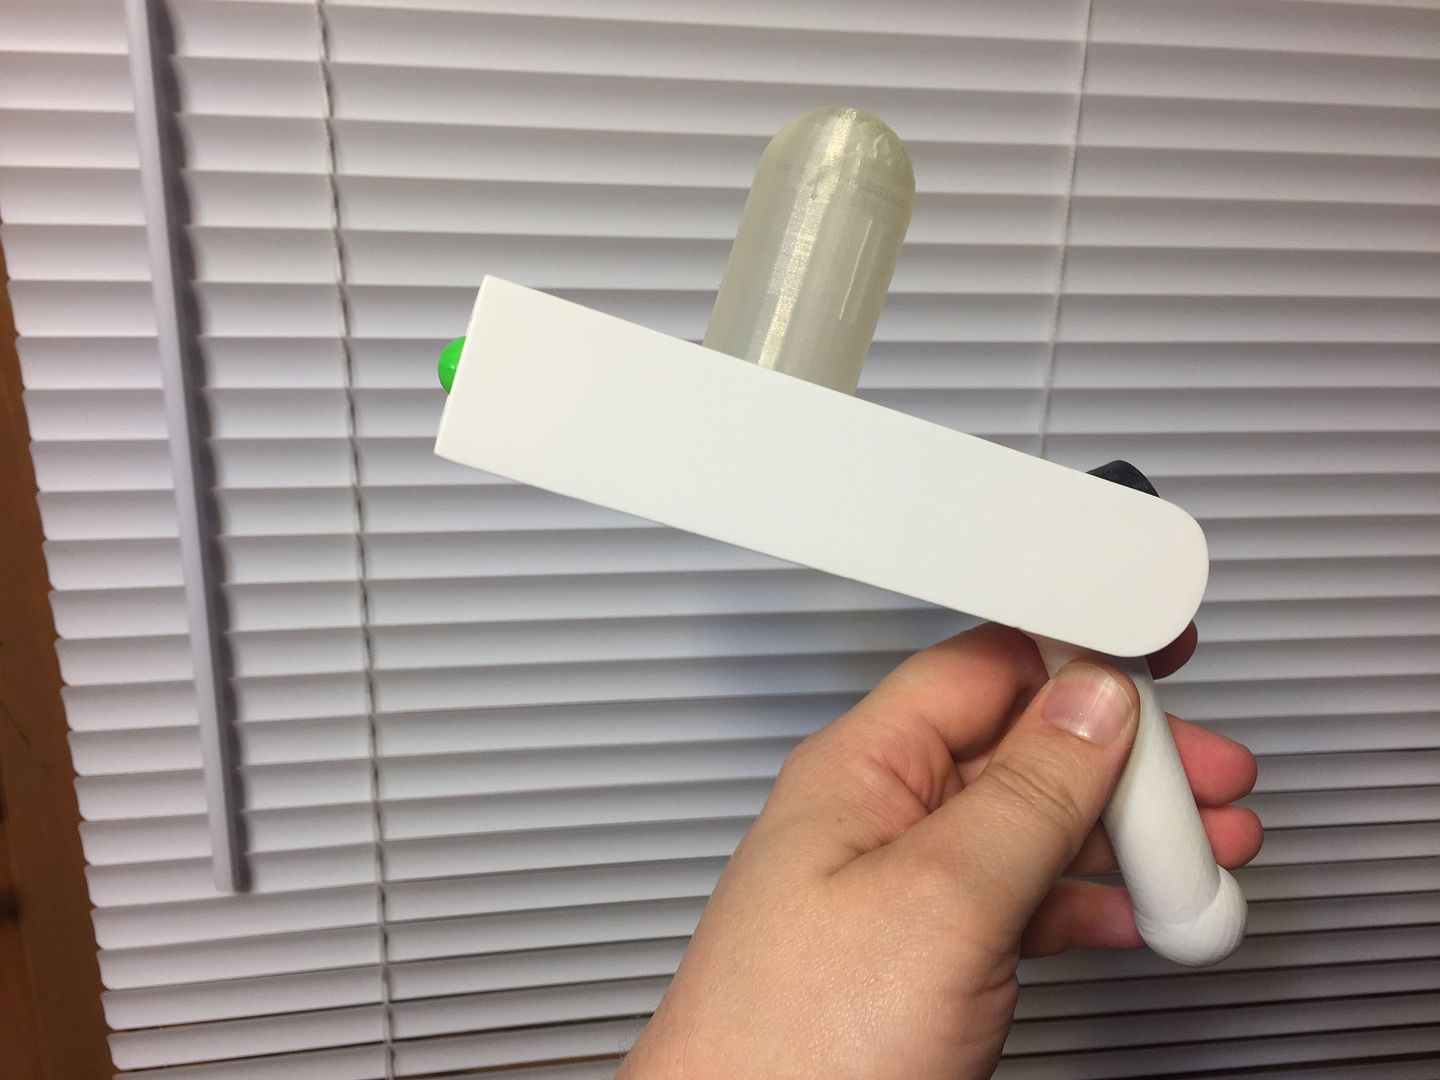
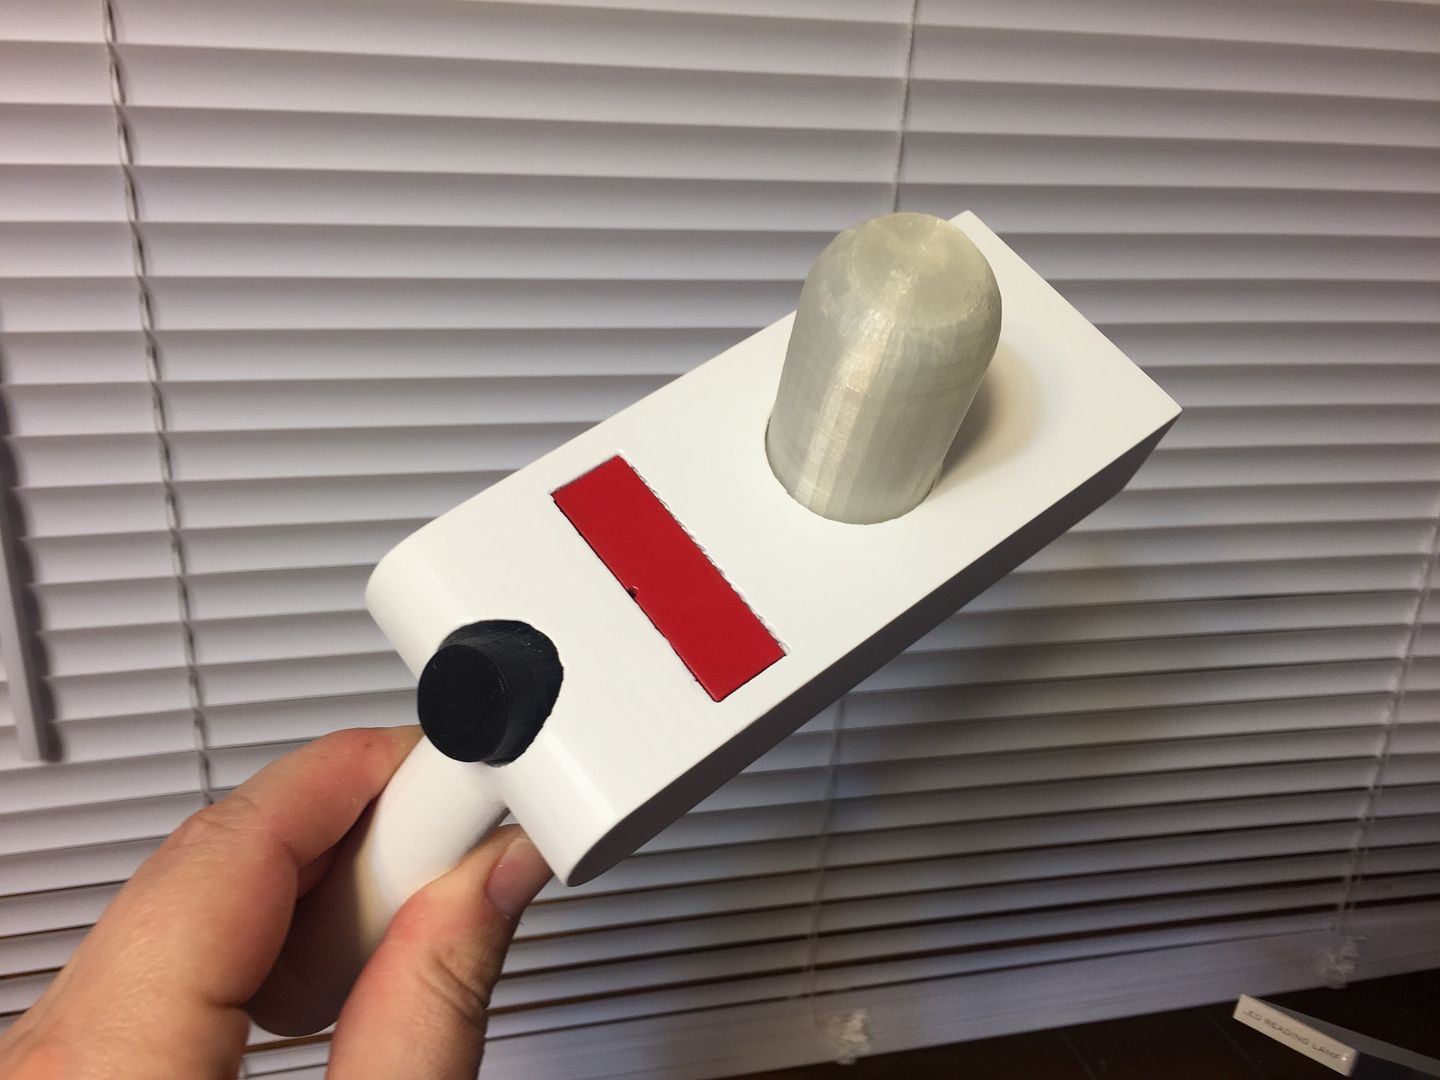
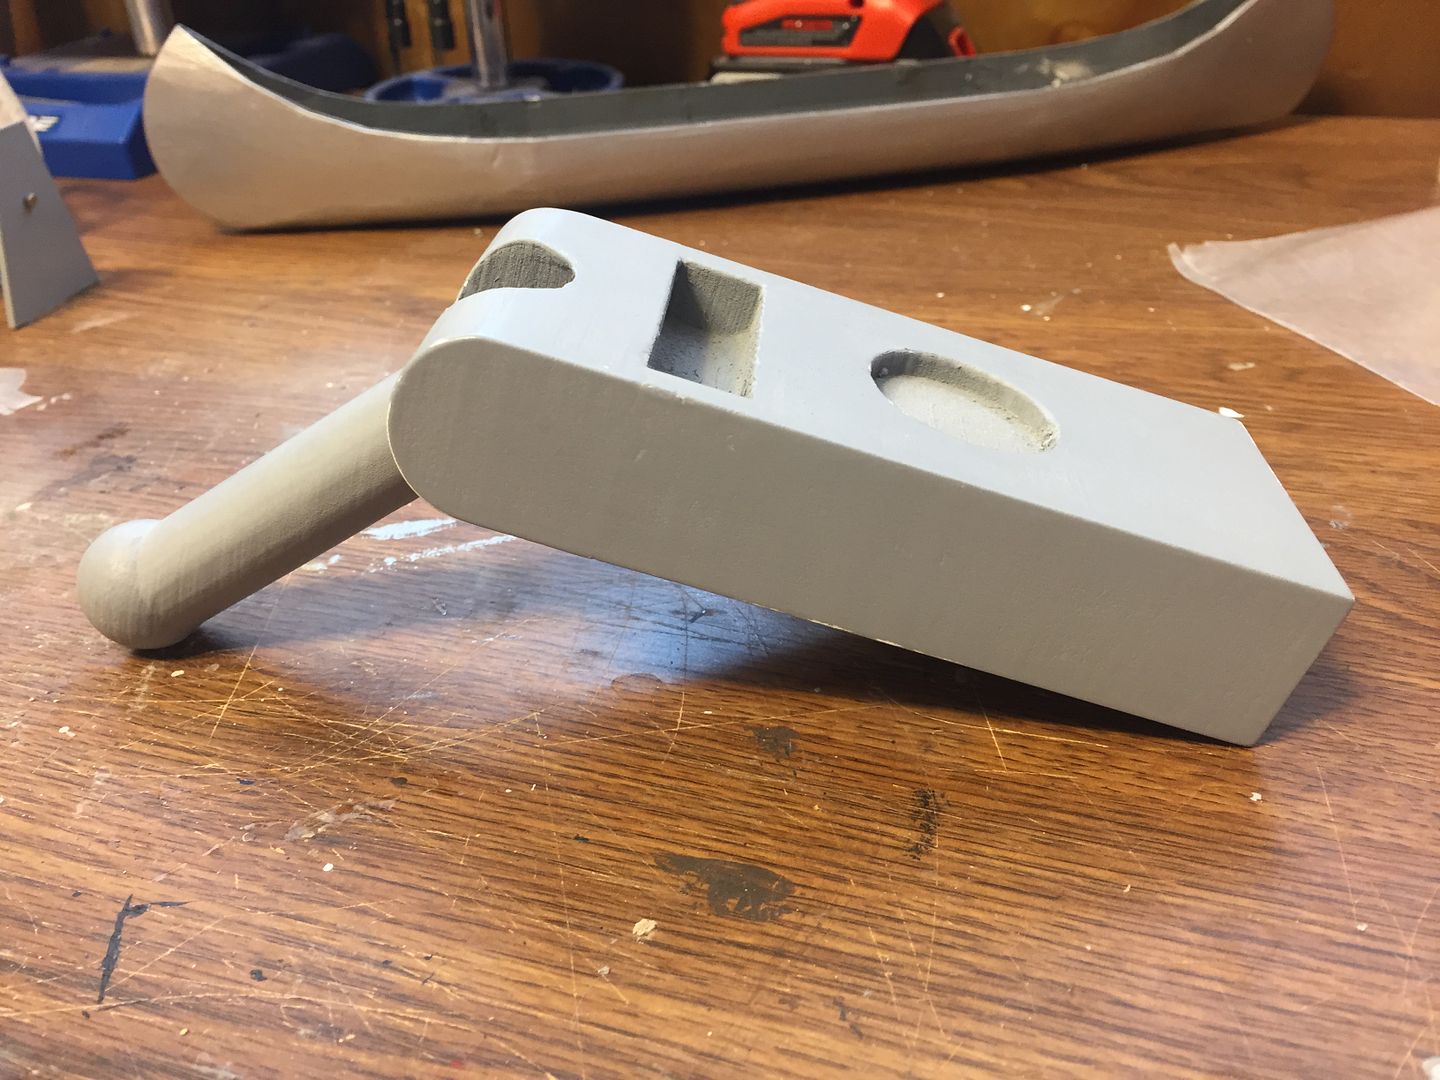
So, I started by finding a nice model on Thingiverse, and got the parts all printed.
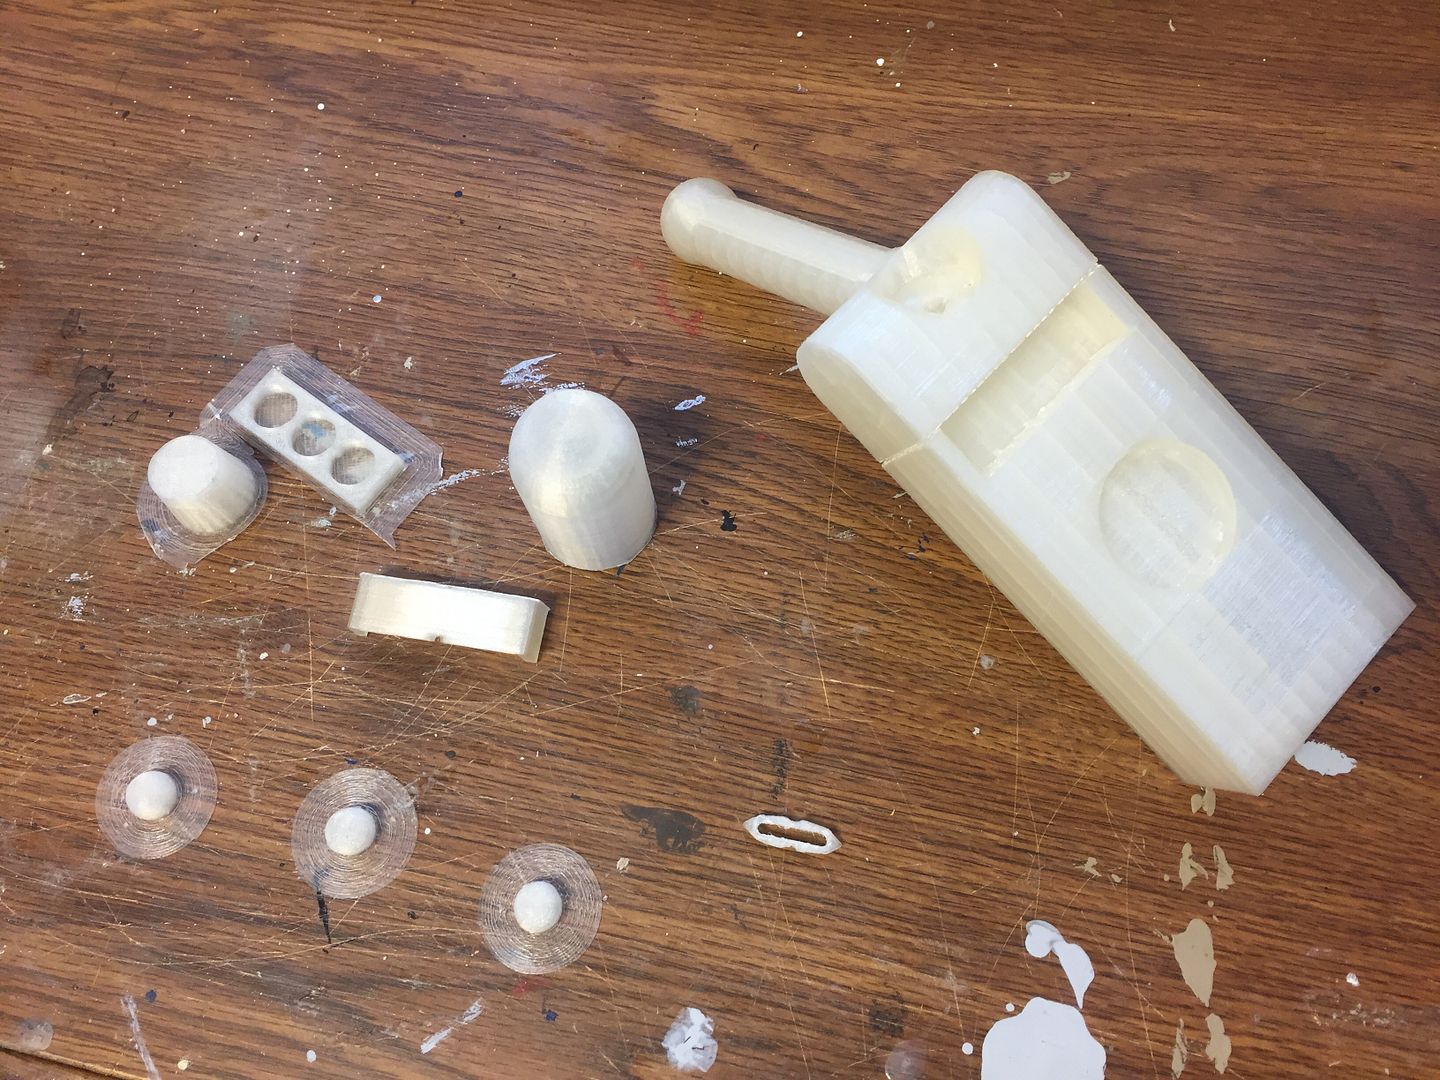
The main body of the gun is two large parts that I epoxied together. I was thinking about trying to use epoxy to smooth the print lines, as I've had luck with that in the past, but the epoxy that I have on hand isn't the same stuff and on the couple of parts I tried it on I wasn't very impressed with the results.
So I decided I'll fill, sand, fill, sand, use filling primer, sand...etc...on the main body of the gun. The smaller parts will most likely be just painted and put together, as they can be a real pain to fill and sand. I figure if the body looks nice and smooth, it's the thing that most people are going to be seeing.
After the first round of filler and some paint to see how the lines are looking, I ended up with this.
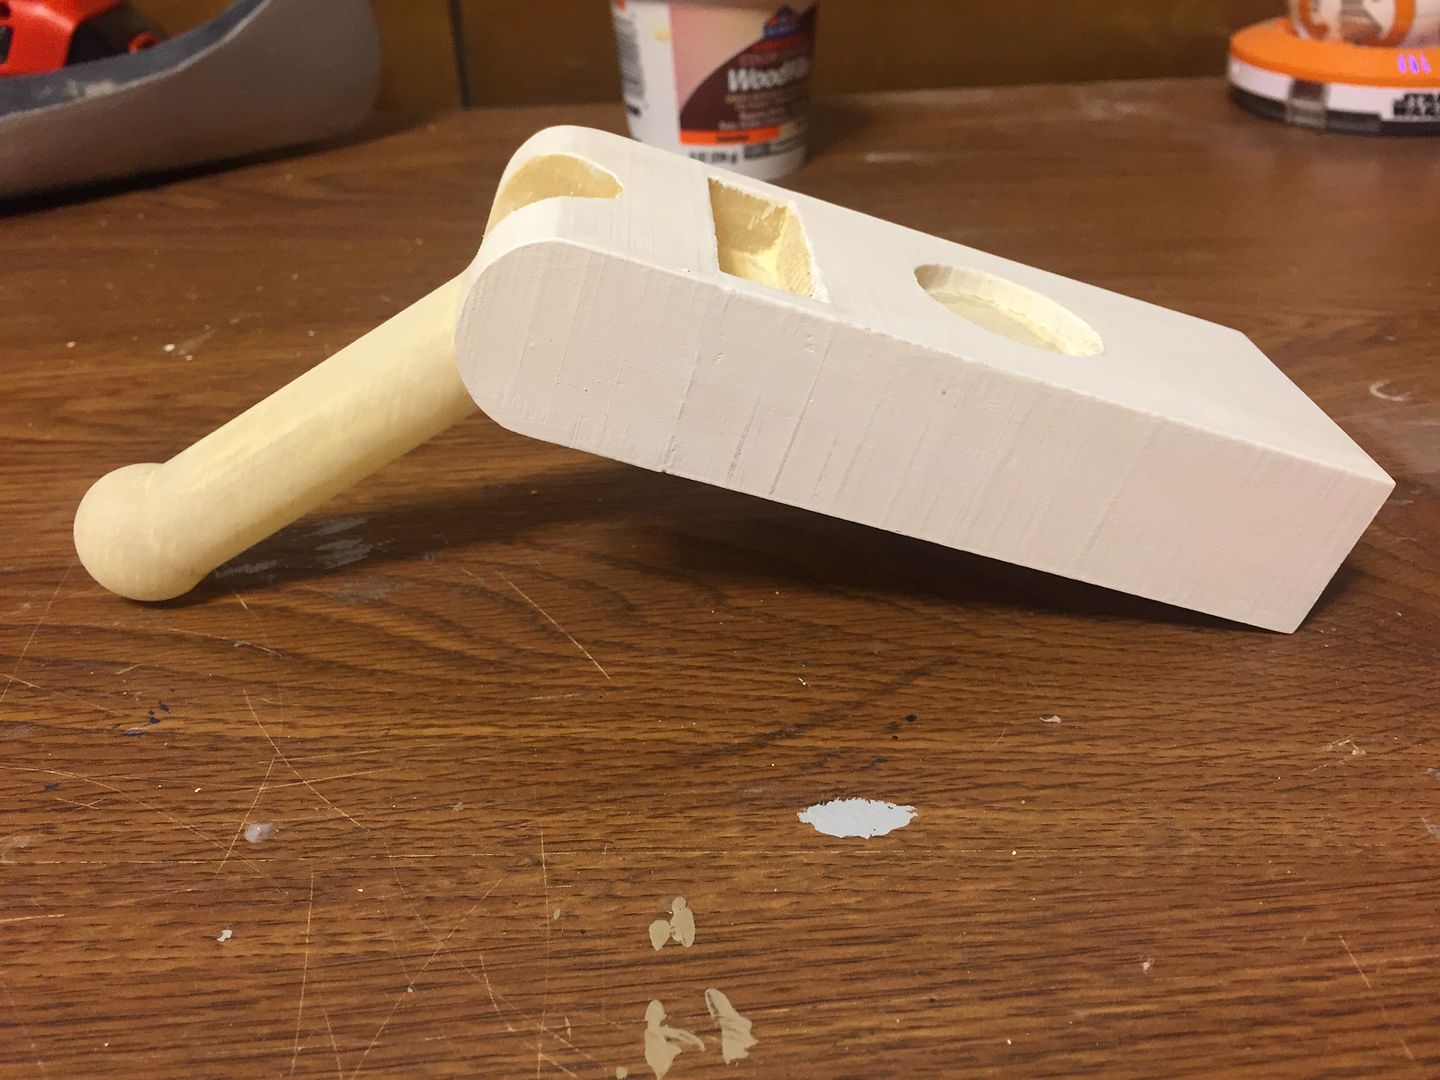
The lines on the side aren't as noticeable as they appear...I think that's the paint not sticking to the plastic with the same adhesion as it was sticking to the filler.
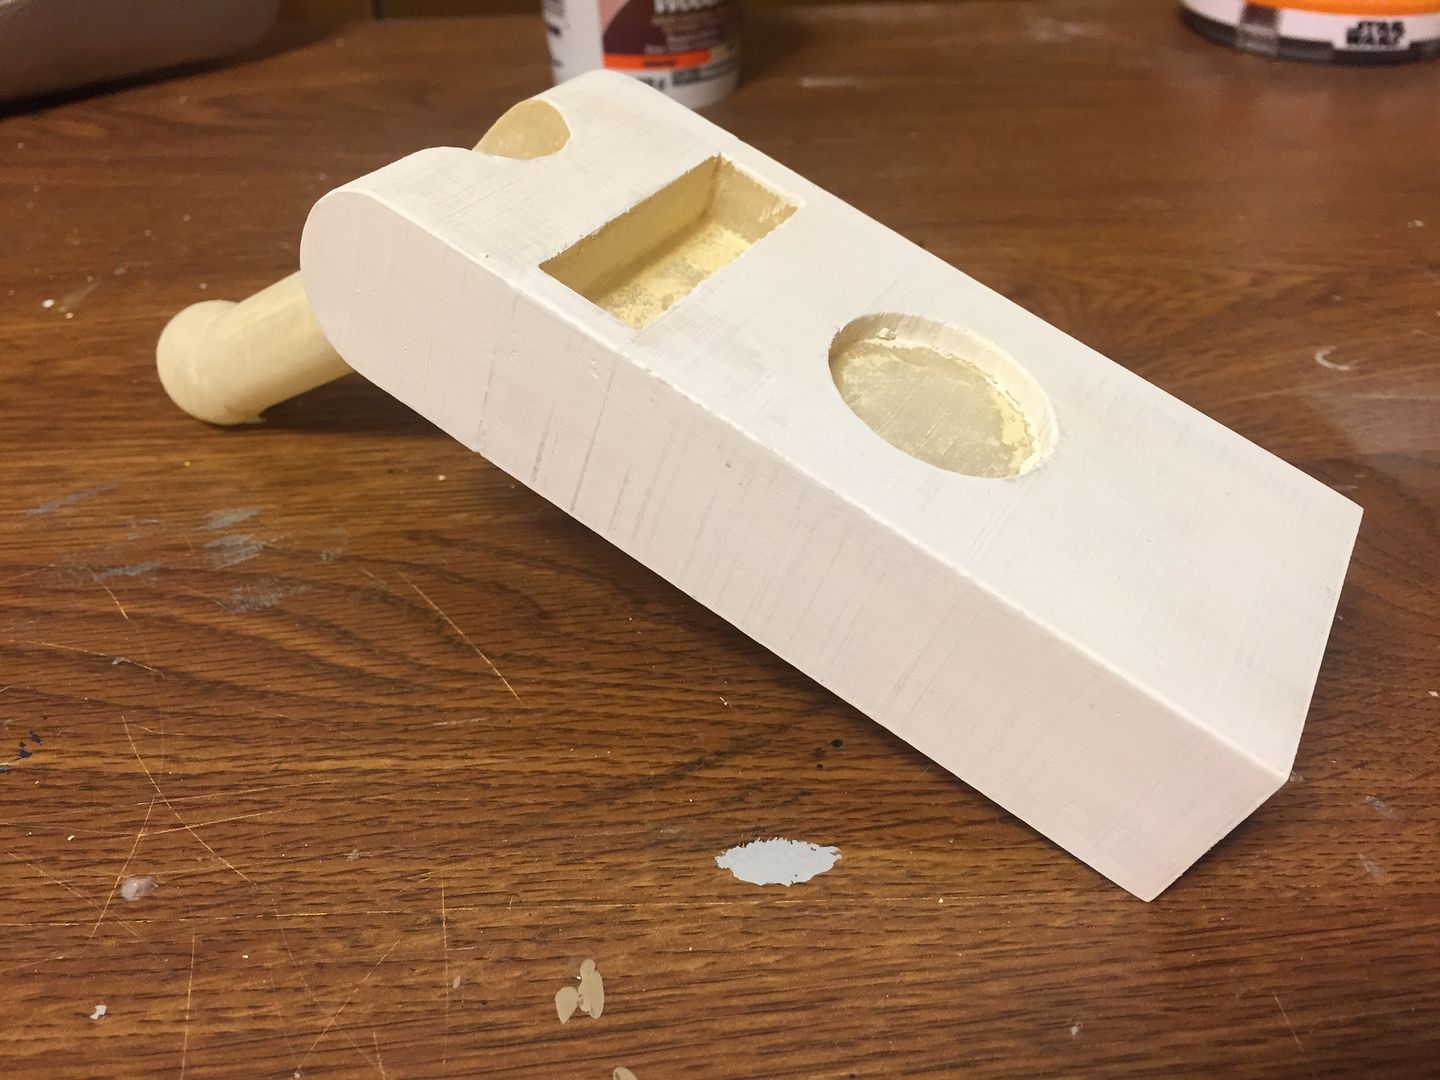
After some high fill primer and a bit of sanding, I'm left with this.
I need to do a bit more sanding to it, but I'm pretty happy with how the finish looks.
I'll be airbrushing it to put the final color on, and I believe I'll be adding a bit of artistic license to it by painting it Pearl White instead of just white...mainly because that's the color my wife wants it. If it looks terrible, I can always just throw some regular white over the pearl.
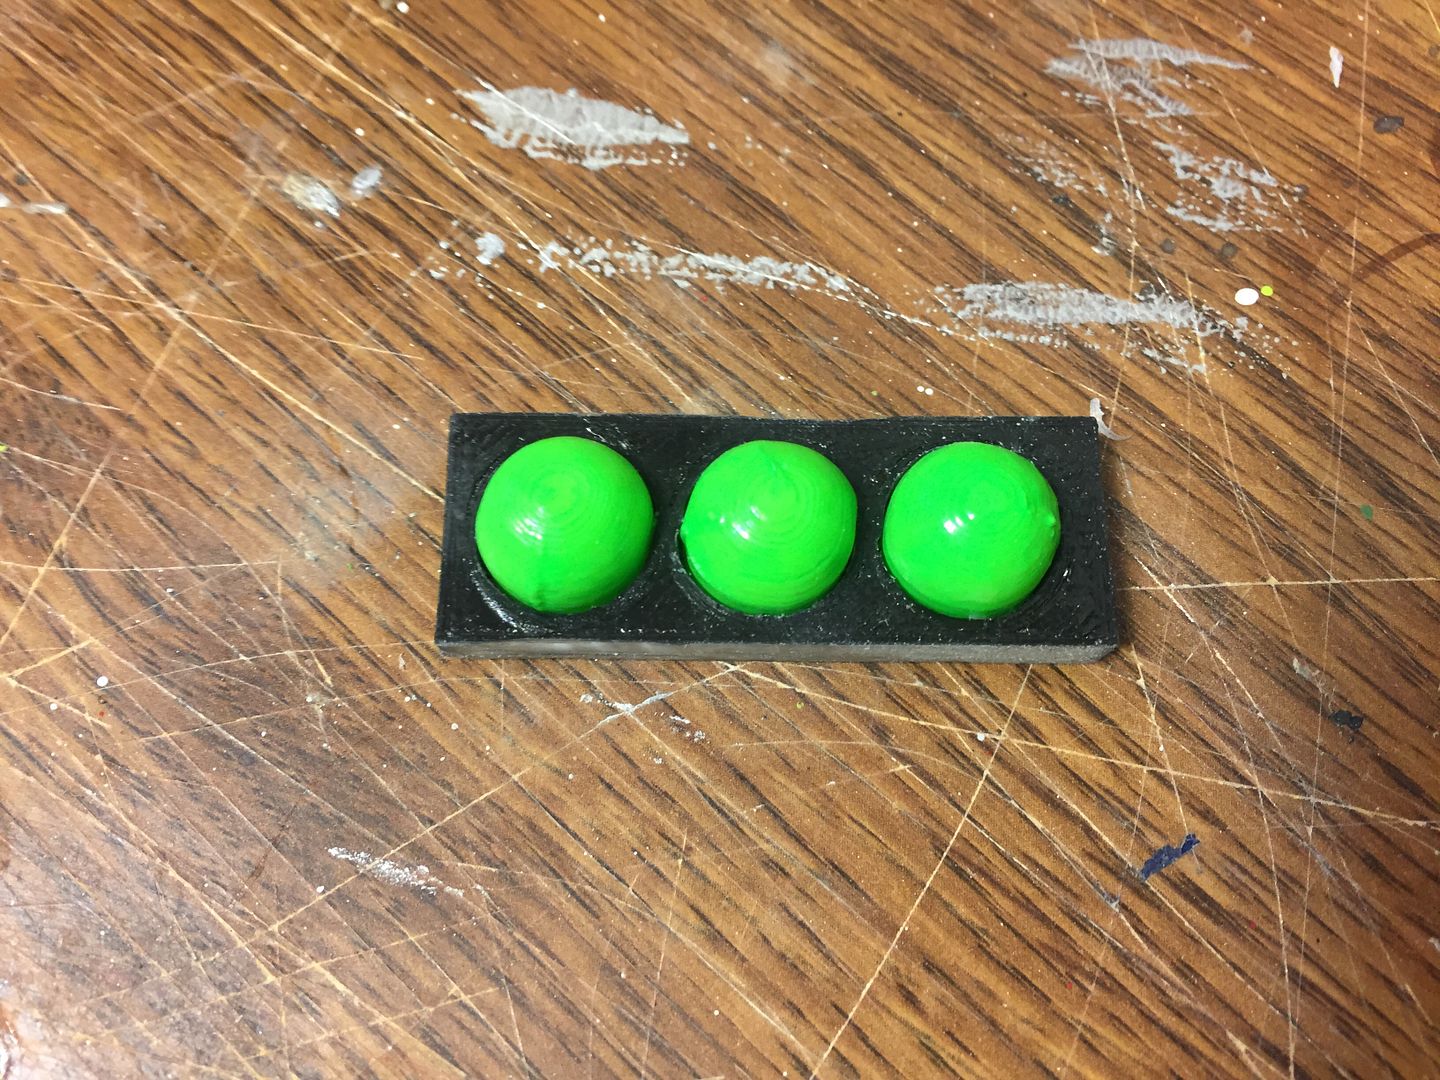
I have a couple of the small bits primed, and a couple I'm not going to prime as they are flat and seem to hold paint well with just a tiny bit of sanding. I've experimented with some colors on some spare parts I had laying around, and the color green I want for the front LED pieces doesn't stick well to the bare plastic so I'm hoping by priming it I'll have better luck with it adhering.
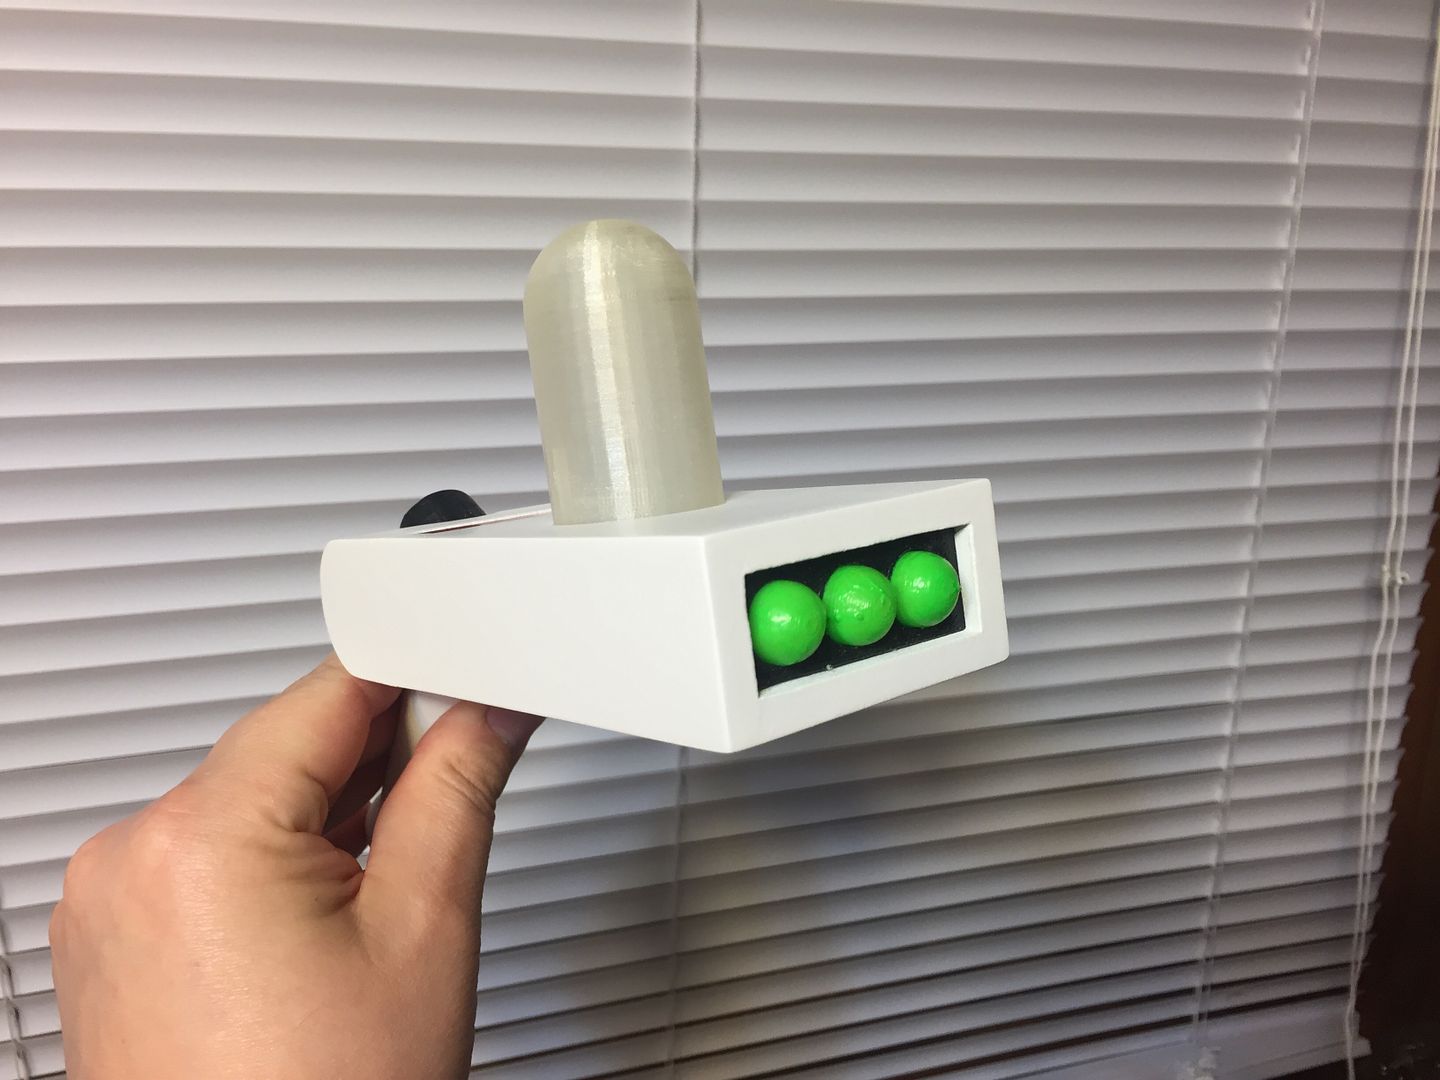
I plan on getting a real LED to put inside the fuel reservoir, so that it will glow green for me, and probably another color for my wife. I've done a bit of testing with some spare LEDs I have laying around and it actually looks pretty cool with the light inside the printed reservoir...the reservoir diffuses the light in a really cool way.
I'll post more pictures as I go along.
Thanks for checking it out!
My wife thinks she wants to go as Rick Sanchez from "Rick and Morty" for Halloween. I'm okay with this, as I love the show and it's a pretty easy costume build. Our plan is to go as alternate dimension Ricks, with her actually going as a female Rick.
So, to get started on the costumes I decided to build us a couple of Portal Guns.
They're going to be pretty basic props, 3D printed, with MAYBE one LED light, but no sounds. I've seen some of these on other sites that play a bunch of sounds, have a good 6-7 LEDs on them, and have a working LCD numeric display that the dial changes. Very, very cool...but also quite a bit more than what I want to put into one, primarily because the party we'll be going to can get a bit busy and I'd rather not have them get damaged, lost, or stolen if I put too much effort into them...where if I just build basic ones and something happens I won't be very upset.
So, I started by finding a nice model on Thingiverse, and got the parts all printed.
The main body of the gun is two large parts that I epoxied together. I was thinking about trying to use epoxy to smooth the print lines, as I've had luck with that in the past, but the epoxy that I have on hand isn't the same stuff and on the couple of parts I tried it on I wasn't very impressed with the results.
So I decided I'll fill, sand, fill, sand, use filling primer, sand...etc...on the main body of the gun. The smaller parts will most likely be just painted and put together, as they can be a real pain to fill and sand. I figure if the body looks nice and smooth, it's the thing that most people are going to be seeing.
After the first round of filler and some paint to see how the lines are looking, I ended up with this.
The lines on the side aren't as noticeable as they appear...I think that's the paint not sticking to the plastic with the same adhesion as it was sticking to the filler.
After some high fill primer and a bit of sanding, I'm left with this.
I need to do a bit more sanding to it, but I'm pretty happy with how the finish looks.
I'll be airbrushing it to put the final color on, and I believe I'll be adding a bit of artistic license to it by painting it Pearl White instead of just white...mainly because that's the color my wife wants it. If it looks terrible, I can always just throw some regular white over the pearl.
I have a couple of the small bits primed, and a couple I'm not going to prime as they are flat and seem to hold paint well with just a tiny bit of sanding. I've experimented with some colors on some spare parts I had laying around, and the color green I want for the front LED pieces doesn't stick well to the bare plastic so I'm hoping by priming it I'll have better luck with it adhering.
I plan on getting a real LED to put inside the fuel reservoir, so that it will glow green for me, and probably another color for my wife. I've done a bit of testing with some spare LEDs I have laying around and it actually looks pretty cool with the light inside the printed reservoir...the reservoir diffuses the light in a really cool way.
I'll post more pictures as I go along.
Thanks for checking it out!
Last edited: