Portal Gun - scratch build finished

christ

New Member
Hi guys,

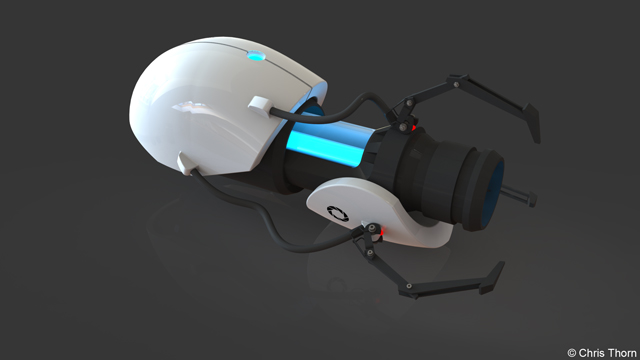
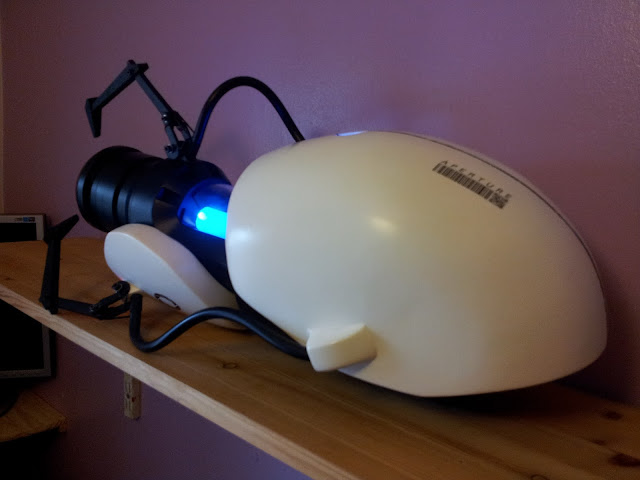
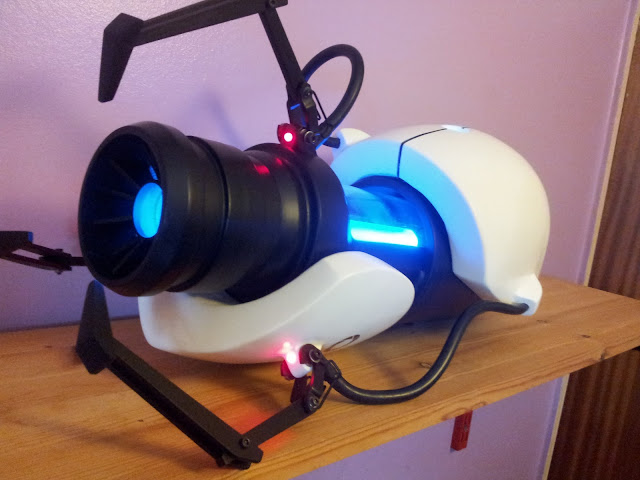
Just thought I'd share with you my scratch-built Portal Gun.

I based my design on the Portal Gun created by Harrison Krix of Volpin Props. Without his detailed photos and descriptions I would have been completely lost.

p1-dark.jpg


2011-09-25%25252017.16.36.jpg


2011-09-25%25252017.16.17.jpg


All the images and details of the build are linked on my blog:


I built the gun in 3-4 months and gave it to a friend as a gift for his 30th birthday. The last couple of days of the build were such a rush that I didn't have chance to take any professional photos with a DSLR, nor did I take a video. However, I am hoping to get a video of the lights and sounds sent through in the next week, at which point I'll add it to the blog.

Chris
 
Well done, Chris! What awesome about your build-up is while it definitely utilizes several of Harrison's methods, you can still tell where YOUR ingenuity took over in certain respects! Your friend is lucky to have you.
 
Thanks all, I appreciate the nice comments!

Quite a few of the steps in making this were very daunting, but once I got stuck into it, I found it wasn't so bad after all.

I'd like to have a go at silicone moulding next (assuming I'm allowed to borrow the gun for a week!)
 
awesome build, i'm working on my own ASHPD right now, myself. i'm really glad you posted all your steps, and since i'm mostly going off of volpin's build as well, it's good to see how you did some things differently. i'm definitely inspired!
 
Glad to be of assistance :)

I am still hoping to get a video posted soon - just waiting for my friend to film it (I think he's been busy!)

Chris
 
I love seeing builds like this, where so much learning is happening on the fly. It gives hope to me for future projects.
 
Definitely. Often the best way to learn is just to have a go at something.

Fortunately no one thing in this build (apart from the sound chip) was too expensive on its own, so if I messed something up it wasn't the end of the world. Plus most of the pipes etc came in 1m lengths, which left more than enough for spares.

The first rear shell I made was using expanding PU foam. I lined a large carboard box with cling film (food wrap), gave it a spray of water, and then squirted in 3-4 layers of PU foam spraying each with water (to accelerate the curing process). Overnight this turned into a massive green brick, and I thought I was onto a winner.

When I came to carve it, however, I found that once I got a few inches inside the surface of the foam, the bubbles were no longer small and densely pack, but enormous and brittle. I continued carving regardless, assuming I could fill it all in with car body filler.

I left the carved rear shell in a bin bag for a week or so (to protect it from UV) whilst I did other things, and when I came back to it I found the foam had deformed a huge amount - as if someone had taken a blow torch to it. Nothing was resting on the shell, and it was tucked safely away from any heat or light sources.

I probably won't be using expanding PU foam again...
 
This thread is more than 12 years old.

Your message may be considered spam for the following reasons:

  1. This thread hasn't been active in some time. A new post in this thread might not contribute constructively to this discussion after so long.
If you wish to reply despite these issues, check the box below before replying.
Be aware that malicious compliance may result in more severe penalties.
Back
Top