Poison Apple - Snow White Evil Queen

i was just thinking...you could drill a hole in the top and use a piece of coat hanger to glue a couple inches into the apple.
then use a 2 part plumber's putty to make the stem and paint it.
then your daughter could tie a string on it and swing it around in circles if she wanted to and it won't break or come off.
 
That streaky red came out great. Nice work all around!

Complete happy accident on the streaks, but really worked surprisingly well. :)

i was just thinking...you could drill a hole in the top and use a piece of coat hanger to glue a couple inches into the apple.
then use a 2 part plumber's putty to make the stem and paint it.
then your daughter could tie a string on it and swing it around in circles if she wanted to and it won't break or come off.

This is a great idea! However, won't quite work exactly that way, because I cast it hollow. :( For one of the testers, I filled it with resin, which had a bunch of stuff which makes it lighter mixed in, and the apple was still really heavy, so I decided to keep the final one hollow. But, still might not be a bad idea to drill the hole, epoxy in a support wire, and the sculpt over it. Definitely would still be more resilient than just gluing on the Sculpey one. I have a bunch of sculpting epoxy, so may have to give that a try.
 
ok so it's hollow...you could still use my idea ....here's what you have to do.
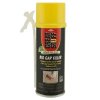
...grab a can of "great stuff" expanding foam insulation for around $3 at the hardware store.
0007498500300_500X500.jpg
stick the little straw thing right into the whole on the top of the apple and let her rip.
the expanding foam will fill the inside with hardly any material and once dry will be pretty light. you could also glue the coat hanger wire to it on the inside.

you'll have to build a little paper cone around the top so as the foam expands and shoots out the top it doesn't get all over your paint job.
but it's a cheap alternative to that expensive expanding foam you buy from a chemical supply company!

:cool
 
Last edited:
Good thinking, ultraman, I always forget about Great Stuff. I'll have to pick some up when I get back home, and give it a try.

We're at Disneyland this week, and debuting full costumes at the party tomorrow. I popped in one of the art stores in Downtown Disney today, and saw these there; could have saved myself a whole buncha trouble, haha! Though, these are ceramic, don't glow, and are extremely expensive!

apples_zpsh9jxgbfc.jpg
 
Last edited by a moderator:
Sinned Looking good man! I'm sure she'll kill it!
(and a nice night-light afterwards...)

And just be careful... that girl is Poison! :)

Bell_Biv_Devoe_Poison.gif
 
Last edited by a moderator:

LOL

Yah Yours is way better! Way more time spent on it i'm sure

Thanks, Scote! This was one project that actually went fairly quick, all considered. :)

Here's how it all came together. Can't quite see it in the picture, but I also made a light-up gem necklace. Well, I did the gem and electronics, and she made the gold part of the necklace, with Sculpey, which was then (imitation) gold leafed. Turned out pretty good overall, though I think she has the roles a bit confused. ;)

EvilQueen-PoisonApple-29_zpskdjvs7h0.jpg
 
ok so it's hollow...you could still use my idea ....here's what you have to do.
...grab a can of "great stuff" expanding foam insulation for around $3 at the hardware store.

stick the little straw thing right into the whole on the top of the apple and let her rip.
the expanding foam will fill the inside with hardly any material and once dry will be pretty light. you could also glue the coat hanger wire to it on the inside.

you'll have to build a little paper cone around the top so as the foam expands and shoots out the top it doesn't get all over your paint job.
but it's a cheap alternative to that expensive expanding foam you buy from a chemical supply company!

So I gave this a shot over the weekend, on a different project (Twisty juggling pins), and I'm on the fence with the results. It definitely filled the voids, but it doesn't seem to be fully curing. If I poke a wire through the cured bottom, a bunch of gas escapes, and then Great Stuff starts expanding out of the hole, eventually sealing itself up again. I'm assuming this means I over-filled the things, and the center is pressurized enough, that it's not curing all the way through. Not that big of a deal, but I'm seeing now that some uncured material appears to be "weeping" (best way I can describe it) through a few micro-holes, in the castings.

Thoughts?
 
couple of thoughts.....
1) you gotta shake the crap out of the can for like a minute......many people forget to shake it which is one of the main causes of it not curing.
2) do a little at a time and build it up. this allows each little layer below it air to cure. that and too much will cause a lot of pressure and could crack your resin if it's too thin.
3) if you can put the piece back in the mold and lock it down....then do the foam and let it sit for like 3 days before opening it. this will keep it from deforming the shape of the thing you molded.

other then that....you just have to work with it to get use to how it acts.
it can sometimes be a pain in the butt....but you have to realize we're using it for a different purpose then its meant for....but it's cheap!

-ultra:cool

Haha, yeah, I shook that thing like mad for a few minutes.

Sounds like it's just a massive over-filling problem then. The pins are about 18" tall, so I rigged up a rubber tube to the end of the actual Great Stuff tube, so I could reach the top of the pin, and fill up from there. It worked so well, I got a little carried away. Wasn't expanding fast enough for my liking, so I definitely did too much.

Luckily no issues with deforming (though my original pins had that problem, using foam from Smooth-On).

Totally with you on the cheap though, doing the same thing I did, using Smooth-On's foam, would have been about $100!
 
I tried Great Stuff once to fill one of those cheap plastic Thor hammers. I put a drop in maybe the size of a golf ball and it ended up expanding so much it split and swallowed the hammer. :lol

I'm sure we are all familiar with the saying "a little goes a long way" but this stuff is just ridiculous!
 
No doubt, Mr Mold Maker, definitely went further than I thought, it's just much slower to expand than the smoothon foams. I'm putting the Twisty pins on an airplane tomorrow... may have an interesting result. :popcorn
 
Last edited by a moderator:
Back
Top