Peter Flarkin' Quill ( Star Lord)

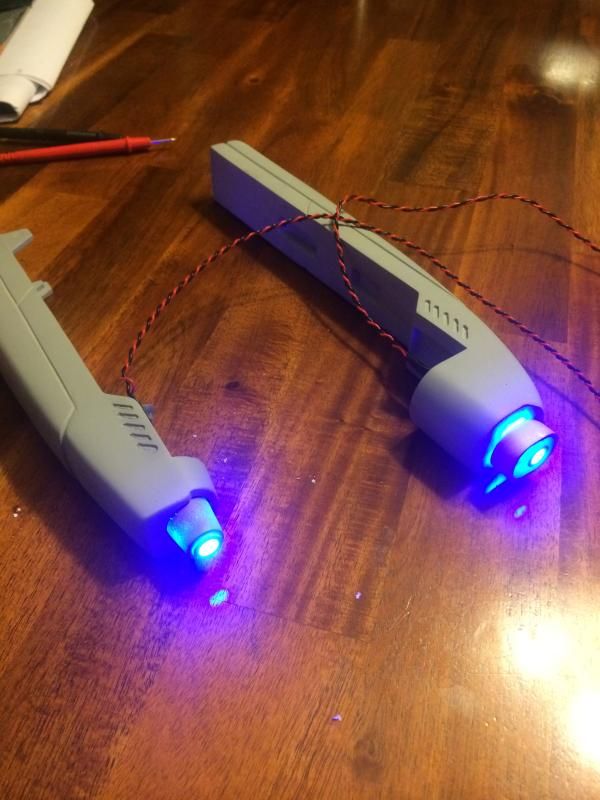
are you cutting of the extra leds...or can you....I see you used 8 in each eye....the string is 20?....just wondering

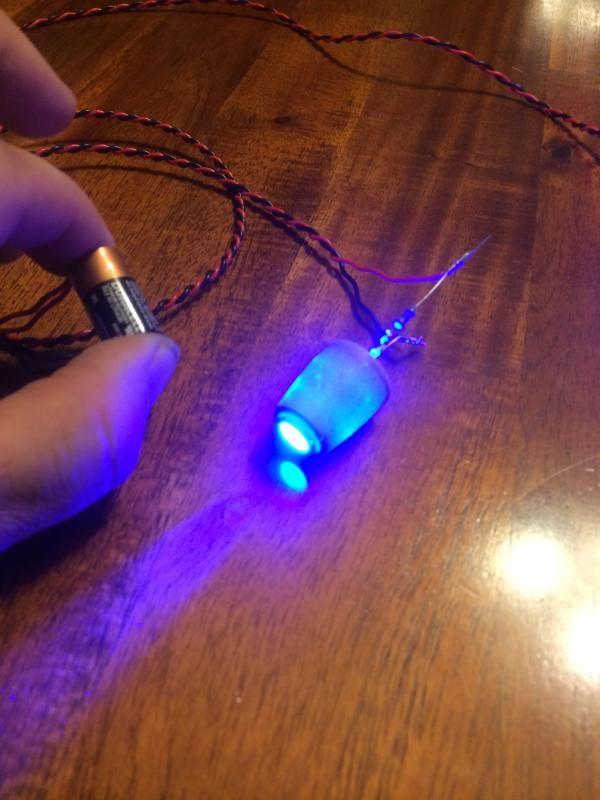
Yes, I just cut off the remaining LED's and there was no effect on the others. Given that I'm changing the source voltage there is the chance I'll need to step down the current with a higher resistor as well.

I'll be adding in a reid switch as well, and that should close when a magnet gets close to it. The idea being that I can put on the helmet and the eye lights will come on automatically.
 
cool idea...like alarm window switch I expect?.....

Correct. I used to install alarms for a living what seems like a lifetime ago. I have found a crazy number of uses for those switches. You don't need all the pretty bits though, just the actual reid switch itself. You'll save lots of room in the helmet.

how well can you see through the lens?

Not too bad in the light.... In a dark room though, not so much.
 
Carving up the blaster this evening, and testing the LED's. I figure I'd post a picture or two while my drill recharges.

073E47A8-FB79-4F4A-867E-6C5D3CBA11C6_zpsjqiz2cda.jpg


6FFDB120-A0EF-4D78-A186-2E275B9E866B_zpst69x8zun.jpg
 
Just in case any of you choose to use spray paints, Rustoleum Universal metallic paint is amazing. Here's my weathered helmet, still needs a matte clear coat , padding, lights, and lenses.

IMG_20141001_061343.jpg
 
Also, I filled in the lines on my Davy kit and cut a more movie-accurate design. Anyone else do this? Mine's a little rough but I like it much better.

IMAG0188.jpg
 
For the darker portions(grill, large tubes, eyes, and cheek cylinders) I used "oil rubbed bronze"
The silver is "Flat antique nickel"
The main base coat is " Flat soft iron"
And finally "Pure gold"

View attachment 383405


I'm using spray paints as well, but I'm having a hard time with the smaller, detailed pieces. Did you just use tape to prevent overflow? Also, did you add the weathered details with a brush?
 
Last edited:
I'm using spray paints as well, but I'm having a hard time with the smaller, detailed pieces. Did you just use tape to prevent overflow? Also, did you add the weathered details with a brush?


In painting RC car bodies there is a spray mask that can be employed. It may also come in a bottle with a brush. Just cover the part you want to keep paint free and cut away the rest with a sharp razor blade.
 
You did the same thing I did to my Davy bucket! What is the best model paint to use that doesn't leave brush strokes?


Yeah, so far I'm dissatisfied with my results though. I'm building out the back with JB weld plastic putty to match the seams for where I split the helmet. I'm hoping that I can salvage it with some serious work. :/ I have a backup plan though.

As for brush strokes... I wouldn't use anything but spray and rub'n buff. I'd only use a brush to obtain a brushed look.
 
Yes, I used regular old scotch blue painter's tape.....a whole lot of it lol. And yes, weathering was done with cheap-o Wal-Mart metallic acrylic paint and a brush.

I'm using spray paints as well, but I'm having a hard time with the smaller, detailed pieces. Did you just use tape to prevent overflow? Also, did you add the weathered details with a brush?
 
There are some very fine areas that need to be silver and gray such as on the sides. That would require the paint brush. Also some of the screws and rivets require some dabs of silver or gray.
 
This thread is more than 8 years old.

Your message may be considered spam for the following reasons:

  1. This thread hasn't been active in some time. A new post in this thread might not contribute constructively to this discussion after so long.
If you wish to reply despite these issues, check the box below before replying.
Be aware that malicious compliance may result in more severe penalties.
Back
Top