Payday 2 Richard Returns "Jacket" Helmet Build

Ned Figglehorn

Sr Member
RPF PREMIUM MEMBER
This is a build that I did a few years back but I documented a decent amount of the build so I thought I'd share the build with all of you. I'm currently in the process of making a v2 helmet so I'll be sure to start a thread on that one as well!

So lets rewind the clock to February 25th, 2015, I was really into the game Payday 2 at the time and on this day they announced they'd be adding a new "Heister" from another one of my favorite games Hotline Miami. This character was the main protagonist in the first Hotline Miami game and up until this point we only saw him as a 16 bit overhead sprite, so I was pretty excited to see him as a fully rendered 3D character!
jacket 2.png

Above is how his character appears in Payday 2

So after this I spent close to a year just thinking of how I was going to go about making his helmet, I initially thought about making a model that I could turn into a Pepakura file as that's what I was most familiar working with at the time, but I decided it was time to delve into the world of 3D printing to tackle this project. After a bit of saving I picked up an Ultimaker 2+ in the summer of 2016 and started down the long road of building this thing!

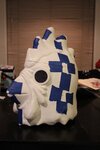
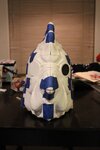
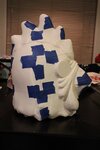
I had created a 3D model using a cleaned up version of the in-game files and started printing the FIRST helmet (keep first in mind), The build platform on the Ultimaker 2+ isn't exactly the largest so I had to cut the model up into a fair amount of pieces in order to print it all but after about a week I had half of my helmet. Unfortunately I didn't document the process of this first print so I only have a few images of it.
20160531_090441.jpg

You may be asking yourself "where's the top?" well I decided to start gluing the pieces together and quickly realized this thing was absolutely MASSIVE, I mean it would've looked big on someone like Shaq's head. Somewhere I must've input a wrong number while scaling the model and it was just stupidly big.
So I went back and started printing a SECOND helmet, hoping this time I got the scale right. After a few hours into printing this new helmet I noticed my printer was skipping layers due to a faulty bearing in the z axis
20160425_112832.jpg

Above is a slightly poor quality image of the layer skipping but you get the idea...

At this point I was pretty frustrated, my new $3,000+ 3D printer wasn't working properly and needed repairs and the convention I had planned on debuting this helmet at was just around the corner, I decided to put it on the back burner until after the con and after I receive the parts for the repair.
 
Last edited:
How long did project sit on the back burner for? well, close to another year...

In the fall of 2017 I started it back up with repaired printer and properly scaled model, so I began printing the pieces for the third and final time!
After a week and a half of printing I finally had a base helmet I could start working on!
17966192_1161808607275420_1020808878600812256_o.jpg17973502_1161808603942087_7907592080091444153_o.jpg17991511_1161808563942091_4364522107032780110_o.jpg

I began coating each piece in XTC-3D to remove the print lines. luckily the Ultimaker does a decent job of printing so the lines weren't too big a deal.
18056024_1168681663254781_2114012510783474161_o.jpg


After that I started sanding the parts and using filler primer between sanding sessions to fill in any small imperfections
18238142_1179489882173959_6344538346033797847_o.jpg


It took a few days worth of sanding but I got all the pieces smoothed and ready to be glued together with CA glue. I was happy with the helmet so far and was glad the seams weren't terrible, so covering them up wouldn't be as big of a chore.
18358875_1186086191514328_7972705572928904764_o.jpg


The seam covering at the time went well but looking back at how I used the bondo makes me cringe a little but it did the job nonetheless!
bondo.jpg


Here he was after 2 weeks of on and off sanding and priming and I was so excited to finally see it all start coming together!
20170516_101757 (2).jpg
 
After all the seams where covered, I brainstormed some ideas on how to replicate the texturing on the comb and wattles. I started playing around with hammered spray paint on a scrap print to get a sort of dimpled texture, I wanted to keep it subtle but still have a visual texture difference.
18318992_1179489638840650_3041907627767403240_o.jpg


I was happy with the results so I taped of the wattles and comb on the helmet and sprayed away!
18620571_1198201440302803_533944808985336313_o.jpg


I ended up doing two coats of hammered paint, waiting a few hours between the coats to make sure the paint would properly texture. On the second coat of paint I waited about 15 minutes and removed the masking tape while the paint was still somewhat tacky as I didn't want to run the risk of the paint chipping when I removed the tape.

Now that I had the Helmet textured I had to figure out how I was going to replicate the fake mesh in the "eyes" of the helmet. I quickly modeled up a circular puck with a screen texture inside of it. I wish I had my resin printer back when I was doing this project because it could've handled the screen texture a little better.
20170731_222716 (2).jpg


I dremeled out some holes in the eyes and set the pucks inside and glued them in with some epoxy. Even without filing in the seams I was already happy with how the effect looked!
IMG_1944 (2).JPG


27021382_1415709591885319_7412243622797550083_o.jpg


27021853_1415709595218652_8770900417426335990_o.jpg


After I covered the seams on the eyes I gave the entire helmet a coat of white primer Just to make sure everything was uniform and prepare for molding!
27747911_1429232300533048_5156842637675390873_o.jpg

He was getting closer and closer to his final form by the minute and I couldn't have been more excited!
 
Once I had the whole helmet primed I gave it a few coats of clearcoat, lightly wet sanding between each layer, after about a days worth of that it was ready for molding! I decided to do a brush on mold with Smooth-On rebound 25, so I set up a table in the living room and started pouring the two parts into cups and getting everything else ready!
20180219_130533.jpg


I the first two layers where just silicone without any thickeners and my god was this stuff messy. I've done brush on molds using rebound 25 before but just not on this scale.
28337094_1442700642519547_20713444390729982_o.jpg


After a few hours I had a helmet encased in silicone! I decided to let the helmet sit over night just to ensure the silicone had plenty of time to cure. I was worried that the chemicals from the clear coat would cause some issues with the curing so I was pretty stressed for those 24 hours, but I grabbed the scalpel and started demolding!

28424439_1442700505852894_8956115635030526838_o.jpg

SUCCESS! I was over the moon with how well the mold came out, the silicone captured the detail of the eye mesh perfectly with little to no trapped air bubbles and everything else was flawless. I wasted no time getting some resin slushed inside and do my first pull. I went with Smoothcast 65D and alternated between bare resin and tinted gray resin as a visual guide to make sure I was getting even coverage.

28828373_1455552174567727_906320966826161521_o.jpg

Mother mold on the left First pull on the right, I made the first pull a tad too thick as I wasn't familiar with the mold yet so It wasn't the greatest weight wise but I was still super happy with how it looked! I ended up doing a second pull and this one was significantly lighter so I started work on that pull.

I started by giving the whole thing a few coats of grey primer and then a base coat of white, and then I started taping of the wattles and comb for the red paint.
28954583_1472000036256274_2536263791478177834_o.jpg

28953903_1472008006255477_2848749547135527086_o.jpg

20180320_002622.jpg


After the red paint was applied I masked off the beak and hit it with some yellow paint.
20180320_142255.jpg


I let everything sit for a few hours and removed all the masking and started getting into some detail work with the airbrush. Let me tell you, every pass I did with the airbrush I got more and more excited seeing this thing coming to life before my eyes!
20180321_140626 (2).jpg

20180321_142100 (2).jpg

20180321_150649 (2).jpg
 
With less than 24 hours left before we had to hit the road from phoenix to Anaheim for WonderCon I finally put the finishing touches on the helmet! I was so excited to see this thing finally come together I waited putting a clear coat on it and I immediately went outside and snapped a picture.
20180321_180641.jpg


It was finally done! Well not exactly. I was still missing the feather details on the sides of the helmet but I simply did not have the time to do it, so I threw on a few layers of clearcoat and let the helmet sit in the garage next to some box fans to speed up the drying, as we had to hit the road in less than 5 hours!

We packed up the car and headed off to WonderCon 2018! I had the helmet wrapped in bubble wrap out of caution, I didn't want all this hard work to be wasted! Once we arrived in Anaheim I wasted no time and I threw on the whole cosplay to finally see it all together.

UUKNXV9.jpg
This was the first picture taken of the cosplay! When I looked in the mirror for the first time I couldn't help but giggle like a school girl, It was such a weird site to see it finally come together, something I had only seen in the digital space in the real world! After this picture was taken we headed down to the convention center where we snapped a few more pictures.

0BlzPJ5.jpg

J4jCc30.jpg

CetPCi3.jpg

It was a hit! I was stopped for a ton of pictures and it grabbed the attention of many Hotline Miami/Payday 2 cosplayers alike! I had a sense of completion, this project I had started way back in 2016 was finally done and I was enjoying all the positive feedback of my work!

April 8th 2017 March 21st 2018
20170408_132815.jpg
Screenshot_20220225-081822.png


When we got back from WonderCon we snapped a few more pictures of the full cosplay.
IMG_5893-1_2.JPG

IMG_5891.JPG

20180330_150238.jpg


Of course I had to re create the original character announcement photo that Overkill put out in 2015!
DlnkG_zXcAQQ0Ou.jpg
DlnkG_zXcAQQ0Ou.jpg


And that was 4 years ago now, the helmet has held up just fine since then! Apart from a few paint chips here and there the helmet has been to many conventions and used in a few short films my friends and I made!

Here's a picture from January of this year!
PXL_20220129_035006476.PORTRAIT.jpg


I never got around to adding the feather details as I wanted them to actually be embedded into the helmet as opposed to painted on... I'll get around to making a v.2 one of these days where I'll add the feather details into the sculpt along with many other changes I thought about along the way while making the v.1. But that's about it for this build and this thread (The first one I've finished on these forums!)

Thanks for reading!
 

Your message may be considered spam for the following reasons:

If you wish to reply despite these issues, check the box below before replying.
Be aware that malicious compliance may result in more severe penalties.
Back
Top