GoblinCityCosplay
Active Member

One of the most helpful threads in the universe when it comes to making this costume: http://boards.theforce.net/threads/padmes-meadow-picnic-dress-v4-0.24588679/ I will cite when I use a method found on here.


Starting with the wig, buns and headband. I bought my snoods from Lady MacSnood (recommended from the forceboard site) on Etsy, she sells them by the pair and they're the perfect mix of gold and metallic. The base wig I used is a 26" spiral curl wig in brown from WigIsFashion lace front. The only downside to this wig is the widow's peak, which I ended up having to pick out. For the headband, I initially bought different colors of silk ribbon from ColorKissedSilksLLC on Etsy and settled on "olive branch". I sewed two sections of ribbon together to get the overlapped look.
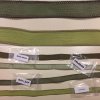


I wasn't entirely thrilled with how the headband ribbon looked, so I called the ribbonerie (from the force site) and while they no longer carried the screen accurate color of silk ribbon, they did carry a darker green version. I bought a few yards, sewed it together, then put it next to the ribbon I had made to compare.
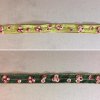
I decided I liked the darker green ribbon better. It was really difficult finding a ribbon that had horizontal striations in it, by the way. I cut out rosettes from the cape fabric (spoiler: they're on everything!) and fabric glued them to the headband. Once I've decided on the length, I'm going to seal the ends of the ribbon, fold them over, sew them, and have a little tunnel to put a bobby pin in and secure the ends to the back bun of the hairstyle.
I sectioned the hair for the back bun off, keeping a few curls in the front out. Try very hard not to "break" the curls by parting them or you'll have to go back and smooth out the spirals later like I'm going to have to do in the front.


I tried making buns directly on the wig using the wig hair and not only was there not enough hair to fill the buns, but it thinned the tail hair too much. So, I bought two packs of yaki hair in dark brown from Sally's, braided them, stubbed the tail, glued the ends of the tails together to form a circle, then twisted the braids into a snail to fill each snood. I then picked a couple of small weft sections on each side of the wig and braided those to go into the snood. I sewed the snoods directly to the wig, then added the braid snails, then tucked in the braids from the wig.
For the back bun, I used a clear hair tie and made a moderately lose ponytail. I parted the hair gently down the middle on the section between the ponytail holder and the wig's "scalp" then flipped the ponytail through. I didn't pull it all the way through and the hair kind of naturally parted into "petals" like Padme's hair. I secured these with a ton of bobby pins. I gathered the small "tail" of hair from the back bun and added in a little more hair and put in a second elastic. This is where the ribbons will attach. A little ways down, I put all of the hair into a clear elastic. The bang sections of the hair need to be finished, but I intend to do that once I have the wig on.


Padme's cape was actually my inspiration for making this costume because I saw a curtain at Walmart that was perfect for it. The pattern I used was Burda 6589 which I altered slightly prior to cutting for a more general shape. Then, I put it on, marked the back at somewhere between above the knee and below mid thigh, cut it, made a gentle triangle from wrist to the end point, then cut it sharply up from wrist to chest. I then dyed the fabric. It's polyester with cotton embroidery, so the flowers don't pick up a lot of color, but they do pick up some.

You can see the two different dye baths above. I tried to use some of the suggested dye ratios from the force boards thread, but in the end, I just mixed and added until I felt the color was right.

There's a combination of red, brown, yellow, and orange DyeMore dyes in varying proportions.
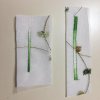
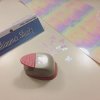
I used a green to white variegated thread and tested a thin satin stitch versus a medium with tear away stabilizer. I made a cardboard pattern for the scallops by tracing a few times around a highball glass, then traced the pattern in sharpie directly onto the fabric, then pinned the fabric to the stabilizer.

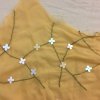
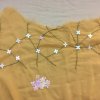
I then painted the white and light green spots with yellow paint as was done in the original costume.

I'm having a replica of the pin made by a jeweler so pictures of that will come when I'm actually wearing it.


The fabric has a pattern to it. Those little squares are also part of the fabric. I bought a crushed gold silk to get the feel of the original fabric.

I decided to use New Look 6480 for the corset because it's got the flat top. The only alteration I really did to this pattern was to round out shorten the length of the front of the corset bottom. I'm making this a pageant corset, so the inner layer will be a lining, coutil, and boning that acts as the corset with the silk embroidered layer lined and on top. I'll probably closet it in back with hook and eye tape.
This corset pattern is also great because it's very flat in front, which is important for the embroidery. The original corset was machine embroidered and since I hate hand sewing, I commissioned a friend of mine, LunaLadyofLight to do the embroidery from a pattern I bought from OCDEmbroidery on Etsy.

I just need to add the flowers from the curtain material onto the embroidery panel.
For the skirt and blouse I bought a double silk georgette in gold from Mood Fabric. I then gelatin bathed it. Gelatin will not harm the fabric, but it will stiffen the fabric up for cutting.
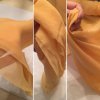
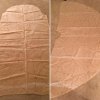
After on the left and middle, before on the right. The gelatin will wash right out in cold water when I'm done cutting.

The force boards thread recommended McCalls 3797 for the blouse. The sleeves do have to be lengthened. I made the sleeves twice the length of my arm when I cut them. For the skirt, there is speculation as to whether a circle or a circle and a half gives the right fullness. I used a circle skirt for the lining and base layer, then a circle and a half for the top layer. I didn't use a pattern, there are a ton of circle skirt tutorials online. I made my own yoke pattern since the movie skirt apparently has a yoke to cut down on bulk where the corset sits.


