Padme Amidala - Pre-Senate Kimono Build

liloandsith

Member
Hiya! I thought I'd do something a bit crazy and start a thread as I start a project instead of waiting until I'm done or almost done :cool:

So this will be my thread on my second Padme pre-senate kimono build. My first was good but I can do better five years later. I have better reference photos, a better knowledge of fabrics, and better skills.

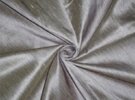
So far all I have is the robe fabric. It took a bit of scouring the internet but I found a nearly perfect fabric. Shot dupioni silk in lavender and silver. Link and photo below (fabric) against the costume fabric (fabric 2). It changes color depending on the light and I'm super pleased with it.


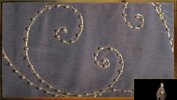
I already have a headdress from the first iteration and I'll be re-using that one bc it's really good. I recently did some upgrades for a Hayden photo-op.

All the fabric elements will be remade!
 

Attachments

  • fabric.jpg
    fabric.jpg
    44.7 KB · Views: 59
  • fabric 2.jpg
    fabric 2.jpg
    53.8 KB · Views: 49
With C2E2 over, I'm now officially starting this rebuild! I made this costume as my second "big" build about 6 years ago. I'll be remaking all the soft bits of this costume now that I'm significantly better at sewing, problem solving, sourcing materials, and research.

So far I made a new sleeve pattern. The new one is on the left. It's more oval, shorter, and has a bit more width. The major change is the armsyce. The original one was completely angled the wrong way... oops. You can see in the reference that all my changes have made the new sleeve much more accurate.

3.jpg
5.jpg


4.jpg


It still needs some tweaks. It needs the bottom angled out a bit to accommodate the A-line skirt, it needs to be a tad shorter, and I might add more width as well.

The next pattern piece I'll be working on will be the flat insert ion the underside of the sleeve that will keep them from being pulled forward. I didn't have this pattern piece on V1 and it caused the sleeves to constantly be pulled in front of the body and to be angled in at the bottom instead of laying on the sides of the robe. You can see that piece in the below reference. You can also see how angled in the sleeve armsyce is on the second reference. There's pretty much no shoulder seam on the robe.

1.jpg
2.jpg
 
As expected, I tweaked the sleeve pattern a bit more and I'm much happier with it now! I also drafted the insert piece that fixed every single issue I had with V1's sleeves. So I'm excited for that!

The insert is the third photo here. This insert is absolutely required. Without it, I had to keep my arms perfectly to my sides with elbows out like a chicken or the sleeves slide forward and want to cross in front of the robe. This insert keeps the sleeves laying flat to your side at all times and gives the sleeve that poof the original has. The sleeve opening for your arm is only on one side of the insert and that too keeps the sleeves flat while you can still move your arm around. I added the photo of the exhibit where you can see that insert pattern clearly. Some of the exhibit's displayed the costume with straight down arms as it was worn on screen and you can't see this insert at all. Thank you to whomever decided to display it with outstretched arms. Otherwise, I don't know how we would've found out about this little secret pattern piece.

ak1.jpg
ak2.jpg
ak3.jpg

1.jpg


I also got the embroidery pattern mapped out. I had to modify it slightly to accommodate my height compared to the original as I'm a wee bit taller than Portman. Once I stretched out the pattern, it left a few gaps that I added a swirl or two to. This photo was taken before I added the extra swirls in the gaps. It's not 100% accurate but it's as close as I'm willing to try for to preserve my sanity.

ak4.jpg


I also purchased the thread that I'll use for the embroidery. I consulted an expert on embroidery and we both came to the conclusion that it was achieved by couching down several strands of fine Japan thread. So that's what I'll be doing on V2. I purchased 3 of these from Etsy from the seller ZELKOVAJAPAN.

ak5.png


I went ahead and used the V1 robe to create the robe pattern for V2. The robe itself is still a great pattern and I'm perfectly happy to replicate it. I laid the robe down and traced around it to recreate the 2 main body patterns for the robe. One of them is affectionately known as "The Beast". It's massive. I used a regular kimono pattern and then added an A-line skirt pattern onto the kimono pattern to create a monster pattern that has more A-line structure than a traditional kimono and a lot of volume in back like the costume. Cat for scale. I'll be adding a bit of length that I didn't have on V1 to account for the A-line structure. V1 was about an inch too short because I didn't account for the underlayers kicking the robe out a bit and therefore making it a tad too short. I'll be adding a bit more train that V1 had.

ak7.jpg


All in all, the outer robe/kimono will be 4 different pattern pieces that I've essentially drafted myself by heavily modifying commercial patterns or frankensteining patterns together or completely created from scratch.
 
I finally got the Japan thread and I've started the embroidery! It's very slow going currently though...


I laid the pearls on top to make sure the size is good!
WFWSFsfsdf.jpg


It's not perfect but I started on the back bottom :) So I have lots of room to improve before I get to the front panels.
I'm also having my husband work on a magnetic hoop design so I can more efficiently work on the embroidery without warping the thread or messing up the threads with a traditional embroidery hoop.
retergdgrtg.jpg


I'll put the magnetics in the holes. My issue currently, is the glue. I can't find one that is working to keep the magnets in the holes. I've tried hot glue so far. I think I need up my game to some gorilla glue (my new favorite glue).
yhfghfhfgh.jpg
 
Couching is in full swing as well as beading!

My husband printed me a hoop and I've added the magnets. It's so helpful and I wish someone made these for real.


This is the back of of the couching. I'm trying so hard to keep it neat!

hrthrthrh.jpg


Couching on one of the back sleeve panels is done. and I started adding the pearls to it last night.


wqdwefrthyjtyj.jpg
 
I'll put the magnetics in the holes. My issue currently, is the glue. I can't find one that is working to keep the magnets in the holes. I've tried hot glue so far. I think I need up my game to some gorilla glue (my new favorite glue).
A good alternative to glue for 3d prints with magnets is lowering the holes inside the model by a layer or two and adding a pause in the slicer so that you can put the magnets in before the top layers print (enclosing the magnets in)
 
Back
Top