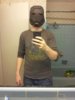
The helmet was epic fail btw, i had to leave the left side of the helmet open just to squeeze it on my head. its only purpose now is to serve as a reminder that we are not all the same size
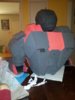
got the other shoulder bell done and ab plate started. I didn't like the foam ab file. It looked too insect like. so i took the pep file and modified it for foam.
Huge thanks to Juice and Stealth for the files and Tutorials!!
about halfway done with my duct tape mannequin tonight. i did learn a hard lesson for anyone want to make one for themselves. you can wrap yourself too tight. my wife helped my and we used some of my trauma shears from work, it still gashed me up pretty good trying to get the shears under the duct tape. All is well and hopefully have some pics up in the morning. any feedback is welcome i know i will have to revist some areas that were not done right the first time.
got the mannequin done and stuffed. tried the armor on it just to see how it fits and I have to say that I am proud of myself. I can tell that I am getting better as I go along.
almost finished the cod piece. need to add about an inch on each side.
I'm not sure if other people do this with their foam but i usee my scrap wedges from my 45 degree cuts to help shape my inverted angles. pics below. Just thought that it might help someone out a little.
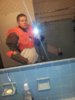
Work has been slow but steady, Finished my left thigh, Shin and Boot today. I also finished my right hand. and by finished I mean I have them put together. They still need alot of touching up. Any advice or comments (positive or negative) are appreciated!
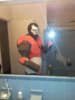
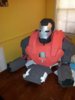
My first suit-up with what I have. its been slow going but finally having something to put on, and not having to use my imagination for the missing pieces is just freaking amazing!
the back piece is janked up but will be an easy fix this weekend. my goal now is to finish the last hand and foot and start to clean some of my lines up.
EDIT: the silver shirt b/c I can't find my underarmor shirt
To those who have come before me, What color scheme did you use? not really sure what brand or even what color to use other than maybe gun metal gray? any advice?
Got the Liquid Electrical Tape on. Not movie quality but passible in my book. Next prime, paint and weathering. As you can see I'm going for the "Beat to hell" look
1. paint on upper torso: DONE
2. minigun started
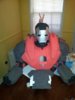
3. Helmet painted and lenses installed
the pics with the flash are to show the lens detail, the left lens is fractured to simulate battle damage, the red leds on the left eye will "flicker" which i think will be a nice touch. and again any comments, criticisms, or advice is more than welcome!
Fist off, I wouldn't be able to build this if not for : Stealth, Dungbeetle, and Sharkhead. thank you guys so much for giving me the blueprints to craft my fandom! painting finished, next is the airbrush dirt and grime to rough it up alittle. I also finished the arc reactor, thank you again stealth!
Tried to do some dramatic landing poses (the abc floor mats just scream dramatic don't they?) and my little girl insisted that she be in the picture with daddy