This was suppose to be my first prop after being bitten by the prop bug a couple of years ago, Since then i have been collecting all of the requisite pieces and have finally got together everything i need to put this baby together. It took awhile as i was between russrep runs and needed to wait for other parts from both rebelscum and roman.
My goal for this Obiwan ANH build was to make a saber that looked like a relic but remained as true to the original prop as i could. I have taken some liberties with the weathering and am pleased to say i did not use one drop of paint on this prop, all weathering effects are achieved with chemicals, real dirt, and a little manhandling of the components. I have (mostly) completed all of the components which i will describe in this post but still need to complete the assembly and then probably add some more weathering once assembled to bring the piece together and make it cohesive.
Ill just start at the top:
Emitter/cone: This is a steel emitter from the latest russrep run. i am super impressed by all of russ's parts but this one is a real beauty, the fit of the pieces is incredible, the only bummer for me is that the cone was sold separately and is not threaded to accept the 3/8" rod that is commonly used to assemble all the pieces. After examining the chronicles book for weathering ideas it seemed simple enough to bang up the lower flanges, not so. this piece is made of steel, and thick steel at that. I took a hammer, crowbar, and screwdriver to it but could not come close to the damaged look of the original. The original must have had a much thinner wall thickness or have been exposed to some serious abuse. I used my favorite gun blue, "outers gun blue", which produces an almost black patina instantly. I sanded the finish down and repeated a number of times making sure to leave the inner ring in its un-sanded blued state. I also left the lower flange darker as well to add dimension to the separate pieces. I had a very happy accident occur when bluing the cone; i used some cyanoacrylate to affix the cone ( i wish this part attached mechanically somehow) and applied a little too much resulting in the glue covering some of the flat top. When i blued this part the glue blocked the chemical reaction with the steel and resulted in a really nice uneven and grungy look, perfect!


Wind Vane: This is another russrep part that came with the steel grenade. Again the part is beautifully machined as two pieces. It was so beautifully crafted i initially had a real problem with banging it up to match the chronicles book. Finally i grabbed a beefy screwdriver and started whacking it, luckily i think the dents give it the character that it needed. To weather this piece i dropped a shot glass upside down into a mason jar, filled the jar with ammonia up to the middle of the shot glass then put the brass wind vane into the mason jar on top of the shot glass and screwed on the lid. A few hours later this is the result. I actually really like the green tones although it probably would have looked more accurate just to use some brass black. I epoxied a 3/8" nut to the bottom so that it stays in place when i run the steel rod through. I love how the emitter screws right on to this piece and this piece screws onto the grenade, awesome!


Grenade: [/B]This is a steel grenade from russ's latest run. The only negative about this piece is the very obvious striation on the angled "grips" due to the machining process. I read someones thread who put the grenade into a rock tumbler with "green pyramids" to knock back the tooling marks, this worked perfectly for them but unfortunately i dont have a tumbler or special green pyramids so i am just trying my best to ignore the tooling. This was an interesting piece to weather, it had already started to develop very small rust spots while being shipped to me which i had to clean off with steel wool. I then used "outers" gun blue to blue all of the raised surfaces. After that i boiled up a bowl of water and added some sea salt then immersed the grenade,removed, and set aside to dry. Instantly the non blued surfaces started to rust before my eyes. i repeated the process several times until i had a deep rust in all of the low areas, in total this probably took about an hour, this was the result:

Graflex clamp/bubble strip/transistors: I tried desperately and failed to find a genuine graflex clamp, plus i just was not willing to shell out the kind of money required to buy one on ebay. At first i settled on a parks version. It was ok until i started trying to weather it and the brass under the nickle plating became visually too overwhelming. I even stuck it in my ammonia jar for a few weeks but just ended up destroying it. Then luckily Roman started a run and i bought two of his excellent satin finished versions. I weathered it by kicking it along a trail near my house, rubbing it down with dirt, and leaving it outside through a couple of storms. I drilled the holes for the tiny brass screws but still need to drill the holes for the wire as seen in the chronicles book. I will need to trim off the brass screw threads as they interfere with the mating of the grenade. The only bummer about Roman's new clamps is that the lever is a total piece of crap. It is not plated like the rest of the clamp but instead painted (poorly) in a dull silver color. The paint started to rub off immediately showing the bright brass underneath. You may notice that i used an aluminum roman's spacer. In the end i feel like maybe this piece is not entirely necessary but ill use it as i already had one.
The bubble strip is from rebelscum and is fantastic. I trimmed it down, hit it with some novus polish to get rid of the sanding marks and inserted it into the clamp. I crimped down the metal of the clamp in order to hold it in place without the use of adhesives. The last thing to do is probably to dust it with some ak interactive pigments.
The transistors are still controversial and i know there is not consensus about exactly what brand and model they are. After reading a few threads here i decided to go with the idea that they are motorola MA-xxxxxx. Of course i could find motorolla transistors but not the correct (maybe) MA series. After an online search i finally found them at an used electrical component place in the UK. I paid a premium to get them here to the US but i am pleased with their proportion and they even fit within the russrep washers.


Booster: This is actually the first part i acquired for this build. It is an aluminum russrep that was originally anodized. For some reason i wanted to remove the anodizing and use aluminum black as the base for weathering. I removed the anodizing by soaking the part in easy off oven cleaner. It is interesting how when you dip the part into the chemical it starts to bubble then the black anodizing just started to peel off. After clean up i used birchwood aluminum black to darken the aluminum. I would say the process was moderately successful as the finish came out very grainy even after treatment with extra fine steel wool. I used steel wool and sand paper to remove the black from the edges and other areas that would show signs of wear. I would really like to replace this part with a new steel russrep version but i just cant justify spending anymore money on this thing. i might try and grime it up just a little more with some MIG "oil and grease stain" ( i know i know, this is going against my no paint mantra). I also epoxied a 3/8" nut into the booster in order to fix it to the steel connecting rod.


Pommel: I got this piece from a member here on the rpf. I was tempted to get a nice repro steel version by romans or russrep but i decided to go, strangely, with a repro from armatage even though it is less accurate than the previously mentioned parts and is plastic (i may upgrade this in the future)! Weathering wise i didnt do much to this part as the chrome metalized part has a little tarnishing and patina, maybe its just soap scum, but still it looks slightly aged. Like a few other parts i may hit this with some pigments to get it to match the weathering on the rest of the saber a bit more. I was extremely nervous about drilling the hole as the drill bit on my harbor freight press wiggles like crazy but in the end it worked out perfectly. I mounted a nut at the bottom of the pommel to finish off the assembly when i am ready to screw everything together. I also had to put in some styrene spacers in order to get the proper gap between the booster and the pommel.

So here are all of the peices photographed together ready to assemble. Once finished i will put some final weathering touches on the completed piece then build a nice stand for it. Let me know what you guys think, really looking forward to putting this one to bed and moving on to the next project...greedo killer.

Cheers
NOW COMPLETE!
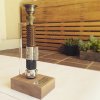
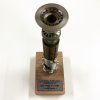
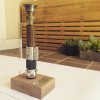
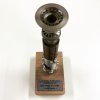
Supreme necro-post. I started in late 2013 and finished probably 6 months later but now, finally, this project is done! Built a custom stand similar to my Luke stand out of 1-1/2" solid walnut and lasercut acrylic. Plaque by pastorjedi. I was able to clip right onto the windvane to hold it vertical. As with my Luke ANH, i love how the vertical presentation, for me, elevates the saber to a sculpture and work of art. I cant say how pleased i am with the weathering and the fact that there is zero paint on this badboy, 100% natural patina on the steel, aluminum an brass parts. on to the next project.
chris


My goal for this Obiwan ANH build was to make a saber that looked like a relic but remained as true to the original prop as i could. I have taken some liberties with the weathering and am pleased to say i did not use one drop of paint on this prop, all weathering effects are achieved with chemicals, real dirt, and a little manhandling of the components. I have (mostly) completed all of the components which i will describe in this post but still need to complete the assembly and then probably add some more weathering once assembled to bring the piece together and make it cohesive.
Ill just start at the top:
Emitter/cone: This is a steel emitter from the latest russrep run. i am super impressed by all of russ's parts but this one is a real beauty, the fit of the pieces is incredible, the only bummer for me is that the cone was sold separately and is not threaded to accept the 3/8" rod that is commonly used to assemble all the pieces. After examining the chronicles book for weathering ideas it seemed simple enough to bang up the lower flanges, not so. this piece is made of steel, and thick steel at that. I took a hammer, crowbar, and screwdriver to it but could not come close to the damaged look of the original. The original must have had a much thinner wall thickness or have been exposed to some serious abuse. I used my favorite gun blue, "outers gun blue", which produces an almost black patina instantly. I sanded the finish down and repeated a number of times making sure to leave the inner ring in its un-sanded blued state. I also left the lower flange darker as well to add dimension to the separate pieces. I had a very happy accident occur when bluing the cone; i used some cyanoacrylate to affix the cone ( i wish this part attached mechanically somehow) and applied a little too much resulting in the glue covering some of the flat top. When i blued this part the glue blocked the chemical reaction with the steel and resulted in a really nice uneven and grungy look, perfect!


Wind Vane: This is another russrep part that came with the steel grenade. Again the part is beautifully machined as two pieces. It was so beautifully crafted i initially had a real problem with banging it up to match the chronicles book. Finally i grabbed a beefy screwdriver and started whacking it, luckily i think the dents give it the character that it needed. To weather this piece i dropped a shot glass upside down into a mason jar, filled the jar with ammonia up to the middle of the shot glass then put the brass wind vane into the mason jar on top of the shot glass and screwed on the lid. A few hours later this is the result. I actually really like the green tones although it probably would have looked more accurate just to use some brass black. I epoxied a 3/8" nut to the bottom so that it stays in place when i run the steel rod through. I love how the emitter screws right on to this piece and this piece screws onto the grenade, awesome!


Grenade: [/B]This is a steel grenade from russ's latest run. The only negative about this piece is the very obvious striation on the angled "grips" due to the machining process. I read someones thread who put the grenade into a rock tumbler with "green pyramids" to knock back the tooling marks, this worked perfectly for them but unfortunately i dont have a tumbler or special green pyramids so i am just trying my best to ignore the tooling. This was an interesting piece to weather, it had already started to develop very small rust spots while being shipped to me which i had to clean off with steel wool. I then used "outers" gun blue to blue all of the raised surfaces. After that i boiled up a bowl of water and added some sea salt then immersed the grenade,removed, and set aside to dry. Instantly the non blued surfaces started to rust before my eyes. i repeated the process several times until i had a deep rust in all of the low areas, in total this probably took about an hour, this was the result:

Graflex clamp/bubble strip/transistors: I tried desperately and failed to find a genuine graflex clamp, plus i just was not willing to shell out the kind of money required to buy one on ebay. At first i settled on a parks version. It was ok until i started trying to weather it and the brass under the nickle plating became visually too overwhelming. I even stuck it in my ammonia jar for a few weeks but just ended up destroying it. Then luckily Roman started a run and i bought two of his excellent satin finished versions. I weathered it by kicking it along a trail near my house, rubbing it down with dirt, and leaving it outside through a couple of storms. I drilled the holes for the tiny brass screws but still need to drill the holes for the wire as seen in the chronicles book. I will need to trim off the brass screw threads as they interfere with the mating of the grenade. The only bummer about Roman's new clamps is that the lever is a total piece of crap. It is not plated like the rest of the clamp but instead painted (poorly) in a dull silver color. The paint started to rub off immediately showing the bright brass underneath. You may notice that i used an aluminum roman's spacer. In the end i feel like maybe this piece is not entirely necessary but ill use it as i already had one.
The bubble strip is from rebelscum and is fantastic. I trimmed it down, hit it with some novus polish to get rid of the sanding marks and inserted it into the clamp. I crimped down the metal of the clamp in order to hold it in place without the use of adhesives. The last thing to do is probably to dust it with some ak interactive pigments.
The transistors are still controversial and i know there is not consensus about exactly what brand and model they are. After reading a few threads here i decided to go with the idea that they are motorola MA-xxxxxx. Of course i could find motorolla transistors but not the correct (maybe) MA series. After an online search i finally found them at an used electrical component place in the UK. I paid a premium to get them here to the US but i am pleased with their proportion and they even fit within the russrep washers.


Booster: This is actually the first part i acquired for this build. It is an aluminum russrep that was originally anodized. For some reason i wanted to remove the anodizing and use aluminum black as the base for weathering. I removed the anodizing by soaking the part in easy off oven cleaner. It is interesting how when you dip the part into the chemical it starts to bubble then the black anodizing just started to peel off. After clean up i used birchwood aluminum black to darken the aluminum. I would say the process was moderately successful as the finish came out very grainy even after treatment with extra fine steel wool. I used steel wool and sand paper to remove the black from the edges and other areas that would show signs of wear. I would really like to replace this part with a new steel russrep version but i just cant justify spending anymore money on this thing. i might try and grime it up just a little more with some MIG "oil and grease stain" ( i know i know, this is going against my no paint mantra). I also epoxied a 3/8" nut into the booster in order to fix it to the steel connecting rod.


Pommel: I got this piece from a member here on the rpf. I was tempted to get a nice repro steel version by romans or russrep but i decided to go, strangely, with a repro from armatage even though it is less accurate than the previously mentioned parts and is plastic (i may upgrade this in the future)! Weathering wise i didnt do much to this part as the chrome metalized part has a little tarnishing and patina, maybe its just soap scum, but still it looks slightly aged. Like a few other parts i may hit this with some pigments to get it to match the weathering on the rest of the saber a bit more. I was extremely nervous about drilling the hole as the drill bit on my harbor freight press wiggles like crazy but in the end it worked out perfectly. I mounted a nut at the bottom of the pommel to finish off the assembly when i am ready to screw everything together. I also had to put in some styrene spacers in order to get the proper gap between the booster and the pommel.

So here are all of the peices photographed together ready to assemble. Once finished i will put some final weathering touches on the completed piece then build a nice stand for it. Let me know what you guys think, really looking forward to putting this one to bed and moving on to the next project...greedo killer.

Cheers
NOW COMPLETE!
Supreme necro-post. I started in late 2013 and finished probably 6 months later but now, finally, this project is done! Built a custom stand similar to my Luke stand out of 1-1/2" solid walnut and lasercut acrylic. Plaque by pastorjedi. I was able to clip right onto the windvane to hold it vertical. As with my Luke ANH, i love how the vertical presentation, for me, elevates the saber to a sculpture and work of art. I cant say how pleased i am with the weathering and the fact that there is zero paint on this badboy, 100% natural patina on the steel, aluminum an brass parts. on to the next project.
chris


Last edited:


