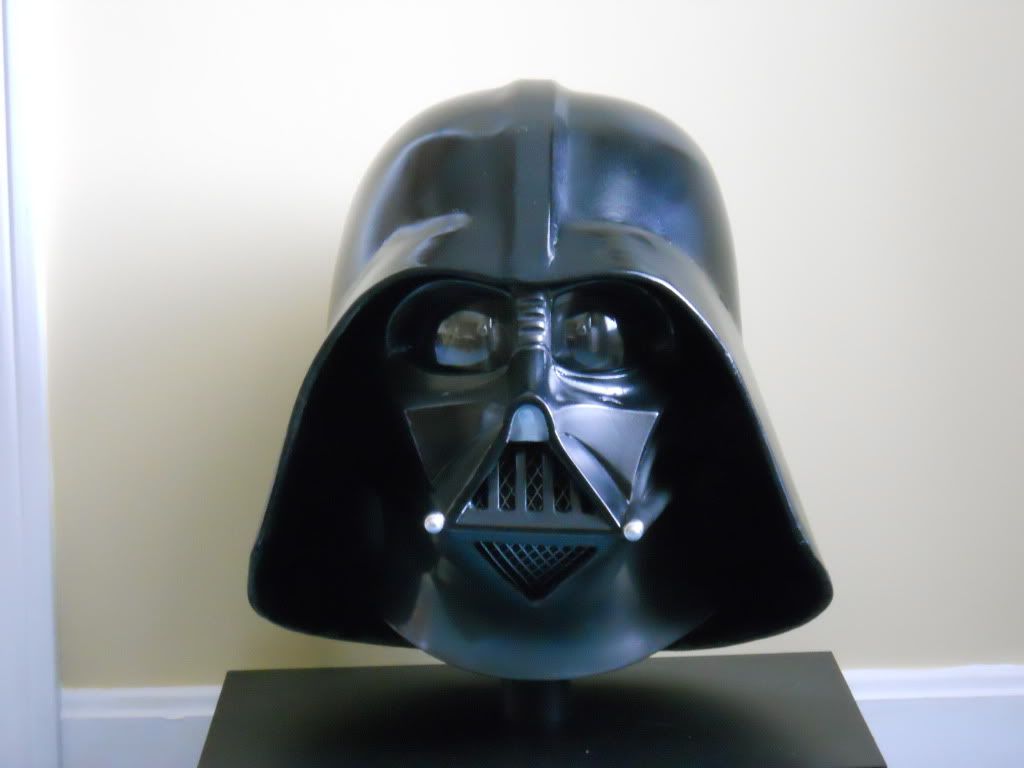
Noob vs Rubies Vader bucket

sztriki

Sr Member
After years of lurking around here I started my first bigger project today. I've already made lots of model kits, some scuplting as well but never a prop replica/mod, so first timer here, I mainly opened this new thread coz I learn this as I go and probably gonna have tons of questions for the more experienced members. I bought a Rubie's Supreme Vader mask about 2 years ago to upgrade it, plenty of topics around here about this one. I'm not even gonna attempt truly accurizing it, just want to fix the most soaring issues with the mask, following Mac's list and ideas and give it a good paintjob. I'd love to fix the dome as well (stripe, make it sharper, brows, etc), but I'm not confident enough in my skills to start on that one and I really don't want to screw it up. Might try and thicken it up though
Here's where I am after day 1, teeth are roughed out, eyes cleared. I think I managed to reduce the neck flaring to an acceptable degree, after boiling this mask about 3-4 times that's as good as it gets I guess. I also tried to undercut and bend the dome mount but it broke off, I'll probably try and scratch built a mount, I'm aiming for a ROTJ positioning.
photo_zps53219a7d.jpg
Got another day-off tomorrow so will try and tidy up the eye sockets and teeth before I start sculpting. BTW this is the worst piece of plastic I ever had the misfortune to work with, it stretches, twists, flakes, doesn't saw properly, doesn't file properly, just really messy. Maybe I'm just used to polystyrene...
Couple of questions:
- I'd like to modify the eyebrows for that "angrier" look, is it just sculpting as in adding and shaping putty or I'll need to trim away the old corners?
- Shall I add putty on the inside or the outside of the mouth wall to thicken it up?
 
Started work on reshaping the facemask, this is the first time I've used Aves Apoxie, and oooh my god, this is excellent stuff! Really easy and enjoyable to work with! Fixed the nose insert, thickened up the mouth wall, filled in the tearducts and the nose slots and reshaped the eyebrows. There's still further sculpting to be done on the eyebrows especially if I get started on the nose. Any comments on the reshaping is welcome, there's probably tons of things I don't see/feel and is an eyesore for the trained ones.
photo1_zpsd9cc305c.jpg
Next step would be shaping the nose, routing the teardrops and the nose slots then a good sanding. Anybody knows if I can get ROTJ-style tusks in the UK? I checked eBay and FenixProp is the only one selling it from Argentina...:unsure
 
Watch the brows, they look a bit "surprised" atm, and be careful with the bridge of the nose...I at least had the most issue with accuracy there. What's your overall plan for the mask?
 
Watch the brows, they look a bit "surprised" atm, and be careful with the bridge of the nose...I at least had the most issue with accuracy there. What's your overall plan for the mask?
Yea, I shaped the eyes more with a file yesterday, also started doing the nose bridge, it is indeed a bit of a pain to get it right. I'll post some update photos tomorrow after some fine-tuning for evaluation. Just a display piece for my study really, I don't have a costume or anything else so no point in wearing it really. Would look funny on my bike though. :)
 
That's where it is now, I think the brows look good, the nose bridge needs some more work, adding putty, filing, small shaping and cutting the notches properly. Also since the original dome connector broke off and I disposed of it I'll need to figure out a way to redo that. Probably gonna put a blob of putty on top of the mask and shape it with the dome until it looks right then let it cure and cover it with velcro.
fcb90a17-4bd4-4836-9595-4a671d6c1904_zps0d18e5a5.jpg image3_zps49e01c5d.jpeg image4_zps92862a4f.jpeg
 
That's where it is now, I think the brows look good, the nose bridge needs some more work, adding putty, filing, small shaping and cutting the notches properly. Also since the original dome connector broke off and I disposed of it I'll need to figure out a way to redo that. Probably gonna put a blob of putty on top of the mask and shape it with the dome until it looks right then let it cure and cover it with velcro.
View attachment 368359 View attachment 368360 View attachment 368361

Brow looks much better, and the nose looks better too, but you fell into the same trap I did, it's a bit too wide. The bridge of the nose comes out to a more gradual tapered slope that's narrower at the end, not at all blocky. I spent hours looking at it, looks a lot different when it's primed and painted. Don't worry about the notches until the very end, I ended up redoing mine when I had some other touchups to do after finishing. What did you use to make the notches?

BTW, you can completely ignore me as well, it looks great no matter what :)
By too wide you mean looking at it from the front and wide horizontally or looking at it from the side as bulging out too much?
The notches are just thin cuts atm to mark where they should be, the black parts are just the old mask showing through after filing amd sanding.
I really do appreciate all comments as I'll try to make the most out of it as far as my skills go.
 
don't rush it, you'll be happier if you take the time for everything to cure than if you rush it. I rushed the nose a bit and it's a visible flaw for me, but I'm happy anyways because it was a learning experience. I'll post pics of mine a bit later. I used that thread as reference too, because too my inexperienced eyes it looked good....and it DOES look really good, but it's not accurate either.
 
Got my rotary tool and pretty much reshaped and rebuilt the whole nose bridge, came out a lot better methinks:
image5_zps6ada9d44.jpeg image6_zpsf3c2f774.jpeg

- - - Updated - - -

don't rush it, you'll be happier if you take the time for everything to cure than if you rush it. I rushed the nose a bit and it's a visible flaw for me, but I'm happy anyways because it was a learning experience. I'll post pics of mine a bit later. I used that thread as reference too, because too my inexperienced eyes it looked good....and it DOES look really good, but it's not accurate either.
Yea, would love to see some pics of yours as well! The more mods I see the better!
 
Bleh...imageshack pisses me off. Here's a few from a recent event I was at: http://imgur.com/a/oHxk1 Note that the nose on mine is also incorrect, didn't realize it until later in the build.
DSC_6676.JPG

DSC_6798.JPG


DSC_6810.JPG

DSC_6817.JPG

DSC_6818.JPG


http://www.therpf.com/f79/my-rubies-vader-helmet-upgrade-wip-175604/ is my WIP thread...I wish someone had told me about the nose when I was doing mine, but that's ok. It was a crazy learning curve, and it's not perfect, but it's mine. :) I want a more accurate one, but this one will always have a special place.
 
Last edited:
Bleh...imageshack pisses me off. Here's a few from a recent event I was at: http://imgur.com/a/oHxk1 Note that the nose on mine is also incorrect, didn't realize it until later in the build.

http://www.therpf.com/f79/my-rubies-vader-helmet-upgrade-wip-175604/ is my WIP thread...I wish someone had told me about the nose when I was doing mine, but that's ok. It was a crazy learning curve, and it's not perfect, but it's mine. :) I want a more accurate one, but this one will always have a special place.

Ah, now I remember, those magnets, great idea! Dome mount is gonna be a tough one for me to figure out as the original one is gone. So yours is not held above the brow by velcro, right, only the magnets on top? I'm probably gonna take the dome to a spray painter as the surface is so smooth and large it's very hard to get a really shiny and spotless gloss finish. Wish I had the skills and the balls to redo the stripe.
 
Ah, now I remember, those magnets, great idea! Dome mount is gonna be a tough one for me to figure out as the original one is gone. So yours is not held above the brow by velcro, right, only the magnets on top? I'm probably gonna take the dome to a spray painter as the surface is so smooth and large it's very hard to get a really shiny and spotless gloss finish. Wish I had the skills and the balls to redo the stripe.

I ended up taking the magnets out, more because the putty and everything added too much to the weight of the helmet. Used industrial Velcro in its place, and it held pretty well.

The stripe wasn't hard, and the gloss is mostly wet sanding and polish more than any crazy skills. Practice on something stupid first to get the hang of it and to see how it dries, same with the clearcoat. Painting was arguably the hardest part for me, but I muddled through.
 
Ah, now I remember, those magnets, great idea! Dome mount is gonna be a tough one for me to figure out as the original one is gone. So yours is not held above the brow by velcro, right, only the magnets on top? I'm probably gonna take the dome to a spray painter as the surface is so smooth and large it's very hard to get a really shiny and spotless gloss finish. Wish I had the skills and the balls to redo the stripe.

For the dome mount on my Rubies helmet, I cut off the mount on the facemask and removed the part on the inside of the dome. I then riveted the back half of a skateboard helmet to the facemask and with some padding, the dome fits perfectly. I just secured it in place with a few pieces of velcro.

This is how it looks
DSCN0709.jpg
 
For the dome mount on my Rubies helmet, I cut off the mount on the facemask and removed the part on the inside of the dome. I then riveted the back half of a skateboard helmet to the facemask and with some padding, the dome fits perfectly. I just secured it in place with a few pieces of velcro.

This is how it looks
http://img.photobucket.com/albums/v420/Jedimaster2000/Vader/DSCN0709.jpg
That does look nice, spot on ESB to my eyes. Pretty sure that your thread/mask was on my list of references as well, how did you set the height? Just put the skateboard helmet on and it was good from start?
 
That does look nice, spot on ESB to my eyes. Pretty sure that your thread/mask was on my list of references as well, how did you set the height? Just put the skateboard helmet on and it was good from start?

Pretty much. I used some 1" foam pipe insulation cut in half and put one on the front inside of the dome and one on the back inside, as well as two on the sides. This, along with the velco, keeps the dome nice and snug on the facemask/skateboard helmet. I'll try to get a pic at some point.
 
Pretty much. I used some 1" foam pipe insulation cut in half and put one on the front inside of the dome and one on the back inside, as well as two on the sides. This, along with the velco, keeps the dome nice and snug on the facemask/skateboard helmet. I'll try to get a pic at some point.
I do have your WIP thread saved, will check out some helmets coz I'll pick up paint, clearcoat and primer from a bicycle/car shop anyway.
Not much progress, been very busy recently, gave the mask an overall sanding with 150 grit, shaped the nose bridge a bit and shot it with a thin layer of satin black to see the surface imperfections (plenty...).
 
What paints are you getting? You'll want to get a good plastic primer, the one listed in the WIP thread with the wrong nose is good:


•TAMIYA Primer Surfacer Fine - great primer, small cans. You may need more than one, depending what you're doing.
Paint Cans
•Dupli-Color ENGINE ENAMEL DE1651 CAST COAT IRON - this isn't bad, but the colour is a little more greenish tinted in bright light....in the light he has this in it looks perfect though. Not quite silver enough, but not bad.
•VHT WHEEL PAINT SP187 GLOSS BLACK - I would have gotten matte had I known that I could get wrinkle when clearcoat was applied....the gloss and clearcoat don't mix well. It's fixable, but a pain.
•VHT WHEEL PAINT SP184 CLEAR - good stuff

AFAIK Duplicolor is not that easy to get in the UK, but I need to double check that. I'm planning to get Halfords own brand paints, this is a pretty big bicycle/car parts company here.
http://www.halfords.com/motoring/pa...halfords-rover-gunmetal-car-spray-paint-300ml
This one and the respective primer/clearcoat/gloss black. How come the gloss got wrinkled? If they are the same brand they're supposed to be fully compatible, no?
 
This thread is more than 8 years old.

Your message may be considered spam for the following reasons:

  1. This thread hasn't been active in some time. A new post in this thread might not contribute constructively to this discussion after so long.
If you wish to reply despite these issues, check the box below before replying.
Be aware that malicious compliance may result in more severe penalties.
Back
Top