TheDarkenedElf
New Member
Hello! I'm not sure what the etiquette is here for posting already finished projects vs projects you're currently working on, so forgive me if this is frowned upon.
I've been wanting to make a set of lekku for a while now, but I didn't want to attempt the whole latex build (my house isn't nearly climate controlled enough for me to feel confidant that the latex wouldn't go south on me). On the other hand I dislike how fabric lekku tend to have a few problems; usually they come straight down off the back of the skull and, depending on the fabric, sometimes you can see the stuffing poking out.
So, I set out to create my own pair, and I'm pretty pleased with the results!
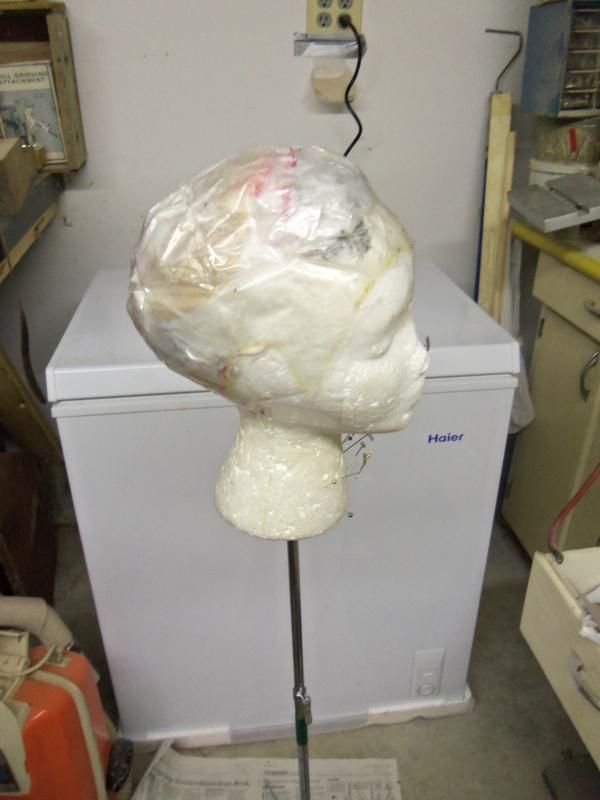
First, start with a wig head that fits your skull, accounting for hair (in my case that's a lot of it), preferably one that shows your hairline so you know where you're working. I made mine using a similar method to this tutorial.
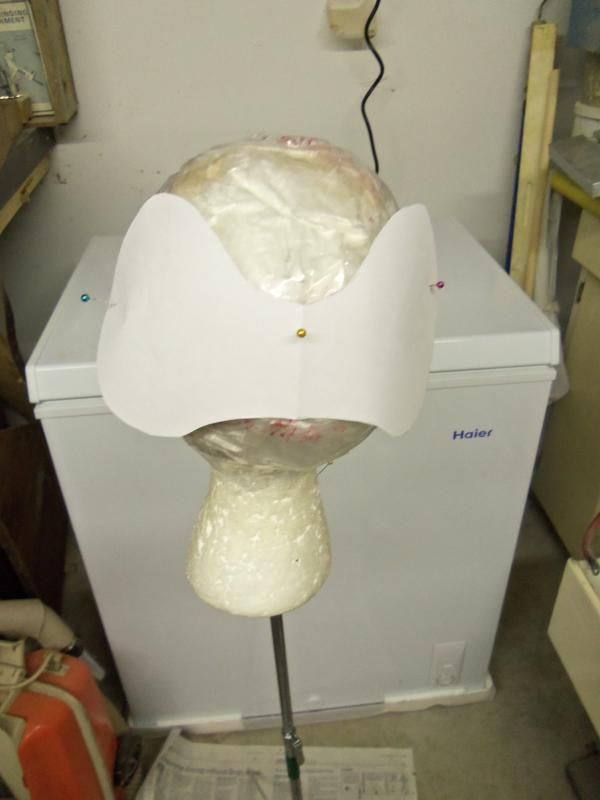
From there, I created a rough size of the lekku base in paper, so I could play around until I was happy.
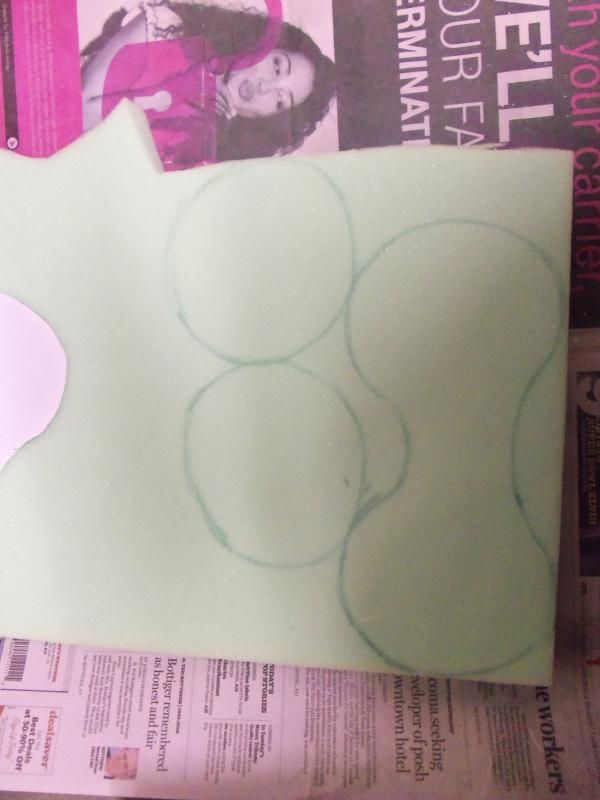
I began cutting layers of foam, starting with one that had a bridge in between the two sides, then circular ones in addition to that. I used 1" foam I had left from another project, which worked out well for the tapering.
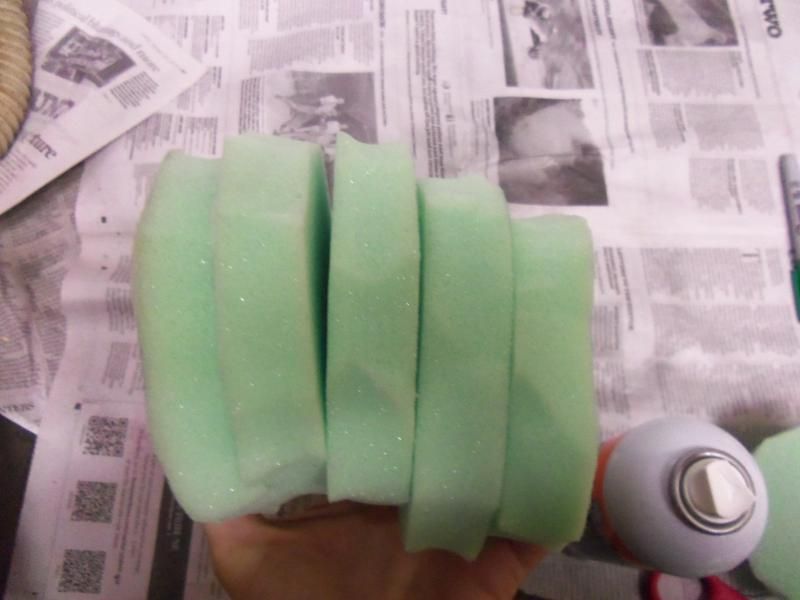
Using spray glue, I started attaching the layers. The first few are almost even with one another.
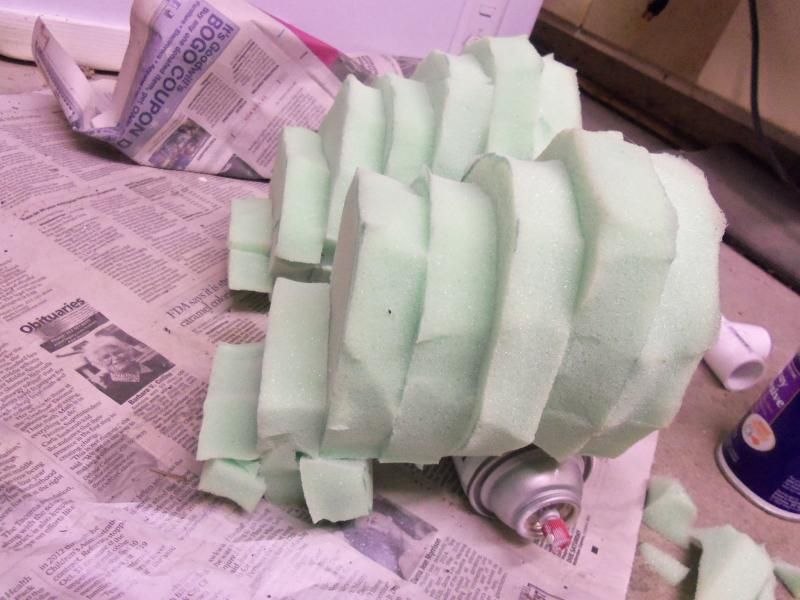
The layers past that taper down. Don't worry about it being uneven right now, and if you can use scrap pieces, go for it!
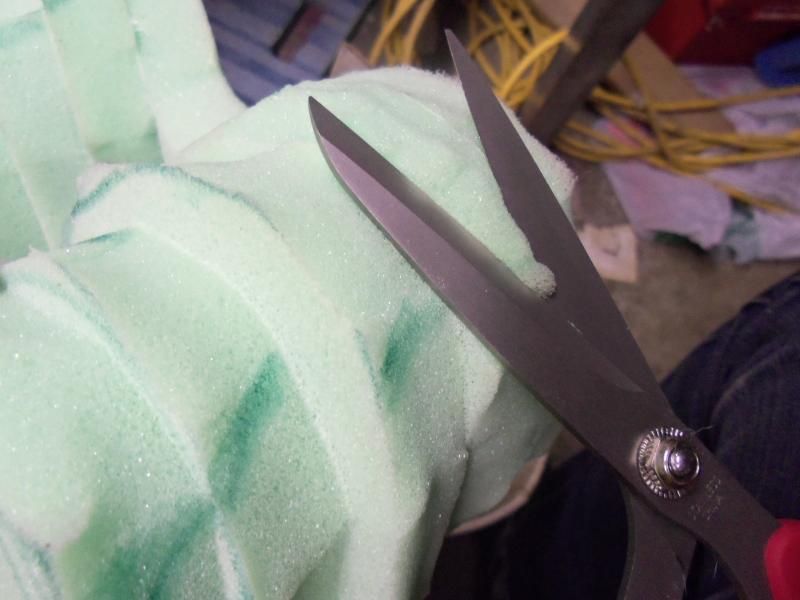
Next, I began the long process of shaping the foam. Cutting at a 45 degree angle in small sections, work it until it's mostly smooth. I used a sharpie to help with where I wanted curves to end up.
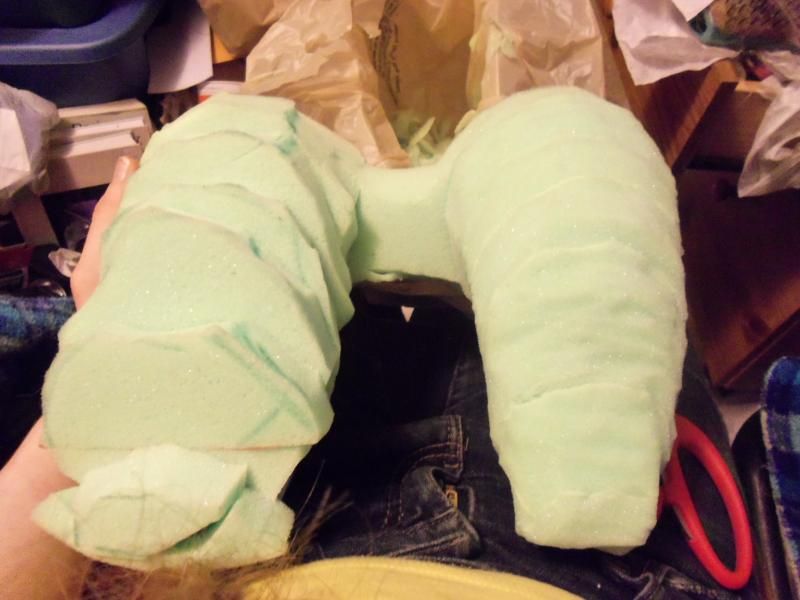
Once I was happy with one side, I moved to the next.
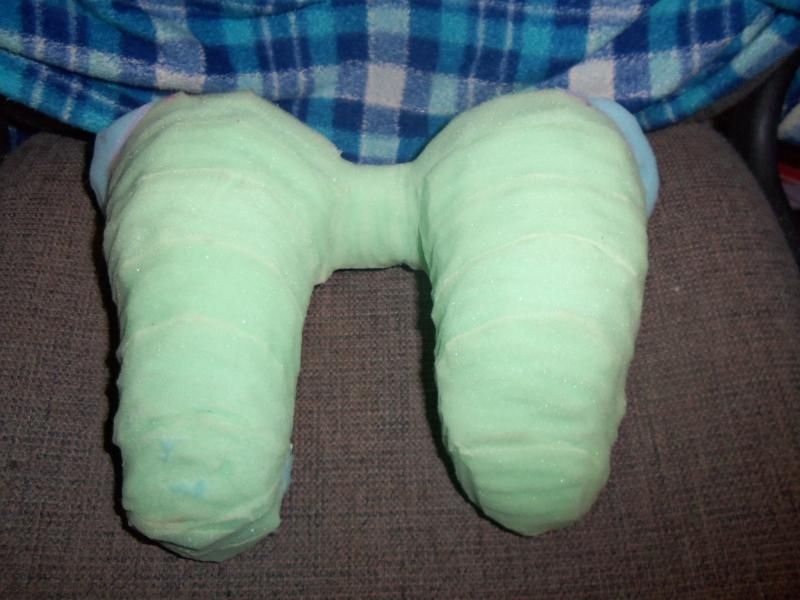
I went back and added some .5" foam to the very base layer, to help ease the transition from foam to skull, using spray glue as I had done before.
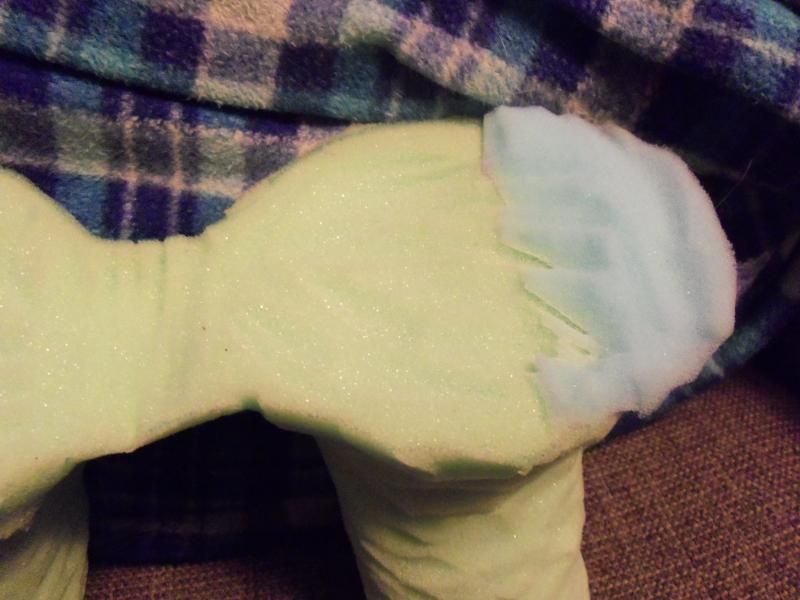
Then, I did the reverse of shaping the lekku to create rounding on the inside, so it would sit more naturally and be more comfortable.
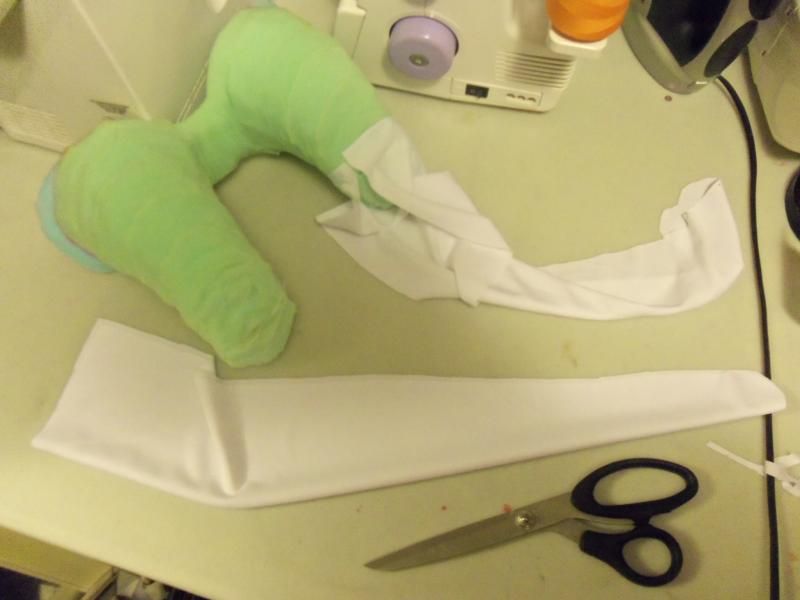
I realized early on that the solution to my batting showing through problem would be to line the lekku, so I got a fabric with similar stretch to the material I will use for the "skin" to both make the lining and use as a pattern. Patterning on a curve with stretch fabrics can be a challenge, so I recommend finding a similar fabric to test with.
To make the length, I simply measured how long I wanted the tails to be, as well as around the foam at the point which they would attach, and made a tube that rounded at the end.
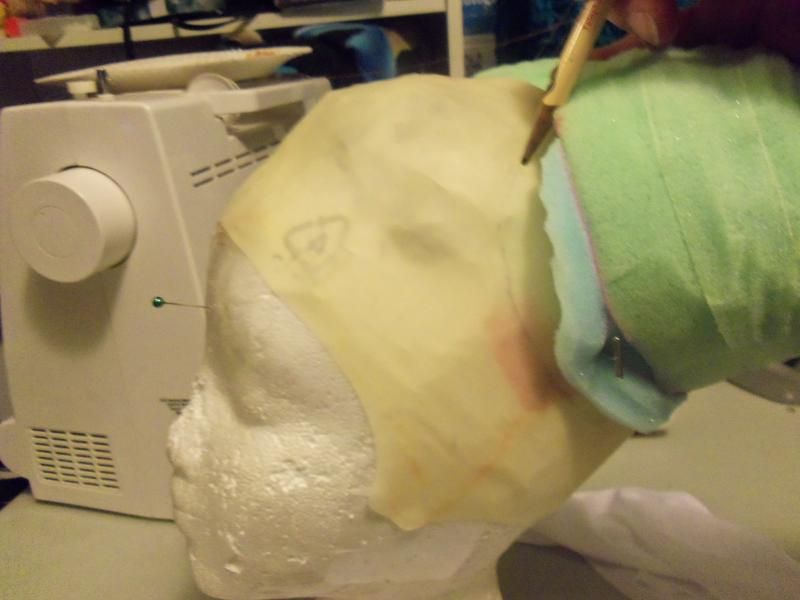
The next step was attaching the lekku base to a bald cap. A wig cap might work instead, but a bald cap seemed sturdier (and less likely to run of course). I marked where the lekku would sit with a pencil while the wig head was upright.
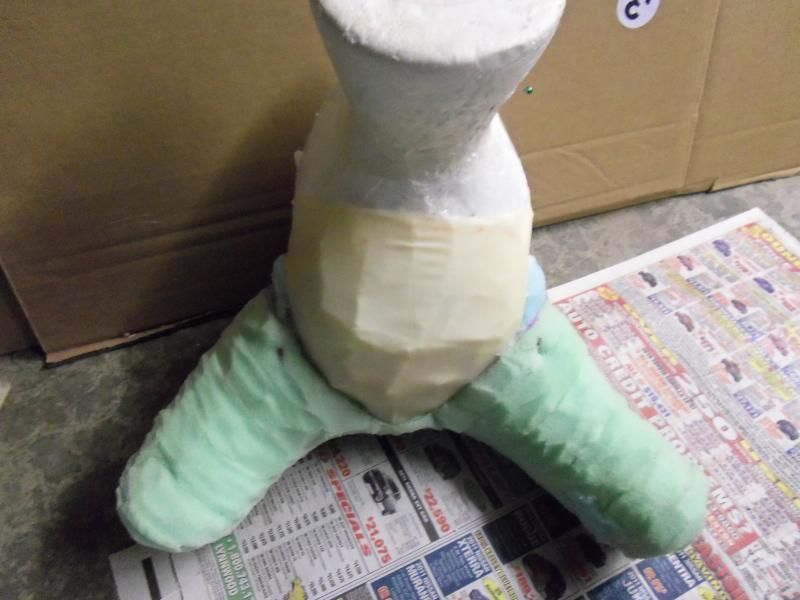
Then, after spraying both the foam and the bald cap with a strong adhesive, I positioned the foam and attached it to the cap. I used T-Pins and light pressure (mostly provided from the wig head itself pushed slightly against the foam), and let it dry overnight.
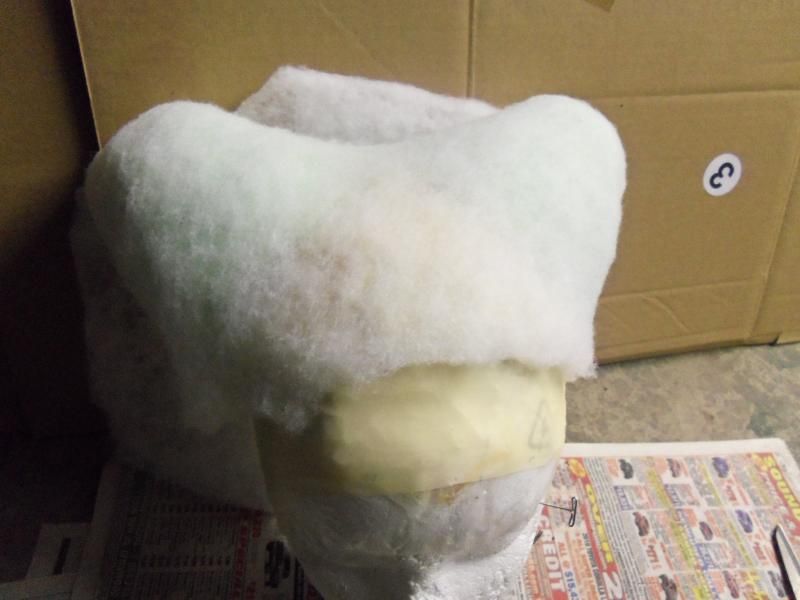
This is why I didn't worry about the foam not being 100% perfect. Using 3oz batting sheets and spray glue again, I covered the foam in one layer. I started from the top front, as that will be most visible.
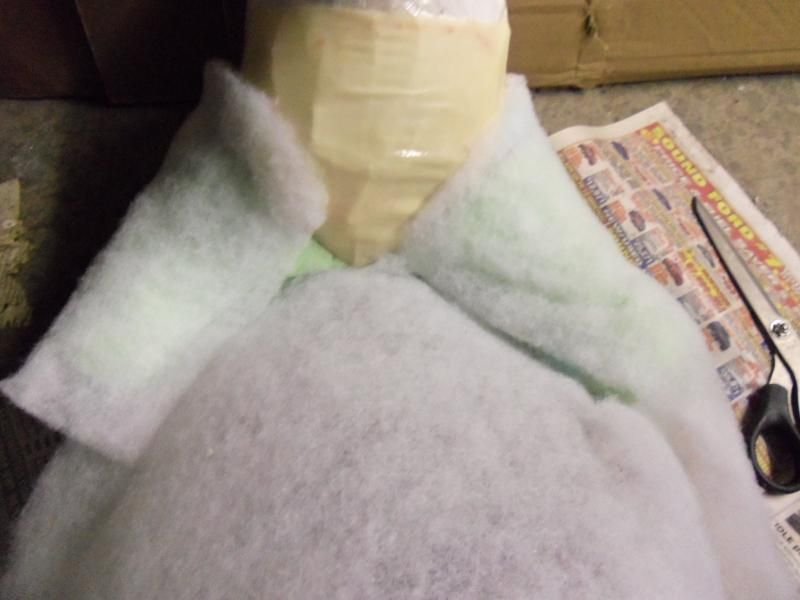
Then, I wrapped the batting around the foam and to the back (which is where I will put the seams, as well).
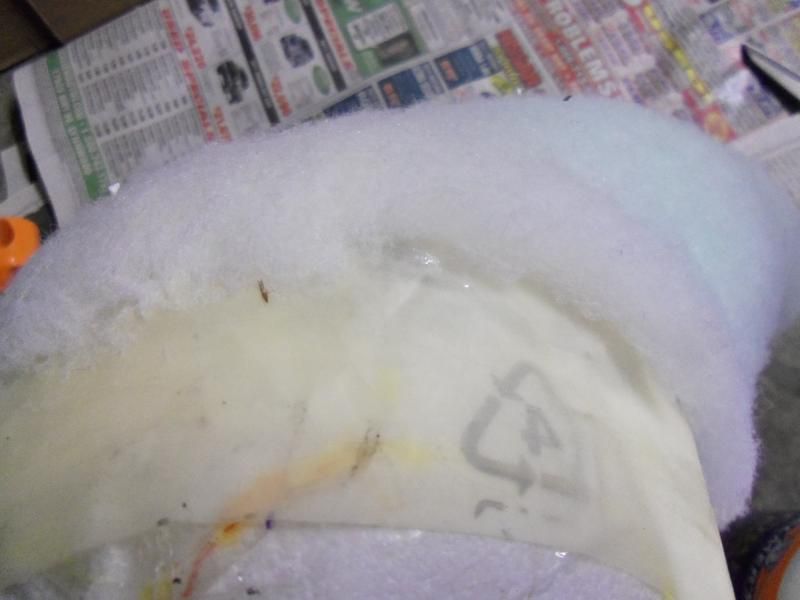
Spraying a thin layer of glue at the seam, I pressed it against the bald cap, so that it would rise naturally. The left side has been pushed down, the right side is not (and would create an uneven lump of a line)
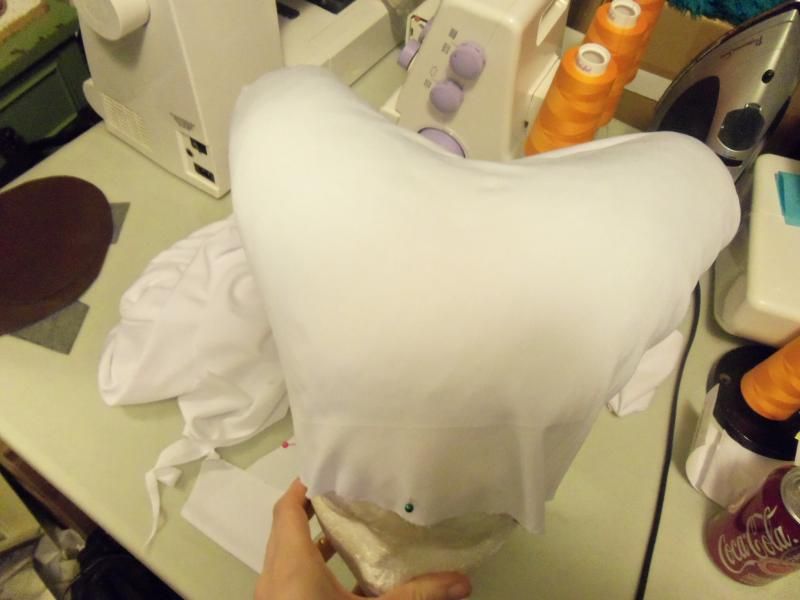
I made my pattern for the top with the same lining fabric as I did for the length of the tails, using the same method of starting at the top front and wrapping it around to the back. This will create two seams: one down the length of each lekku, on the inside, and one down the back of your head from the middle of where those two join. While there isn't much you can do about that if your Twi'Lek doesn't have some sort of headwrap, they aren't terribly noticeable (which is why I placed them there).
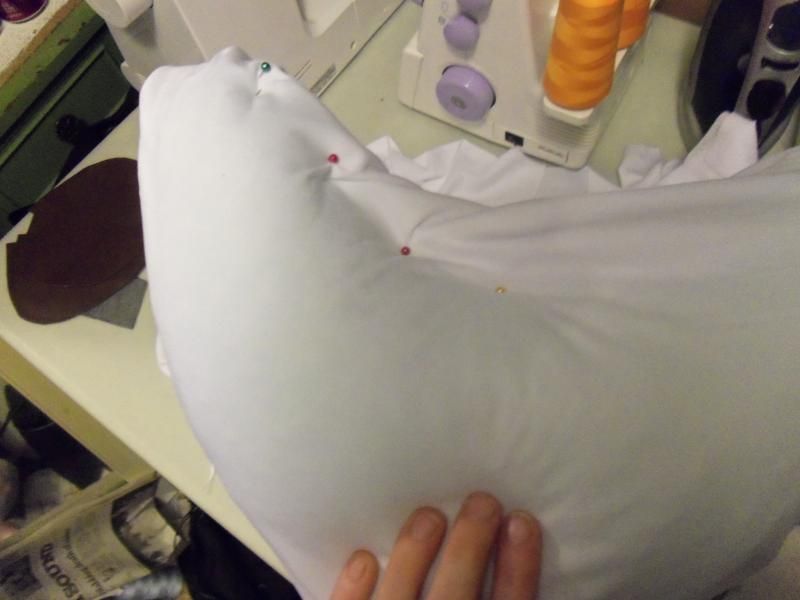
I used pins to hold each side flush with the other, marking with a pencil where the seam would go. I also took this point to figure out where my tails would be joining the skull piece, marking that on the pattern.
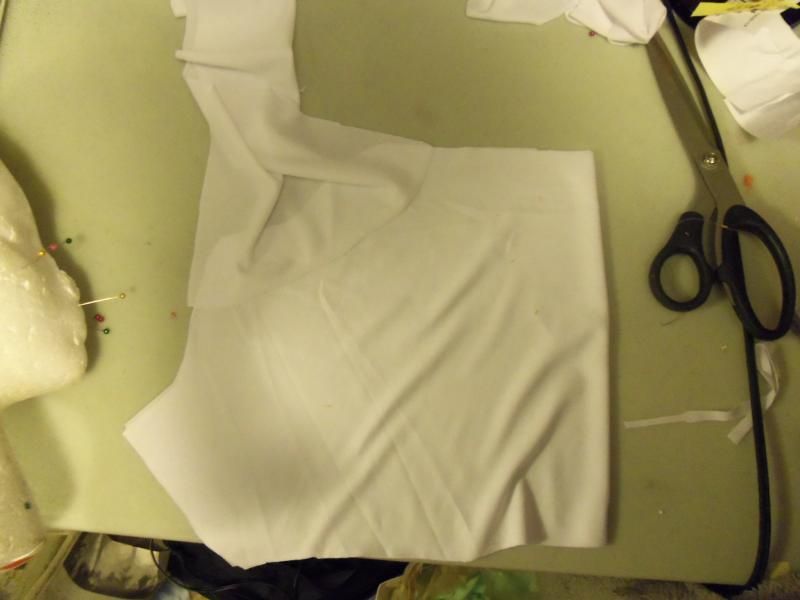
After attaching the length of the tails, I have my pattern. I had though about leaving the lining as this piece, but the seam where they joined was noticeable, so I ultimately cut a second one out of a single piece.
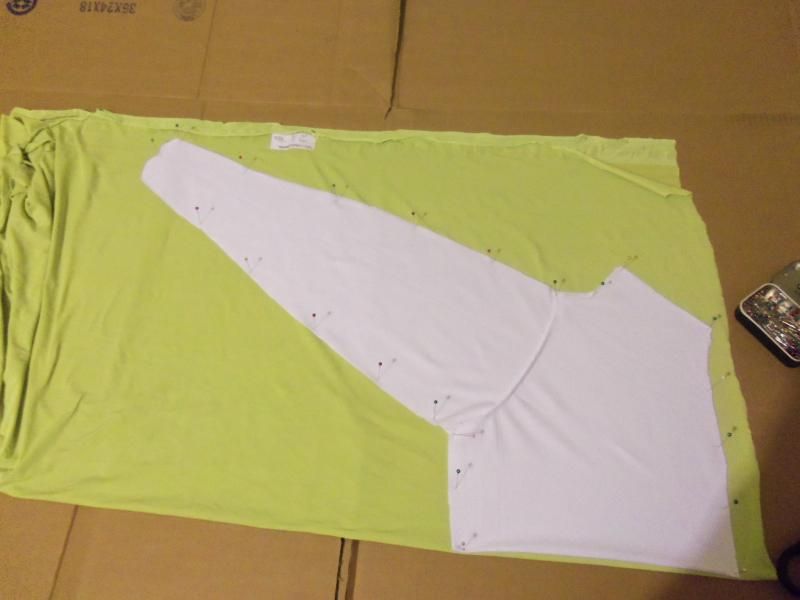
With the front of the lekku on the fold of the fabric, I laid down my pattern and cut out both the lining and the "skin".
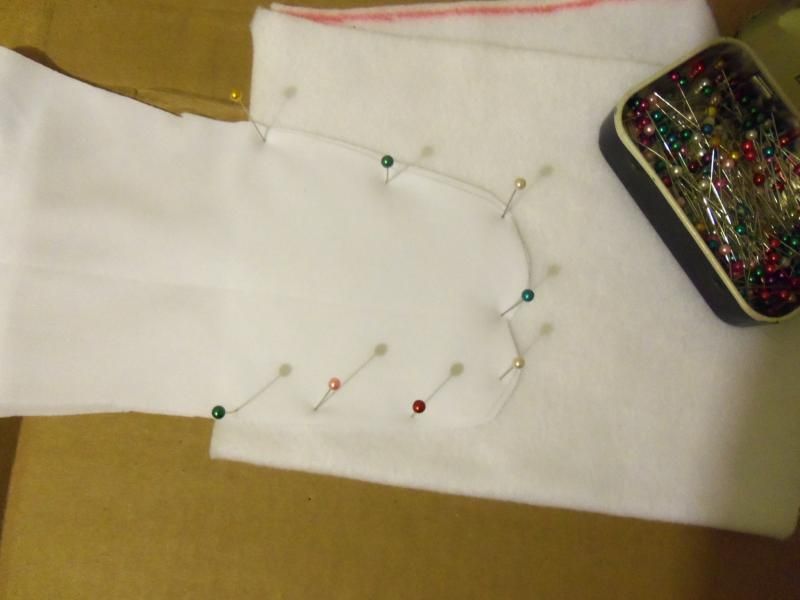
I also took this chance to cut out a pattern for the tip of the tails out of fleece. I then filled these with poly pellets and sealed them at the top (with a circular piece of fleece). These give my lekku a small amount of weight, which helps them swing and bounce.
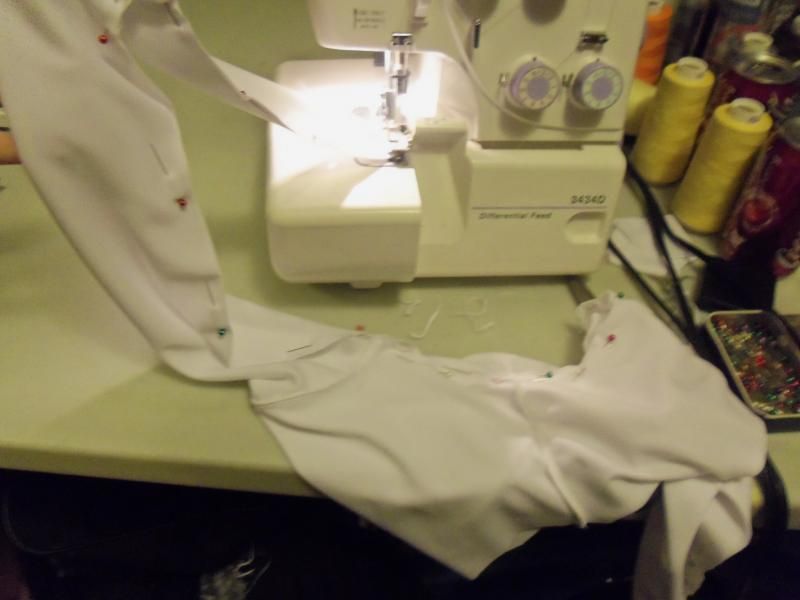
Sewing these is actually fairly simple. The back seam is first (the short one at the base of your neck), and then the long one that runs along the tails themselves.
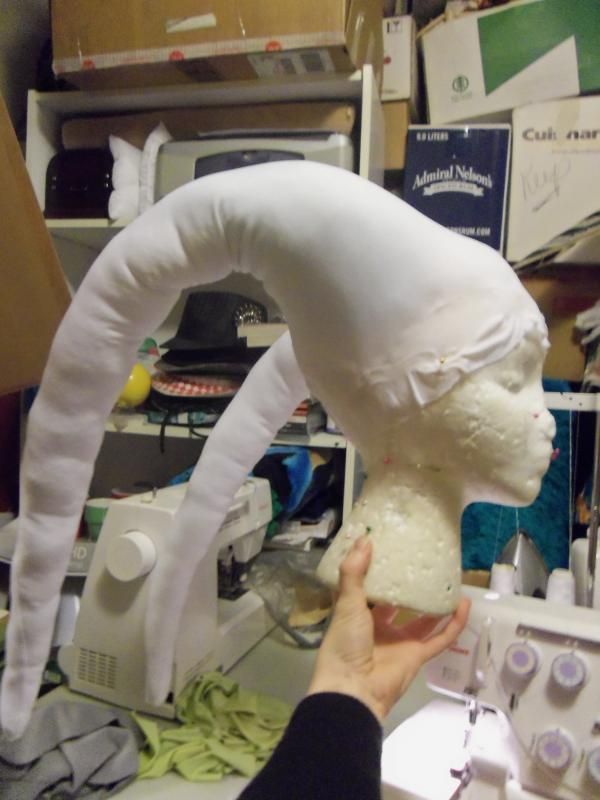
After that, I stuffed the tails until where they met with the foam. Take a few minutes at this point to even out the fiberfill with you hand - the far side has been evend out, the near side has not. It makes a huge difference, and it's so quick to do!
I also used the same spray glue to attach my lining to the bald cap. I decided against attaching the skin, in case I ever wanted to use the same base for another Twi'Lek I have planned, but this keeps the rest of it from shifting around.
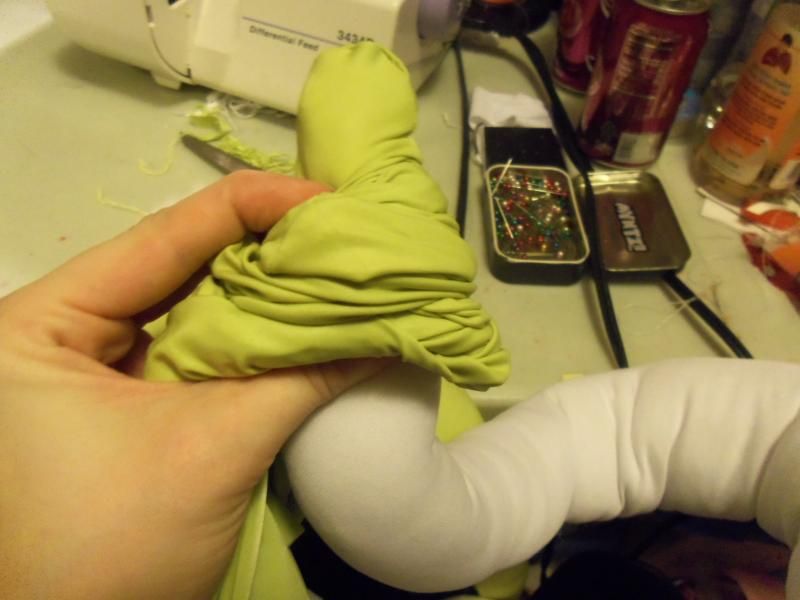
Much like putting on tights, I made sure the tip of the tail was smooth and taught before pulling them the rest of the way up, holding onto the tips as I went.
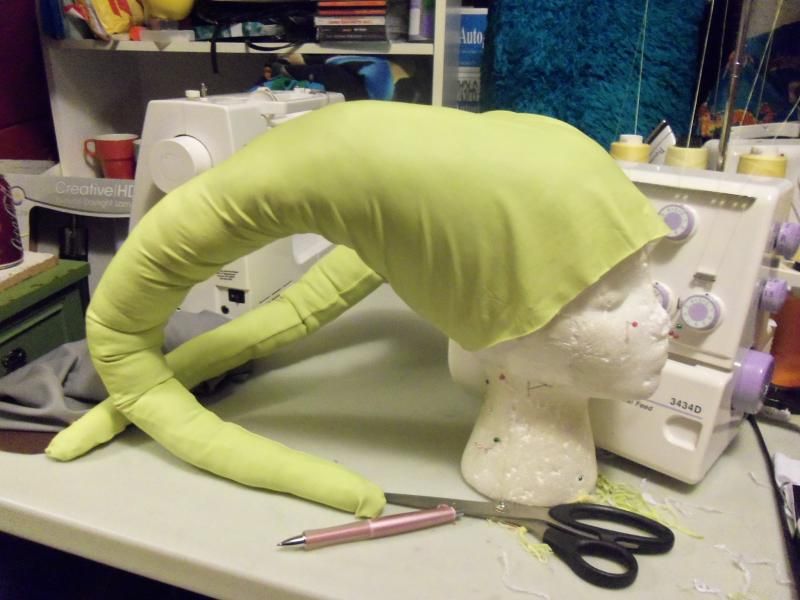
And that's it! Shift the fabric around as needed to keep it from wrinkling as much. Some wrinkling is to be expected, but that's lekku for you.
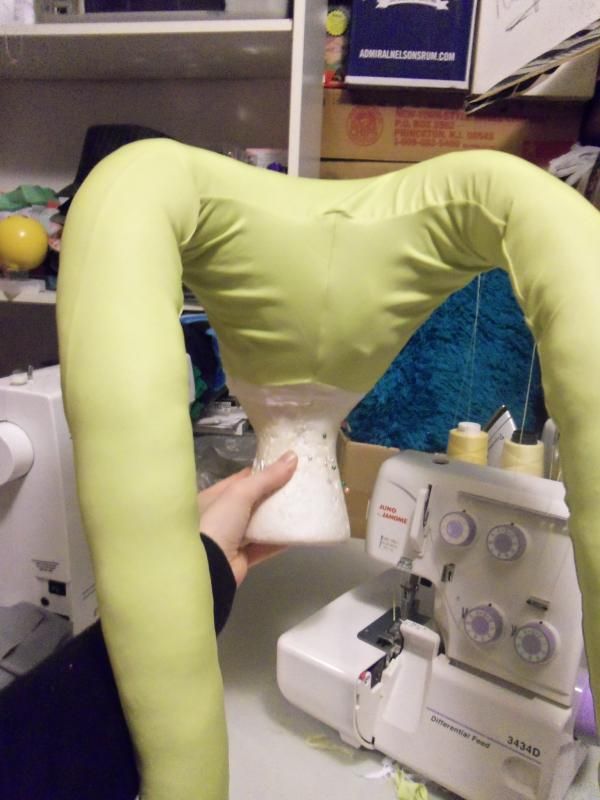
The view of the back, with the minimal seams.
I attached my lekku with spirit gum and liquid latex over top to hide the seam. I'm planning to do a video of putting them on once I get my video camera up and running again.
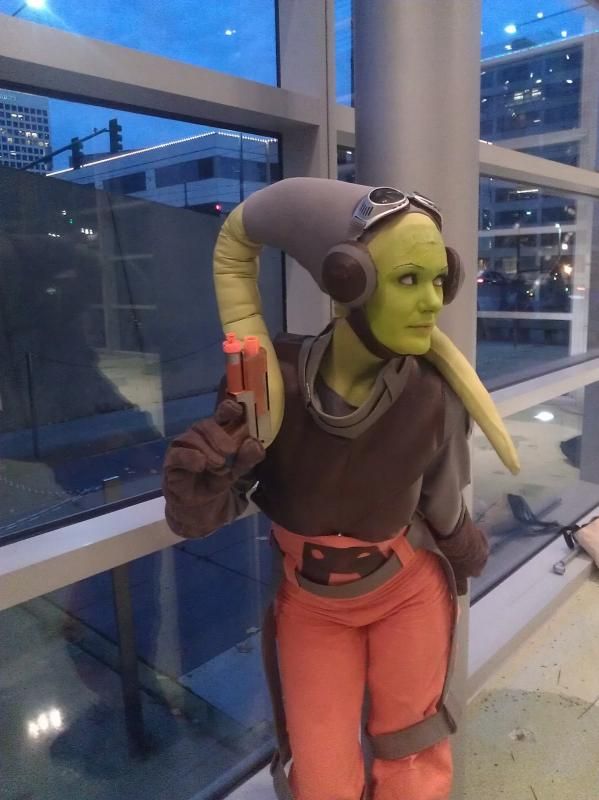
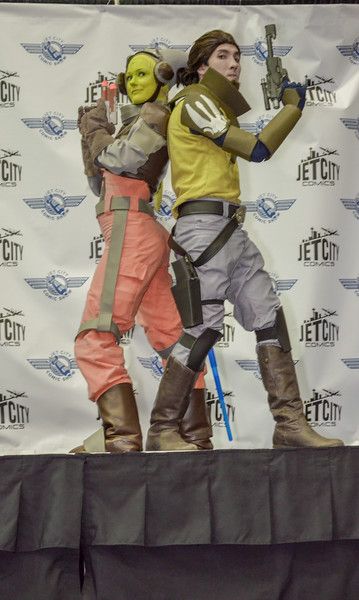
Here are a few pictures of them worn.
And a gif to show how they move

PS: Sorry for messy workspace pictures. I was too excited it was actually working at the time to clean properly.
I've been wanting to make a set of lekku for a while now, but I didn't want to attempt the whole latex build (my house isn't nearly climate controlled enough for me to feel confidant that the latex wouldn't go south on me). On the other hand I dislike how fabric lekku tend to have a few problems; usually they come straight down off the back of the skull and, depending on the fabric, sometimes you can see the stuffing poking out.
So, I set out to create my own pair, and I'm pretty pleased with the results!

First, start with a wig head that fits your skull, accounting for hair (in my case that's a lot of it), preferably one that shows your hairline so you know where you're working. I made mine using a similar method to this tutorial.

From there, I created a rough size of the lekku base in paper, so I could play around until I was happy.

I began cutting layers of foam, starting with one that had a bridge in between the two sides, then circular ones in addition to that. I used 1" foam I had left from another project, which worked out well for the tapering.

Using spray glue, I started attaching the layers. The first few are almost even with one another.

The layers past that taper down. Don't worry about it being uneven right now, and if you can use scrap pieces, go for it!

Next, I began the long process of shaping the foam. Cutting at a 45 degree angle in small sections, work it until it's mostly smooth. I used a sharpie to help with where I wanted curves to end up.

Once I was happy with one side, I moved to the next.

I went back and added some .5" foam to the very base layer, to help ease the transition from foam to skull, using spray glue as I had done before.

Then, I did the reverse of shaping the lekku to create rounding on the inside, so it would sit more naturally and be more comfortable.

I realized early on that the solution to my batting showing through problem would be to line the lekku, so I got a fabric with similar stretch to the material I will use for the "skin" to both make the lining and use as a pattern. Patterning on a curve with stretch fabrics can be a challenge, so I recommend finding a similar fabric to test with.
To make the length, I simply measured how long I wanted the tails to be, as well as around the foam at the point which they would attach, and made a tube that rounded at the end.

The next step was attaching the lekku base to a bald cap. A wig cap might work instead, but a bald cap seemed sturdier (and less likely to run of course). I marked where the lekku would sit with a pencil while the wig head was upright.

Then, after spraying both the foam and the bald cap with a strong adhesive, I positioned the foam and attached it to the cap. I used T-Pins and light pressure (mostly provided from the wig head itself pushed slightly against the foam), and let it dry overnight.

This is why I didn't worry about the foam not being 100% perfect. Using 3oz batting sheets and spray glue again, I covered the foam in one layer. I started from the top front, as that will be most visible.

Then, I wrapped the batting around the foam and to the back (which is where I will put the seams, as well).

Spraying a thin layer of glue at the seam, I pressed it against the bald cap, so that it would rise naturally. The left side has been pushed down, the right side is not (and would create an uneven lump of a line)

I made my pattern for the top with the same lining fabric as I did for the length of the tails, using the same method of starting at the top front and wrapping it around to the back. This will create two seams: one down the length of each lekku, on the inside, and one down the back of your head from the middle of where those two join. While there isn't much you can do about that if your Twi'Lek doesn't have some sort of headwrap, they aren't terribly noticeable (which is why I placed them there).

I used pins to hold each side flush with the other, marking with a pencil where the seam would go. I also took this point to figure out where my tails would be joining the skull piece, marking that on the pattern.

After attaching the length of the tails, I have my pattern. I had though about leaving the lining as this piece, but the seam where they joined was noticeable, so I ultimately cut a second one out of a single piece.

With the front of the lekku on the fold of the fabric, I laid down my pattern and cut out both the lining and the "skin".

I also took this chance to cut out a pattern for the tip of the tails out of fleece. I then filled these with poly pellets and sealed them at the top (with a circular piece of fleece). These give my lekku a small amount of weight, which helps them swing and bounce.

Sewing these is actually fairly simple. The back seam is first (the short one at the base of your neck), and then the long one that runs along the tails themselves.

After that, I stuffed the tails until where they met with the foam. Take a few minutes at this point to even out the fiberfill with you hand - the far side has been evend out, the near side has not. It makes a huge difference, and it's so quick to do!
I also used the same spray glue to attach my lining to the bald cap. I decided against attaching the skin, in case I ever wanted to use the same base for another Twi'Lek I have planned, but this keeps the rest of it from shifting around.

Much like putting on tights, I made sure the tip of the tail was smooth and taught before pulling them the rest of the way up, holding onto the tips as I went.

And that's it! Shift the fabric around as needed to keep it from wrinkling as much. Some wrinkling is to be expected, but that's lekku for you.

The view of the back, with the minimal seams.
I attached my lekku with spirit gum and liquid latex over top to hide the seam. I'm planning to do a video of putting them on once I get my video camera up and running again.
Here are a few pictures of them worn.


And a gif to show how they move

PS: Sorry for messy workspace pictures. I was too excited it was actually working at the time to clean properly.
