KokiriHero
New Member
Hey there guys and gals! I'm new to the site and RPF forums, but I have been cosplaying for a few years now with my girlfriend under our cosplay name ChrisTeganCosplay. Just wanted to to introduce myself before I start talking about the newest project I have been working on.
I love all of the work I've seen around the forums, it's so inspiring to see so much talent all in one place. I wanted to get some input on my work so far and see what you all thought. Anyways, on to the interesting stuff
Beginning stages of creating the main face plate using a craft foam and super glue. Peperuka files were provided to be from a fellow cosplayer who goes by the name of MNC Props. He edited it for use with foam.
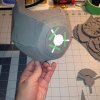
So much super glue, agh my finger tips! Here's the main face area complete and the general shape is coming together.
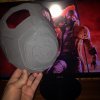
Adding the eye areas.
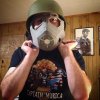
After finishing the main face plate I wasn't happy with the thickness of the face and how flimsy it was. I currently live with my girlfriend and I really did not want to mess around with toxic resins or anything of that sort. I'm attempting to work mainly with foam, eva foam and craft mainly, so my solution was to resize and use extra layers. It really started looking like I wanted it to at this point. Also added the size piece to give it some flair and an area for the nozzle to attach through.
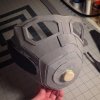
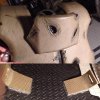
In order to make it wearable I added a back strap and used two very strong magnets embedded into the foam on both sides to make it easy to take off and on. At this point I started using filler to hide the imperfections and sealed the mask using Modge Podge.
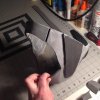
Added the front mouth pieces!
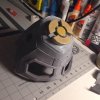
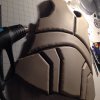
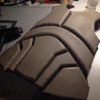
I also wanted to include the progress on my Ranger Armor as well! I'm actually incredibly happy with how it's turned out thus far! The piece took forever to dremel down to shape and get it properly fitted to me. Added some battle damage using a wood burning tool and put down some gashes then opened them up with a heat gun. After all of that was done I put on the strapping and used plastidip to give it a metal texture that will be easy to paint!
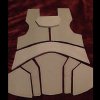
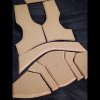


Hope you ladies and gents like all of the progress so far and feel free to link to me to any of your work on Fallout related cosplays . Thanks again for taking the time to look at my cosplay progress.
I love all of the work I've seen around the forums, it's so inspiring to see so much talent all in one place. I wanted to get some input on my work so far and see what you all thought. Anyways, on to the interesting stuff
Beginning stages of creating the main face plate using a craft foam and super glue. Peperuka files were provided to be from a fellow cosplayer who goes by the name of MNC Props. He edited it for use with foam.

So much super glue, agh my finger tips! Here's the main face area complete and the general shape is coming together.

Adding the eye areas.

After finishing the main face plate I wasn't happy with the thickness of the face and how flimsy it was. I currently live with my girlfriend and I really did not want to mess around with toxic resins or anything of that sort. I'm attempting to work mainly with foam, eva foam and craft mainly, so my solution was to resize and use extra layers. It really started looking like I wanted it to at this point. Also added the size piece to give it some flair and an area for the nozzle to attach through.

In order to make it wearable I added a back strap and used two very strong magnets embedded into the foam on both sides to make it easy to take off and on. At this point I started using filler to hide the imperfections and sealed the mask using Modge Podge.

Added the front mouth pieces!

I also wanted to include the progress on my Ranger Armor as well! I'm actually incredibly happy with how it's turned out thus far! The piece took forever to dremel down to shape and get it properly fitted to me. Added some battle damage using a wood burning tool and put down some gashes then opened them up with a heat gun. After all of that was done I put on the strapping and used plastidip to give it a metal texture that will be easy to paint!


Hope you ladies and gents like all of the progress so far and feel free to link to me to any of your work on Fallout related cosplays


