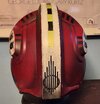
Welding on a new mohawk strip.
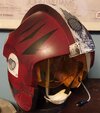
If you do no other modification for your repaint, do this. You don't even have to take it apart (except maybe the front cap), and it makes a world of difference in an accurate look.
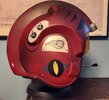
As noted previously, the built-in one is recessed, while the ones on screen had one sitting on top. (It was there simply to hide the seam of the two vacuformed halves stuck together.) Keep the original, though, because it helps keep the helmet together, and is a surface to weld upon.
Start from the front and do a bit at a time.


At the back, a little touch of flame softens up the plastic to enable the strip to be bent with a nice curve.


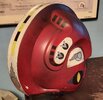
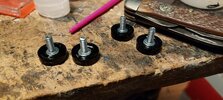
Weld & trim.


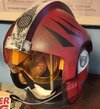
Strip attached!

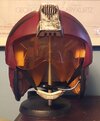
If you do no other modification for your repaint, do this. You don't even have to take it apart (except maybe the front cap), and it makes a world of difference in an accurate look.
As noted previously, the built-in one is recessed, while the ones on screen had one sitting on top. (It was there simply to hide the seam of the two vacuformed halves stuck together.) Keep the original, though, because it helps keep the helmet together, and is a surface to weld upon.
Start from the front and do a bit at a time.
At the back, a little touch of flame softens up the plastic to enable the strip to be bent with a nice curve.
Weld & trim.
Strip attached!
Last edited:


") ).
).