My Luke Macrobinoculars

Gigatron

Sr Member
Hey Gang,

Here's a project I've been working on for a few months now, Luke's macrobinoculars

Built on a real eumig servomatic, it has resin lenses from gw2tulsa (purchased from odiwan72 - thanks again.), a real Kalimar 660 viewer and knobs (thanks THX1138) and a russrep lens plate

Macros-finished-1A.jpg


macros-finished-2A.jpg


macros-finished-3A.jpg


macros-010A.jpg


The large knob says "magnification" and goes from 1 - 10 AND actually rotates. And the top sticker says "power cell", both in aurebesh.

Let me know what you think.

Thanks to WC for hosting.

-Fred
 
Thanks guys :D.

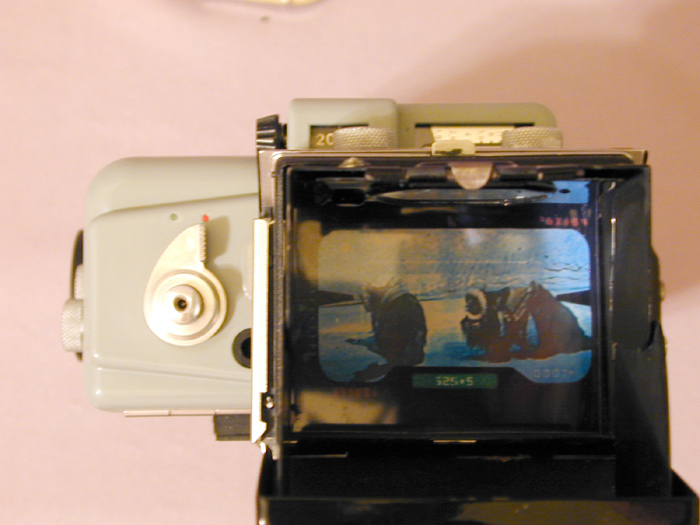
RMS, the Bantha picture is just a screen cap printed out on photo paper and stuck in there :lol.

Hyper, I only wish mine could be 1/1000 as cool as yours :).

-Fred
 
Finally, someone whose brain I can pick. Evil laugh. Mine are almost finished, not as nice as yours that's fo sho. :)
 
Fred,

Really nice macrobinoculars. Got my eumig off ebay recently and am going to do my own version.

Question for you. What is that black widget on the side of the eumig?

[attachmentid=7049]

Thanks for your help

Gene
 
I like your interpretation of the mystery box - excellent use of the Eumig parts.
 
Hi Fred

Great interpretation of the macros :):thumbsup
Your blackbox looks very interesting...do I spot two Obi transistors in there?

One comment reg. the two stickers...
I really like the touch you´re giving your macros by adding aurabesh details, but I´d go with black or grey stickers with yellow or white letters. The white "pops" out too much IMHO. Otherwise...excellent.

p.s: I really like the bantha grafic you put into the viewer :rolleyes

Markus
 
Hey, thanks guys :D.

Wick, the black box on the side is the black box from the front of the eumig, with a section cut off, some sort of spring assembly from the internals and 2 vintage transisitors.

Thanks, Moff. That means a lot coming from you :D.

Hey Markus, those are indeed two vintage (Obi) transistors. As far as the stickers, I've been leaning the same way. Usually when I do white letters on a black background, it comes out all crappy. But, I just got a new printer, so I'll give it a go and see how it turns out. If it turns out nice, you'll be seeing new pics by tomorrow night.

-Fred
 
Hey Fred,

Thanks for the info. Ok...clue me in on the vintage transistors. I assume these are from the 70's?

Thanks,
Gene

Originally posted by Gigatron@Mar 7 2006, 02:48 PM
Hey, thanks guys :D.

Wick, the black box on the side is the black box from the front of the eumig, with a section cut off, some sort of spring assembly from the internals and 2 vintage transisitors.

Thanks, Moff.  That means a lot coming from you :D.

Hey Markus, those are indeed two vintage (Obi) transistors.  As far as the stickers, I've been leaning the same way.  Usually when I do white letters on a black background, it comes out all crappy.  But, I just got a new printer, so I'll give it a go and see how it turns out.  If it turns out nice, you'll be seeing new pics by tomorrow night.

-Fred
[snapback]1200604[/snapback]​
 
Hey Gene,

The transistors are from the 50's/60's/70's era. They're Germanium PNP type and are easily found on ebay (just look for germanium pnp transistor*). They usually sell in lots of 30 for $10.

We know these are the correct type used on the Obi ANH saber, we just haven't been able to nail down the correct manufacturer and model number.

-Fred
 
Originally posted by JHVanOphem@Mar 8 2006, 02:13 AM
Heh, what is needed now is a casting of the Kaligar lenses, but replace the text with Aurebesh.
[snapback]1201093[/snapback]​


It's in Japanese Aurebesh, that's why it looks like english ;) :lol

-Fred
 
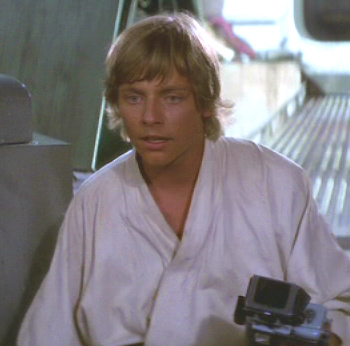
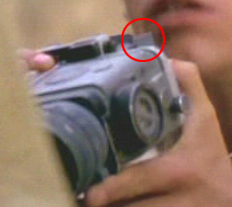
I couldn't sleep last night, so I got to freeze-framing SW and found these. Was the viewer black in some scenes and gray in others? I think it's cool that nobody's is the same and we see all the cool variations.

Black?
M07.jpg


Gray?
M08.jpg
 
I managed to get the image in my macros.
viewer.jpg


Here is the 2+meg .tif file if anybody wants to use it:
http://www.heycomputer.com/macros/binocs_final_stretched.tif
Right-click the link and choose 'save target as'.

I squeezed the screen together and stretched it out a bit top to bottom to get a good fit inside the viewer. When I printed it with photoshop, I resized it to 2.07 inches for a perfect fit.

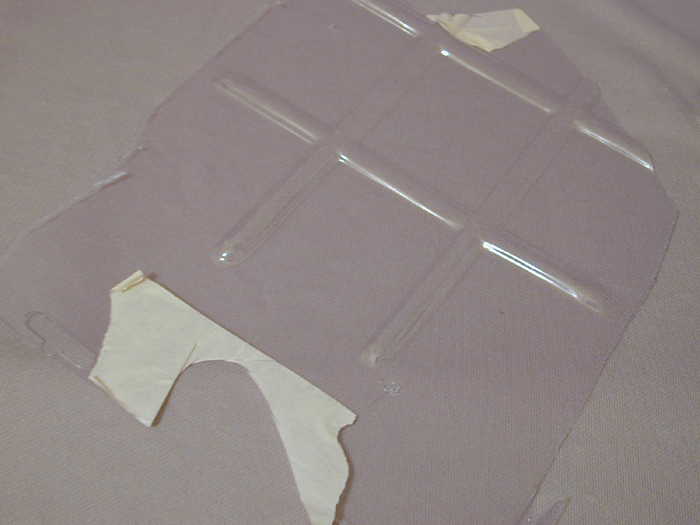
The clear plastic cover over the image is some scrap plastic that I had left over from a set of junk wal-mart tools for a few bucks:
sheet.jpg
 
Thanks dude, yours is looking awesome as well.. I get all worked up about stuff like this because I'm a klutz when it comes to building things.
 
Back
Top