PeteVenkman
Well-Known Member
Hi everyone, I thought I would share my build of the Polar Lights snap together TOS Enterprise. I have to say I was really impressed with this model considering it was a snap-tite. It's one beauty of a kit. I bought the kit to build as a gift for a friend who is an old school Trekker from way back and this has always been his favorite E. I decided to go with the regular series configuration, to me it just says classic Trek. Anyway, he was thrilled and that makes me happy.
This is a first for me in a couple of ways, it's my first time building a TOS Enterprise and it's the first model build I've posted here on the RPF.
I hope you enjoy.
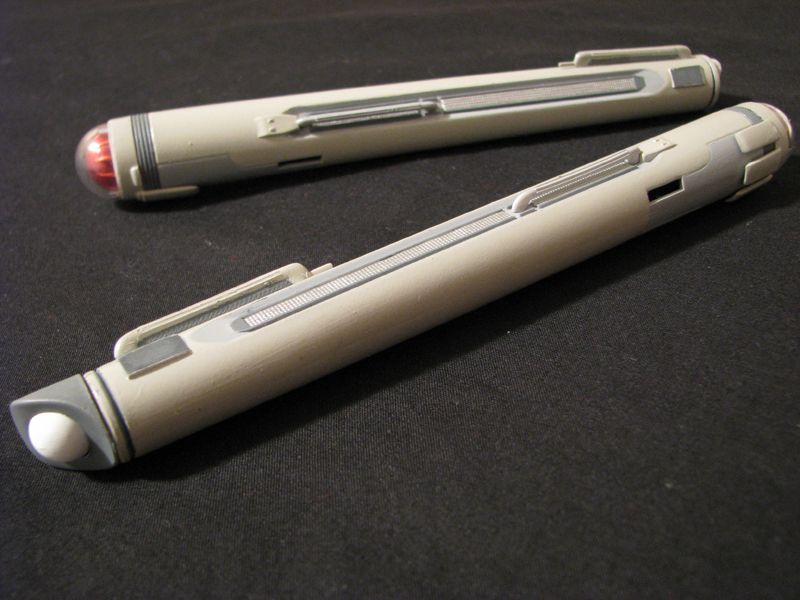
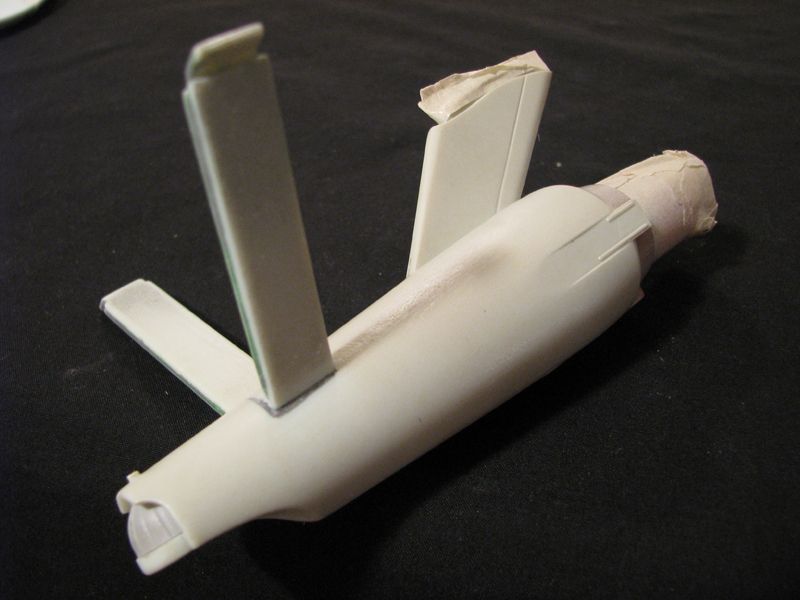
First I started off by separating and washing the parts then pre-painting some as needed. I have a bad habit of getting wrapped up in my work and forgetting to take pics, these first two are a good example of that, I was well into painting the warp nacelles when I realized I hadn't taken any photos yet.
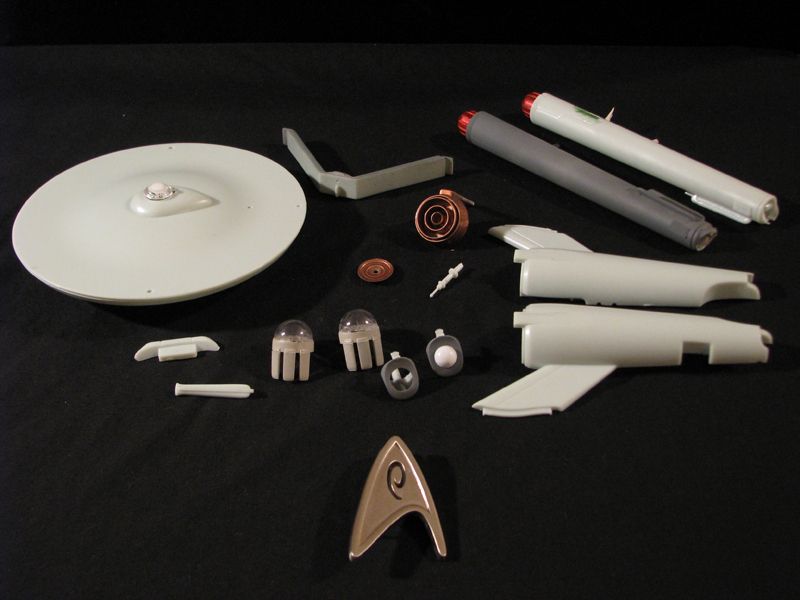
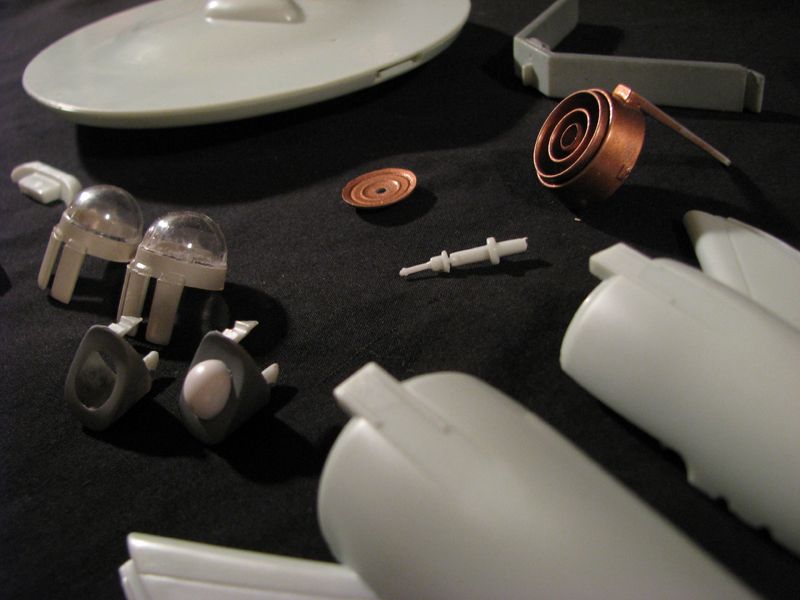
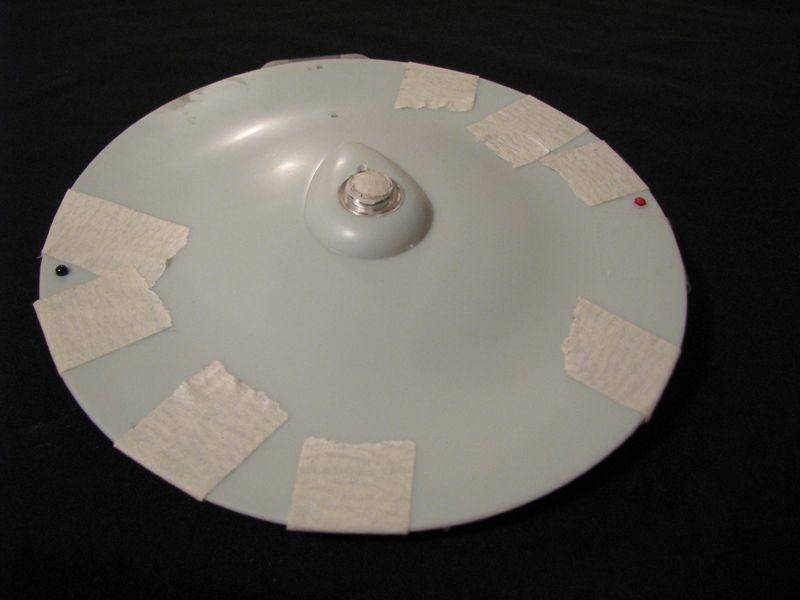
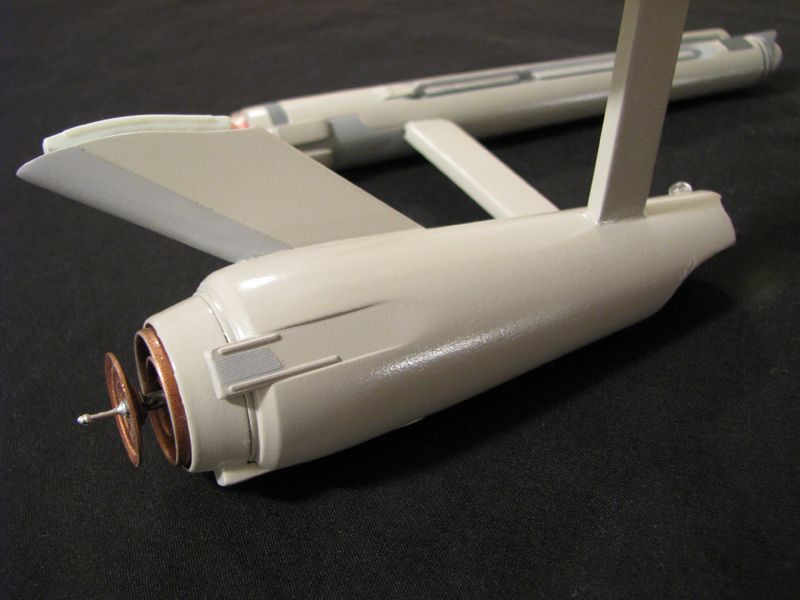
I then assembled the nacelles and masked them for the first round of paint. I used the primer as colour, in this case the darkest of the 3 greys I used on this kit. The Paints I used for this were Krylon Primer for the dark grey, Krylon Fusion River Rock for the main colour of the ship and Tamiya Surface Primer for the light grey accents. I used Krylon Outdoor Spaces Metallic Finish Copper for the Sensor dish. The silver I used is from Citadel paint.
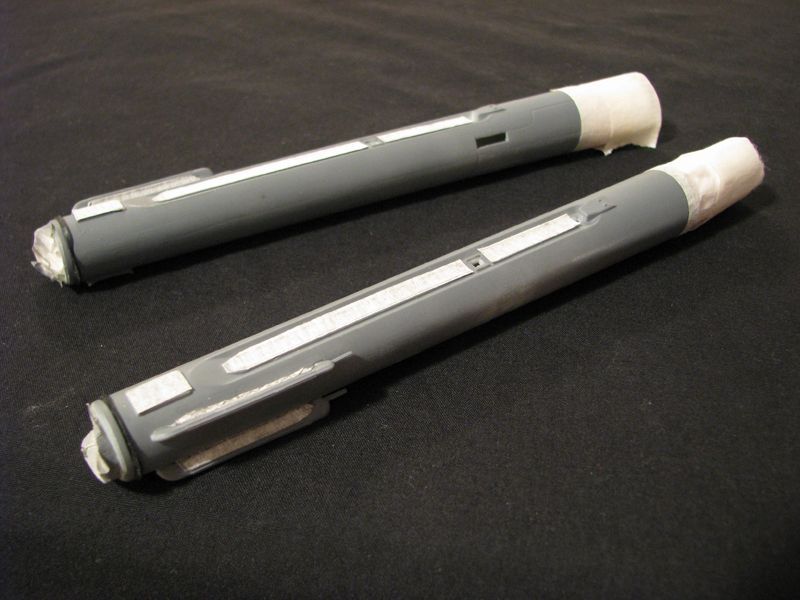
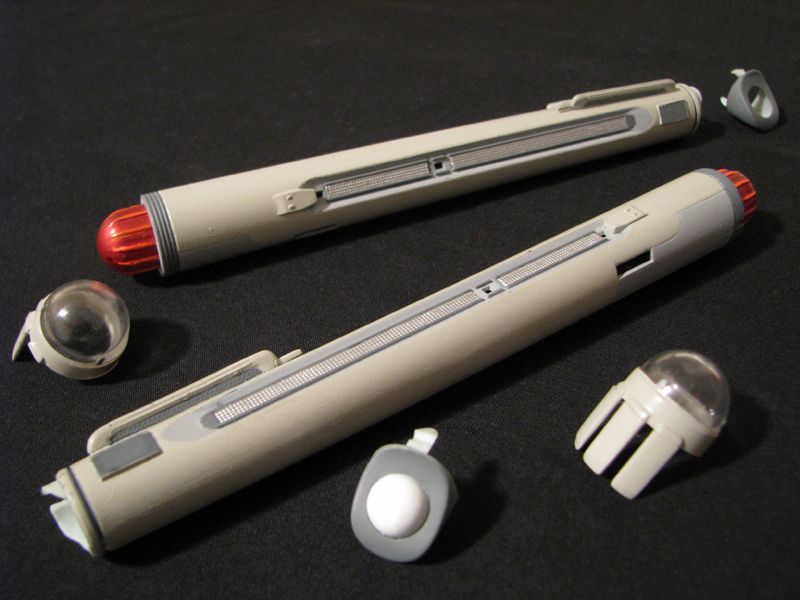
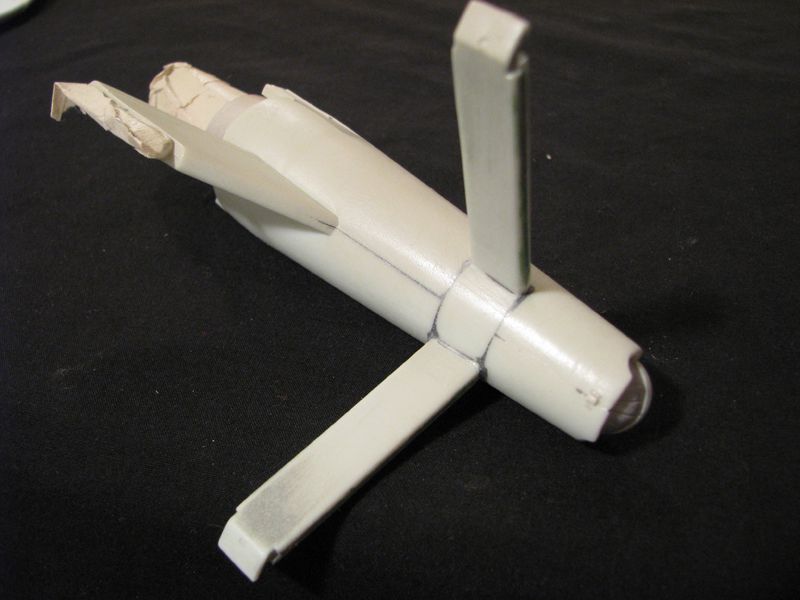
After that was dry I re-masked the nacelles and hit them with round 2.

The end result turned out like this.
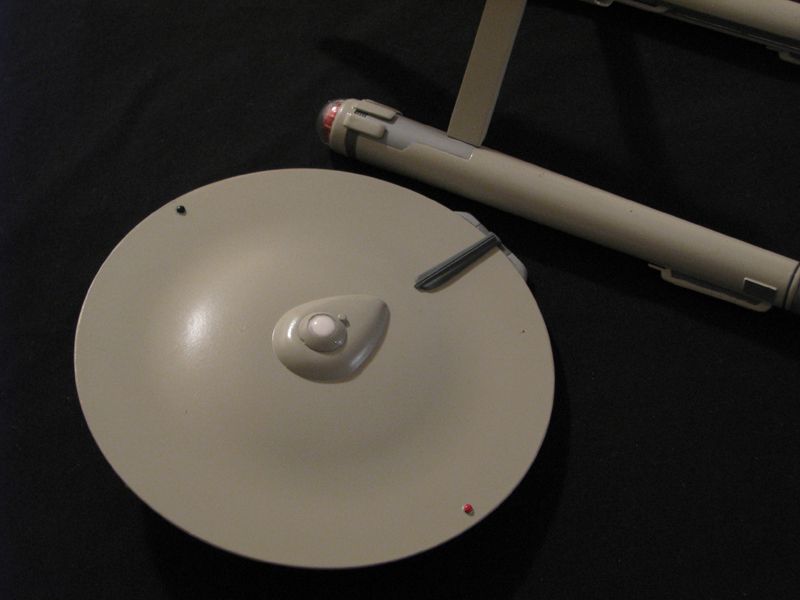
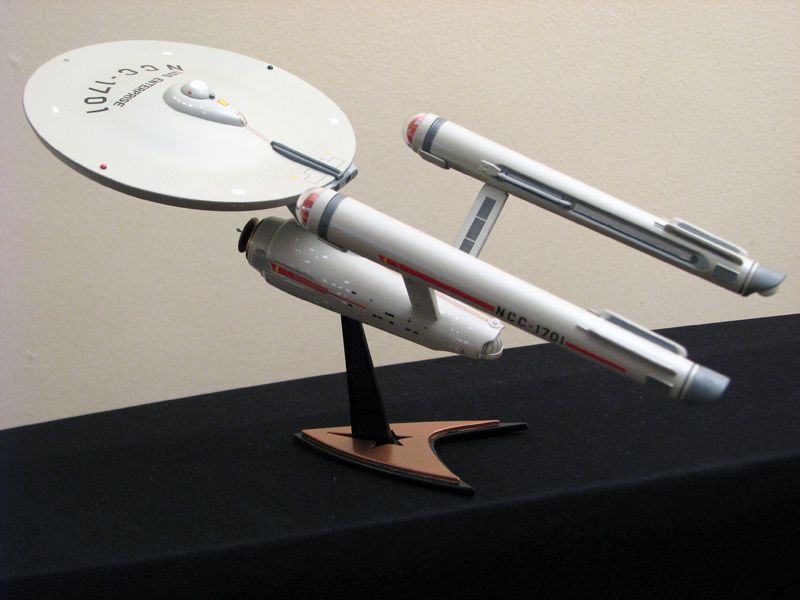
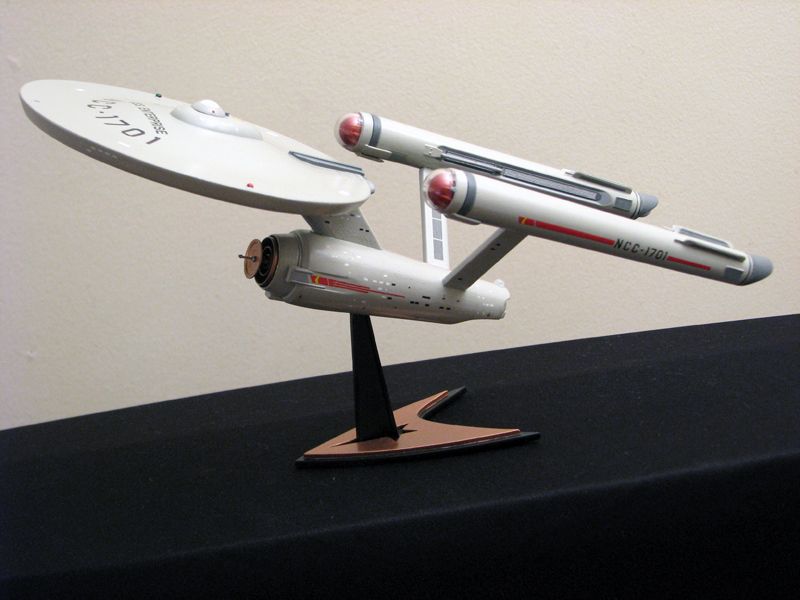
Now on to the Primary and Secondary hull. I wanted to get rid of as many of the seam lines as possible. I used black Milliput to fill the gaps where parts didn't fit well and Ambroid Pro Weld for the rest, but not on the clear parts, obviously.
Painted...
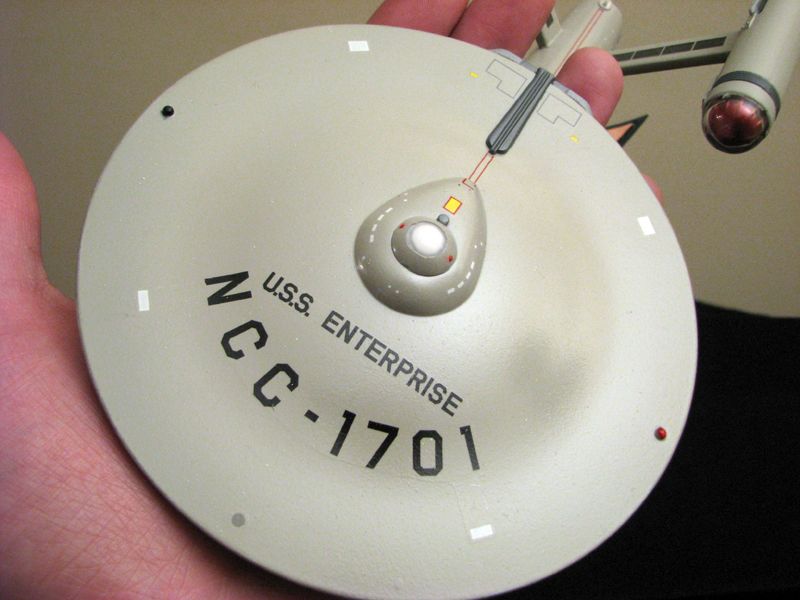
After that it was a matter of applying the decals and giving her a clear coat to protect everything.
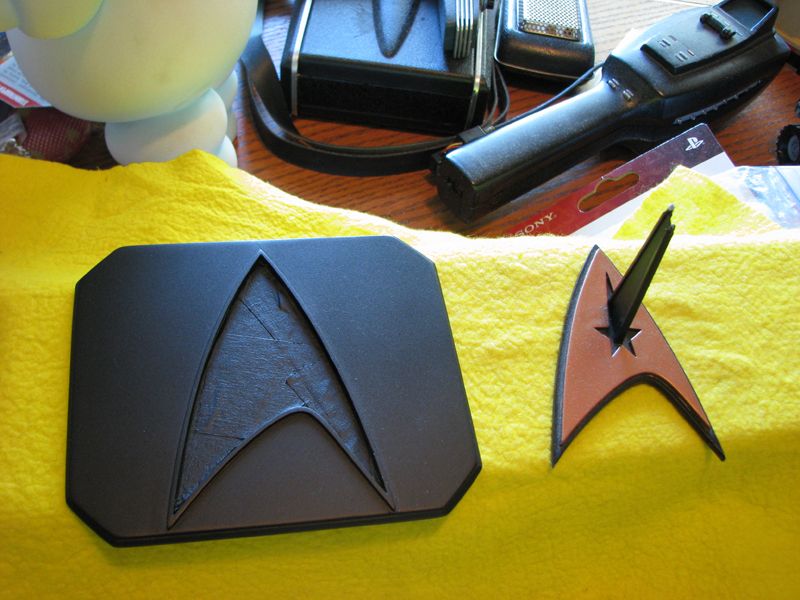
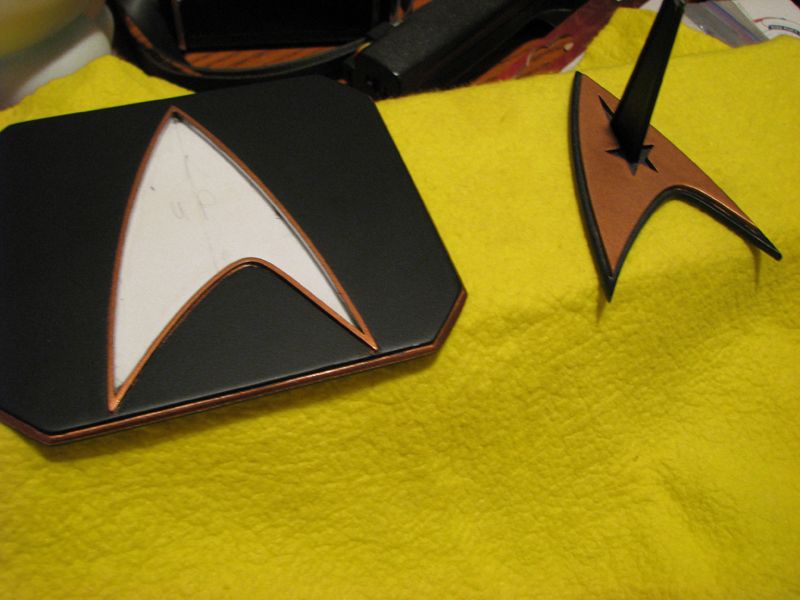
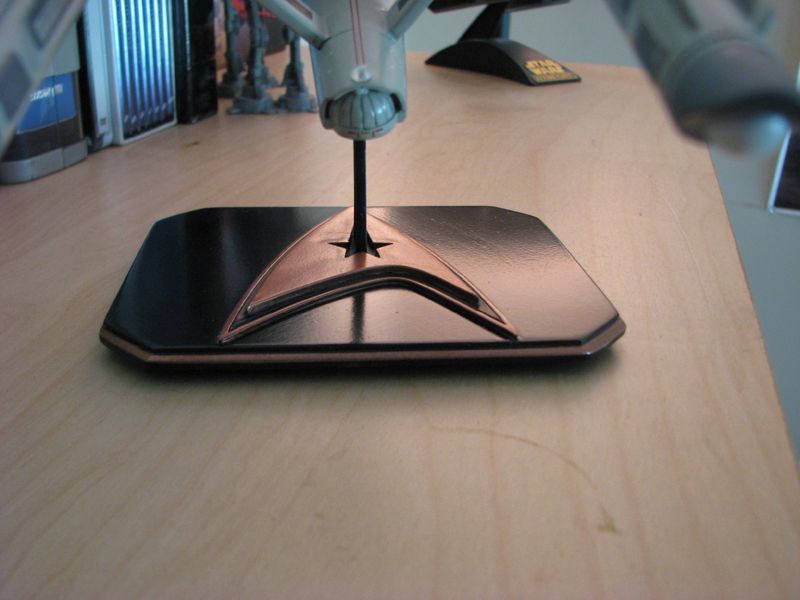
And that brings me to the base for this model. It's the only disappointment I have for this kit, everything else is perfect. But the base, well, it's just not stable.
My fears were realized when My friend came back a while later and said it had fallen and snapped a warp nacelle. Somehow I just knew it would happen, I never liked the stand. I got to work on repairing the ship and
decided to make a little addition for the existing stand to fit into, for stability. I took a 1/8" sheet of styrene for the base and layered a 1/16" sheet on top of that. I cut the shape of the original base out of the 1/16th sheet for the base to sit into. I then took strips of 1/16th by 1/16th styrene and outlined the original base with them. I beveled the edges and painted it with a base coat of Krylon primer, then Tamiya Flat Black and the Krylon Copper metallic finish. Topped it off with a shot of clear coat.

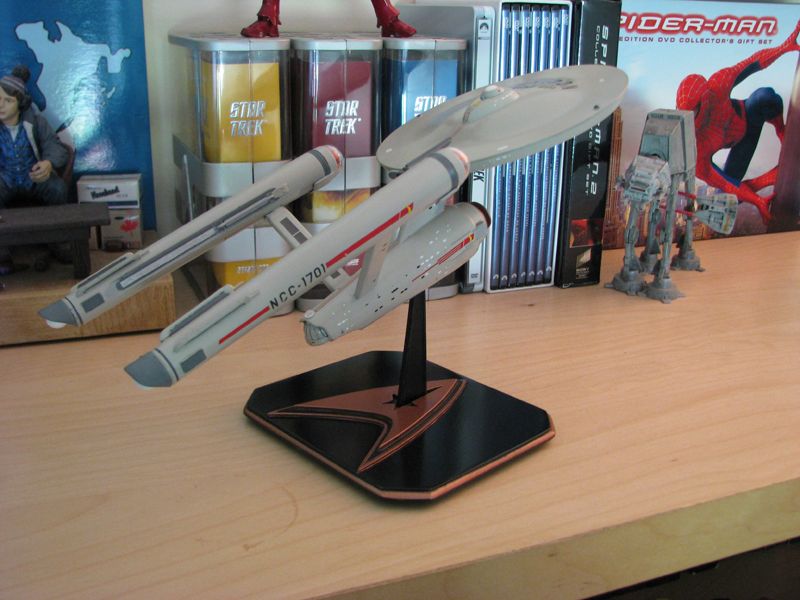
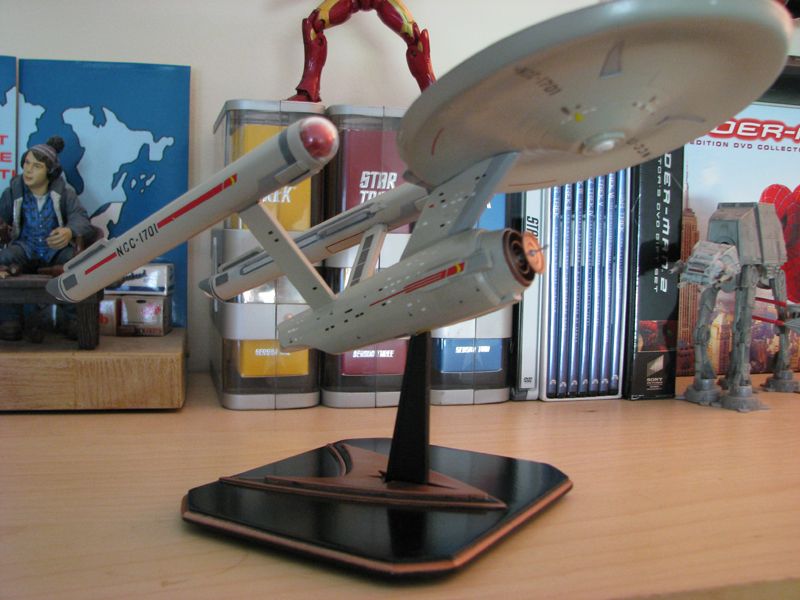
And here she is all finished.

Thank you for taking a look, hope it was entertaining.
This is a first for me in a couple of ways, it's my first time building a TOS Enterprise and it's the first model build I've posted here on the RPF.
I hope you enjoy.
First I started off by separating and washing the parts then pre-painting some as needed. I have a bad habit of getting wrapped up in my work and forgetting to take pics, these first two are a good example of that, I was well into painting the warp nacelles when I realized I hadn't taken any photos yet.
I then assembled the nacelles and masked them for the first round of paint. I used the primer as colour, in this case the darkest of the 3 greys I used on this kit. The Paints I used for this were Krylon Primer for the dark grey, Krylon Fusion River Rock for the main colour of the ship and Tamiya Surface Primer for the light grey accents. I used Krylon Outdoor Spaces Metallic Finish Copper for the Sensor dish. The silver I used is from Citadel paint.
After that was dry I re-masked the nacelles and hit them with round 2.
The end result turned out like this.
Now on to the Primary and Secondary hull. I wanted to get rid of as many of the seam lines as possible. I used black Milliput to fill the gaps where parts didn't fit well and Ambroid Pro Weld for the rest, but not on the clear parts, obviously.
Painted...
After that it was a matter of applying the decals and giving her a clear coat to protect everything.
And that brings me to the base for this model. It's the only disappointment I have for this kit, everything else is perfect. But the base, well, it's just not stable.
My fears were realized when My friend came back a while later and said it had fallen and snapped a warp nacelle. Somehow I just knew it would happen, I never liked the stand. I got to work on repairing the ship and
decided to make a little addition for the existing stand to fit into, for stability. I took a 1/8" sheet of styrene for the base and layered a 1/16" sheet on top of that. I cut the shape of the original base out of the 1/16th sheet for the base to sit into. I then took strips of 1/16th by 1/16th styrene and outlined the original base with them. I beveled the edges and painted it with a base coat of Krylon primer, then Tamiya Flat Black and the Krylon Copper metallic finish. Topped it off with a shot of clear coat.
And here she is all finished.
Thank you for taking a look, hope it was entertaining.
")