mortifactor's stuff. ESB Trooper Helmet. Trick or Trooping (in the loosest sense)

mortifactor

Well-Known Member
RPF PREMIUM MEMBER
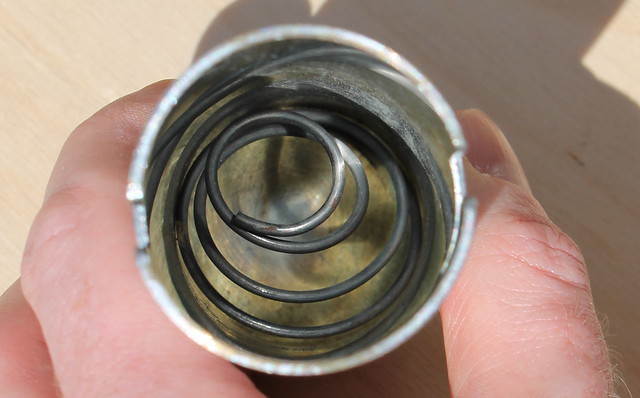
Gonna start out with the ESB graflex - I'm sure we already know what one looks like but here you go!


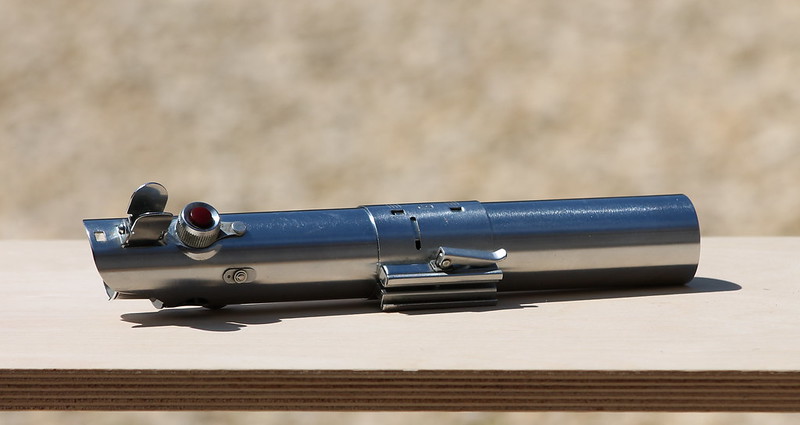
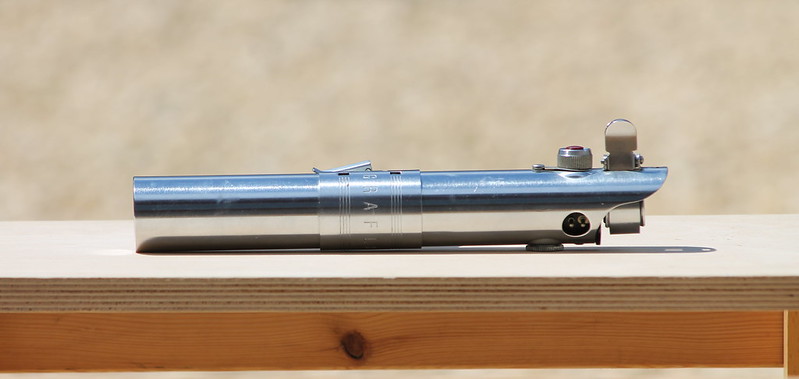
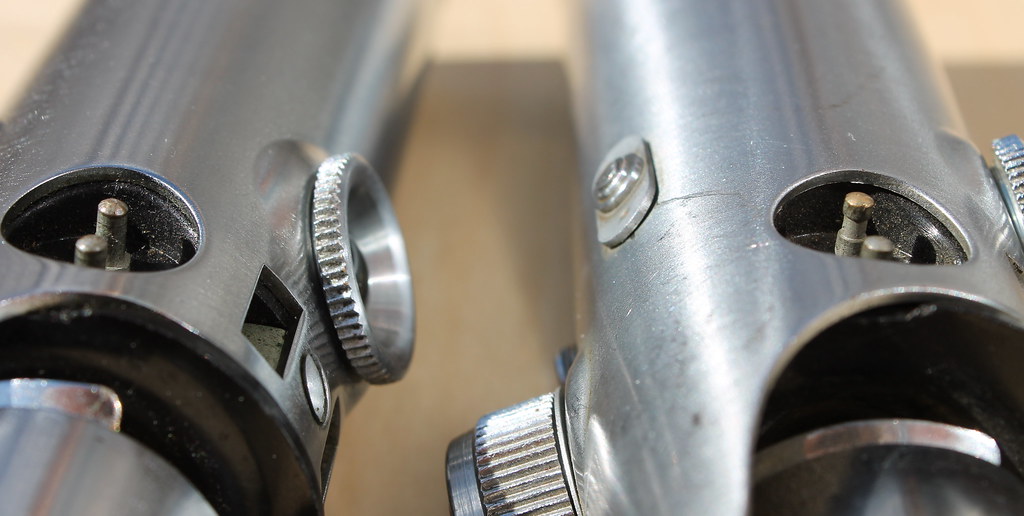
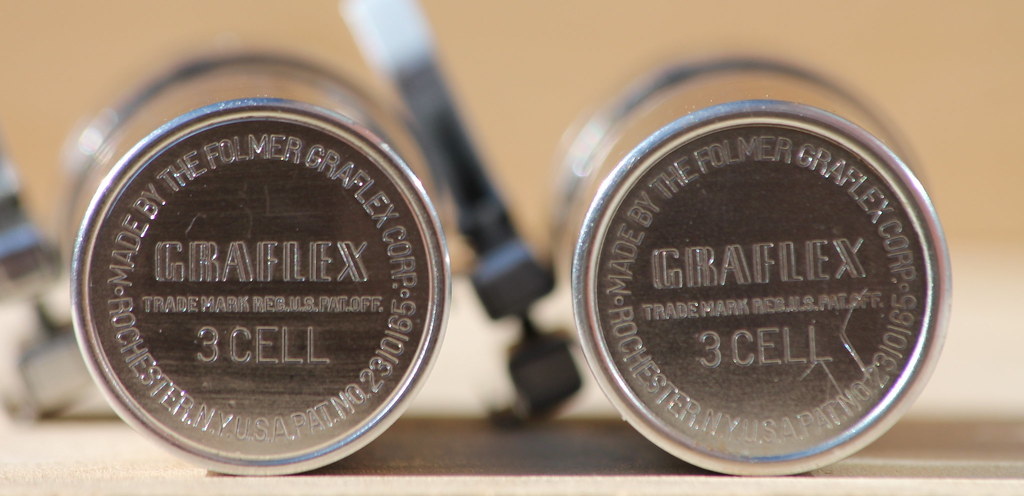
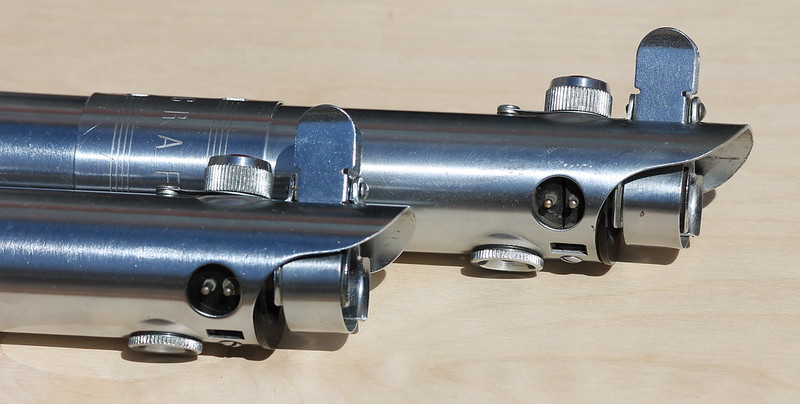
From some cursory research (many thanks to the members here!) I believe it to be a smooth pinned Folmer Graflex with patent. I'm not sure if that is the exact version of any particular screen used saber, but I'm very happy with it.

This is actually my second Graflex 3 cell... I bought my first a few days beforehand and am currently waiting on it from the USA! And to think I nearly thought I could do with just the one.. but the marketing men got me at a young age with the Star Wars figures and now I'm throwing money at anything Star Wars shaped.

In fact, as I wrote that previous paragraph the UPS man came with the Denix Mauser I ordered for a DL-44 conversion (I won't be taking outside pictures of that, the neighbours would phone the police!!)

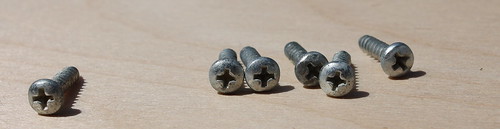
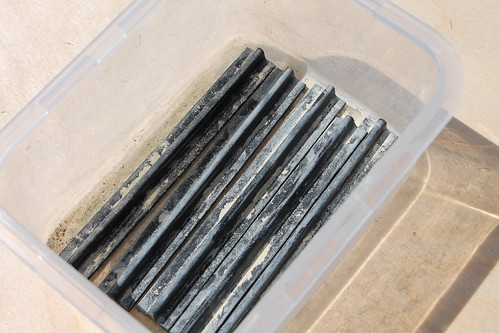
I'm busy with work at the moment but I've been preparing some of roygilsing's lovely parts. I left the screws out in the garden for a week to take the 21st century sheen away (although they perhaps went a bit too far!) and left the t-track in a box of water with some rock dust. The water evaporated and has left a a dusty residue that I will brush off to leave a "used" appearance.


As for the activation board, I rubbed it down with a shop receipt to leave some feint grey grubbiness conducive with constant contact to the user's hand. Similar to using newsprint to dirty up storm trooper armour. It's quite hard to make out in the sun, but it makes it look pre-owned.


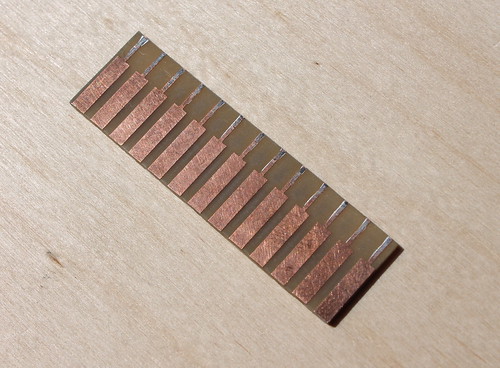
The one thing that I find can go wrong with weathering is not knowing when to stop. I think I went a bit far with the rub down and it removed a tad too much of the silver. Now the silver is completely gone from the sweat of my thumb pretending to turn the saber on as soon as the postman delivered it. Authentic weathering fail :lol - Got another board ready though and will be sure to put some dullcote or something on to block sweat issues.

Obligatory clip dent


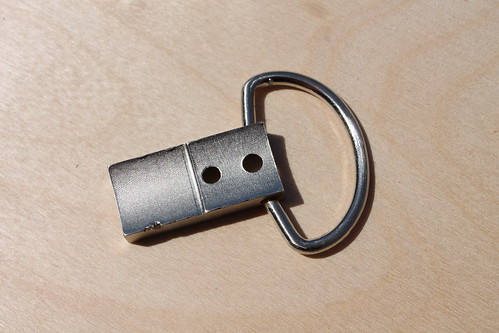
This was in the garden too and developed some rust where the d-ring links into the clip. I think I'll remove it.


Lingering questions for those who are knowledgeable:

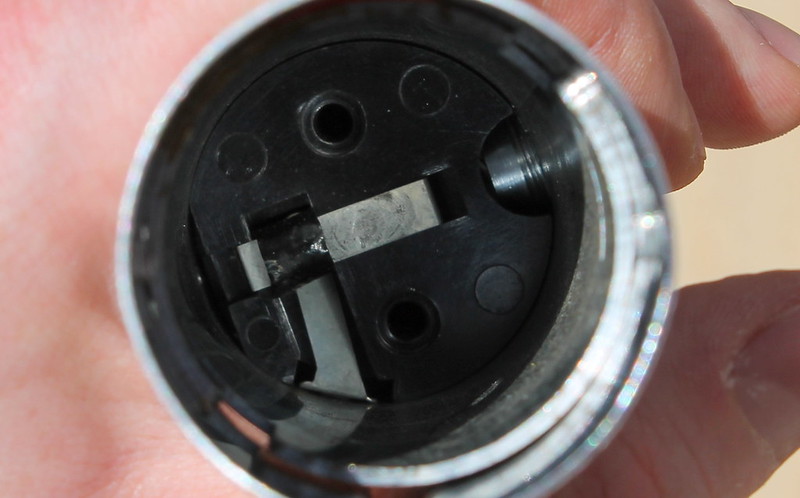
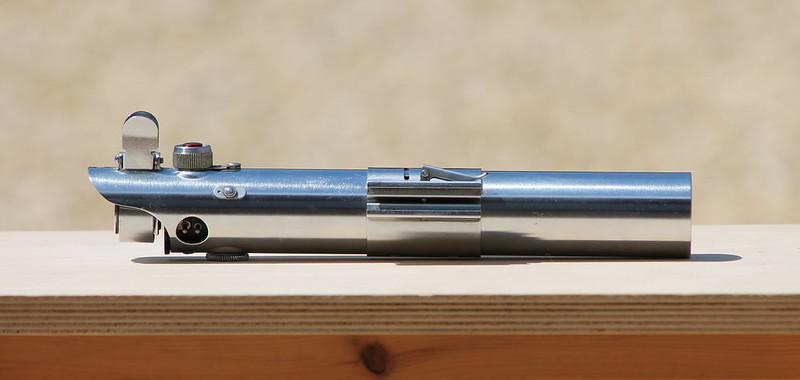
1) I'm terrified of breaking the clamp lever. I have it quite loose at the moment. I take it you tighten it until it grips the tube as the clamp is intended to grip a metal bar that isn't there. What lever position is optimum/safe?

2) This 3 cell is missing the tiny screw on the clamp. Will it fly apart from swishing? Will the forces put undue pressure on the clamp lever? (which is holding the tube together by its tension in lieu of the screw) I've already thought of putting a wooden dowel in the tube and screwing a replacement screw into the dowel

3) Before I go full ESB on this, is this 3 Cell model (Folmer Graflex with patent and smooth pins) more accurately suited to a different sabre? I enjoy accuracy and can imagine possibly being tempted to remake this in the future if I find out the version is different enough.
 
Last edited:
Re: mortifactor's first prop build - Graflex ESB

Congratulations! It looks like the Graflex you got is in awesome shape!

To answer your questions:

The lever can be tightened by turning the threaded pin that goes through the clamp. You need to take it off of the top and bottom tube to do this. Once the clamp is off of the two tubes, squeeze the clamp together with one hand. This frees up the squared end of the threaded pin (the end that the clamp lever is attached to). Once you have the squared end of the pin out of the square hole in the clamp, rotate it (it being the pin and lever) clockwise to tighten the clamp's overall grip. Go one rotation at a time. Be sure to seat the squared end of the pin back into the square hole. Then put one of the tubes back into the clamp. Is it still loose? If so, take the tube back out and repeat the procedure one more turn. I have not had a pin break on me before following this procedure. If it feels like you are about to break the lever or the pin, go back in the opposite direction. Just don't ever force anything when you are handling something this old.

To be screen accurate, with the Flashgun standing upright on its stamped end, the word GRAFLEX on the clamp should also be right side up. With the part of the clamp that attaches to a camera facing toward you, the lever should be on the right side of the clamp, with the free part of the lever pointing down. Basically, the way you have it in your photos is the correct positioning.

If you have the clamp on, and locked (meaning the lever is not pointing straight out) the Graflex should not be able to come apart.

The tiny missing screw that you mention is unnecessary.

I cannot say that this model of Graflex is better suited to any particular screen used saber other than the Luke ESB, as the only screen used verifiable image available of the bottom stamping is in the Wampa Cave Scene on Hoth when Luke uses the force to pick the lightsaber up, free himself, and chop the **** out of that poor hungry Wampa. There is believed to have been several different prop ESB saber's used, pretty much all with different configurations of button, or glass eye, etc. Unless you are specifically going for the Wampa Cave scene Luke ESB saber, this one is basically as good as any other Graflex.

*The Wampa Cave Scene Luke ESB is a Folmer without Patent Number, or as I refer to it, a Folmer New York, as it is the only version made with the state name New York actually spelled out rather than being represented by "N.Y.". In a freeze frame HD screen shot, the word "NEW" can be read on the stamped bottom.
 
Re: mortifactor's first prop build - Graflex ESB

Thanks mugatu, that's some great info. The clamp tip worked and I have just the right amount of pressure now. No fear or snapping the lever and no risk of the tubes coming loose! Good to hear about the graflex version not mattering a great deal, one less thing to have an aneurysm about :lol
 
Re: mortifactor's first prop build - Graflex ESB

...one less thing to have an aneurysm about :lol

Yeah, I've given myself headaches looking for vintage busboard PCBs, vintage 18ga brown wires, Praco flashguns, vintage Lamborghini model wheels, vintage Hind-D model kits, vintage dental expansion screws, etc. etc. Honestly, sometimes this hobby/passion makes me feel like it has to be influenced by the Dark Side, just a little bit.

Just ask my wife:

"You spent HOW MUCH on an old calculator?!? But you already have the same one!"

"No, Honey; the bubbles are different..." Haha, that really happened. And reading it here, I can't help but feel like reason and sensibility would be on her side!
 
Re: mortifactor's first prop build - Graflex ESB

Congratulations! It looks like the Graflex you got is in awesome shape!

To answer your questions:

The lever can be tightened by turning the threaded pin that goes through the clamp. You need to take it off of the top and bottom tube to do this. Once the clamp is off of the two tubes, squeeze the clamp together with one hand. This frees up the squared end of the threaded pin (the end that the clamp lever is attached to). Once you have the squared end of the pin out of the square hole in the clamp, rotate it (it being the pin and lever) clockwise to tighten the clamp's overall grip. Go one rotation at a time. Be sure to seat the squared end of the pin back into the square hole. Then put one of the tubes back into the clamp. Is it still loose? If so, take the tube back out and repeat the procedure one more turn. I have not had a pin break on me before following this procedure. If it feels like you are about to break the lever or the pin, go back in the opposite direction. Just don't ever force anything when you are handling something this old.

To be screen accurate, with the Flashgun standing upright on its stamped end, the word GRAFLEX on the clamp should also be right side up. With the part of the clamp that attaches to a camera facing toward you, the lever should be on the right side of the clamp, with the free part of the lever pointing down. Basically, the way you have it in your photos is the correct positioning.

If you have the clamp on, and locked (meaning the lever is not pointing straight out) the Graflex should not be able to come apart.

The tiny missing screw that you mention is unnecessary.

I cannot say that this model of Graflex is better suited to any particular screen used saber other than the Luke ESB, as the only screen used verifiable image available of the bottom stamping is in the Wampa Cave Scene on Hoth when Luke uses the force to pick the lightsaber up, free himself, and chop the **** out of that poor hungry Wampa. There is believed to have been several different prop ESB saber's used, pretty much all with different configurations of button, or glass eye, etc. Unless you are specifically going for the Wampa Cave scene Luke ESB saber, this one is basically as good as any other Graflex.

*The Wampa Cave Scene Luke ESB is a Folmer without Patent Number, or as I refer to it, a Folmer New York, as it is the only version made with the state name New York actually spelled out rather than being represented by "N.Y.". In a freeze frame HD screen shot, the word "NEW" can be read on the stamped bottom.

thats some great information right there!

- - - Updated - - -

moritfactor i love your "real world weathering"
 
Re: mortifactor's first prop build - Graflex ESB

We seriously need a book with all of this cool info about every lightsaber compiled together.

i can't agree more, i edit copy paste it in word pad, and then when i need something "control + f" to try and find it
 
Re: mortifactor's first prop build - Graflex ESB

I like the t-track weathering... when I finally do my ESB, I'll have to run my Gino grips through that. My ESB is supposed to look beat to hell (my graflex sure is) so that will be great.
 
Re: mortifactor's first prop build - Graflex ESB

Yea I'm a big fan of that rock dust style of weathering :)

youre on the right track! I do half-turns at a time with these levers but Andy is right. Remove it from the flash entirely and test for it each revolution. There will be a point you feel a great deal of resistance before the lever is halfway closed. Stop, back up and the position before is the correct one.

i also recommend a V Block to drill those holes!
 
Re: mortifactor's first prop build - Graflex ESB

Great looking Graflex...
And welcome to the board.
I'll subscribe and hope to get some ideas what to do with the Graflex I reserved for ESB/TFA saber. Hoping that they are similar and I only have to switch between glass eye and red button.
 
mortifactor's first prop build - Graflex ESB

We seriously need a book with all of this cool info about every lightsaber compiled together.

Now THAT would be awesome! The only problem is that the investigation is still ongoing, the knowledge is still growing, opinions keep changing and it never seems to be finished! Or so it seems.
 
Re: mortifactor's first prop build - Graflex ESB

mortifactor Great job on weathering the parts! That's going to be an amazingly beautiful LUKE ESB. But that Graflex seems in MINT condition; looking too good perhaps. What a shame to weather such a beauty!
 
Last edited by a moderator:
Re: mortifactor's first prop build - Graflex ESB

Thanks guys - the graflex isn't actually as "used" as I'd like haha. I've got another on the way that is a bit more tarnished and beaten that I might use for ESB. I wouldn't weather this one at all, I like its natural subtle weathering (it has a few dings and scratches).

I need to hunt down a second red button at this stage. I can temporarily pinch one from the spare 3 cell I'll have, but I'll have to track down a trashed 2 cell eventually :lol. Or keep the ESB as a provisional TFA sabre for the time being :p.

As for right now, I'm getting pics for clamp placement and will be getting a pop rivet gun tomorrow. Hoping to get a completed sabre within the week.
 
Re: mortifactor's first prop build - Graflex ESB

Looks good to me! I'm just tired of the current books out there with bad info or horrible photos, when all the correct info is here and could be compiled into an accurate guide for people, instead of trying to sort through hundreds of threads from the last 15 years. An accurate visual dictionary or parts, details etc would just be amazing to have.
 
Re: mortifactor's first prop build - Graflex ESB

Haha, I always thought a wiki would be good for a site like this.

Got the second 3-cell now, it has a perfect level of wear and tear on it. I think it's a frankenstein though.. flared pins but with a folmer stamp on the base. The reflectivity of the bottom part is slightly different as well, I think it is made from the parts of multiple 3 cells. The bottom doesn't look like a replica though, it is all dirty inside and looks to have carried a few batteries in its time. Will try and take some pics later.
 
Re: mortifactor's first prop build - Graflex ESB

My dad just picked up a couple Graflex frankensteins off the bay too. I told him to sniff the metal when he gets them. :lol
 
Re: mortifactor's first prop build - Graflex ESB

Before I get started with the conversion, here are the pics of the "frankenstein" Graflex in comparison to the other. The one I think is a mix of parts has the flared pins but the base says Folmer Graflex and patent number. It also has the little dimples inside the upper circular clamp like the later Graflex Inc ones.

I'm hoping the Folmer Graflex base on this one isn't a modern replica added to a Graflex Inc 2 cell, it has some fair wear and tear on it.


Left = Folmer Graflex patent number, Right = suspect mixed parts.


The lip on the one on the right is a bit fatter than the other.

Funnily enough, somebody has pilfered the internal screws holding the plastic innards together.


I can't unscrew the ones on the complete 3 cell for some reason,

Question - does anybody know what size of screws I could use as a replacement?

Atm it is leading to a gap where the connector pins are, visible on the upper flash gun in this picture


Hopefully the next time I post I'll have a lightsaber build progress, and won't be showing off a third Graflex :lol
 
Re: mortifactor's first prop build - Graflex ESB

Hopefully the next time I post I'll have a lightsaber build progress, and won't be showing off a third Graflex :lol

There's absolutely nothing wrong with having a 3rd Graflex!

Its hard to say for sure about the bottom tube of the 2nd. Maybe a shot of the slots/notches would help, but even then it may be difficult. scottjua would be good to ask.
Frankensteined Graflexes are pretty common and not really anything to get too ruffled about provided all the parts are there and they are all real. I'll check to see if I have an extra screw for you. I had a Graflex where the Bakelite portion had a broken lip so I swapped it out with the Bakelite from a 2 Cell. I think I have the screw somewhere.

And, the beaten up finish on the 2nd Graflex top you got is pretty typical for many of them at this point. Doesn't look like any rust that I can see so that is great news.
 
Last edited by a moderator:
Re: mortifactor's first prop build - Graflex ESB

Hey, thanks mugatu, it'd be a pain to find imperial screws of the same type here nowadays.

I've been looking closing at references for lettering etc of known replicas and other 3 cell tube stamps, I think the bottom is a genuine and is just with the wrong top half. Don't mind that at all. Its scratches and internal weathering are consistent with the top too. This beaten one would probably make a better ESB than the other!
 
This thread is more than 7 years old.

Your message may be considered spam for the following reasons:

  1. This thread hasn't been active in some time. A new post in this thread might not contribute constructively to this discussion after so long.
If you wish to reply despite these issues, check the box below before replying.
Be aware that malicious compliance may result in more severe penalties.
Back
Top