Millennium Falcon Bunk Bed Build - TFA Details 5/8 Scale

Holy Wookiee

Active Member
First and foremost, I am a procrastinator. So, RPF, I need your help to keep me focused, driven, motivated, and help me FINISH what I start. Thank you in advance!

We decided after watching TFA to overhaul my boys’ bunk bed. Inspired by SofaKing01’s 1:1 Millennium Falcon build, I starting imagining my kids (ages 10, 9, 7, & 1) sitting in the cockpit of that iconic ship. I am fairly handy and have a completed a few projects but nothing on this scale. After two months of research, planning, drawing, ‘ciphering, and a good amount of (you guessed it) procrastinating, it’s time to get started.
221415_LLS.jpg
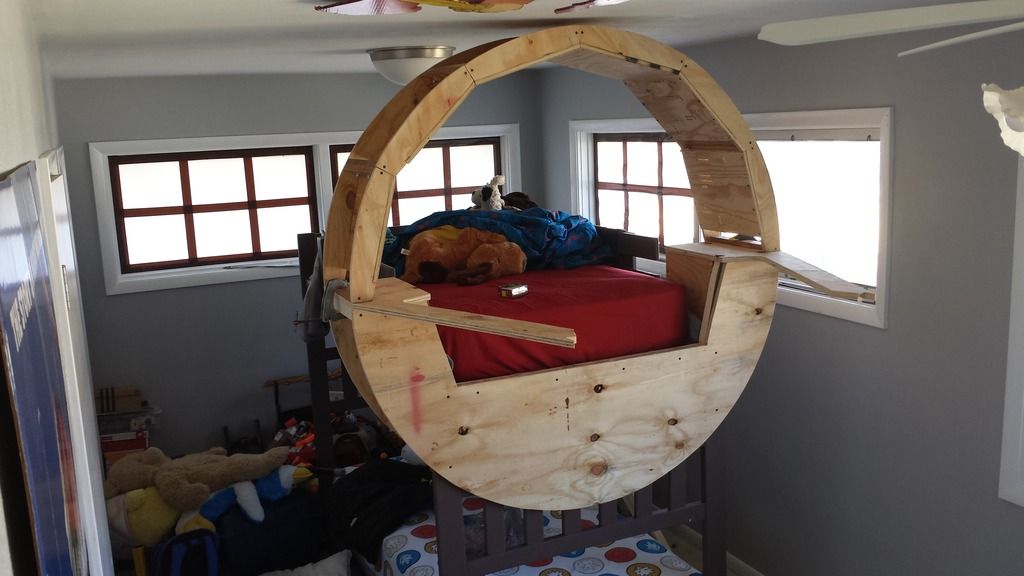
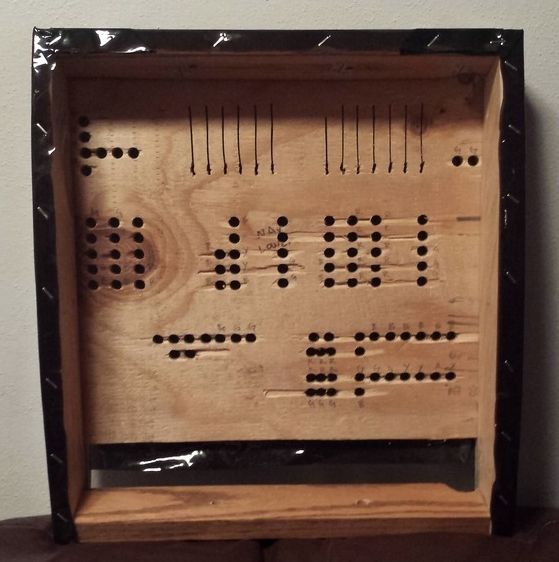
Serious fans beware… it’s not exactly screen accurate. I had to make some sacrifices in order to provide enough room for two children (or one middle aged man) to fit inside AND for it to fit in the bedroom. I hit on a diameter of 5 feet which puts it at roughly 5/8 scale. The Gallifreyan writing at the top was used to determine various radii... not really.
145522.jpg
As of now, the bunk bed is a very plain wooden structure with few redeeming qualities. It’s also somewhat flimsy so step one was to reinforce it to accept the massive structure that I envision. Step two should’ve been to buy a new circular saw instead of using my grandfather’s which is apparently made of lead and throws more sparks than sawdust.
175643.jpg
With the cross beam, it is much more rigid. With 4 kids and two huskies, it’s something that I probably should’ve done anyway! Note to self: reinforce bathroom door next.
164341.jpg
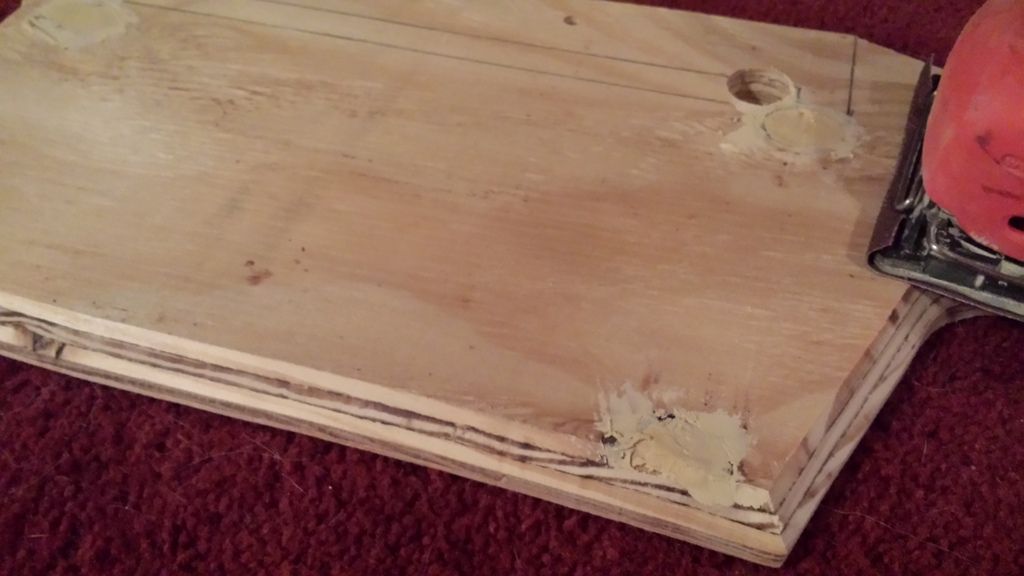
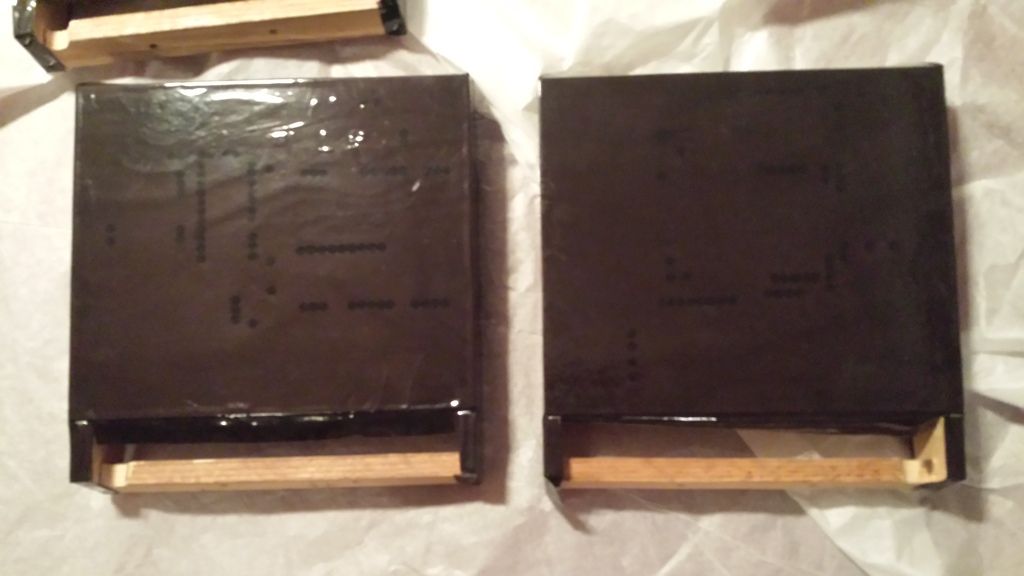
Hard to see but I started with the largest single piece in my build, a five foot semi-circle. CAUTION: this is not the thread to find advanced woodworking tips. I used a jigsaw to freehand cut this board while it’s sitting on a dog kennel (no dogs were harmed in this process).
165505.jpg
I cut the railing off the bed and mounted the bottom circle. Ahhh… it’s a perfect fit… wait, what???
165522.jpg
You know the old adage, “Measure twice, get paranoid and measure again, still cut it exactly 1 inch oversize.”? That’s all me. At this point, I am so frustrated with myself but my boy is gracious and encouraging… where’d he learn that?
172140.jpg
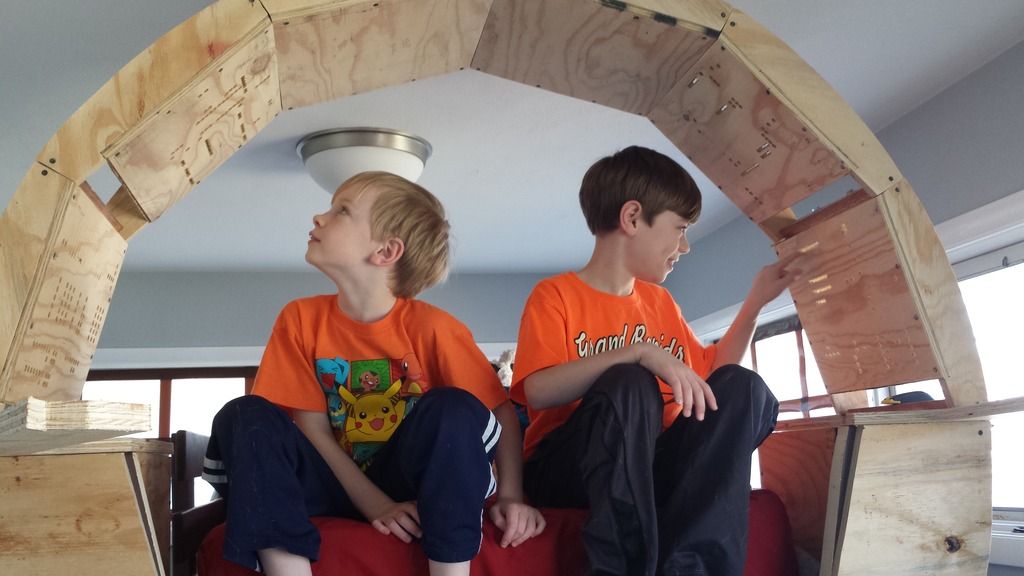
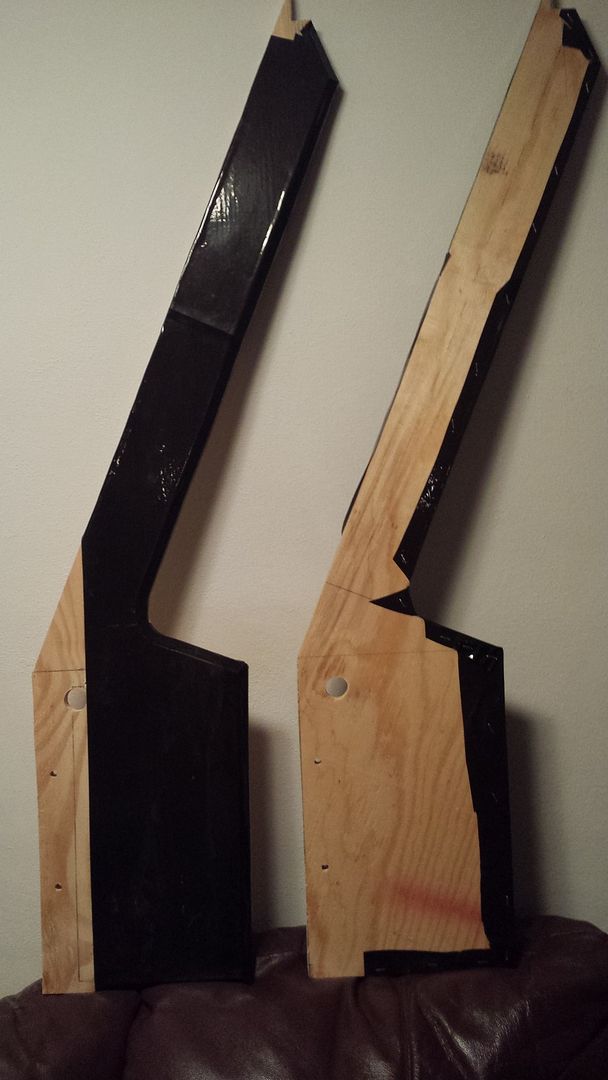
I left the rest of cutting to my stormtrooper, We worked on cutting out what I call the prongs. They run the length of the ship to define the middle of the cockpit, provide stability, and impale you if caught unawares.
190131.jpg
There’s going to to be 14” panels surrounding the edge of the bed and the actual cockpit will extend outward about 3 feet. One of the prongs is leaning against the wall... not pictured, the blood soaked tip.
185602.jpg
I added some bracing and set the prongs on top to see how it looked. Don’t be fooled by the level in the picture… nothing is level.

That’s all for now. Hope to have more done this weekend. Stay tuned and hold my feet to the fire!
 
Hi HW,

I'm really looking forward to seeing how this turns out! You are an awesome dad! Dont get frustrated! The best part of these builds is the journey. Have fun with it!

Please let me know if there anything we can do to help out. :)
 
This weekend wasn't as fruitful as I'd hoped. I need to get a move on since I've got two kids sleeping on the floor… which is apparently the best thing ever when you're young.
20160225_050822_resized_zpsnrocg992.jpg
The cockpit walls are going to be roughly 14" panels. I've incorporated the interior angle and exterior radius (good tip from SK). I need to make six panels total to enclose the top of the cockpit. That's a lot of jigsawing. If you'd like to send me a compound miter saw, I'll pm you my address. ;)
20160224_173005_resized_zps9vabauep.jpg
Too late. I wish I could blame this on one of my kids. The most difficult part of this build so far has been to let go of my perfectionism. My deepest fear (and greatest desire) is that Mark Hamill himself walks in when I'm finished and exclaims, "What a piece of junk!"
a8a38d98-1d71-423d-9ced-3f6765a43757_zps58aohgw4.jpg
I need six panels which means 12 identical side pieces. Even using a template, the parts came out about as identical as Arnold Schwarzenegger and Danny DeVito (if you understand this reference - bless you). I keep telling myself that I'll sand them and they'll even out and be awesome. this is a lie.
20160228_233304_resized_zps7xl0f9n1.jpg
I managed to cut out all the panels and side pieces. This took WAY longer than I expected and any woodworker looking at this will die a little inside. Pro tip: when working in the garage, hang your work light from a rake wedged into a nearby shelf.
159892e0-ba07-45a7-ba7c-7de5e5a68ef0_zps9hye4h6r.jpg
I set pieces together just to see how they look. The two inch gap at the bottom will house the light bar. The eighth inch gap between the cross piece will house shame and wood filler.. but mainly shame. All kidding aside, I'm happy with where I am so far on this project. Special thanks to SK and everyone interested. I'll keep building!
 
Great update! Filler and MDF hide a LOT of shame. ;)

What the plan for the interior details?
 
Thanks SK! I'm going to put lights in the side panels but nothing functional. I've looked at toggles and switches but the amount necessary is too costly. I have plans to make the console a little more interactive with control yokes, throttles, and a nav screen.
 
I have a plan for each panel that's based on the interior of the Falcon. Again, not screen accurate but a fair representation. In the movies, the panels right next to Han and Chewy are fairly drab with just hoses and greeblies. I've replaced those with the ones further back that light up (navicomputer? hyperdrive control? Mr. Radar?) and made some adjustments to fit the smaller frame.
20160304_002856_resized_zps563xcmgw.jpg
I transferred the sketch to each individual panel... a process taking no less than 3 hours. I've noticed a reoccurring theme during this project... everything takes WAY longer than I plan.
7a9993eb-f379-450d-be0b-b11253e5a6d6_zpsoojvadup.jpg
So now I know where to drill the holes... hundreds of them. Did I mention this took WAY longer than I thought it would?
20160304_040734_resized_zpsvtc2u2ur.jpg
FINALLY got four (of six) panels drilled out and things look promising. The top two panels will not have any lights but rather the greeblies that form an 'x'. I can't find my reference photo but you get the idea. In the movie, there are some levers up top but I'm going to be low on head room so I don't want anything dangling from above (except maybe a pair of dice).

On an unrelated note... I am lazy. The idea of sanding, filling, sanding, painting, filling, etc. does not appeal to me. But hiding the wood grain and preventing splinters is a must. I'm toying with the idea of covering the inside with a sheet of vinyl. I grabbed a swatch of tinted black (couldn't find solid colors) from a local fabric store and tried it out on scrap wood.
20160304_002956_resized_zpsgohrtt5g.jpg
Scrap wood with a couple drilled holes and a coat of paint.
20160304_010227_resized_zpsxymlfplw.jpg
Vinyl attached with spray adhesive.
20160304_052050_resized_zps6m5x4an2.jpg
I poked a couple holes in the vinyl afterward and shoved in some lights. I like how this looks and I'm sure with practice, I could make it smoother. I don't know if I like how shiny it is though... reminds me of something from Star TREK ((shudder)). I'll toy with the idea more and perhaps find a way to paint it. The main goal of the coating is to hide the shoddy saw cuts and wood grain... oh and something about kid safety.

Feel free to chime in on the build and your opinion of the vinyl. As always, I'll keep building!
 
This weekend saw a lot of progress. I assembled the six panel sections and marked the rear with a color code for lights. I've included green lights inthe mix despite the fact that there doesn't seem to be any green lights in the movie prop. Green lights are a good thing, right?
20160304_073915_resized_1_zpsn0tutmxb.jpg
Pilot side middle panel section.
20160305_102812_resized_zpsyj48xt8e.jpg
All panel sections arranged on the ground. There are some gaps here and there but I'm not terribly disappointed. It's hard to be angry at a dodecagon.
20160306_073236_resized_zpsmyrdi9go.jpg
I shimmed and bolted all the sections together to test the fit. I will disassemble to do the finish work. Speaking of finishing...

20160306_224747_resized_zpsb44wxzhz.jpg
I spray painted the vinyl test piece and am pleasantly surprised by the results. It looks like I'll be covering the inside with this stuff. The holes I poked for the lights ended up tearing so I'll use a soldering iron or hole punch to remove material rather than displace it. That should smooth out the finish as well. The paint adhered well and I was only able
to scrape off a small amount (towards the top of the bar) but I was really trying!

That's it for now. As always, I'll keep building!
 
Just a quick update. Today, I took the panel canopy and clamped it temporarily to the existing framework on the bed.

20160308_133509_zpsqhffbzk4.jpg


It’s a perfect(ish) fit. I drilled holes vertically through the ends to install bolts during the final assembly connecting top panels, middle prongs, and bottom frame. There’s about 3/4” clearance between the top and ceiling. That will end up even tighter after skinning the outside… glad I got that measurement right! I outlined the joints on the prongs as well to help me determine where to put some holes for lights/wiring. Overall, I was very satisfied with the result and I wasn’t the only one.

20160308_132826_zpshtbftxwy.jpg


That’s it for now. Hope you enjoy and as always, I’ll keep building!
 
WOW! Love it! Are you still going with the vinyl to cover the panels? Is it thick enough to hide the wood grain?
 
Well this is awsome, consider me subscribed!

Thank you mmhnc! I appreciate the encouragement.

WOW! Love it! Are you still going with the vinyl to cover the panels? Is it thick enough to hide the wood grain?

Thank you and yes, that's the plan. The vinyl is only about .032" thick but I plan on painting it to hide the wood grain. I'm not sure how it will hold up in the long run but I'm (uncharacteristically) optimistic.
 
I managed to distract the kids long enough to get a bit done today. I disassembled everything yesterday and spent time tonight filling holes/cracks/gaps etc. with wood filler. I’m using cheap Elmer’s stuff which is not very spreadable but gets the job done. I also routed the inside edges of the prongs.

20160310_195710_zpsie59csun.jpg


I used Loctite spray adhesive “general performance” to attach the vinyl fabric. After careful reading it specifically says NOT to use with vinyl fabric but I have two cans left over from Minnion costumes. It also says to use in a well ventilated area so the basement rec room probably doesn't qualify. But I don't play by anyone's rules... also I am dizzy. ;)

20160310_195656_zpsu7o7i6ju.jpg


This is one of the top panels with face and sides covered. It’s sticking (for now) but I’ll let it cure overnight and test it before committing the other panels. The edges are not very crisp but that's a small price to pay for added safety.

I’m doing what I can to inch toward the finish line. Thanks for looking and I’ll keep building!
 
Hi HW,

Hopefully the vinyl will work out. If all else fails, have you considered 1/4" MDF for the face of the panels? Easy to sand and paint? :)
Thanks SK. It's coming together quite well. I think I may have missed my calling as a re-upholstery expert! Lol. I'll get a proper update this evening.
 
All six panels and both prongs are now covered in vinyl. I switched to Bostik SuperTak general adhesive and that seemed to work a bit better. I wrapped the edges around and stapled the back. For my next project, I now have the experience and confidence to re-upholster my couch with Bantha fur! ;)

207da259-daf2-4403-b4ca-bf3c044cd633_zps31da6ftl.jpg


Layout is very important and LABEL, LABEL, LABEL everything! Don't think, "I'll remember how I did that." or "I know how this fit together." because you'll forget! Life will get in the way and you'll be distracted by dog vomit or baby poop or some other bodily fluid you have to clean up. Back to the build, you can see from this (blurry) picture that the vinyl is translucent... hence the need to paint it.

20160312_194222_zpssnsm7erw.jpg


I was running low on material so I pieced together the remainder on the prongs. One seam isn't bad, right? The blank area on the sides is where the panel arch connects. Holes are for wiring.

20160312_194539_zpszqc8dtur.jpg


I like the smooth feeling of the covered pieces. Again, the edges aren't very crisp but I'm happy with how it turned out. I'm hoping to paint tomorrow and start on some detail work. I know, I know... the rest of the frame isn't even done. Well, I need to give my jigsaw a break! ;)

Thanks for stopping by and I'll keep building!
 
Fantastic! Such an awesome project, Being a farther myself I think the satisfaction must be immense. Subscribed.
 
Back
Top