I figured I'll just dump my second suit progress here.
For my second suit, I took Ken Landrum's free TASM2 suit file, and I split it up to have accurate seams like in the movie. I printed edited versions of Ken's pattern onto paper and cut those and traced them onto the fabric. For the red parts, I used this pattern:
View attachment 500446
And for the blue, I WAS supposed to send the fabric to a screen printer, but they kept telling me that screen printing on lycra is not possible and that it would cost a lot. So I applied a very very thin layer of puff paint to the brick pattern. Here's how I laid the blue sections out:
View attachment 500447
The fabric I used was real cheap. I got mine from a local market, 2 yard of blue and 2 yards of red cost me roughly $6. The red fabric isn't really the best since it's a bit too thin. But I'm thinking that when I start to puff paint it, it would look and feel better.
As you can see, there is no actual printed brick pattern on the fabric on the blue. What I did was I drew them onto the fabric myself using a ruler and a red textile marker. This was the first crotch piece I did, and I actually had to redo this piece since the puffy paint splattered onto the fabric and I made the mistake of spreading it. You can clearly see it here:
View attachment 500445
For the back spider, I did the same technique I used for my last suit. I created my own back spider, screen printed it onto the fabric and puffy painted it. But this time, I outlined the spider with black puff paint before filling it in with red
View attachment 500448 View attachment 500449
For this suit, I installed a lot of zippers for my convenience. In my last suit, I had a hard time getting into the suit and zipping and unzipping myself up. Whenever my foot would itch inside, I'd have to unzip my suit and stretch the legs out a bit so i can scratch my foot through the ankle zip. And the most annoying thing: bathroom breaks. I had to unzip the U-zip and leave it the top part hanging down as I go pee. So, what I did here is I used accurate zipper placements. One zipper on the back of the neck, zippers on each wrist, zippers on the ankles, one zipper going half up the back, a separating zipper on the waist, another small zipper above the butt (so i can get my legs in the pants section since zippers don't stretch), two crotch zippers, and separating zippers at the boots. All in all, there are 12 zippers in this suit. Here you can see the zips of the shirt section. Keep in mind, these were taken when the shirt wasn't finished yet
Half back zip
View attachment 500456
Back of the shirt
View attachment 500455
Wrist zip
View attachment 500454
Waist zip
View attachment 500453
Front of the shirt
View attachment 500452
Neck zip
View attachment 500457
And now for the lenses, I 3d printed Ken Landrum's free flat lens frames fils. I used an old speaker mesh, painted it white and cut it to shape.
View attachment 500460
I then attached a clear plastic to the lens frames first using E6000, and then the mesh
View attachment 500463 View attachment 500462
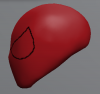
I attached these to my face shell with magnets. Here's what it looks like:
View attachment 500467View attachment 500468
And then I basted everything since I'm taking this thing to a tailor to strengthen up the stitches. Thankfully the seams didn't pop off when I tried it on.
View attachment 500459View attachment 500458
I will be using my web shooters that I used for my previous suit.
View attachment 500464
And now for a good pic of the suit so far.
View attachment 500465
When the suit is sewn, I will start puffy painting it and adding the shoes in. Stay tuned folks.
")