Mass Effect Carnifex prop, in solidworks for 3d printing

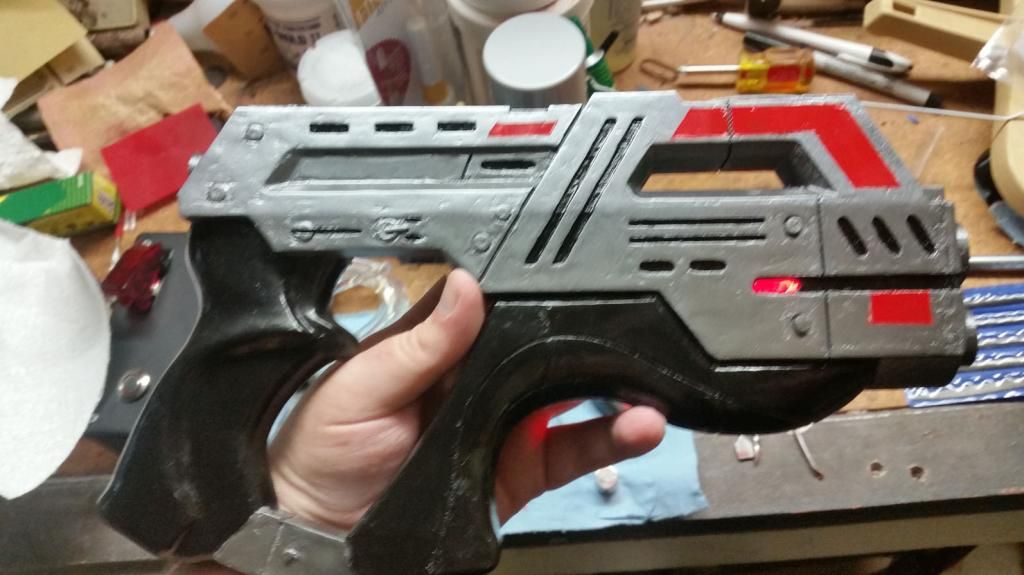
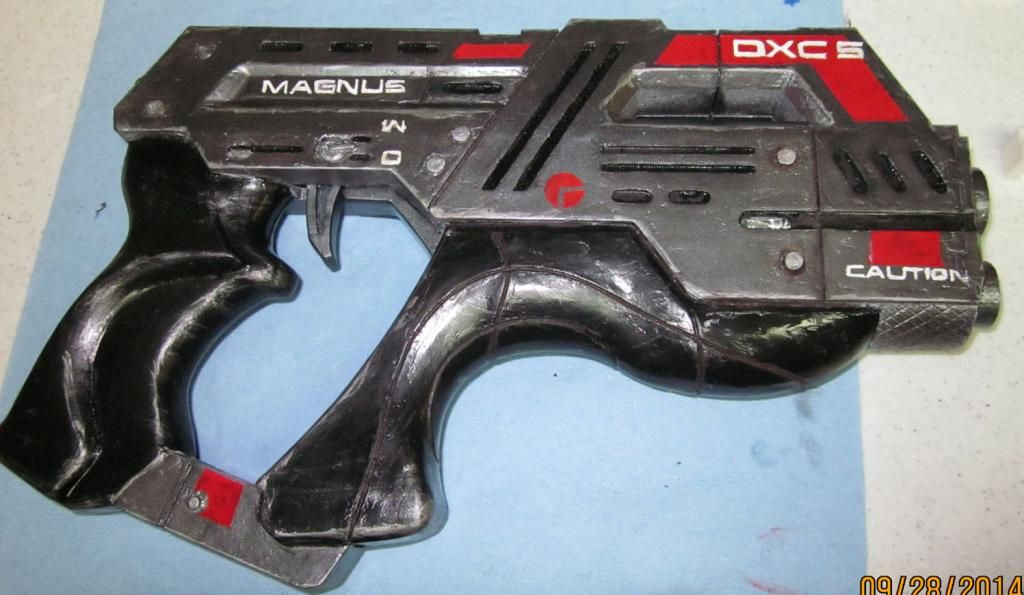
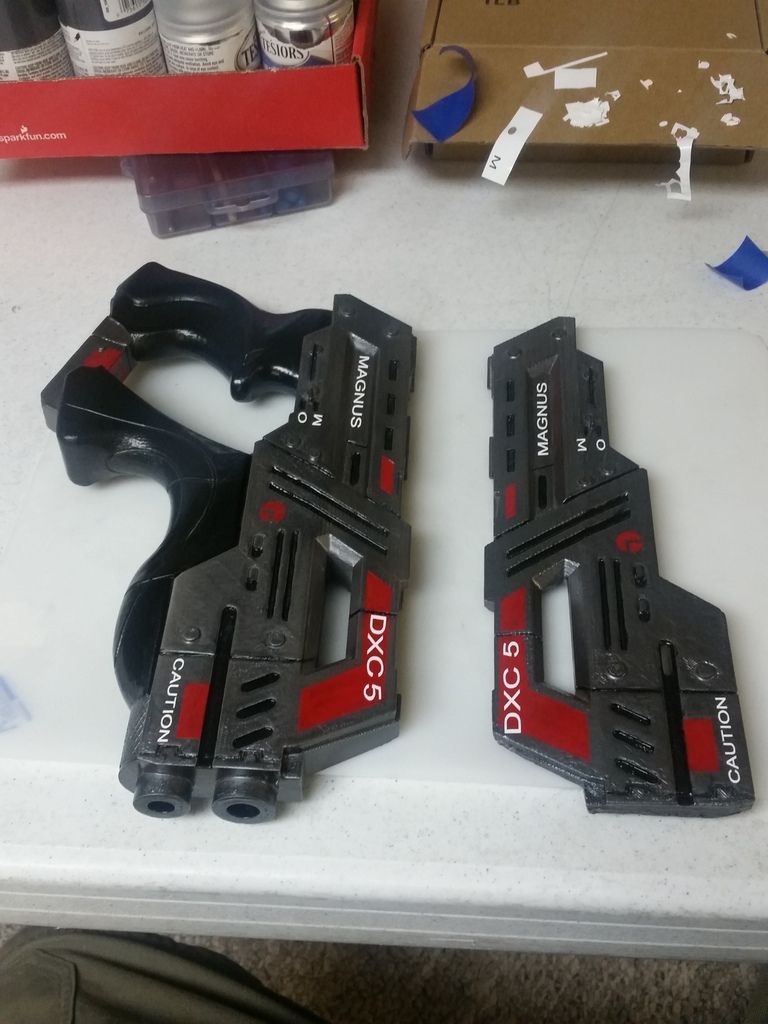
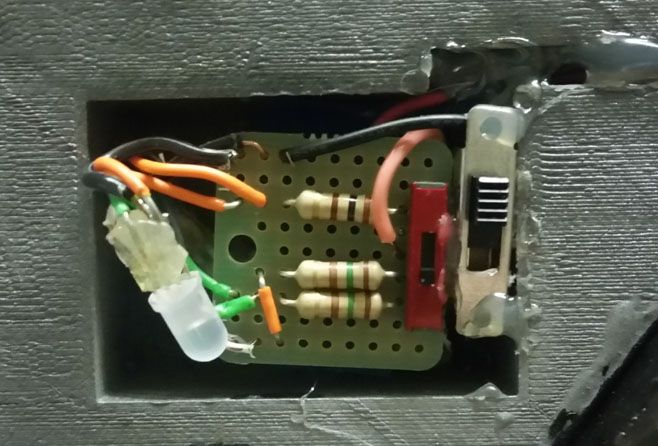
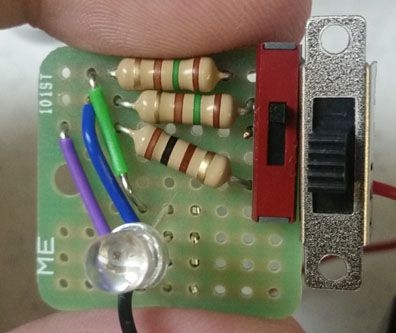
I have the electronics soldered together, and I've tested it out. The switch isn't going to fit where I'd originally planned, which is disappointing. However, it's really easy to pop it open to turn it on/off and close it again, thanks to the magnets.
20140906_192943.jpg

20140906_192935.jpg

20140906_192949.jpg


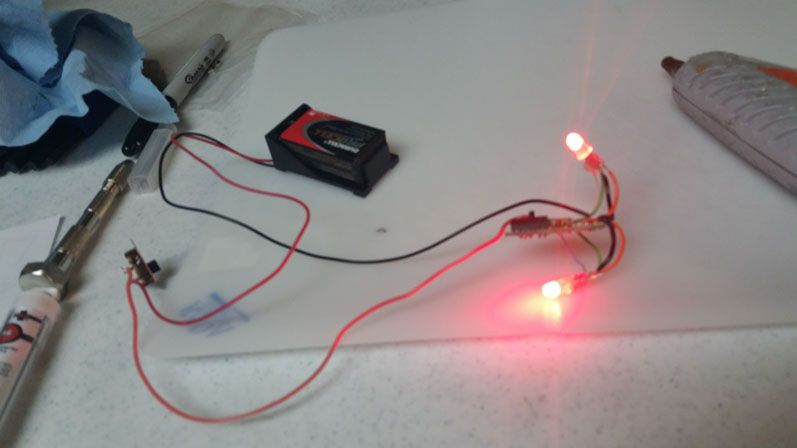
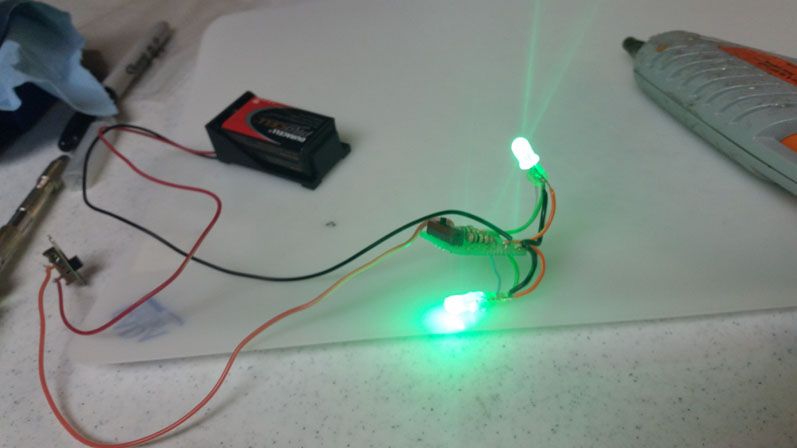
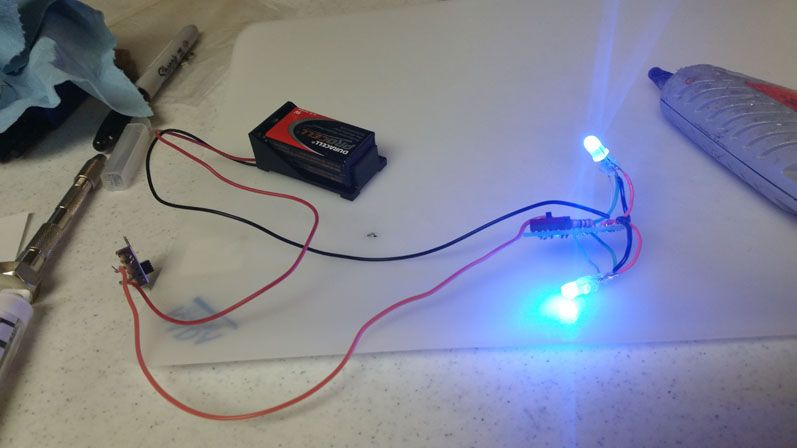
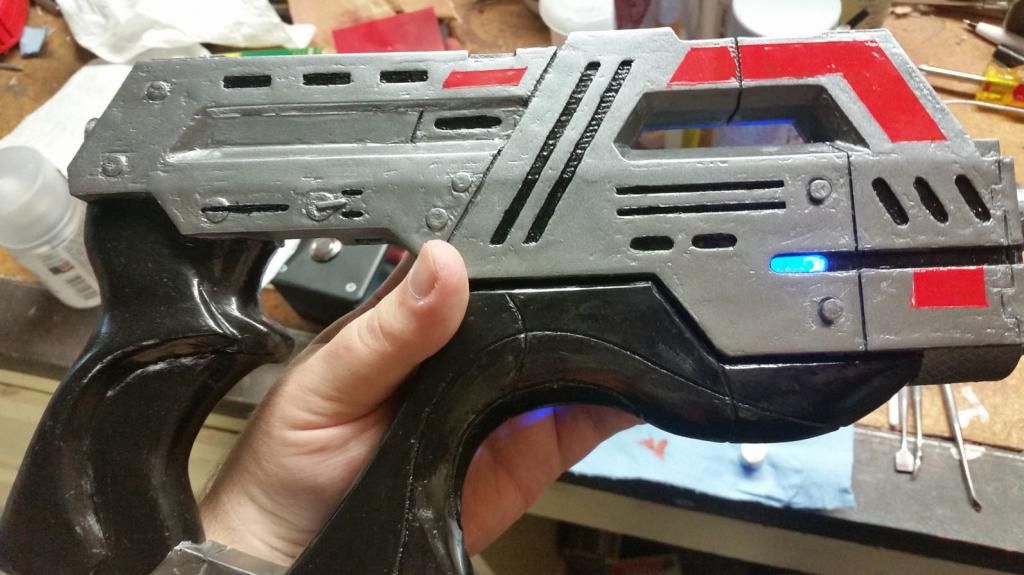
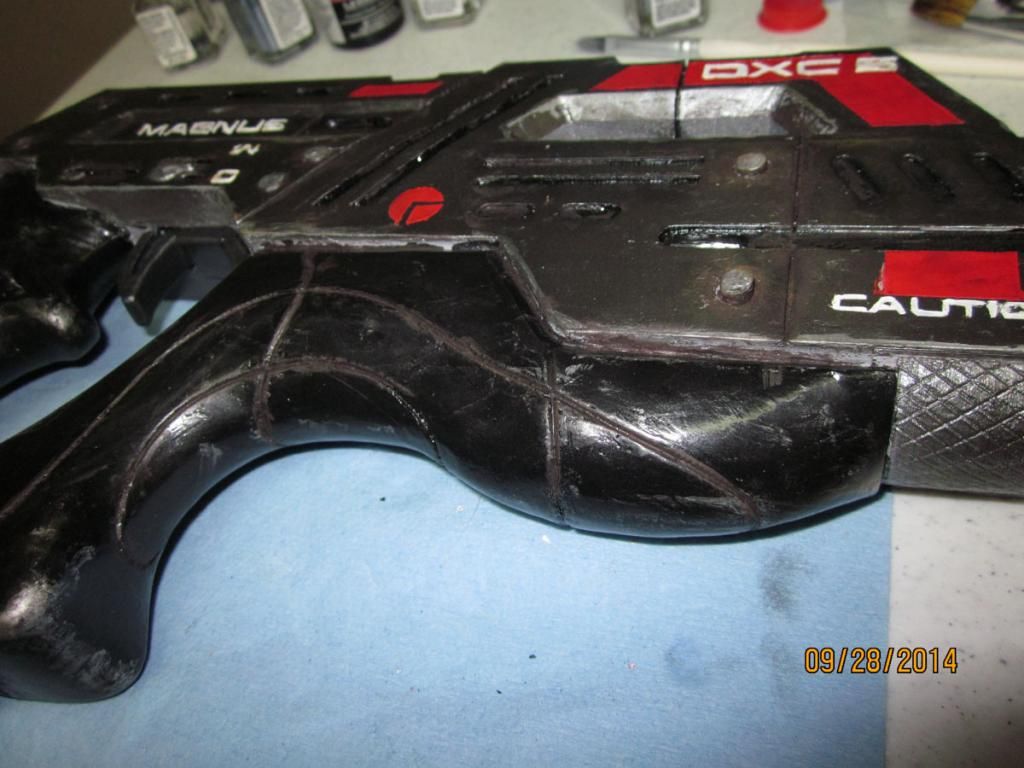
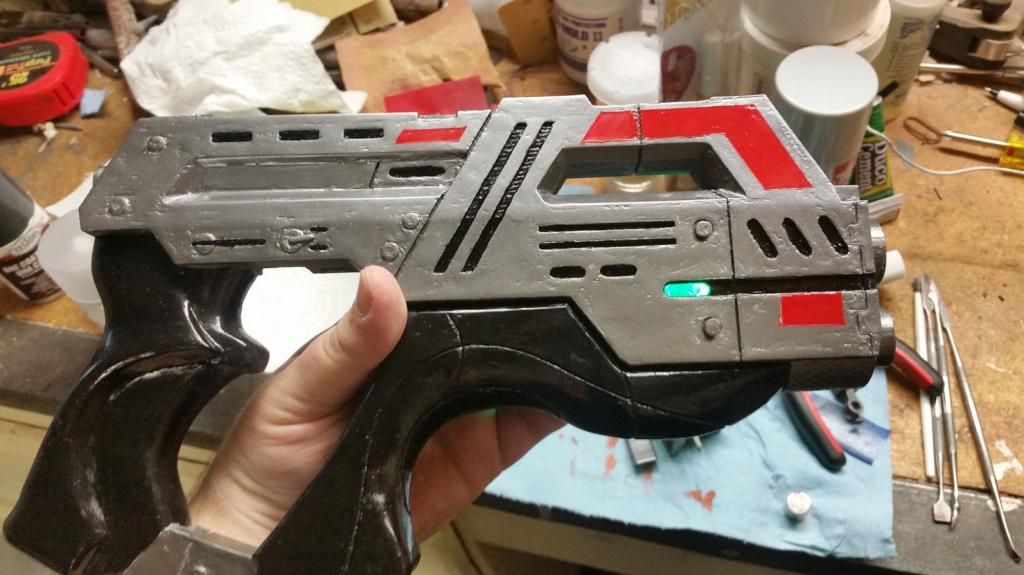
I've got some light tubing that I'll put in the holes of the body, and I'll stick the LEDs so they shine through it. If I want it a little brighter, I might stick some foil to the back of the tubing. They're pretty bright, though, and that shouldn't be an issue.
 
Most of the main red accents are done now, and all that's left is the lettering, and the couple of accents I need a circle template to finish. Here are some test shots with the electronics glued inside.
20140907_142508edit.jpg

20140907_142516edit.jpg

20140907_142523edit.jpg
 
Although I'm not done with it just yet, I am far enough along that I wanted to publish and share the model. Here's a link to the thingiverse page where I've got it uploaded.

I'll post links to other places as I get it posted. I'm putting it in my shapeways store, because I saw someone else had uploaded my old model to that site without ever saying anything to me. This way, at least I can claim it as my work, and have a timestamp to prove it.
This is where you can see them all on Shapeways. It's expensive, but their work is excellent and extremely precise. I've no doubt they'd look amazing right out of the package from shapeways.
 
Last edited:
Finished the lettering, and I'm almost done weathering it. I've still got to do the other side, then give it a couple coats of varnish to protect it, then I'll be finished with this project. For now.
IMG_1216edit.jpg

IMG_1218edit.jpg

IMG_1217edit.jpg
 
IMG_1224rc.jpg

Here's the finished paint job, after a couple coats of varnish to seal it. That's probably all I'm going to do to this, though I may post pictures later when I make some of the barrel mods.
 
Nice work on this. Thanks for the detailed breakdown on what you did. If I try to learn 3D printing, this is definitely one of the things I'd want to do.
 
Someone else printed a copy of it, and they painted it to be the Paladin variant.
20141027_195641_preview_featured.jpg


That same awesome person drew up a display stand to go with it, and I printed one today.
20141102_185626.jpg

I might paint the stand and make it weathered so it'll match the carnifex, but I'm just thrilled to have actually on display instead of just laying on my desk.
 
Resurrecting this thread because I've started work on a second one. I cut the model into smaller pieces in Solidworks, so it would be less prone to warping, or at least have less warping. That would also make it accessible to people who don't have a gigantic build platform (since the old version barely fit kitty-corner on our 10x10 platform). I am also going to experiment with some Smooth-On XTC-3D brush on stuff for 3d prints. It's supposed to fill in the gaps and even out the surface, hopefully cutting down on post-printing finishing work. It's currently drying, so these are the 'Before' pictures.
DSCN3004edit.jpg

DSCN3007edit.jpg

DSCN3011edit.jpg

DSCN3014edit.jpg


I'll post more after the finish has cured, and hopefully we'll be able to see a noticable improvement.
 
I've got a couple coats of XTC-3D on it now, and it looks pretty good.
DSCN3026edit.jpg

It blends the layers in really well on parts that are flat or angular.

20150112_231040edit.jpg

The curved section was where I spent a lot of time cleaning up on my last version, and it looks great this time.

20150112_231049edit.jpg

The grip and other sections turned out really well, too. There were a few spots I didn't get coated evenly, but for a first time using this stuff, I think it worked rather well.

20150112_231114edit.jpg

This bottom part was one that also took a lot of work before to blend in the print layers, and with this stuff it worked very well.

Now for the downsides of using Smooth-On XTC-3D. It fills in some of the smaller details, more than you'd think. If you've got any knurling or details like that, you won't want to use this. Nor will you want to use it on anything that has similar gaps, or recessed areas. It does a little too good at filling in, and you'll have to carve out your details again.

The other reasons that you'll want to consider using it:
20150112_231219edit.jpg


It's both corrosive, and toxic. Not nearly as fume-heavy as you'd expect a brush on epoxy to be, but it's certainly not good for you. I'll post more once I get a coat of primer on, and you'll be able to see its effects a little better.
 
IMG_20150706_225948.jpg


I got some vinyl lettering made for this one, so I didn't have to spend hours trying to do it by hand. It has been so much easier, and it looks much nicer than the ones I tried on my last Carnifex.
 
I'd like to think I've made some progress with my electronics building since my first version, too. This is a shot of the first version, kind of cobbled together as I figured it out.
20150614_173120%20edit.jpg


And this is how it looks in my latest Carnifex.
20150614_173129%20edit.jpg


This one should also be easier to repair, if someone else has to work on it. It's all pretty clearly laid out, the wires are almost color coded (purple=red, and I transposed the blue/green wires). I also wrote a quick diagram inside the prop of which switch positions turn it to what color.
 
If I was you I would have exported the various layers to vector files to be laser cut from various thickness sheet styrene and assemble that way. The time it saves in post 3D print clean up is worth it especially when using a home 3D printer.
You will no doubt have noticed the loss of quality in the capsule recesses of the weapon and trying to fill print lines, as you mentioned the 3D printer was giving you trouble.

This isn't a criticism of your work. As a Solidworks user modelling is a bit trickier to do well compared to using 3DSMax etc so I'm very impressed.

Most people see 3D printing as the only way to make these kind of props but the loss of quality between the CAD model and actual surface is disappointing.

Having said that, congratulations on finishing your first 3D CAD designed prop.
 
20150721_213524.jpeg


This one is done. I've even whipped up an orange barrel plug that assembles around a bolt, so it can just be threaded in the insert, and you can be compliant with laws and convention rules (I think, best check both before you think you're covered, but it's a step in the right direction).
 
tumblr_nsw4xdFWkP1r1f5alo1_540.jpg


I gave this (my second) Carnifex to Rana McAnear (the face model for Samara). I figured it would get used and appreciated much more than if I had just sent it to live on the Bioware wall of fanart/props. She's taken it to one con so far, and photos are starting to pop up from it. I'm stoked, and if she suggests any changes or runs into any probelms with it wearing out or breaking, I can still change my design to accomodate it and improve it even more.
 
https://40.media.tumblr.com/6331cd7c0d79c1ae5ed54d557e1f0f4c/tumblr_nsw4xdFWkP1r1f5alo1_540.jpg

I gave this (my second) Carnifex to Rana McAnear (the face model for Samara). I figured it would get used and appreciated much more than if I had just sent it to live on the Bioware wall of fanart/props. She's taken it to one con so far, and photos are starting to pop up from it. I'm stoked, and if she suggests any changes or runs into any probelms with it wearing out or breaking, I can still change my design to accomodate it and improve it even more.

The Carnifex wasn't what drew my attention in that photo!!
 
This thread is more than 8 years old.

Your message may be considered spam for the following reasons:

  1. This thread hasn't been active in some time. A new post in this thread might not contribute constructively to this discussion after so long.
If you wish to reply despite these issues, check the box below before replying.
Be aware that malicious compliance may result in more severe penalties.
Back
Top