I Make Stuff
New Member
This is my first replica build and its not completely done but its time to show some build pics. Finding the exact pieces used is almost impossible because of its nature. I have spent a lot of time studying reference images and scouring the internet for likely alternatives to match what i see. Its time to show the experts here and see what you think.
Heres my reference pics. And thanks for looking


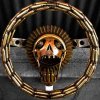
The wheel is a 13 inch Super 500 rat rod wheel i found on Ebay. I covered the black foam with gold paint to make a better surface to bond the shells to and it should be better for applying the weathering. I could not find a gear with the straight teeth so im using a differential ring gear from a suzuki samurai that has the exactly correct dimensions

The gear could not be chemically rusted so I applied a faux rust paint job and used a garage door pulley that fit perfectly inside gear


The shell casings in ref pics appear to be .308 but i am using .223 because they fit on curved surface easier and a friend gave me a large bag of them. I made a jig for removing primers and splitting them in half on my bandsaw. They are attached to wheel with a very durable silicone type sealant that has worked well for me on other projects.


Most of the brass parts were sourced from 2 lamp supply websites, this ring that attaches the face to the gear was cut from a lamp canopy them shaped with a hammer and a curved jig to flare out inner edge.


The head/face was a bit more challenging, it is a 3.5 diameter sphere with a seam running down the middle, as if it was made as 2 pieces and bonded together. For this i started with a 6 inch diameter parabolic lamp shade, split it in half and proceeded to shrink it to the size needed. This was done using what metal workers call a shrinking stump. I made my stump out of old plywood scrap and bought a shiny new ball peen hammer so as not to misshape metal too much. To finish smoothing the outside of the shape my planishing shape was a trailer ball. The softball was the exact diameter needed to use as a shape guide.


The 2 halves of the face were bonded together from the inside with epoxy and a strip of brass backing material. The teeth were cut from another lamp part that is for making the center of a chandelier, it was the perfect size diameter


I could not even come close to figuring out what was used inside the nose opening but i found a suitable piece made of cast brass that had the proper shape to fit. The ear pieces were made from a lamp fitting cut to size and AK rounds that fit inside existing holes perfectly.


Heres my reference pics. And thanks for looking


The wheel is a 13 inch Super 500 rat rod wheel i found on Ebay. I covered the black foam with gold paint to make a better surface to bond the shells to and it should be better for applying the weathering. I could not find a gear with the straight teeth so im using a differential ring gear from a suzuki samurai that has the exactly correct dimensions

The gear could not be chemically rusted so I applied a faux rust paint job and used a garage door pulley that fit perfectly inside gear


The shell casings in ref pics appear to be .308 but i am using .223 because they fit on curved surface easier and a friend gave me a large bag of them. I made a jig for removing primers and splitting them in half on my bandsaw. They are attached to wheel with a very durable silicone type sealant that has worked well for me on other projects.


Most of the brass parts were sourced from 2 lamp supply websites, this ring that attaches the face to the gear was cut from a lamp canopy them shaped with a hammer and a curved jig to flare out inner edge.


The head/face was a bit more challenging, it is a 3.5 diameter sphere with a seam running down the middle, as if it was made as 2 pieces and bonded together. For this i started with a 6 inch diameter parabolic lamp shade, split it in half and proceeded to shrink it to the size needed. This was done using what metal workers call a shrinking stump. I made my stump out of old plywood scrap and bought a shiny new ball peen hammer so as not to misshape metal too much. To finish smoothing the outside of the shape my planishing shape was a trailer ball. The softball was the exact diameter needed to use as a shape guide.


The 2 halves of the face were bonded together from the inside with epoxy and a strip of brass backing material. The teeth were cut from another lamp part that is for making the center of a chandelier, it was the perfect size diameter


I could not even come close to figuring out what was used inside the nose opening but i found a suitable piece made of cast brass that had the proper shape to fit. The ear pieces were made from a lamp fitting cut to size and AK rounds that fit inside existing holes perfectly.


