N2darkness
Sr Member
Here is my latest project after the lengthy Boromir's shield build.
[URL="http://www.wetacollectors.com/forum/showthread.php?t=41411"]http://www.wetacollectors.com/forum/showthread.php?t=41411[/URL]
I wanted to make my own version of the Twilight Witchking crown for a very long time, but I also knew if was going to take some effort as well as learning some new skills. Here is some of the steps that went into making this.
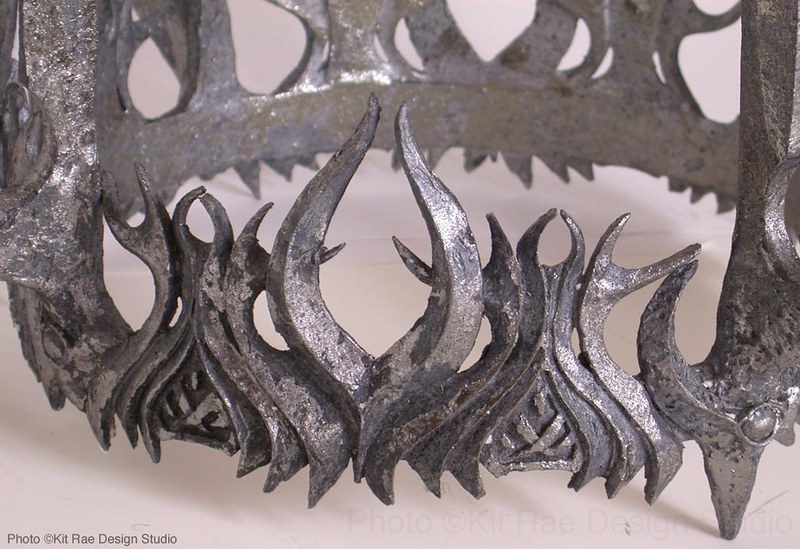
First I got some great photos of the actual crown from Kit Rae on the UC forums here.
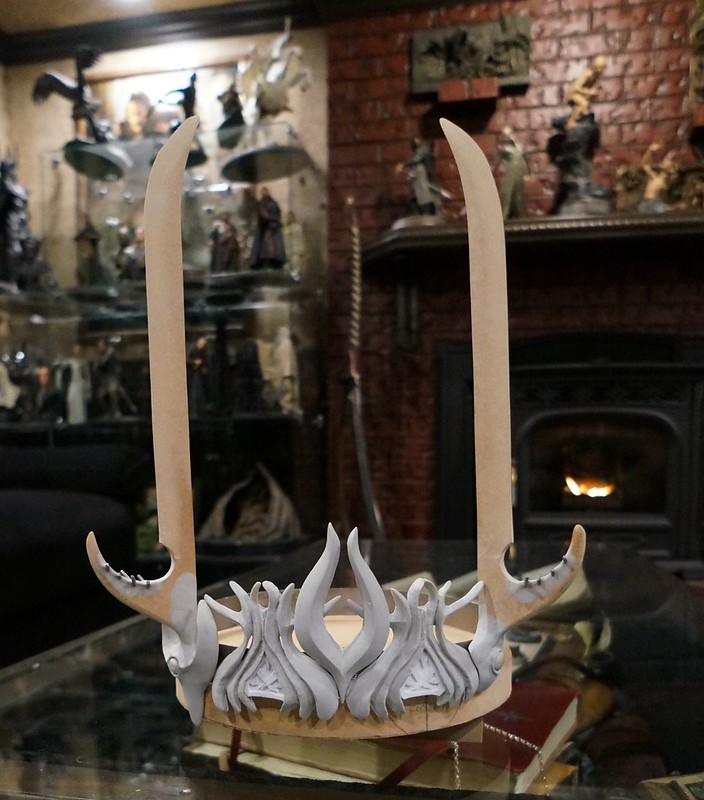
I started with some 1/4 inch MDF for the spikes and used some epoxy sculpt for the rest of the details and a few cut off nails for the smaller spikes.

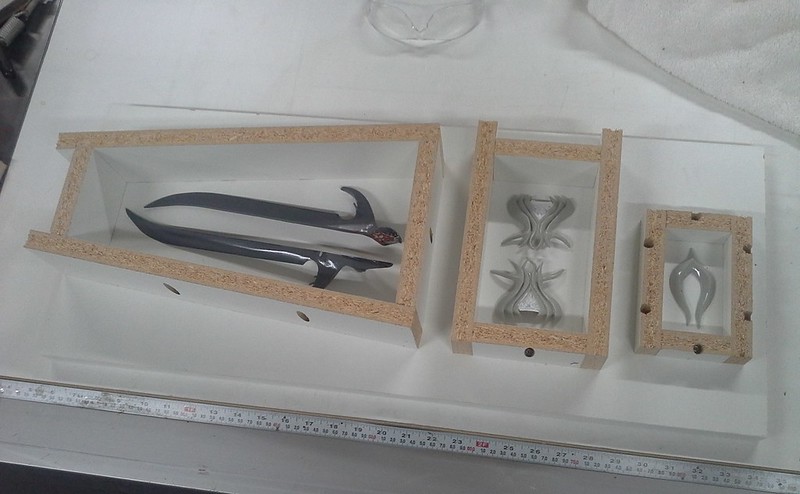
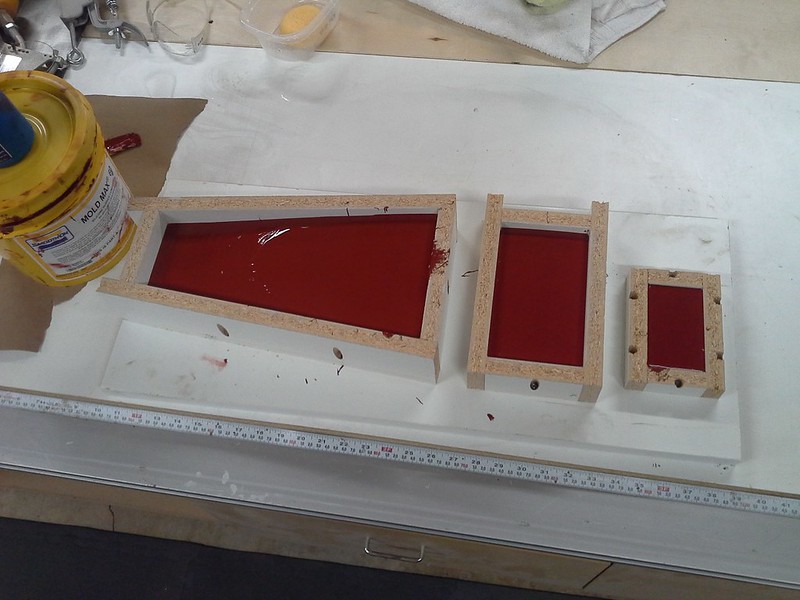
There was a lot of clean up and sanding that needed to be done before molding could begin. Since I had never molded anything before it was all new and did a lot of research on-line. I wanted to make this out of pewter from the beginning so I decided to used Smooth-on Mold Max 60 for the molding material as its high temp for casting pewter. Here is the mold boxes after the priming had been done.
Then the clay up for the 1st half.
1st half poured.
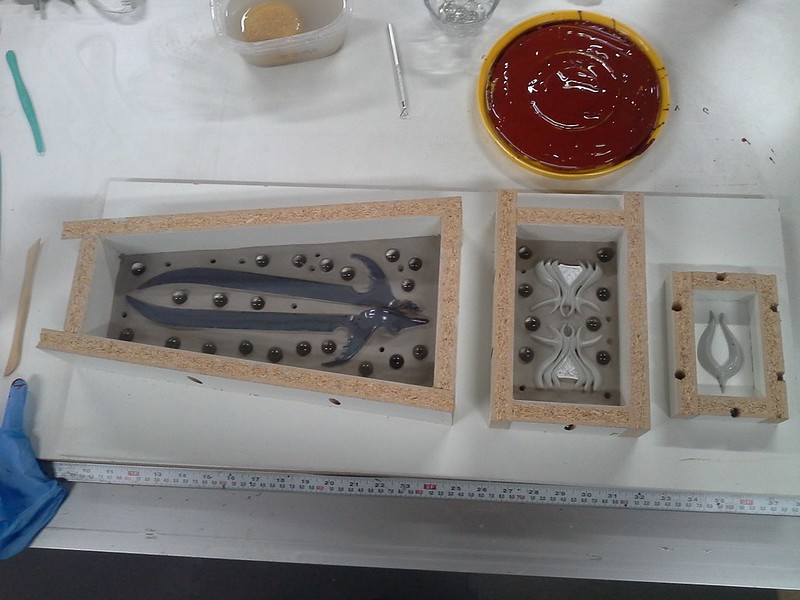
And then the 2nd half was done after the clay was removed and the mold release was sprayed. Here is the finished mold with the originals. Did have 1 casualty though.
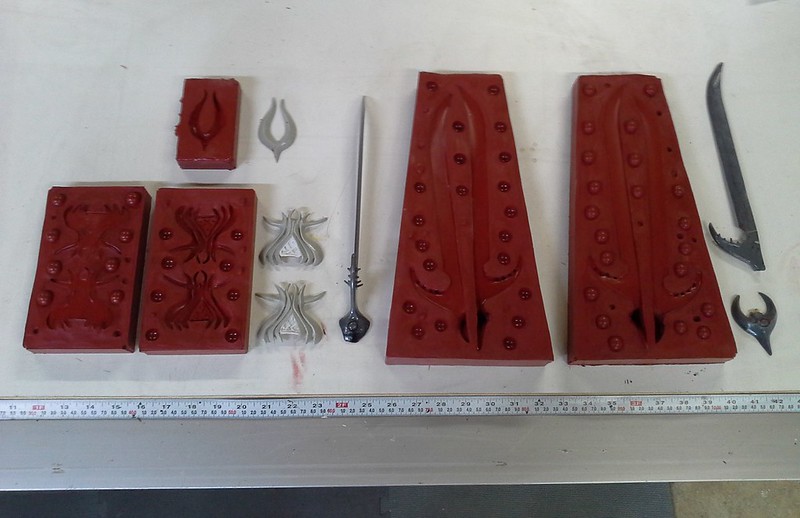
I didn't get any photos of the actual casting process as it was my first time with the melter and was kind of a crazy experience. Here are all the cast parts needed for assembly.
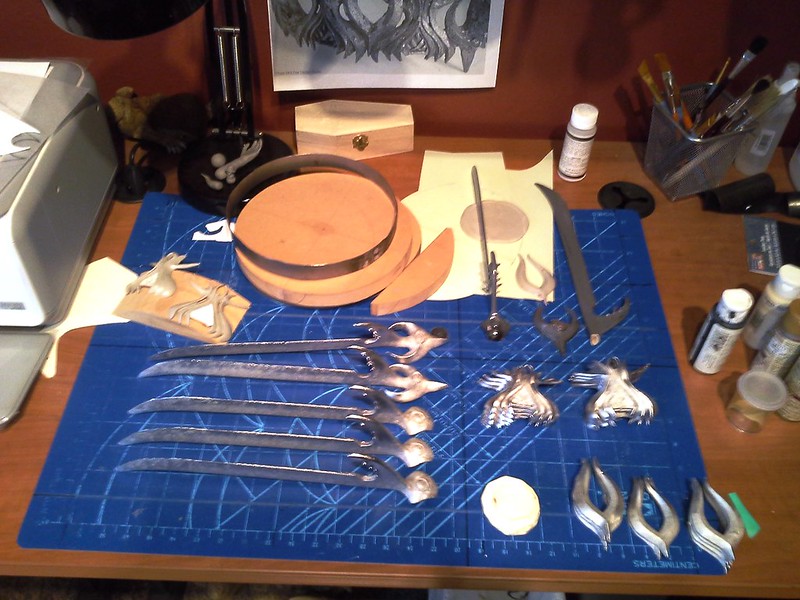
I found a local sheet metal company to make the inner rings that all 16 pieces would attach to. They were done out of 16 gauge steel and welded together. Here is a photo of most of the pieces clamped on the ring to check for spacing.
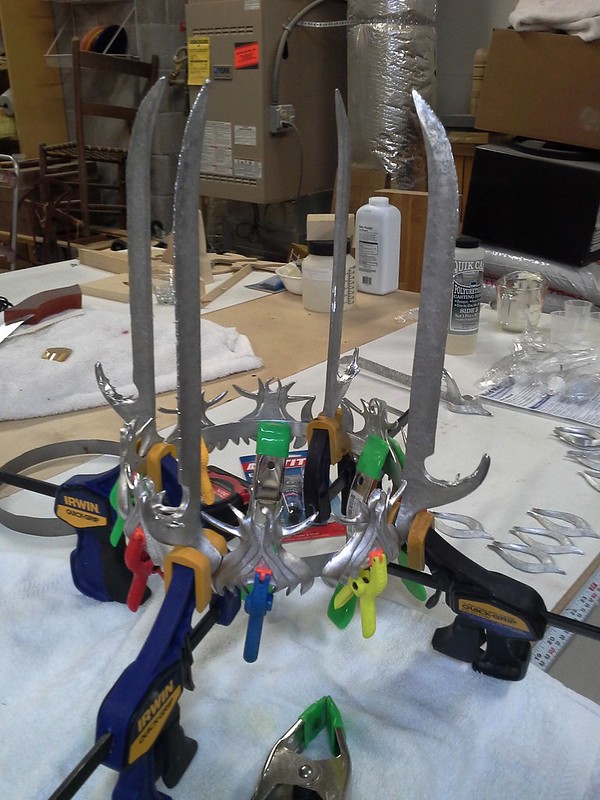
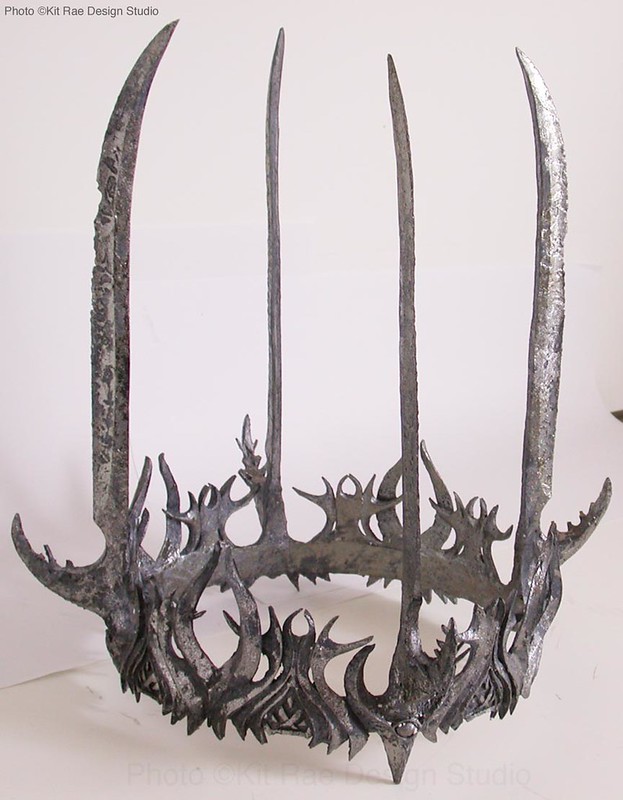
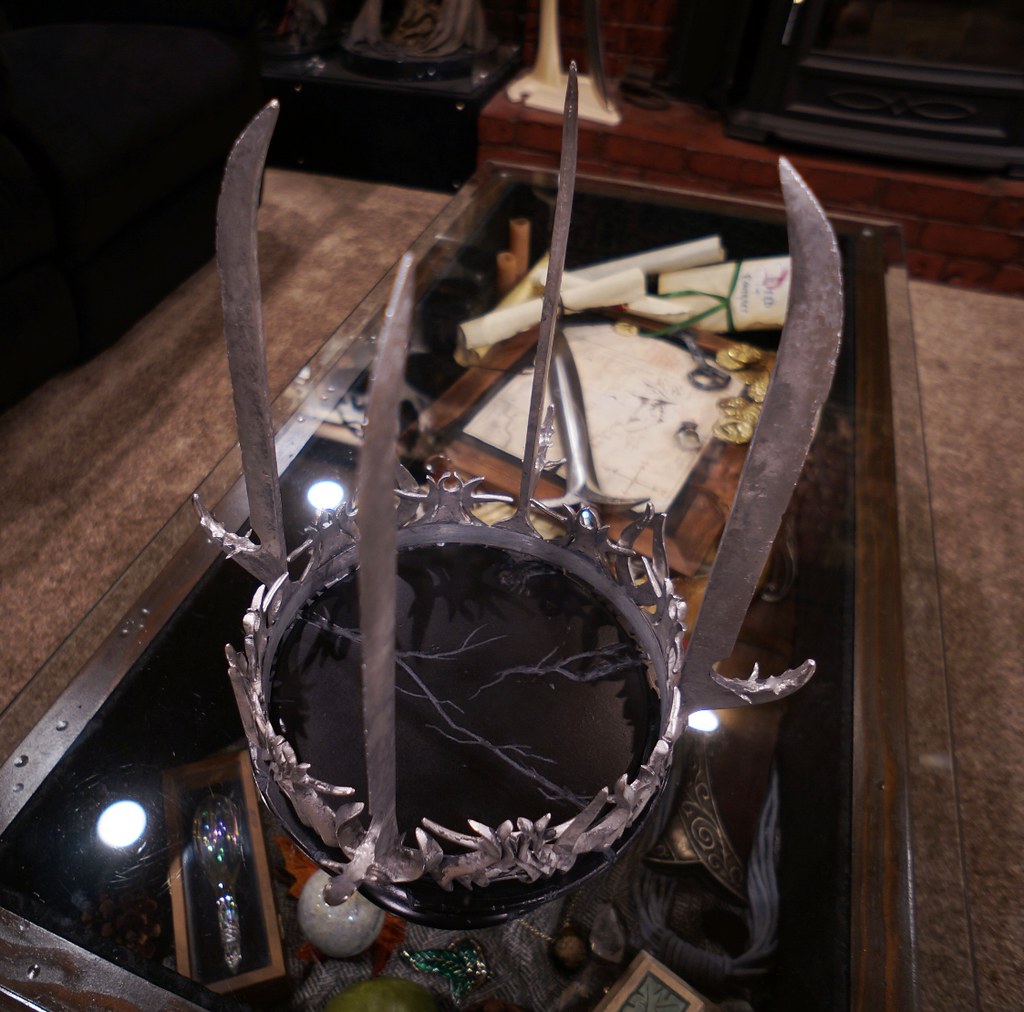
I tried to solder both traditionally and with paste and couldn't get it to work so I sanded the ring and grind-ed the individual pieces and used Loctite's version of JB weild. Worked rather well. Here is a photo of the completed crown fully assembled. Its rather heavy being made of pewter and comes in at just under 4 lbs! Here is the beginnings of the stand, pre-weathering.
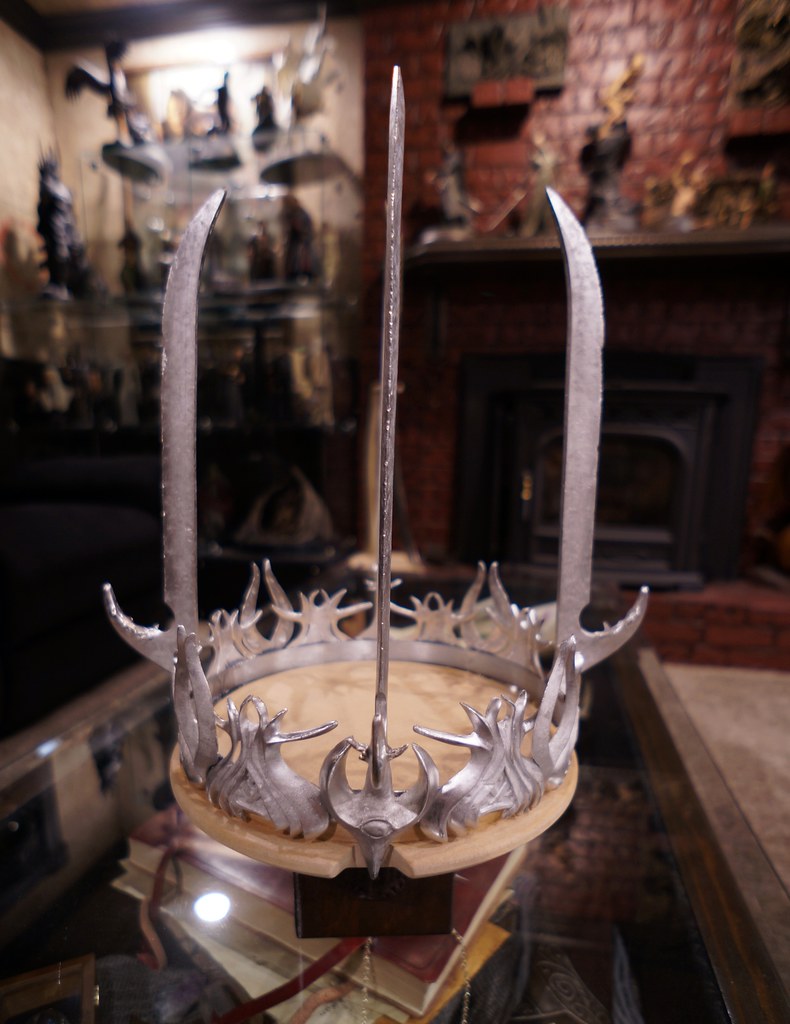
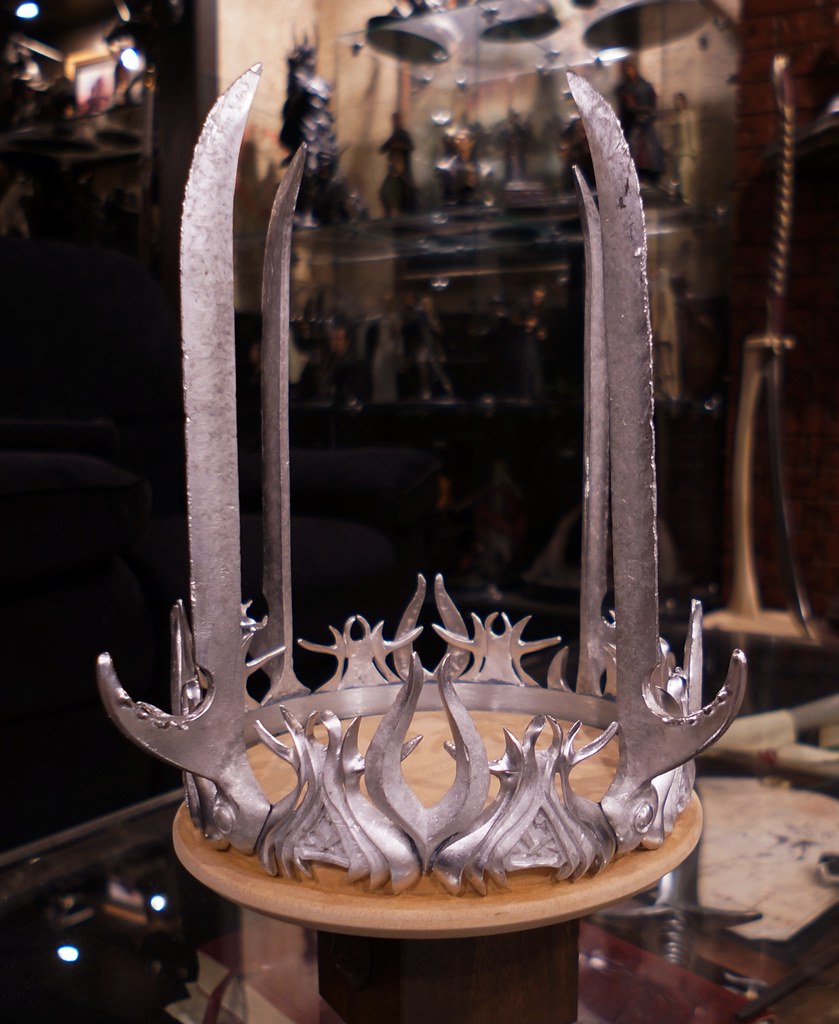
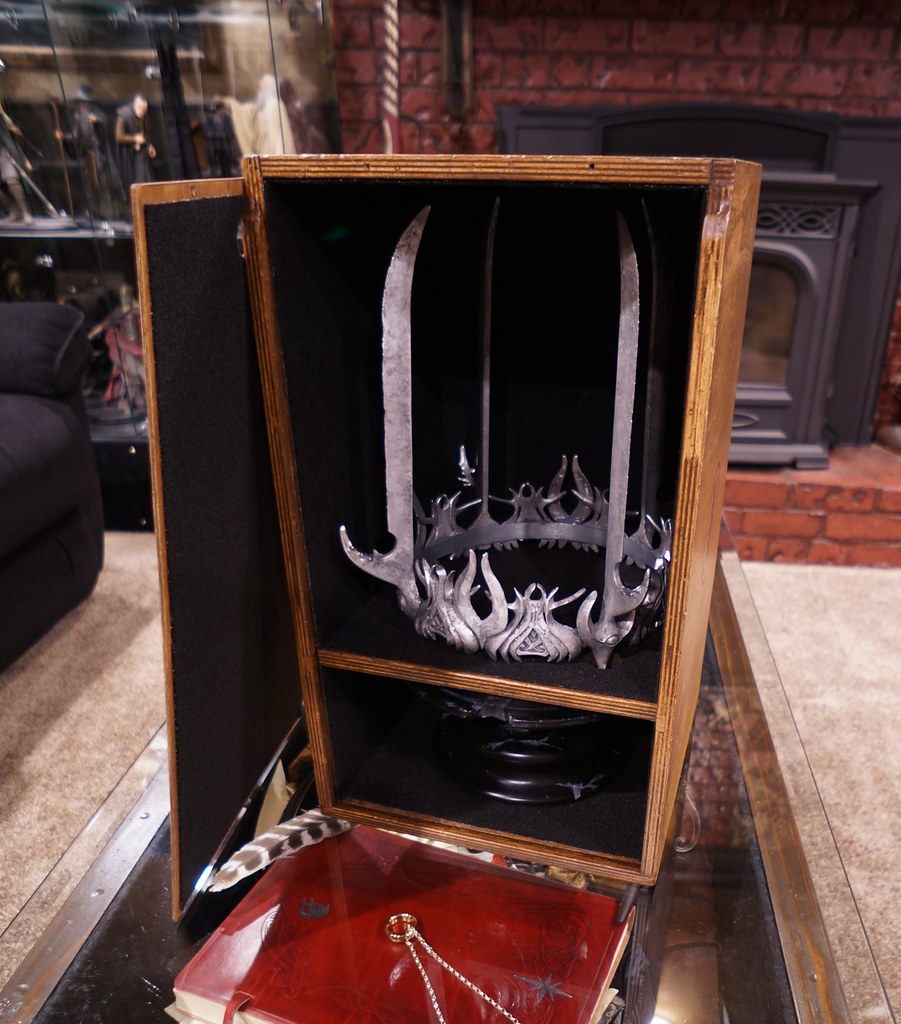
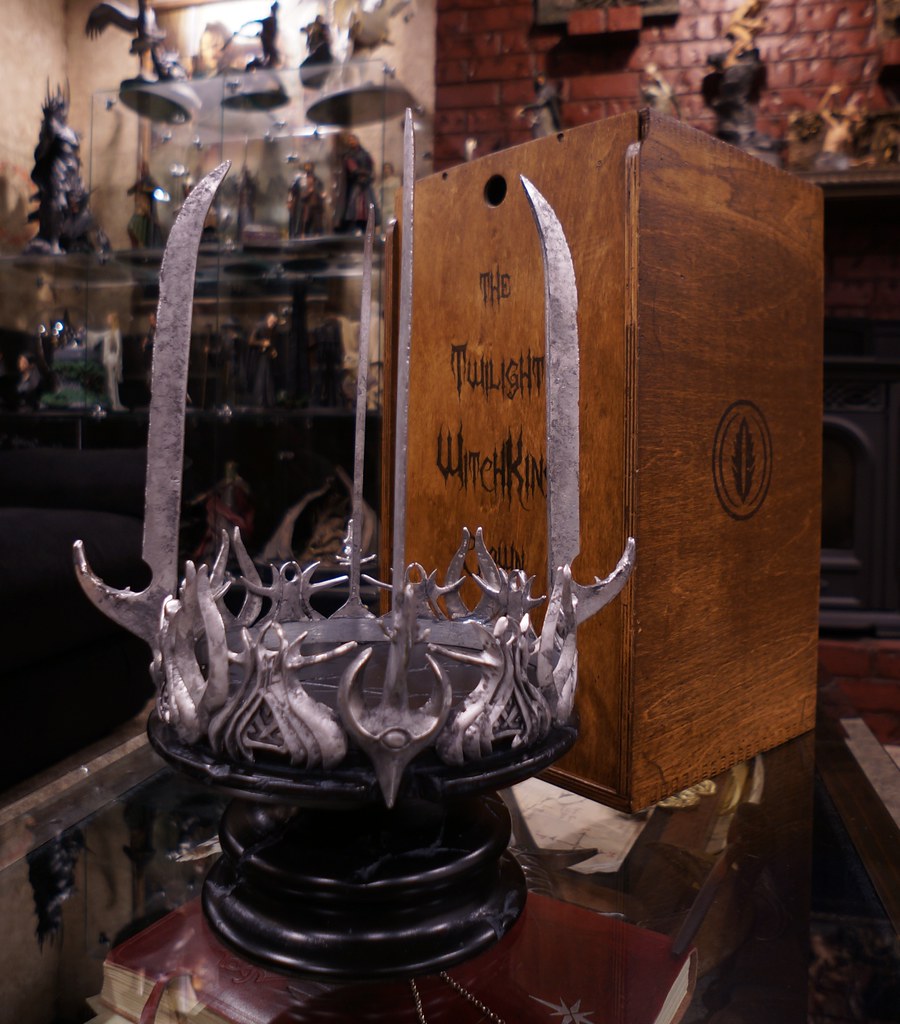
And here is the completed stand, it was MDF turned on the lathe and then rather distressed to add cracking and age with the crown weathered - I think it really brings out the details and textures in the casting.
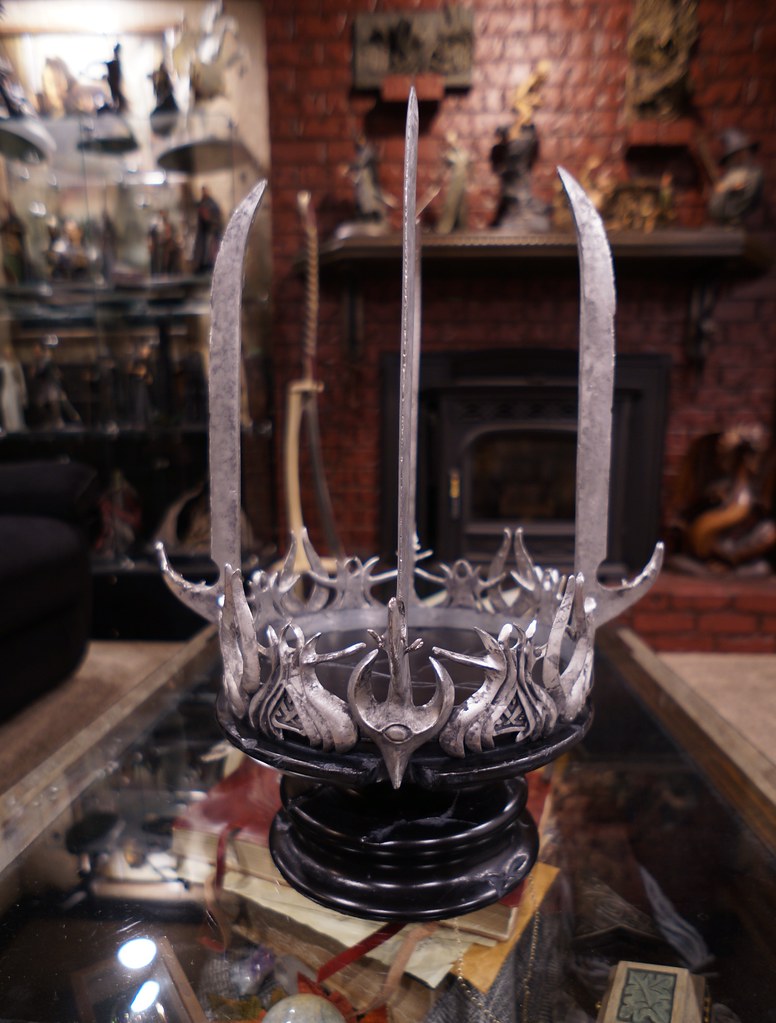
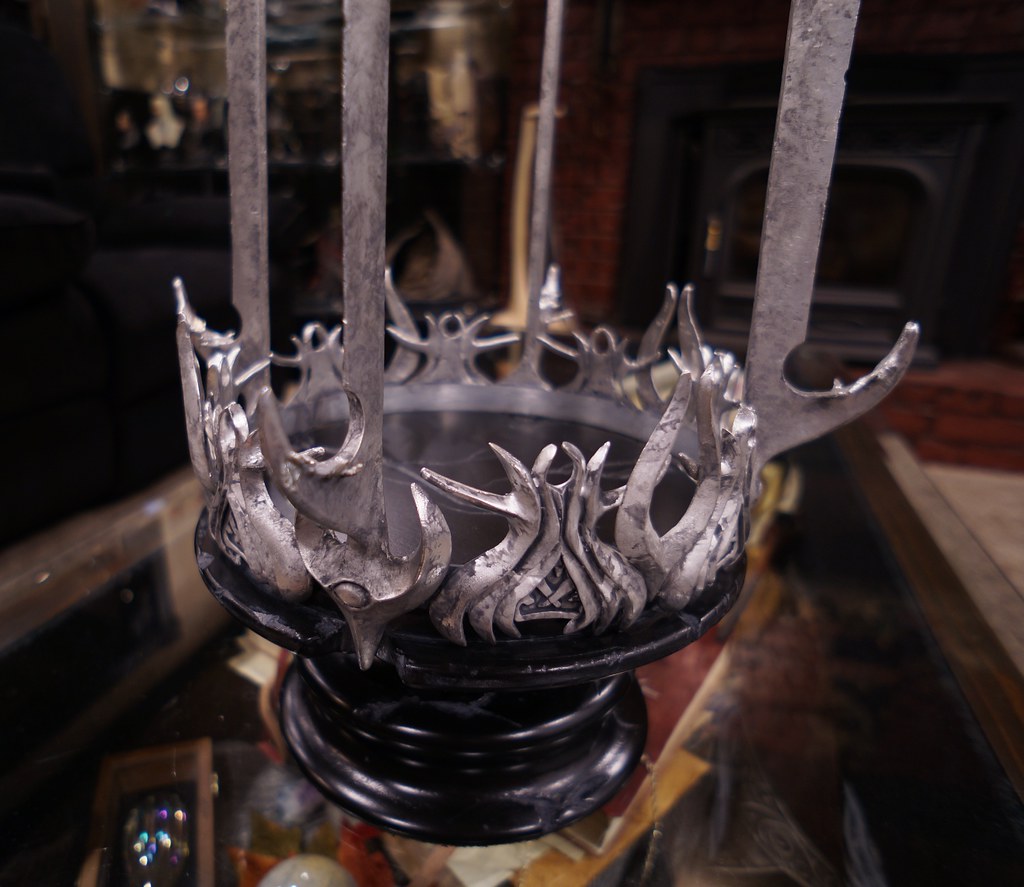
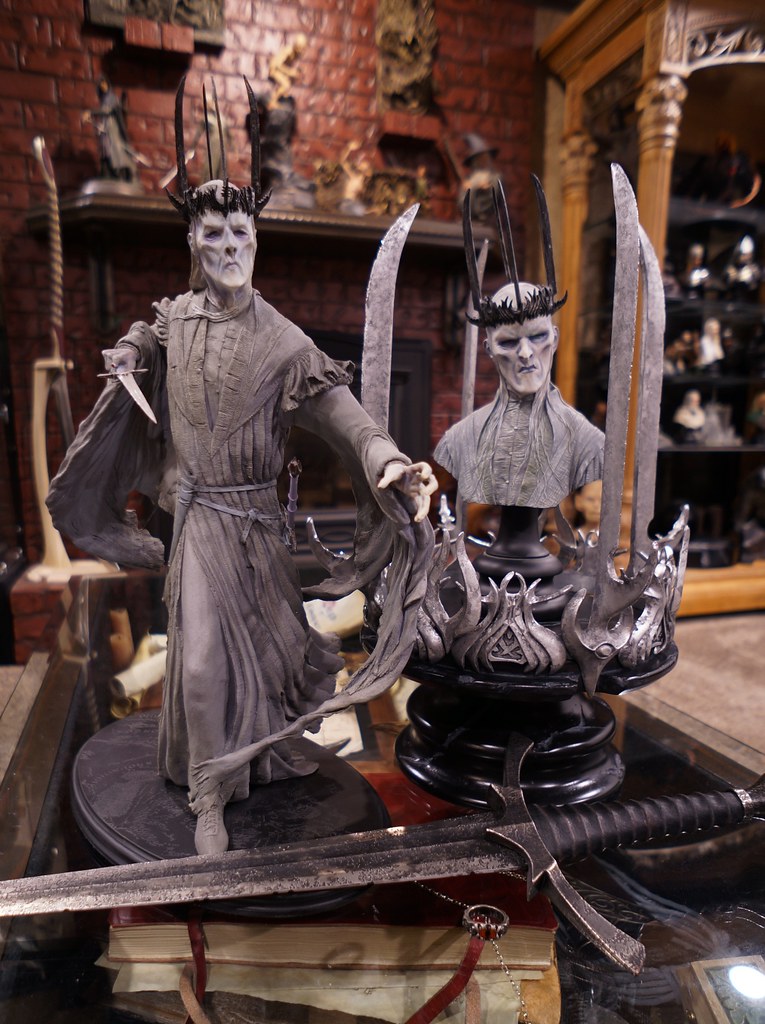
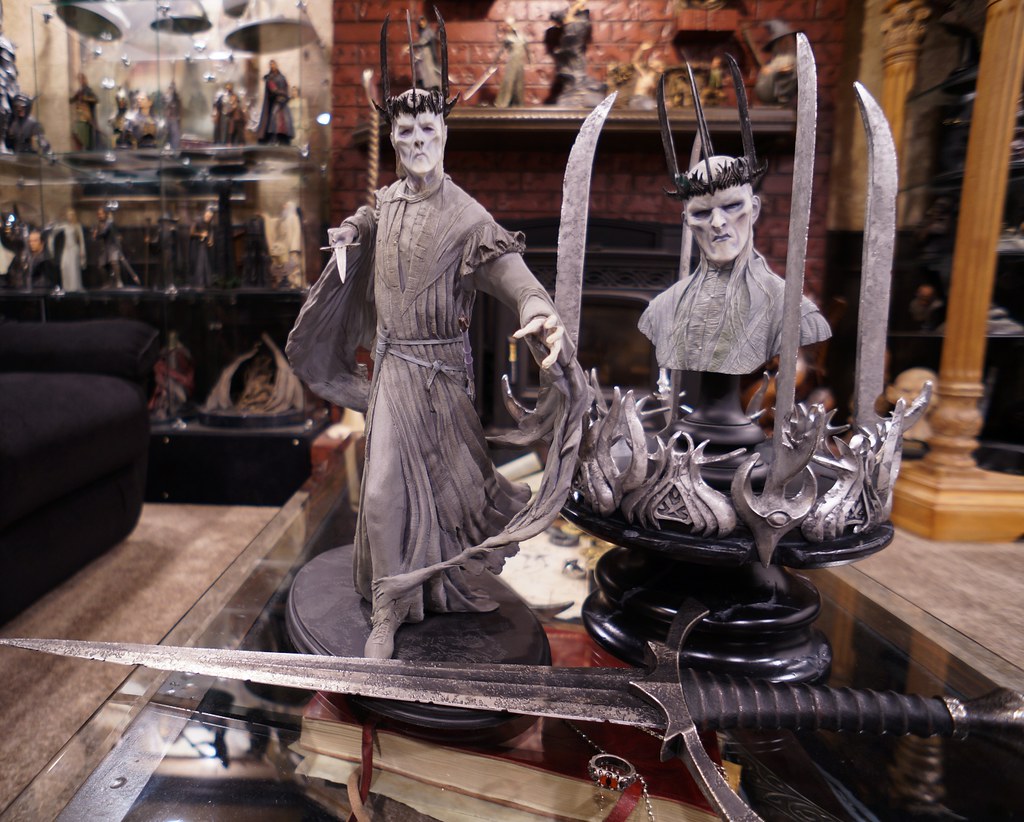
Here are a couple more and a few in a Twilight Witchking collection.
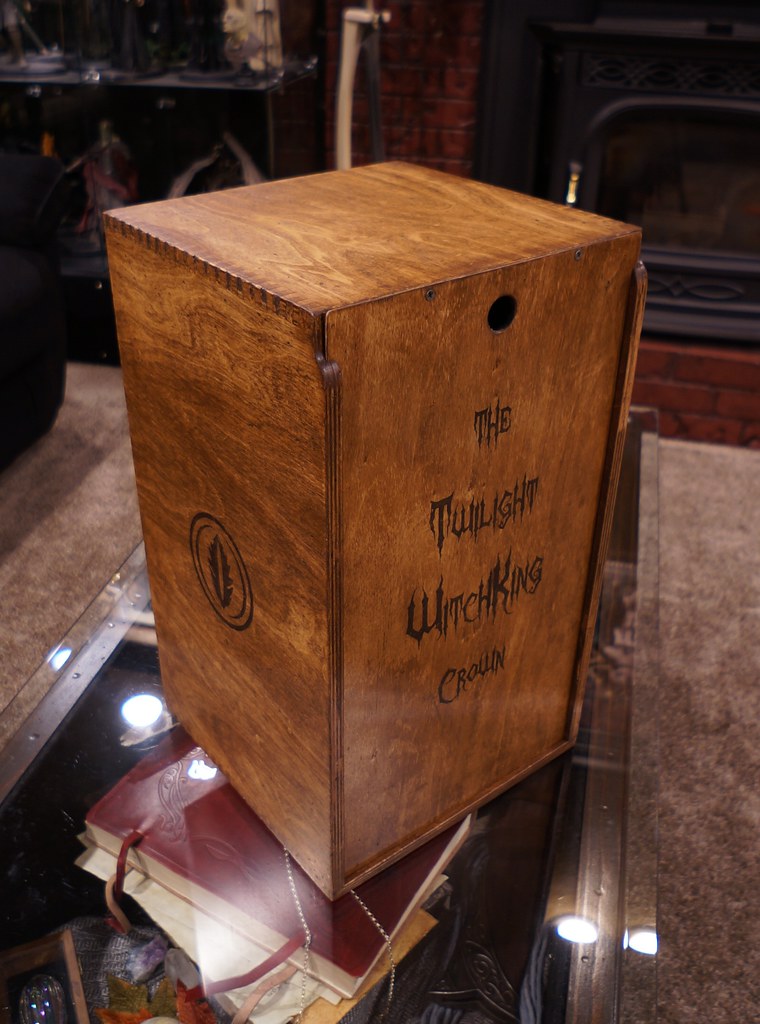
This has been by far the most (expensive) and challenging project to date, but also one of the most rewarding. I still plan to make a decorative wooden storage box to accompany both the stand and the crown for safe keeping.
Please let me know what you think and if you have any questions.
[URL="http://www.wetacollectors.com/forum/showthread.php?t=41411"]http://www.wetacollectors.com/forum/showthread.php?t=41411[/URL]
I wanted to make my own version of the Twilight Witchking crown for a very long time, but I also knew if was going to take some effort as well as learning some new skills. Here is some of the steps that went into making this.
First I got some great photos of the actual crown from Kit Rae on the UC forums here.
I started with some 1/4 inch MDF for the spikes and used some epoxy sculpt for the rest of the details and a few cut off nails for the smaller spikes.
There was a lot of clean up and sanding that needed to be done before molding could begin. Since I had never molded anything before it was all new and did a lot of research on-line. I wanted to make this out of pewter from the beginning so I decided to used Smooth-on Mold Max 60 for the molding material as its high temp for casting pewter. Here is the mold boxes after the priming had been done.
Then the clay up for the 1st half.
1st half poured.
And then the 2nd half was done after the clay was removed and the mold release was sprayed. Here is the finished mold with the originals. Did have 1 casualty though.
I didn't get any photos of the actual casting process as it was my first time with the melter and was kind of a crazy experience. Here are all the cast parts needed for assembly.
I found a local sheet metal company to make the inner rings that all 16 pieces would attach to. They were done out of 16 gauge steel and welded together. Here is a photo of most of the pieces clamped on the ring to check for spacing.
I tried to solder both traditionally and with paste and couldn't get it to work so I sanded the ring and grind-ed the individual pieces and used Loctite's version of JB weild. Worked rather well. Here is a photo of the completed crown fully assembled. Its rather heavy being made of pewter and comes in at just under 4 lbs! Here is the beginnings of the stand, pre-weathering.
And here is the completed stand, it was MDF turned on the lathe and then rather distressed to add cracking and age with the crown weathered - I think it really brings out the details and textures in the casting.
Here are a couple more and a few in a Twilight Witchking collection.
This has been by far the most (expensive) and challenging project to date, but also one of the most rewarding. I still plan to make a decorative wooden storage box to accompany both the stand and the crown for safe keeping.
Please let me know what you think and if you have any questions.
")