DrMcoy
Sr Member
Got mine built -- no frills, right outta the box.
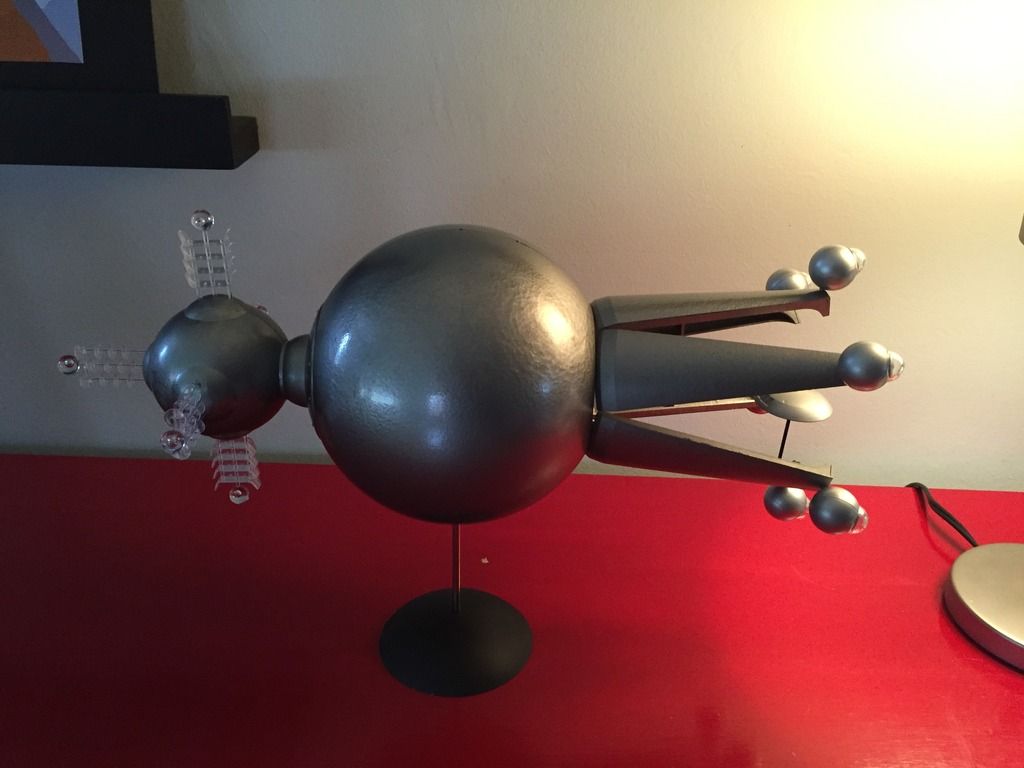
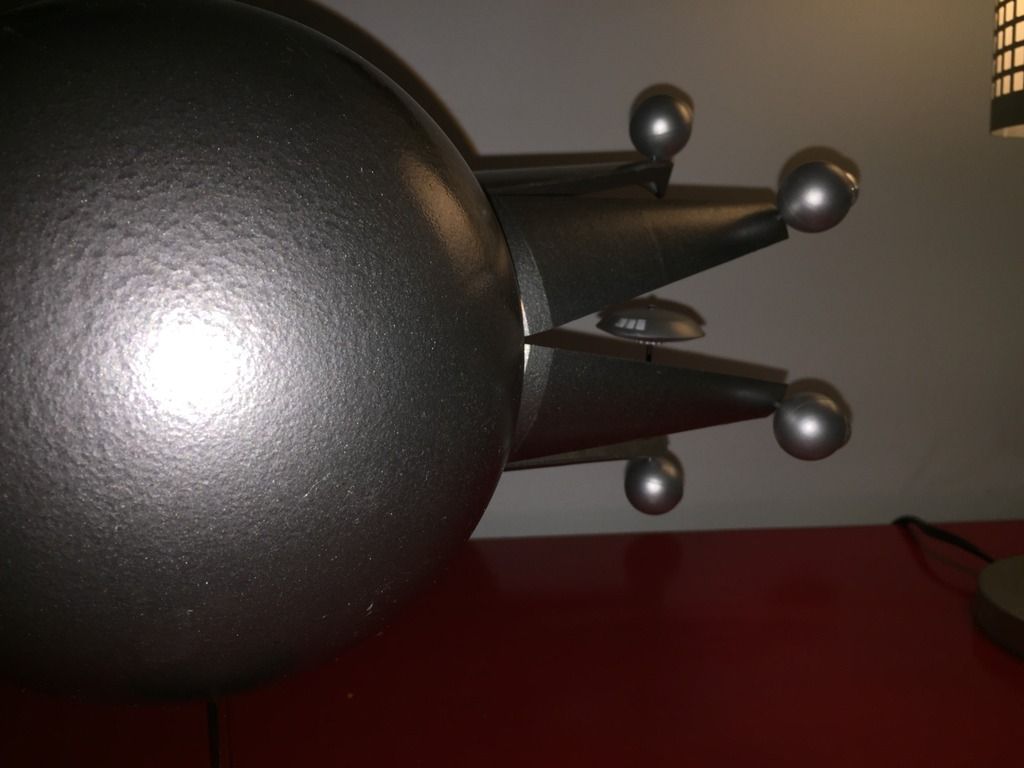
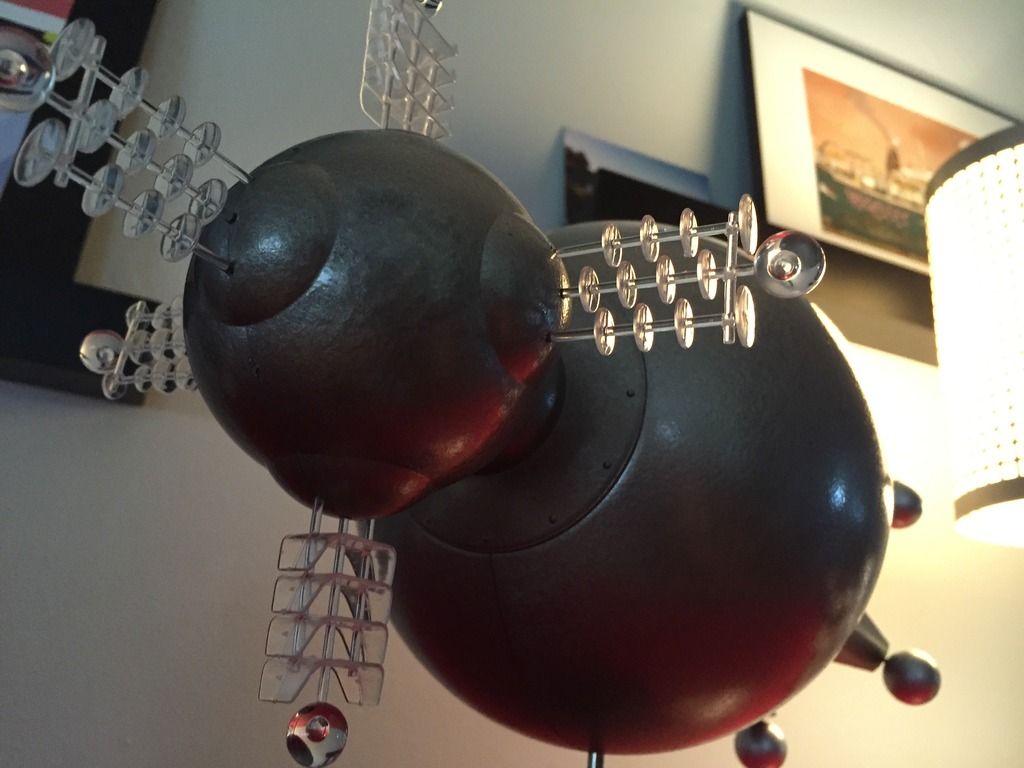
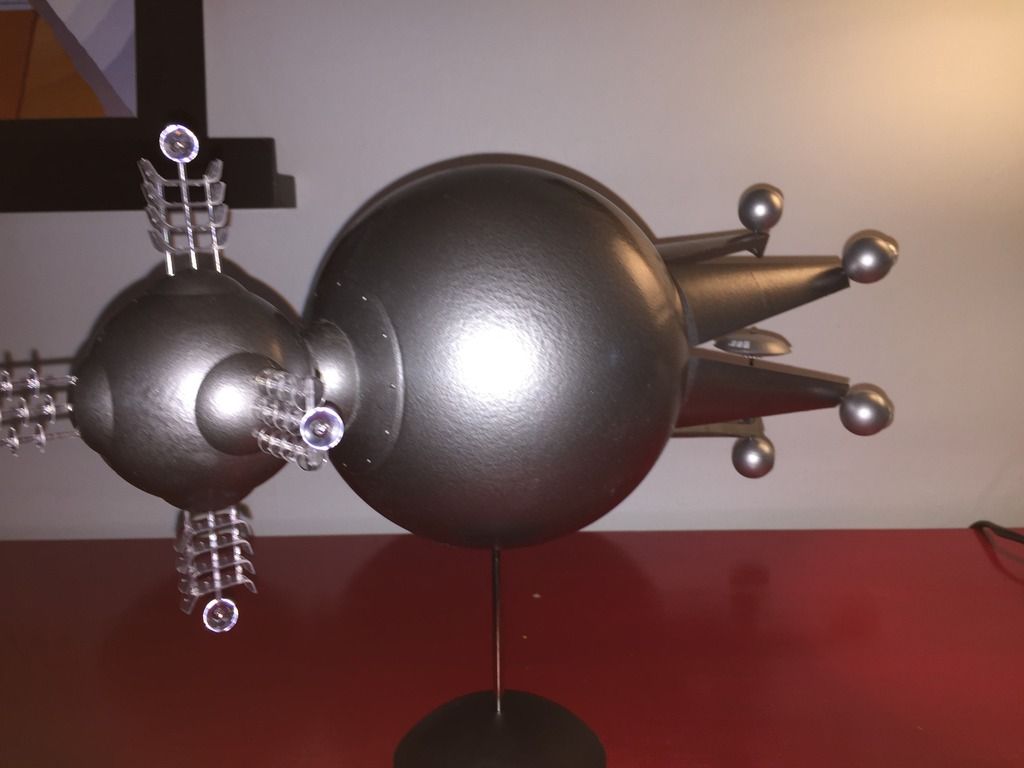
As much as I wanted to match paint job on original model, with slight pebbled finish and subtle swirl pattern, I took the lazy way out and simply hit it with RUST-O-LEUM UNIVERSAL ADVANCED FORMULA ANTIQUE PEWTER FORGED HAMMERED FINISH -- paint and primer in one can.
So, it still has a somewhat mottled texture, and the pewter is darker to offset the silver nodules on the ends of the arms.
I used a very advanced method to mask off the dome and windows on Jupiter 2 -- Elmer's School Glue. Just a dab placed on with a toothpick -- let it dry, hit with some Tamiya Silver, let that dry, then carefully picked the glue off with toothpick - it came off pretty easy. I painted flat white under dome and behind window to help make it not look so dark, as I did not plan to light the Jupiter 2...but I'm sure it will look cool for those that decide to do it.
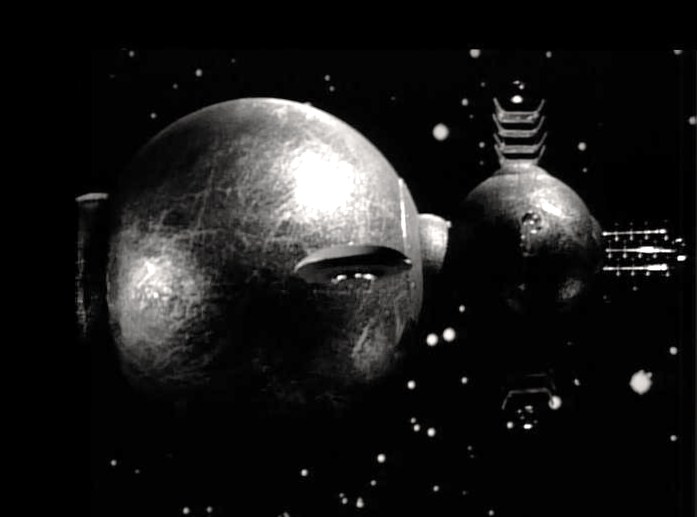
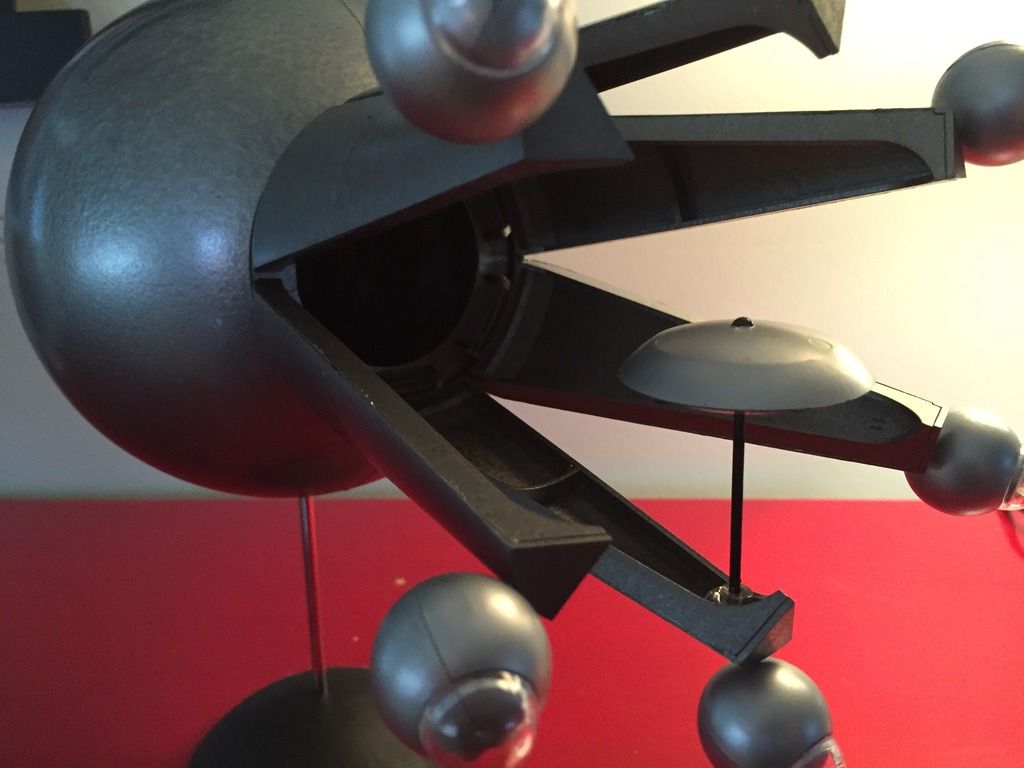
I loved this episode, and remembered that when watching it as a child, getting kind of freaked out when the door opened and the Jupiter 2 got pulled inside, so I knew I wanted to make it with doors open. As others have attested, getting the interior diorama to sit properly in the grooves inside is a pain -- I don't think there is truly any way to guarantee that both sides rest within the slots, so I glued a thin piece of flat plastic sheet to bottom of diorama floor to help keep it rigid.
As I wanted to have Jupiter 2 within the open Derelict doors, I decided to use the elbow clamp that came with the kit, but rather than attach it to the bottom metal post that holds the Derelict, I simply glued it into the bottom most arm -- less wire to see, compared to having it attached to the main base post. I took a shot at using magician's invisible thread to dangle the Jupiter 2 inside Derelict doors, but that stuff is so hard to see and get it to come out to proper length, that I ditched it in favor of the easier modification to the elbow clamp.
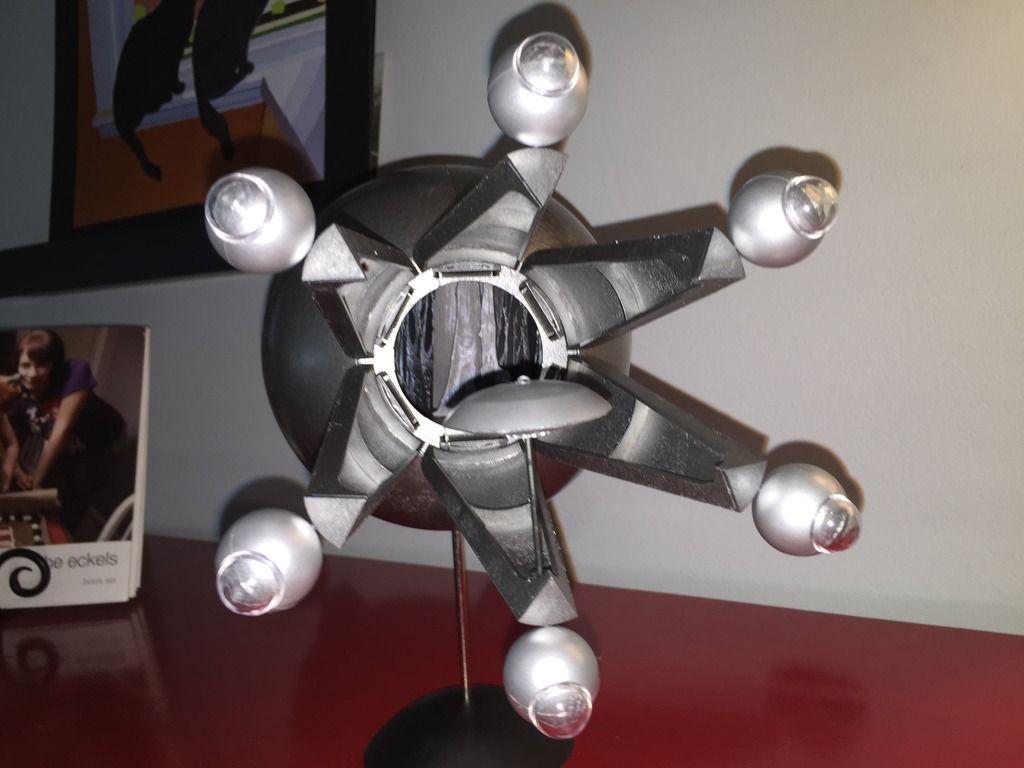
As for the clear antenna parts that stick out the Derelict front module, you do have to take great care to remove the mold sprues from the antenna...I used a very fine-tooth hobby saw on a few of them, and the others I was able to remove with gentle back and forth rocking motion, to weaken the sprue bonds, taking care to hold the circular antenna discs between finger and thumb as the spindles that hold the discs together are so fragile. You'll want to attack this portion of the build when you are rested, are in a well-lit place, and are feeling very patient. Take your time -- better to spend a few extra minutes with this rather than spending even more time trying to glue broken clear parts together that you broke in haste.
So, here it is -- again, nothing fancy, but I'm happy to have it on my shelf.
As much as I wanted to match paint job on original model, with slight pebbled finish and subtle swirl pattern, I took the lazy way out and simply hit it with RUST-O-LEUM UNIVERSAL ADVANCED FORMULA ANTIQUE PEWTER FORGED HAMMERED FINISH -- paint and primer in one can.
So, it still has a somewhat mottled texture, and the pewter is darker to offset the silver nodules on the ends of the arms.
I used a very advanced method to mask off the dome and windows on Jupiter 2 -- Elmer's School Glue. Just a dab placed on with a toothpick -- let it dry, hit with some Tamiya Silver, let that dry, then carefully picked the glue off with toothpick - it came off pretty easy. I painted flat white under dome and behind window to help make it not look so dark, as I did not plan to light the Jupiter 2...but I'm sure it will look cool for those that decide to do it.
I loved this episode, and remembered that when watching it as a child, getting kind of freaked out when the door opened and the Jupiter 2 got pulled inside, so I knew I wanted to make it with doors open. As others have attested, getting the interior diorama to sit properly in the grooves inside is a pain -- I don't think there is truly any way to guarantee that both sides rest within the slots, so I glued a thin piece of flat plastic sheet to bottom of diorama floor to help keep it rigid.
As I wanted to have Jupiter 2 within the open Derelict doors, I decided to use the elbow clamp that came with the kit, but rather than attach it to the bottom metal post that holds the Derelict, I simply glued it into the bottom most arm -- less wire to see, compared to having it attached to the main base post. I took a shot at using magician's invisible thread to dangle the Jupiter 2 inside Derelict doors, but that stuff is so hard to see and get it to come out to proper length, that I ditched it in favor of the easier modification to the elbow clamp.
As for the clear antenna parts that stick out the Derelict front module, you do have to take great care to remove the mold sprues from the antenna...I used a very fine-tooth hobby saw on a few of them, and the others I was able to remove with gentle back and forth rocking motion, to weaken the sprue bonds, taking care to hold the circular antenna discs between finger and thumb as the spindles that hold the discs together are so fragile. You'll want to attack this portion of the build when you are rested, are in a well-lit place, and are feeling very patient. Take your time -- better to spend a few extra minutes with this rather than spending even more time trying to glue broken clear parts together that you broke in haste.
So, here it is -- again, nothing fancy, but I'm happy to have it on my shelf.


")