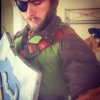
Link; the Hero of Time (Fan Design) - UPDATE P.2

Re: Link; the Hero of Time (Fan Design)

This is great. Usually I think women make better Links but this design really works.
 
Re: Link; the Hero of Time (Fan Design)

Just a small update. Got this bow from Party City for $15. Removed the hemp twine from the body and the fishing line string. Replaced the string with hemp, and applied the first layer of wood stain in a medium brown. It took to the sides and back really well, but the front not so much. I think it's bamboo, and still has skin on the front so the stain doesn't absorb in as well. We'll see how it looks after it settles, and then I'll be making the metal details out of craft foam.

This thing is entirely non functional, and thus should be event friendly. I might have an elastic string on standby for film shoots where I need to draw the bow, but it still won't bend realistically, so I may just invest in a real bow down the line.
11032801_672123679562860_1461806829_n.jpg
 
Re: Link; the Hero of Time (Fan Design)

WonderCon has come and gone, and my Link isn't quite finished yet. I ran out of time due to a sudden, but fortuitous, move to a new condo the week of the con. That and I've been swamped at work with 50 hour weeks. That being said, I did wear version 2.0 to WonderCon! And I'm overdue for posting some inspirational imagery!

First off for inspiration is this awesome design by Split-Heart at DeviantArt:

111123_concept_link1_by_split_heart-d70y04j.jpg

And this custom figure by CIn320, also at DeviantArt:

Link_by_Cin320.jpg

I'm 99.9% certain that the custom figure inspired Link's look in the video recently released by the folks at The Zelda Project. I love the overcoat and scarf as additions to Link's garb.

And this awesome re-design of the Lens of Truth, by Laura Hutton:

rENDER1+copy2.jpg

Rather than a faithful replication, I'm taking elements of the designs I like and implementing my favorite parts. Of course I'm adding my own flair here and there. WIthout further delay, here are just the few pics I nabbed of version 2.0, all taken by by buddy Nasir (Mr Morgan Smee on Twitter):

CBygt1CUMAAfbte.jpgCByhW00UgAAInqK.jpgCBzAj4iUMAAnxkb.jpgCBzAkR-UAAEtiv6.jpg

I prefer the pants from version 1.0, but they are currently MIA, likely in one of the many boxes we're yet to unpack. And I've now got two swords: one steel and one foam, so that they can be used for different shoots/events whenever needed.

My immediate plans are to remake the shield, now that I have a better understanding of foam work, and to give both swords sweet new paint jobs. With that will also come a pair of scabbards, as the swords aren't the same dimensions. I'm thinking of going all out and making leather covered wood scabbards, but I'm still not sure about that. I also plan to finish putting fabric toggles on the jerkin, as right now it's just safety pinned shut. On the jerkin, I'm going to remove the hood, and add a high collar as in Split-Heart's design. The old green hood will be repurposed into a "traditional" Link cap in case I feel like wearing it.

I also have the fabric for the new shirt (it matches the lighter brown of the striped pants), so I've got to crank that out.

For long-term plans, I'm going to build a darker green overcoat and scarf (that can be worn as a cowl) of my own design, inspired by both of the images posted here. I've got a chainmail shirt in the works, but I like the brown suede shirt as an alternative. It makes me feel very Celtic. My wife is also making me OoT inspired gauntlets and a new belt that will match the baldric. For my part in leather work, I need to make boots, pauldrons, and eventually pouches for the many accessories the belt will carry. That list currently includes:


  • Ocarina of Time (from Songbird) in a leather pouch
  • Lens of Truth in a leather holster
  • OoT Longshot in a leather holster
  • MM Gilded Sword (to an adult Link, this would be a companion sword, or long dagger)
  • Ruppees in a leather wallet

Then of course, there's finishing the bow, quiver, arrows, etc.

So there's still a long road ahead on this build! And I'm loving it every step of the way!
 
It is good to know you had a good time at the convention.
Rad reading all the things you have planned for the costume.
I look forward to seeing your progress.
 
Another update. Had a film shoot this today, and needed the Lens of Truth as a prop for several shots. I had some craft foam (3mm or so?) and some sheet styrene, about 1mm, lying around. Spent about $40 at Michaels and about 10 hours crafting yesterday. Here are a few progress shots.

The first step was to cut a center layer out of the sheet styrene, which I did with some heavy duty scissors after tracing a template on paper and cutting that out. For the smaller areas I very carefully cut them with a small dremel blade, and sanded everything smooth with a sandpaper attachment. The gems also have sheet styrene, for structural support. The gems are from a big box of pink gems from Michaels. I buffed the metallic finish off the back, and superglued them down. Then I cut the styrene to fit the gems perfectly before gluing on the other side. I was worried otherwise that matching up each layer would be nearly impossible.

If I were to do this again I would use a stronger plastic, like ABS. Styrene has failed me before but it's what I had on hand.

IMG_0567.JPG

I opted for a slightly small Lens of Truth, so it looks like it can be wielded by a child or an adult, and so it fits on my belt without being warped when I move.

Next up was the 3mm craft foam, which I cut as close as I could, leaving a little wiggle room. I beveled every part of it with the dremel and added these bull skull pendants I found at Michaels. I couldn't find any nocturnal creatures that I liked, but the bull skull looked ominous and it complemented the shape of the Lens so I'm content with it. It's made of brass, so I filled the hollow back with hot glue and then just pressed it firmly into place. I superglued the craft foam onto the styrene before carefully trimming and beveling with the dremel.

The lens is simply an unbaked shrinkie dink sheet that I colored with sharpie. Bootleg, but it's low profile and I can touch it up as needed. And it looks good enough for the camera, which is the end goal.

This side I used as the backside because my embossed lines were done at the wrong angle. I went back and put in the right ones because I wanted to, but there are too many embossed lines here.

IMG_0568.JPG

The hardest part was matching up both layers of craft foam so that the whole thing looked uniform, and not supergluing my fingers or the shrinkie dink in the process. It took a few minutes of swearing and cursing, but I got it done, and beveled the new front side as evenly as possible.

IMG_0569.JPG

To finish for the shoot, I trimmed and smoothed out all the rough patches of the foam that were still left to try to get everything as uniform as possible. I coated everything except for the lens and gems in 3 layers of mod podge, and painted with a mixture of blue and purple metallic acryllic paints. The small copper details were done with a red metallic, which I also used to paint the white styrene between the gems.

I didn't get around to adding the gauze wrapped handle because I knew it wouldn't show in the shoot, and I was too tired and didn't want to rush it. All in all, I'm happy with the finished result, especially since it was kind of a "dive in first, make plans as you go" type of thing done in a single day. The materials cost me more than I wanted to spend, and I now have an abundance of pink gems, but such is life.

IMG_0572.JPG

Link tax:

IMG_0582.JPG

Stay tuned!
 
This last week I've been working on finishing this costume. I've wanted to add an overcoat for some time now, based largely off of the custom figure I posted on one of my earlier posts. I saw a render of the character from Assassins Creed: Rogue and did a quick recolor and headswap:

Link Concept hoodsmall.pngLink Concept nohoodsmall.png

This isn't the exact style I want, as it's more renaissance than medieval, but it gave me a good idea of how to start. I really like the idea of a blueish sash, which helps to make my eyes pop, and also goes well with the sword and shield. I fortunately already had that scarf for my pirate garb, but I may replace it with one that is a bit more blue. We'll see!

Next I nabbed some awesome double sided microsuede in olive, and got to work!

12027594_10153648699581912_1042362591670565037_n.jpg

I *love* how the olive color looks against my more vibrant green jerkin! This was obviously taken before I added the sleeves (which are on there now). I have the yoke pinned into place and plan on adding lots of handstitching (both functional and decorative) before weathering the coat. My wife and I are also working on some more leather pieces, namely a new belt, boots, new gloves, some vambraces w/ elbow cops, and pauldrons. It's getting there!

11218839_10153652675171912_4708076194120262925_n.jpg
 
Loving the new version of the costume, and the Shay Cormac-inspired coat! I've been thinking about doing my own Link design for a while. Not sure if I'll be able to get around to it anytime soon, unfortunately, but I hope I can eventually.
 
Loving the new version of the costume, and the Shay Cormac-inspired coat! I've been thinking about doing my own Link design for a while. Not sure if I'll be able to get around to it anytime soon, unfortunately, but I hope I can eventually.

Thanks Cam! Link is definitely a hard character to pull off well. His in-game appearance better suits a female cosplayer, in my opinion. But that's why we have the option to do original takes!

My coat is nearly done now, I still need to add the shoulder coverings (yoke?) and then belt buckles to close the front, and a few buttons. Then I'll do lots of decorate handstitching and weathering. And I need to get more of the olive fabric once I settle on my final hood design. The suit really bulks me out when worn in full, because it's got a shirt, covered by chainmail, covered by the bright green jerkin, and finally the coat. But I think the pauldrons will help to balance that out as I've already got wide shoulders.

I'm loving working on this build too, and that's the main thing. :)
 
Been chipping away at this some more lately. Picked up a foam Master Sword at a con last year and started repainting it to match my grittier style. My steel sword will get a similar facelift later on!

CbOOKGKVAAApjop.jpg
 
DUDE! That is awesome! I've started work on the Twilight Princess costume that link has, but I need some reference pictures of the gauntlets.
 
Back
Top