Leif Ericson Galactic Cruiser-FINISHED PICS!!!

Re: Leif Ericson Galactic Cruiser

More progress from yesterday night...

The light gray lacquer painted bay was masked to allow only the framework on the end walls to be sprayed with Tamiya Silver Leaf lacquer.


36359235583_8401d7fd04_z.jpg
Launch Bay Masking by trekriffic, on Flickr

Walls and floor after painting:

36352579794_b39f7fb9d3_z.jpg

Lauch Bay Construction Complete by trekriffic, on Flickr


Photo-etch is glued in place on the inside face of the hangar bay doors and sprayed Light Gray:

36359234593_c94891eede_z.jpg
Main Lanch Bay Doors by trekriffic, on Flickr

A silver Sharpie pen was used to color the baroque style pattern and grooved panels on each launch bay door:

36359234013_404f8c77c2_z.jpg
Detailing of Doors by trekriffic, on Flickr

The finished doors:

36406388714_02c80d2b6d_z.jpg
Bay Doors Painted by trekriffic, on Flickr


Thanks for reading!
 
Last edited by a moderator:
Re: Leif Ericson Galactic Cruiser

I totally love this! This is exactly the same kinds of things I want to do to my kit - bravo!!

Any compliment from the man who built that fantastic Blade Runner off-world blimp is high praise indeed. I am honored sir.
 
Re: Leif Ericson Galactic Cruiser

Steve-san.
This is very beautiful! It takes me back to the era of romantic Sci-fi.
And your build is very crispy.

katsu
 
Re: Leif Ericson Galactic Cruiser

Step 6:

Sensor Ray Dome...

I decided to modify the Sensor Ray Dome that sits up on top of the command tower. I didn't just want a chrome ball up there so while at Michaels I bought a package of rhinestones:

Rhinestones by trekriffic, on Flickr

Then I sanded off the chrome plating and sanded off the top of the dome before gluing a rhinestone on with epoxy.
I'll paint the whole thing steel or maybe aluminum before installing it in the model:

IMG_2168 by trekriffic, on Flickr

I also soaked the engine Inter-Adapters in Super Clean overnight and, by this morning, was pleased to find the chrome plating was gone with no damage to the plastic underneath:

Inter-Adapters by trekriffic, on Flickr

That's it for now.
Thanks for reading along!
 
Last edited:
Re: Leif Ericson Galactic Cruiser

So today I wet sanded the windows to make them level with the hull and decided that 6 or 8 of them still looked like crap due to bubbles in the resin when I originally poured from the inside. So I drilled and filled them out, stuck transparent tape on the inside, and refilled them with fresh resin from the outside making sure to drag any bubbles out of the window frames so the resin is nice and clear now. I could only do one side of each hull section so will do the windows on the opposite side tomorrow after these are dried. This phase of construction is a pain in the arse but i'm not going to be satisfied with crappy looking windows.
 
Last edited:
Re: Leif Ericson Galactic Cruiser

Took the day off Friday so got a bit more done...

Step 7:

The Scout Ship...

The scout ship is only 4 parts- upper hull, lower hull, and 2 fins. It's cute, looks like a duck.
I won't be using the kit legs as they look like inverted plastic cups.
I'll be using Paulbo's PE landing gear instead.

After gluing I puttied her top and bottom with Tamiya Basic Type putty:

Scout in Putty Top by trekriffic, on Flickr

Scout in Putty Bottom by trekriffic, on Flickr

I'll sand and prime tomorrow.

Step 8:

The ion drive engines...


Ion Engines Ready for Install by trekriffic, on Flickr

The engines were fairly easy to assemble.
I just fed the wires thru the large slots and inserted the inter-adapters which I'd sprayed with Tamiya silver.
The inter-adapters were a tight fit so had to use a goodly bit of force to get them seated properly so the large clear red tabs on the finned engine bits would align with the slots in the hull.
Then I glued on the intercoolers and spikes.

Step 9:

The stand...


I enlarged the small hole at the top of the stand arm intended for the wires to pass thru from the engines and trimmed away the extra tab that was designed to fit into a slot in the lower hull.
Then I mounted a size K power plug to the top of the stand arm and soldered the wire leads.
After soldering I filled 5 minute epoxy in around the plug threads to secure the plug to the stand arm:

Stand Power Plug Wiring by trekriffic, on Flickr

I covered the backside of the stand arm with .040 thick styrene sheet:

Stand Arm Mods by trekriffic, on Flickr

Underside of the stand:

Base Underside by trekriffic, on Flickr

The completed stand.
Still need to sand and paint it of course:

The Stand by trekriffic, on Flickr

I mounted the lower hull to the base and tested the ion drive engines by touching the wires to the power jack wires in the lower hull.
The negative lead from the power jack has a 220 ohm resistor soldered to it.
I was relieved to see that all the lights lit up! Thank God!

Next I'll start some of the wiring to light the windows in the forward hull, the neck, the phaser projector, and the commad tower.
I'll also try and finish the hangar bay.
I'm thinking of running fiber optic to the landing lights in the bay.
I want them nice and bright to illuminate the underside of the scout ship as it sits in the bay.
I'm also going to fashion a clear support rod to insert into the underside of the scout ship.
This acrylic rod will have a thin brass rod in the lower end of it to fit thru a hole I'll drill in the center of the circle in the floor of the bay to secure the scout ship.

Thanks for reading!
 
Last edited:
Re: Leif Ericson Galactic Cruiser

Yesterday I pretty much finished the hangar bay. I glued the side walls and rolling doors in with CA and glued in clear plastic for the side windows. I also drilled a small hole in the circle at the center of the bay for the scout ship support rod. For the floor, the PE had lines inscribed for the basketball court so I took a mechanical pencil and traced along the lines so you can see the markings on the floor. Then I sealed with Glosscote. The only thing remaining are the landing lights which I need to run fiber to.

I also sanded the putty on the scout ship, drilled two small holes-one in the belly and one in the tail giving me two options for inserting a brass support rod, and attached the PE landing struts. So far so good.


I'll post a few pictures later.
 
Re: Leif Ericson Galactic Cruiser

Update for today...

Pic of the almost finished launch bay. As mentioned last night I still need to run the fiber to the landing lights:

Launch Bay Painted by trekriffic, on Flickr

Scout Ship...
The three landing struts ready for install in the scout ship:

Scout Ship Landing Struts by trekriffic, on Flickr

Scout ship with landing struts glued in place:

Scout Ships Mods by trekriffic, on Flickr

More to come!
 
Last edited:
Re: Leif Ericson Galactic Cruiser

^^^ VERY cool! Love the basketball court in the landing bay.

Is it me or do those landing gears look like they belong on a Colonial Viper?
 
Re: Leif Ericson Galactic Cruiser

Today's update:

Paulbo over on HobbyTalk reminded me about the hangar bay floor decal that came with the kit:

Floor Decal by trekriffic, on Flickr

I had totally forgotten about it!
It will fit in quite nicely around the landing lights.
Thanks Paul!

So last night I spent about an hour working on the engine shrouds.
First thing I did was tape the ion engine in place on the port side afterwhich I taped the hull halves together.
Then I mounted the shroud halves to the hull and brushed on Ambroid ProWeld to the inner seam of each shroud assembly:

Cowlings Test Fit by trekriffic, on Flickr

Got a nice fit; however, the front of the ion engine was a little too far forward which would place it almost up against the forward PE grillwork so I'll be redoing the slots in the hull where the engine tabs fit so they will sit further back in the shroud.
This will be more in keeping with the position of the engines in the original Leif Ericson kit I built as a boy.
I read somewhere that when they reissued the kit, AMT moved the engines forward, which I don't quite understand since the red plastic fin bits are slotted to allow them to sandwich the forward inner leading edge of the ship's wings.

After the Ambroid set a few minutes I pulled the shrouds off the hull and gave them another going over with Ambroid so the bond was good and strong between the shroud halves:

Ion Engine Cowlings by trekriffic, on Flickr

I then test fitted the forward and rear PE engine grills to the shroud:

Cowling and Grill Test Fit by trekriffic, on Flickr

Aft Ion Engine Grills by trekriffic, on Flickr

ParaGrafix got the fit just right! Paulbo even accounted for the bend in the forward inner edge at the front of the shrouds by creasing the forward PE where it needed to bend:

Forward Ion Engine Grill by trekriffic, on Flickr
Now that's thinking of everything.

The last thing I did last night involved doing something to enhance the glow from the ion engine LEDs inside the shrouds.
I remembered I had 2 sheets of 060 spaced corrugated aluminum sheet from K & S Engineering in my hobby cart:

Corrugated Aluminum Sheet by trekriffic, on Flickr

I'd bought it years ago from HobbyTown for another project but ended up not using it. It was the perfect thing for lining the inner surface of the shrouds.

Elmers white glue was used to glue the corrugated aluminum to the inner surface of each shroud:

Elmers Glue by trekriffic, on Flickr

Engine Shrouds with Corr Aluminum Lining by trekriffic, on Flickr

I can hardly wait to see how the engines look all lit up with these shrouds!

Thanks for reading!

:cool
 
Last edited:
Re: Leif Ericson Galactic Cruiser

Awesome job you are doing!


Yeah. They sorta do don't they?

Paul would say "yeah - that's because photoetch in this scale has it's limits!" :cool

Way back in the day, in the Strategic Space Command forum, there was a big debate on ret-conning the scout's landing gear into something better than the club feet it has in the kit. Rob Merril came up with teh tandem wheels; Nyrath's site documents alot of the concepts:
Scout Gallery 03

Modelnutz & I worked up this in 1/72 for a limited run resin kit:
 
Re: Leif Ericson Galactic Cruiser

Looked at the pictures of the scout.

:eek

Then read the text and realized those were pictures of a larger version. The lesson: a picture is worth a thousand words, but that doesn't make the words irrelevant.
 
Re: Leif Ericson Galactic Cruiser

I love all the intricate and fine details you are adding to this build. Great tutorial on everything you’re doing as well. Can’t wait to see more.
 
Re: Leif Ericson Galactic Cruiser

Updates from yesterday and today...

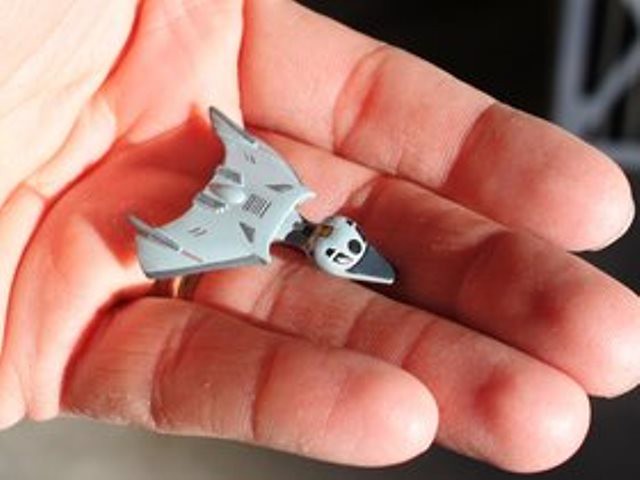
I finished painting the scout ship and decided to go with a paint scheme very similar to what modelnutz used for his resin kit.
It's so simlar it's almost identical but I really liked the look of his Vega shuttle.
Hopefully he won't mind, after all, imitation IS the greatest form of flattery right?

Anyway, after the paint dried I added some decals from my leftover decal stash to go along with the window decals from the kit.
I used a nail set to punch out some tiny round black decals for the four portholes (two per side) on the rear of the pilots cabin:

Scout Ship Window Decals by trekriffic, on Flickr

[h=2]I also used some of the leftover decals to represent the open landing gear wells in the underside of the scout:[/h]Scout Ship Decals by trekriffic, on Flickr

The finished scout prior to gettign a rub down with Tamiya silver and gunmetal pastel chalks:

IMG_2251_zps7314f8f2 by trekriffic, on Flickr

Today I gave it a shot of Glosscote to seal the decals:

IMG_2398 by trekriffic, on Flickr

I decided I wanted to be able to turn off the lights in the hangar bay while having the lights in the neck and engines still lit so I canabilized a dollar store booklight for a micro slide switch.
This will allow me to create a separate circuit just for the landing lights and any sidewall and control tower window lights in the hangar.
I cut a slot and installed it in the stern hull bulkhead.
At some point before final paint I'll fashion a slide cover to disguise it better:

Launch Bay Light Switch by trekriffic, on Flickr

For lighting the neck I used a high brightness (7000 mcd) white LED from Radio Shack.
I installed it facing dead forward mounted in the reflector from that same dollar store booklight.
I soldered a 220 ohm 1/4 watt resistor to the negative leg. :

Main LED by trekriffic, on Flickr

A test in my darkened downstairs bathroom proved that this one LED is sufficient to light up all the windows in the neck, the command tower, and the phaser projector in the nose.
Pretty awesome IIDSSM!
I thought I might have to add one more near the front but nope, not necessary.

The further along I go with this build the more ideas I get.
One idea actually stemmed from a 3-D mesh Craig Fey did of his interpretation of the Leif:

Craig Frey-SSC_Leif_Ericson by trekriffic, on Flickr
He added what I would call "impulse engines" to the stern and I thought this looked fantastic!

So I just had to do it for my build; however, my engines would be blue rather than yellow...

Looking thru my greebly box I found some transparent blue window inserts I'd saved from some empty Glide dental floss dispensers:

Using Found Objects by trekriffic, on Flickr

I also use the small plastic hubs that the floss wraps around for making shrouds for my LEDs but that's another story.

Anyway, I gave these transparent blue bits of plastic a rough cut using an xacto razor saw blade:

Razor Saw Cutting by trekriffic, on Flickr

Then I filed and sanded them to final shape and placed them on the hull just for ducks, They looked pretty good I thought:

Impulse Engines Covers Test Fit by trekriffic, on Flickr

Tracing the shape of the inserts onto Tamiya tape I used them as a guide to drill several pilot holes thru the plastic afterwhich I cut the plastic out with a #11 blade:

Drilling Impulse Engine Vent Openings by trekriffic, on Flickr

The holes after cleanup with a half round needle file file and my xacto knife:

Stern Impulse Engine Vents Opened by trekriffic, on Flickr

The blue inserts were given a light sanding with a fine sanding stick to make them somewhat more opaque then glued into the openings with Elmers white glue. The fit was perfect. No light leaks so no puttying required. This was accomplished thru extensive test fitting while I shaped the holes until the pieces slid in nice and snug.

Here's where I started getting real creative. I'd bought some mesh brass photo-etch years ago before my local HobbyTown USA closed...

Brass Screen by trekriffic, on Flickr

...and it was just laying around looking meshy and taunting me until I could finally find the right use for it and that time was now! I trimmed two quarter round pieces from the sheet and glued them inside the hull behind the blue impulse engine vents:

PE Screen by trekriffic, on Flickr

Next thing I'll do is install two blue LEDs to light up the impulse engines.

By the way, those Trek purists who may take exception to me calling them "impulse" engines should recall that Matt Jefferies himself designed this ship and, aside from that, the instruction sheet itself makes reference to the nose-firing phaser projector so the Star Trek connection has been well established by now.


Next up I install the hangar bay and doors in the upper hull and run fiber to the landing lights. Then I'll finish up the wiring and seal the hull.

As always, thanks for reading!
 
Last edited:
Re: Leif Ericson Galactic Cruiser

Ya know...I've never really liked this kit. But I'll be darned...you've made it look interesting to me! Awesome Work!

Mike
 
Back
Top