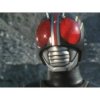
I've been fairly interested in prop making for a while now, and I wanted to try my hand at actually making something that can pass for a film or cosplay prop. So I decided to start with something I was familiar with and would like to have in real life, a kamen rider helmet.

This is kamen rider black, if he rings any subtle bells of nostalgia at the back of your mind, his successor, kamen rider black RX was used in Saban's masked rider in the US.
Since this is my first build, I figured that there were 2 ways that I could go about this
1) well-done, nicely treated paper mache
2) eva foam sprayed with plasti-dip
I wanted to make this as cheap as possible and decided that if all I needed was a form, paper mache was my best bet. I will tackle using eva foam in later iterations of the helmet when get more of a feel of the form and application.
It turns out making paper mache is a long process

This first "cast" was made from the paper mache balloon trick, unfortunately I blew the balloon too big and got a large, wobbly, disproportionate shell that I was all to eager to spray some gesso on. Fortunately, there were things to be learned and the costs of this was only some newspaper and gesso.
Then I tried again, this time with a balloon size matching my head

And what I got was leagues better than my first attempt. I also picked up a tip that using the paper bags from the grocery store as a final outer layer did wonders for its strength and integrity. I cut out the shapes and moved on to the mouth piece

This piece was fairly easy to make with some cardboard. What is special is instead of cutting out straight geometric shapes, I had some thinner, more flexible cardboard that I bent with armature wire to make most of the piece. The concept I was going for is to have a detachable mouth piece, much like what other prop makers incorporated into their helmets. *which was first seen in kamen rider: the first.*
I'm still in the middle of this build and i'll post more of my progress here. Any comments and advice is greatly appreciated.

This is kamen rider black, if he rings any subtle bells of nostalgia at the back of your mind, his successor, kamen rider black RX was used in Saban's masked rider in the US.
Since this is my first build, I figured that there were 2 ways that I could go about this
1) well-done, nicely treated paper mache
2) eva foam sprayed with plasti-dip
I wanted to make this as cheap as possible and decided that if all I needed was a form, paper mache was my best bet. I will tackle using eva foam in later iterations of the helmet when get more of a feel of the form and application.
It turns out making paper mache is a long process

This first "cast" was made from the paper mache balloon trick, unfortunately I blew the balloon too big and got a large, wobbly, disproportionate shell that I was all to eager to spray some gesso on. Fortunately, there were things to be learned and the costs of this was only some newspaper and gesso.
Then I tried again, this time with a balloon size matching my head

And what I got was leagues better than my first attempt. I also picked up a tip that using the paper bags from the grocery store as a final outer layer did wonders for its strength and integrity. I cut out the shapes and moved on to the mouth piece

This piece was fairly easy to make with some cardboard. What is special is instead of cutting out straight geometric shapes, I had some thinner, more flexible cardboard that I bent with armature wire to make most of the piece. The concept I was going for is to have a detachable mouth piece, much like what other prop makers incorporated into their helmets. *which was first seen in kamen rider: the first.*
I'm still in the middle of this build and i'll post more of my progress here. Any comments and advice is greatly appreciated.


