Jabba's Door Droid

Mangamax

New Member
jabba_s_palace_gate02_zps6529aad3.jpg


I've been having a hankering just lately to have a go at another full-size Star Wars character. But who could i do that won't take up a ton of space?
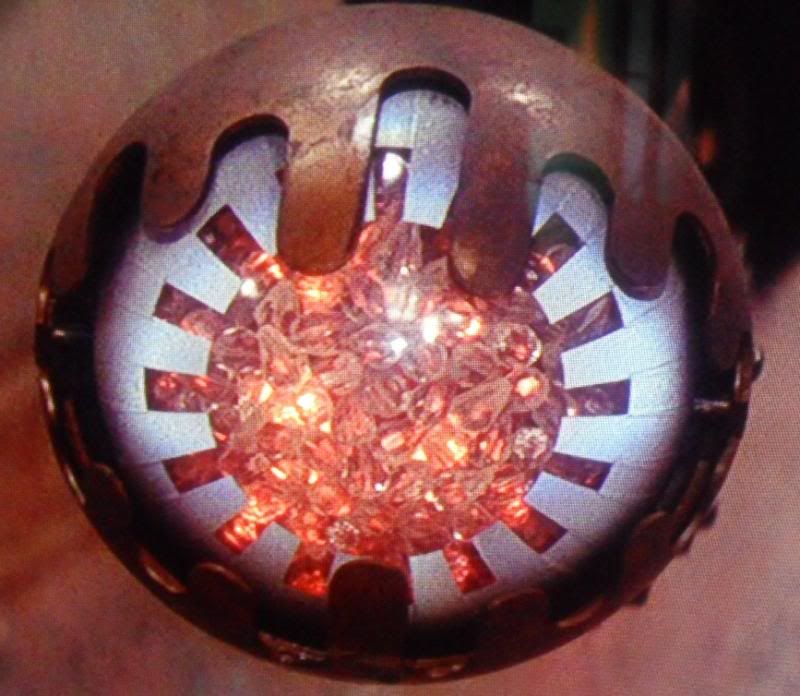
Was watching the opening of "Jedi", got to the bit where the Droid's arrive at Jabba's Palace - and the light bulb pops on the moment that hatch opens and the Door Droid pops out.
"Ahhh" goes i, "I can make one of them. Its just a ball on a stick with some fairy lights"
Have since realised its a bit more than that, but that was the intial thought, along with, if i make it not too long, i could have it as a detachable door ornament, maybe in time for Halloween.
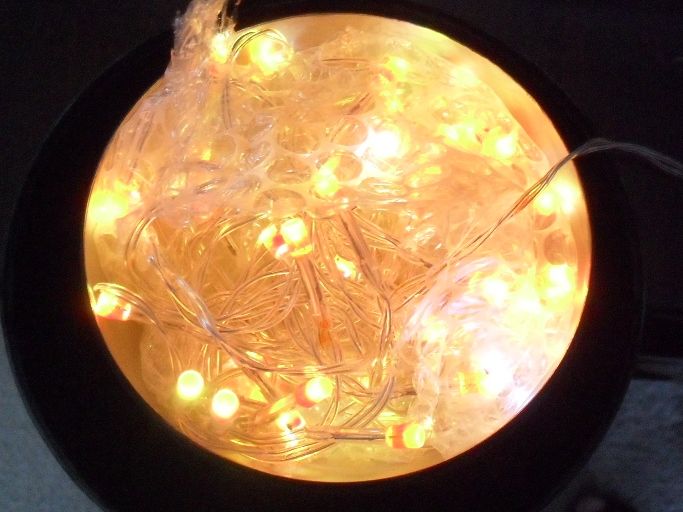
Okay, ball on a stick the. First up, the ball. Well, balls - i needed a large ball with a smaller, clear ball inside it. Eyeballing (sorry) it, and trying to gauge the "eye" next to C3PO, it looked roughly face-sized.
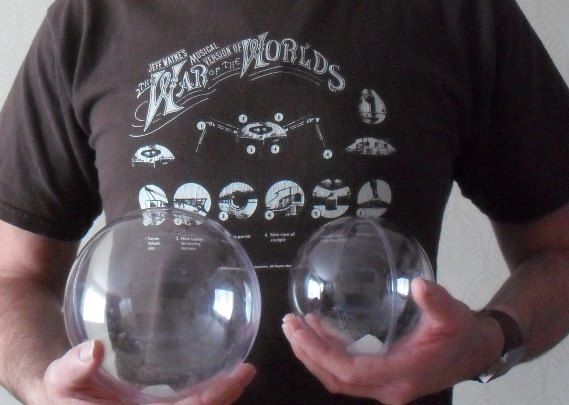
So i looked online and ordered two acrylic balls, 16mm and 12mm diameter, which come as snap togther hemispheres - handy i thought, as there'd be a lot of messing:

1231412_580173968690425_1325283065_n_zpse69c1994.jpg


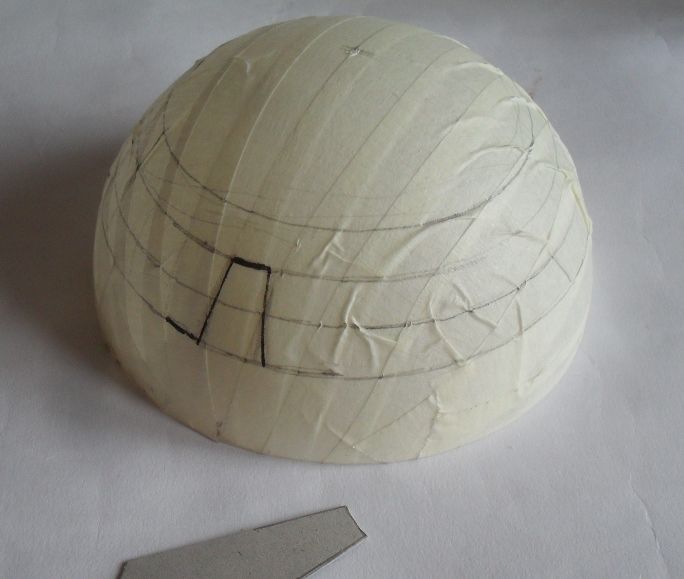
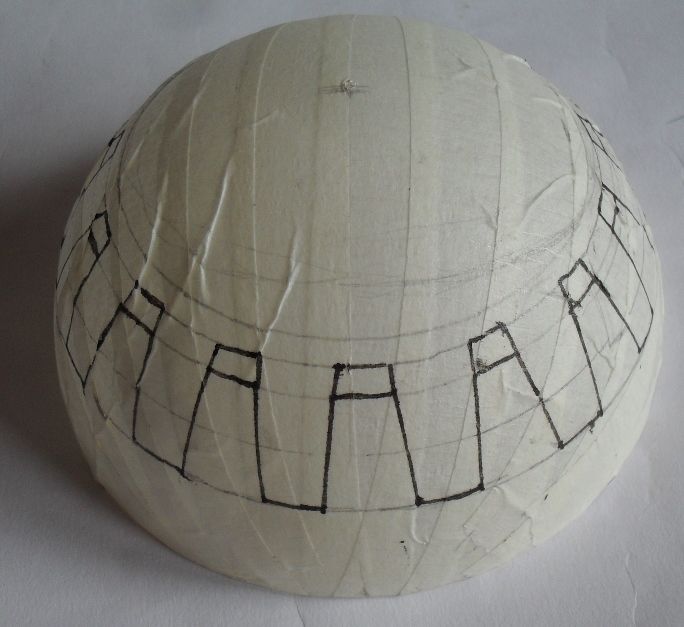
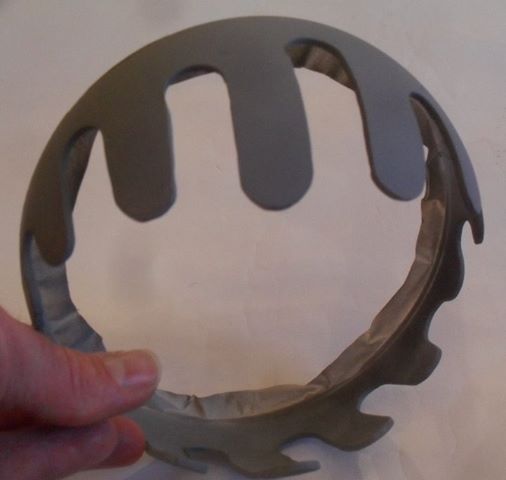
First thing i did was to spray one half of the larger ball in Grey Primer and then draw out where the "eyelids" should go. The it was a case of out with the Dremel and cut and grind and grind and cut, until the shape started to take, er, shape:

524513_582523571788798_407107694_n_zps07d69a94.jpg


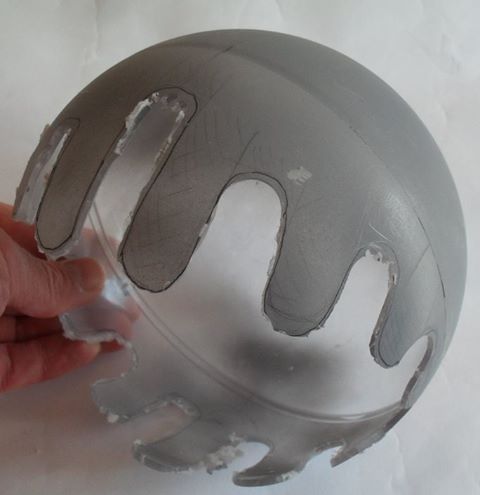
That was a messy affair as the plastic melted into blobs as i did it, but this is where i am with this part at the moment, gradually refining the shapes with Wet & Dry:

1375747_584731044901384_1964169998_n_zpsc1bd42dc.jpg


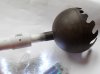
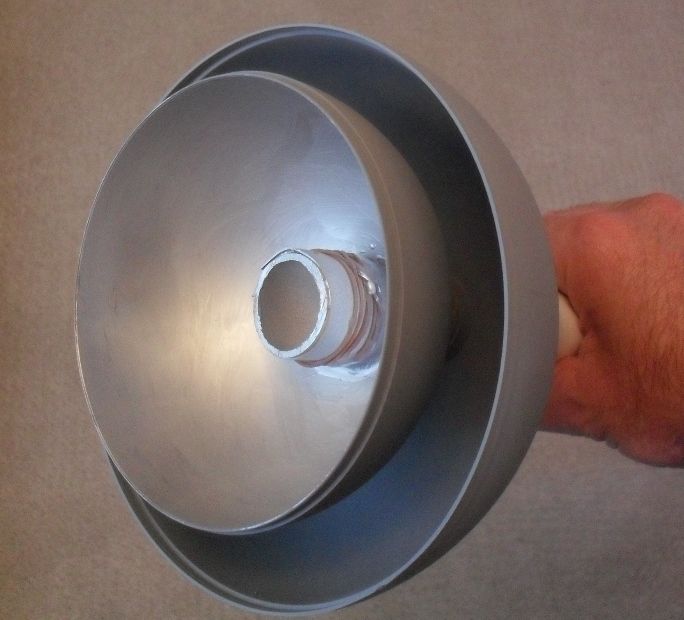
I've also made a start on the back of the "eye" and the "neck". I knew i'd have a problem with the piuping i'd be using as its plumbing pipe and no glue sticks to that at all.
So what i did was: wrap a strip of Plasticard around the end of the pipe and glue it to itself, smear glue along the rear edge of the Plasticard and offer up the rear of the small ball to it, then i assembled both balls and judged just where the small ball should be inside the large ball, marked the pipe where the rear of the large ball was on it, took everything aprt, then put a spacer of Plasticard the right size behind the small ball and glued the rear of the large ball in place, with another strip of Plasticard behind it for added strength.
All of which leaves my with what looks like a complex Dalek plunger:

SDC132932_zpsec646b1e.jpg


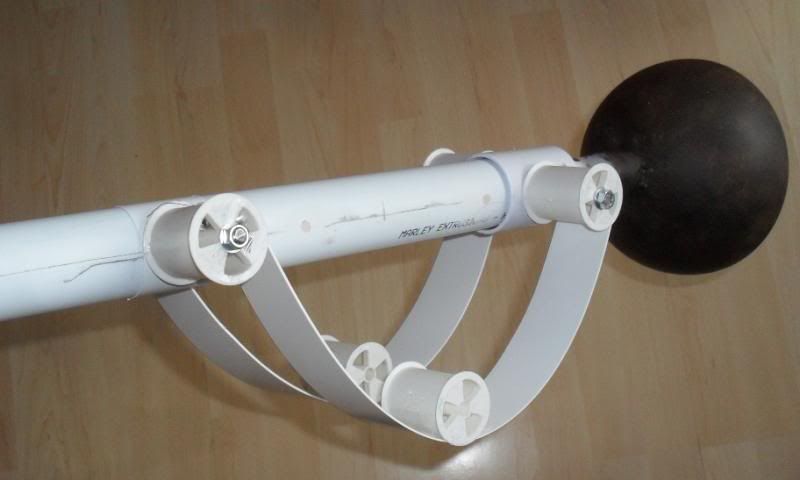
And this is where i am this morning:

SDC132952_zps93dbcd75.jpg


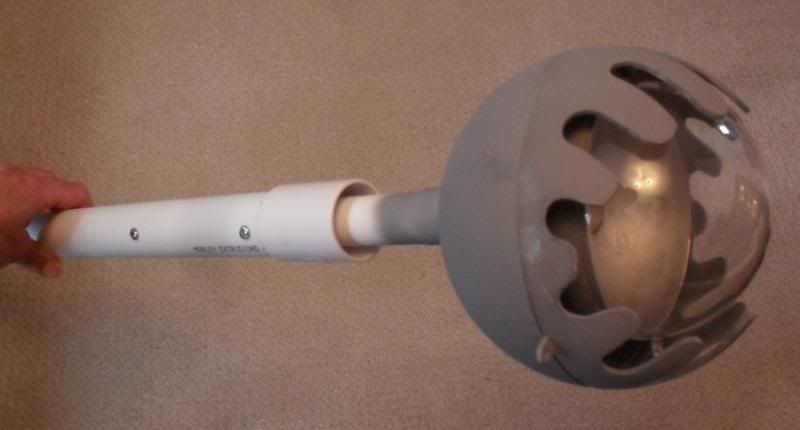
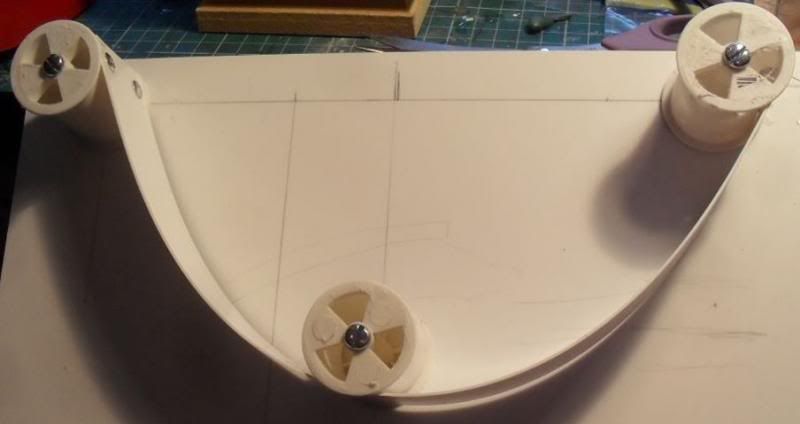
You can see i'm using two sizes of piping as the Droid seems to have a thinner lengthg just before its head. I've bolted the tow toether. Oh, and i've put a plumbing piece at the end of the larger pipe to emulate the original. Next up is to try and work out the strange, almost barbaric-looking side details. And wait for the lights to arrive for the inside.
 
COOL! But be carefull... the next thing will be the door flap, then the housing, then the door, then Jabba's Palace... Looks great!
 
Ta for the kind comments folks (y)
Had another look at the fella on the Blu Ray - and talk about memory cheating: the gubbins that i thought was extra detail on the inner ball just turned out to be part of the hinge, there are no white flashing lights and steady amber one's - just flashing amber one's, and there's no single red light at all - just a single green one up top when it decides to let the Droids in (green is go on Tatooine too i guess).
Anyway, good shots of the eyeball are pretty rubbish on the Net, so i decided to freeze frame the Blu Ray at certain points and take a photo.
And this is one of them.
As well as the amber lights, you can see what was fooling me into thinking there were white one's too - a bunch of stuff in there, i'm guessing to break the light up and make it nice and busy.
At first i thought it was bubble-wrap, but looking closer it almost looks like some sort of jewel affair.
Not going to try and replicate that - to keep it nice and light and cheap, i'll be going the bubble-wrap route.

0000000000000000e_zpsa8e9db8c.jpg


Next up was to decide how to go about replicating the white areas of the "eye".
Looking at that photo i last put up, i think they used another ball and cut the pattern out, painted it white, and stuck it on.
I've not the budget for that, so decided instead to emulate it with paint.
First step, cover the whole clear hemisphere with Masking tape, roughly draw out the size of the circles i'd need, then draw them on using a compass.
Once i'd done that i could roughly draw out one of the prongs and, when happy, transfer it to a template that i could use to draw all around.

SDC133042_zps3bdbdd4b.jpg


Once i'd gone all the way round marking things out, i sat back, looked at it. and the open area is too small and the prongs not short enough.
You can see here where i originally had the prongs up to and where i've elongated them to now.

SDC133062_zps4af74b07.jpg
 
Pretty sure it was bubble wrap inside the eye...

Kinda like they did with Zuckuss's eyes.
 
You could always fill the interior with cheap plastic jewellery and fairy lights?

Looking great!

"E-je-dakka-duukha - GOODNESS GRACIOUS ME!" :)
 
Bubblewrap will be too uniform. That looks like one or two layers of dirt cheap teardrop crystal beads. Any bead shop or craft place will have those. They're a staple of kids bead kits. Plastic ones would still be super light.

Edit: and yeah, that's looking great. Turn your front door into a steel plate bulkhead and greet people with it. :lol
 
I say go with the teardrop jewelry too, It gives such an interesting effect and it wouldn't much more. Great progress so far looking really good!
 
Cheers guys - have taken your advice and ordered the jewels.
Bit more progress with the Door Droid.
At the bottom of the pic you can see the lights i've got for it.
They're flashing one's but bright white, so i'll have to paint each one Clear Orange. I'll also have to extend the lead as it has to run down the full length of the neck.
And you can see i've put the head all togther bar the white section and painted it.
What i like about a lot of Jabbas Palace fixtures is how they look almost medievel in their design and hard, brutal colour schemes. And its the case here, which i've tried to copy by squigging out some Raw Umber, Burnt Umber, Black, Yellow Ochre and a couple of sandy colours out onto a tile, then mixing them randonmly and just splogging it on, keeping it nice and random, moving it around until i was happy with the look.

SDC133332_zpsb8abfd4c.jpg
 

Attachments

  • SDC13333 (2).jpg
    SDC13333 (2).jpg
    298.6 KB · Views: 146
Last edited:
Great idea! Very cool build!
maybe add a recording of it to play through small speaker?
Keep up the good work!
 
I'm indebted to Lurksmith on the RPG and TrooperMatthew on the UK Garrison for pointing out that its not just a case of bubblewrap inside the Door Droids eyes, but more a case of teardrop-shaped plastic beads.
I've ordered and got those but before i can do anything with intalling the lights, i need to extend the lead right down the neck to the other end.
I need a connecting block to do that and, before i can get to the town that has them, i've roughly balled up some bubblewrap (which i'll be using at the rear of the ball) and clumsily plonked in the orange stained light to have an idea of how things look:

SDC133512_zps21dc2773.jpg
 

Attachments

  • SDC133512_zps21dc2773.jpg
    SDC133512_zps21dc2773.jpg
    344.3 KB · Views: 113
looks awesome man, great job so far, I will keep on eye on this thread as this is something I've considered building myself :)
 
Next up on the Door Droid is the strange, almost medievial side parts. They're quite hard to make out but seem to be some sort of chain/gearing affair, with spikes all over:

00000000000000e2_zps05db6edb.jpg


The start of this section are the anchoring parts on the "neck" and the one that hangs down, and i'm using cotton reels for them.
I measured the distance between where they'd be going and drilled two holes that distance apart in some Plasticard and bolted two reels down.
I then eyeballed where the lower one in the middle would be and again bolted another reel there.
And you can i've rivetted a strip of Plasticard between the two upper one's, looped around the bottom one.
I think the original is a definete chain affair, but i'm not too bothered about using a solid strip of plastic as, with all the detail on, i don't think you'll see too much of it anyway.

1394259_596201523754336_751752386_n_zps408722e5.jpg


And here the both of them, taken off the Plasticard sheets and bolted in place, with the lower reels Hot Glued on:

SDC133692_zpsbd838f45.jpg


Next up is to source suitable "spikey bits" and some sort of flat, rectangular shapes that i think make up the actual gearing teeth of the device.
 
Back
Top