J326's Ironman Build: adding to the RPF's Iron man army

J326

Well-Known Member
Hello RPF! Long time viewer first time register. I have had some experience with costuming and Iron Man will be my 3rd costume to make. The first 2 suits ive done
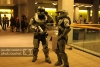
The first being my attempt at noble 6 from the Halo series, an early costume that I no longer have.
74560_482827172602_1803672_n.jpg

and the second a foam version of the reach suit
IMAG0249.jpg


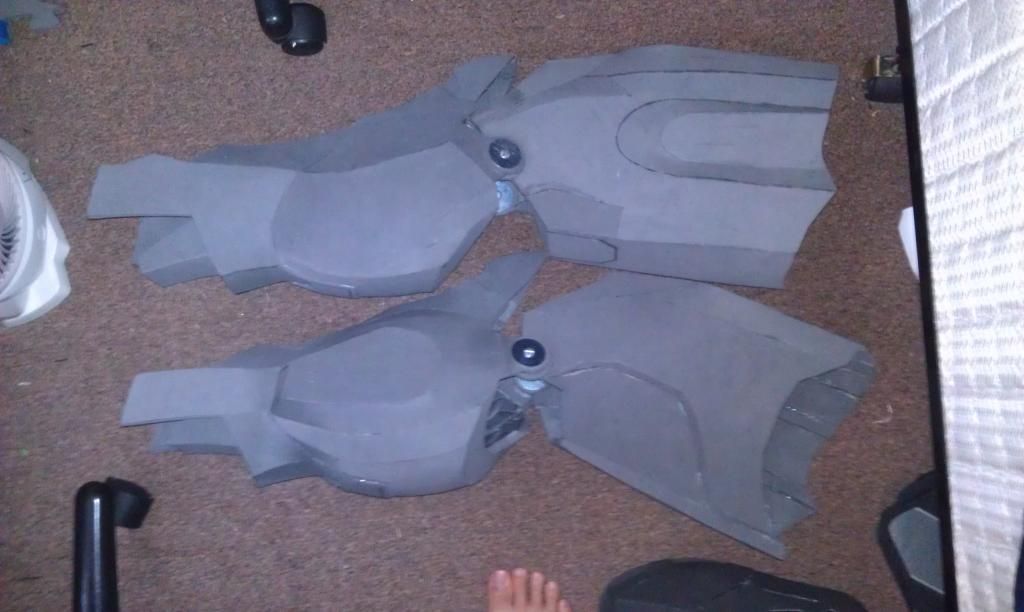
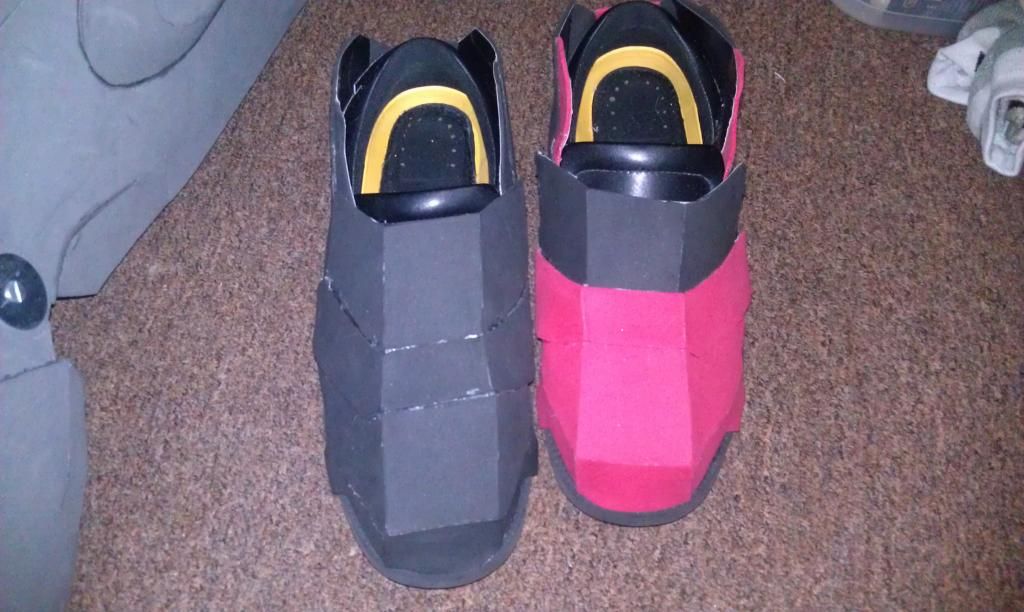
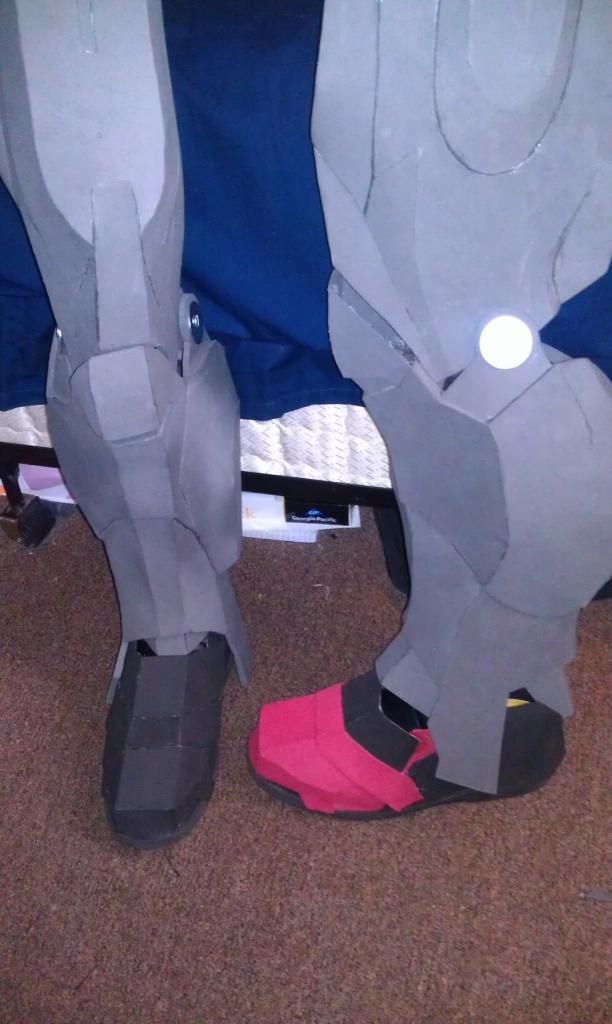
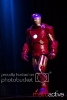
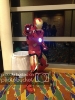
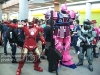
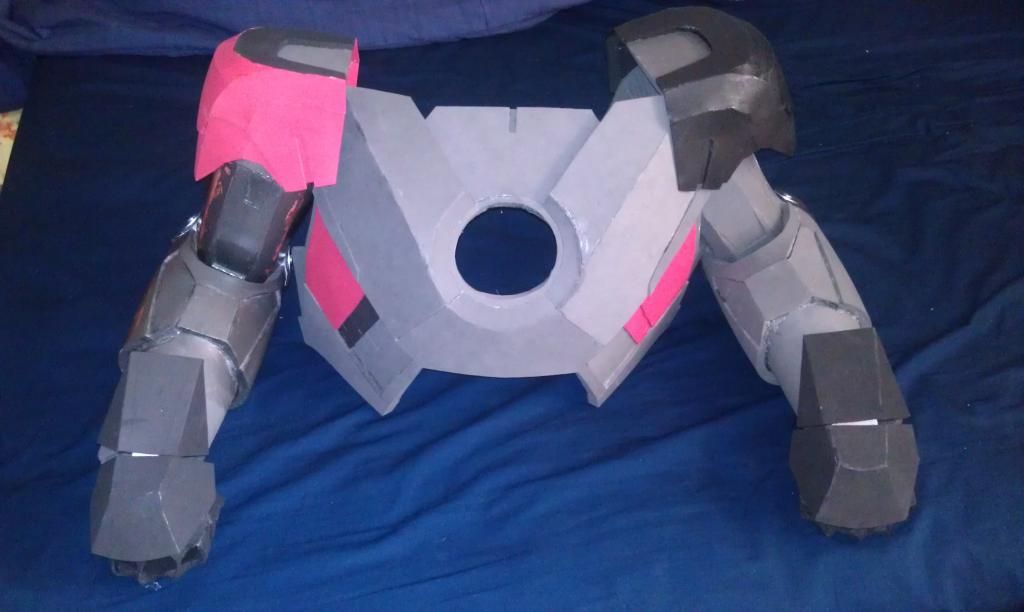
So like all the people that build iron man costumes, i love the character and the challenge of this suit, so here's my foam attempt at it. I am going to Fanime 2013 in San Jose so that will be the deadline for a suit that can make it out the door. I decided to make a mish mash of pieces that I liked and think are easier and faster to make/better looking. Thanks to all the RPFers that made and unfolded the files.

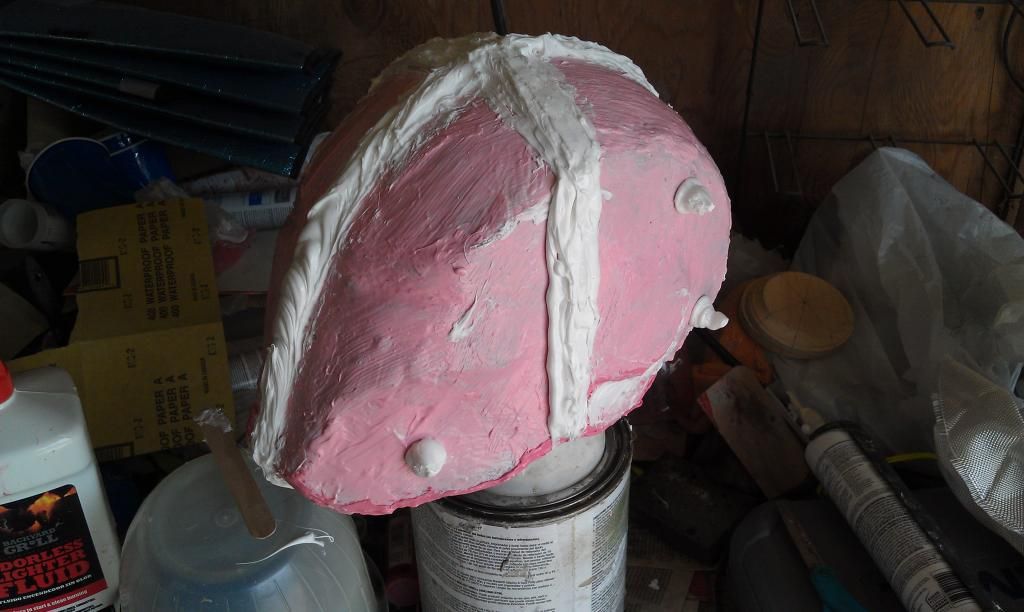
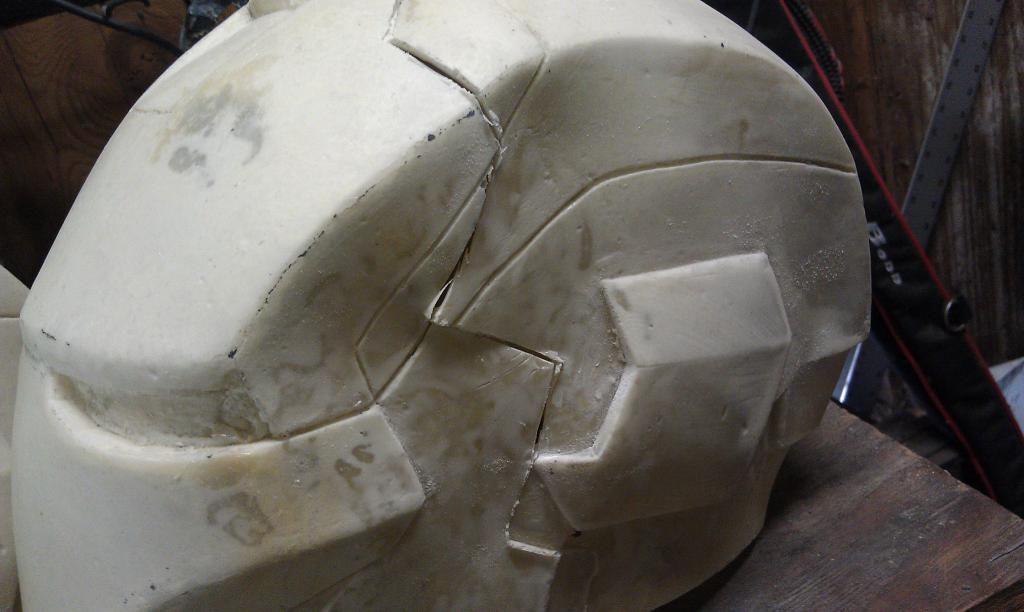
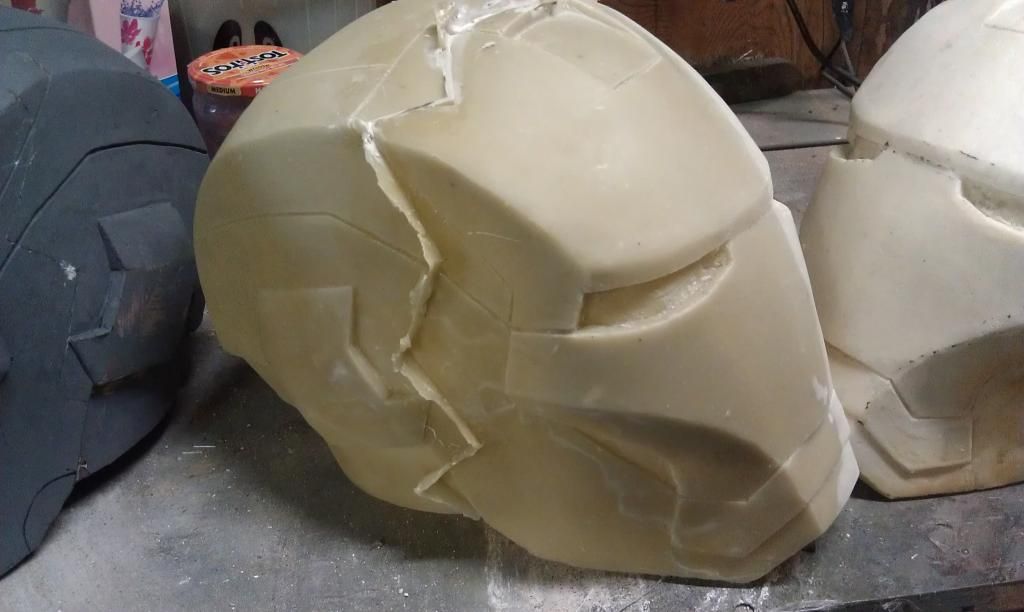
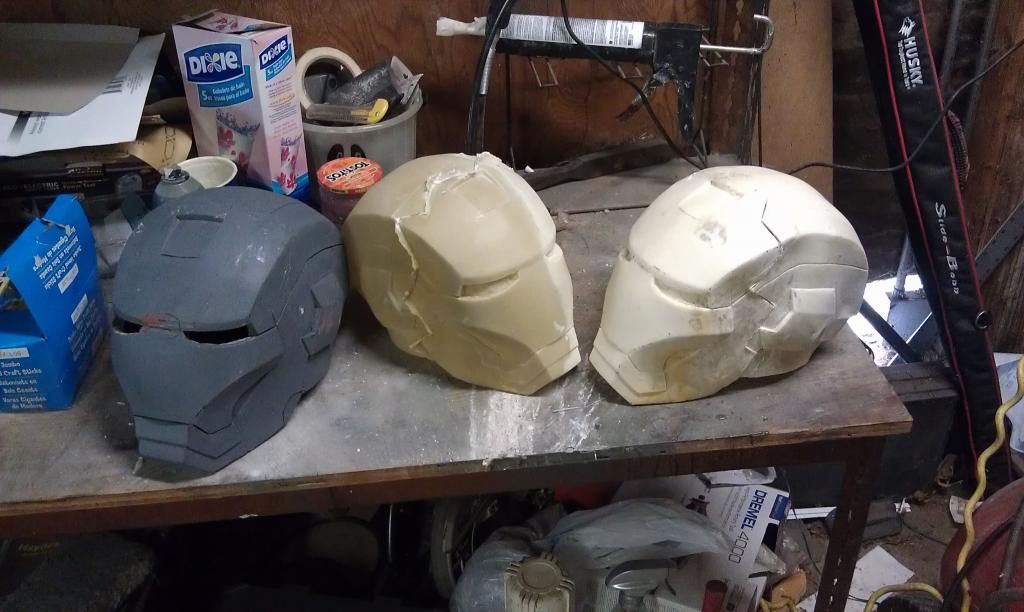
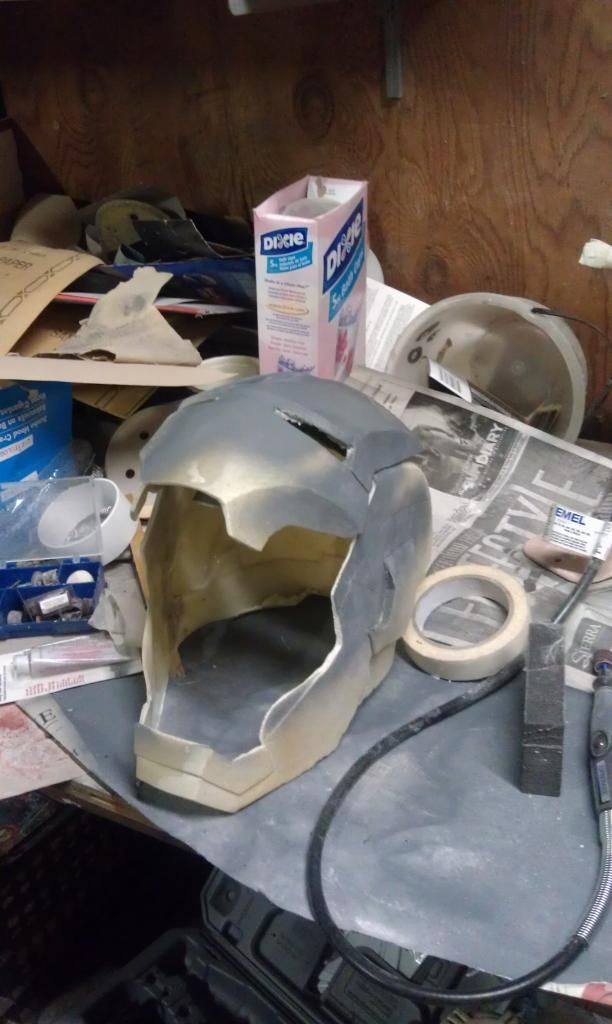
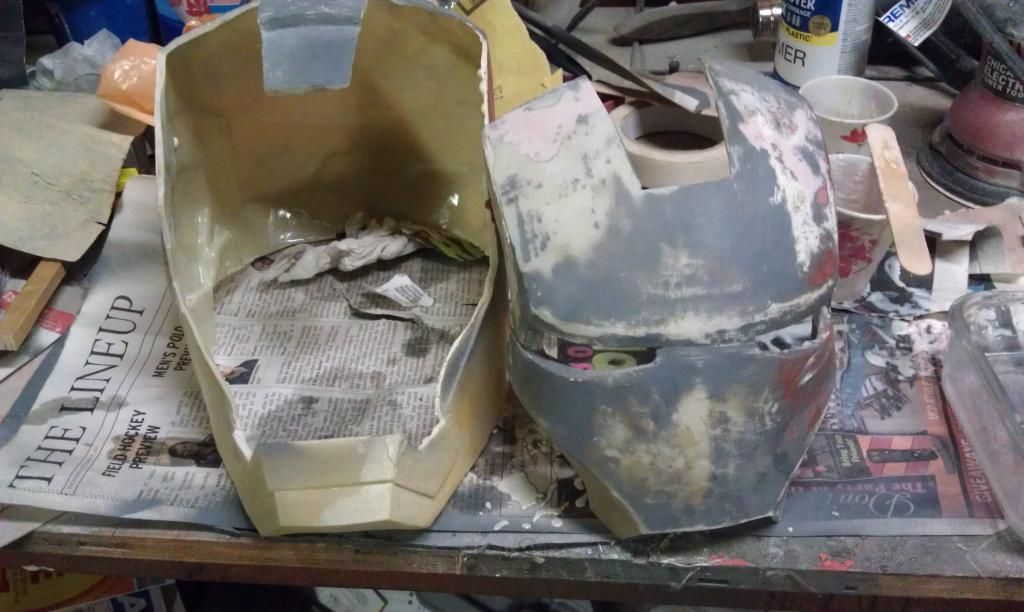
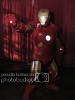
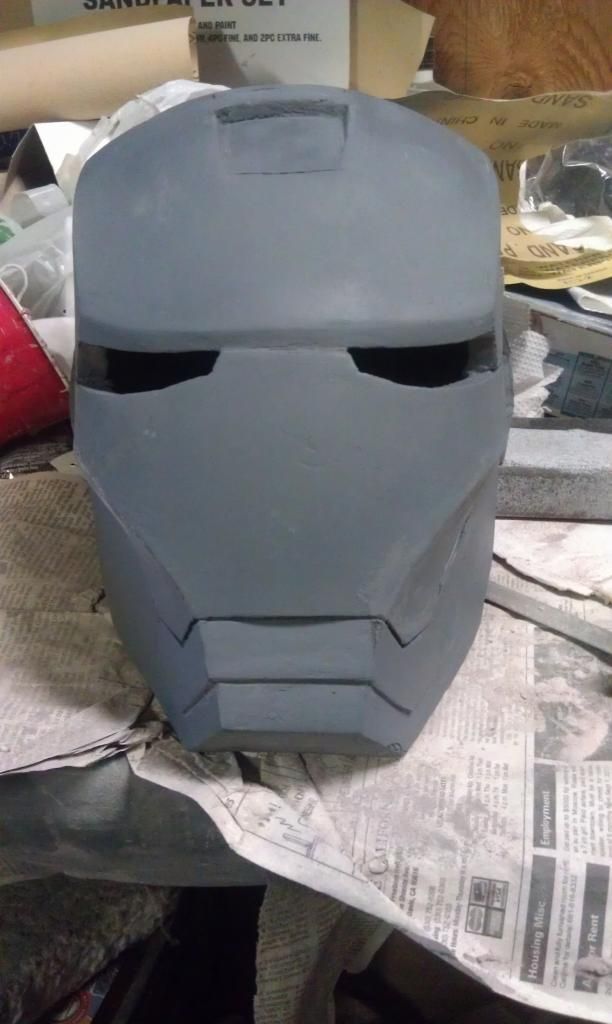
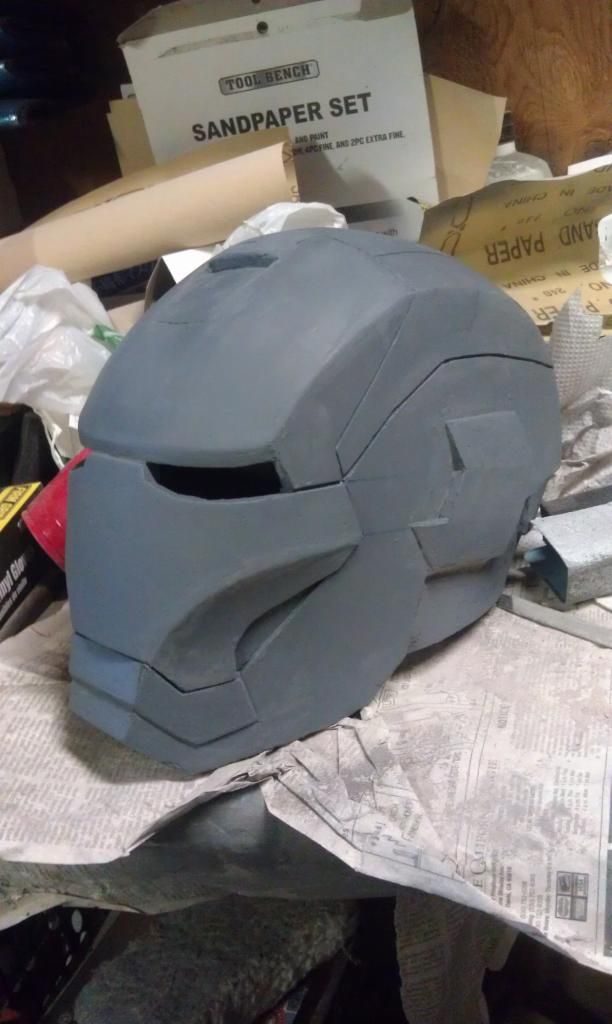
originally this was a mark 6 helmet but I was having trouble with getting perfectly rounded ears and clean inside gaps since I am still new to dremeling stuff. I ended up cutting them out filled in the gap and made mark 47's ears and stuck them on and bondoed the area. (if i ever end up selling casts of these helmets least I'll know if any1 recasts them haha)
IMAG0102_zps8adfdecb.jpg

IMAG0101_zps87ce143c.jpg


IMAG0105_zpsa958ddf0.jpg

IMAG0104_zps90a7aa70.jpg


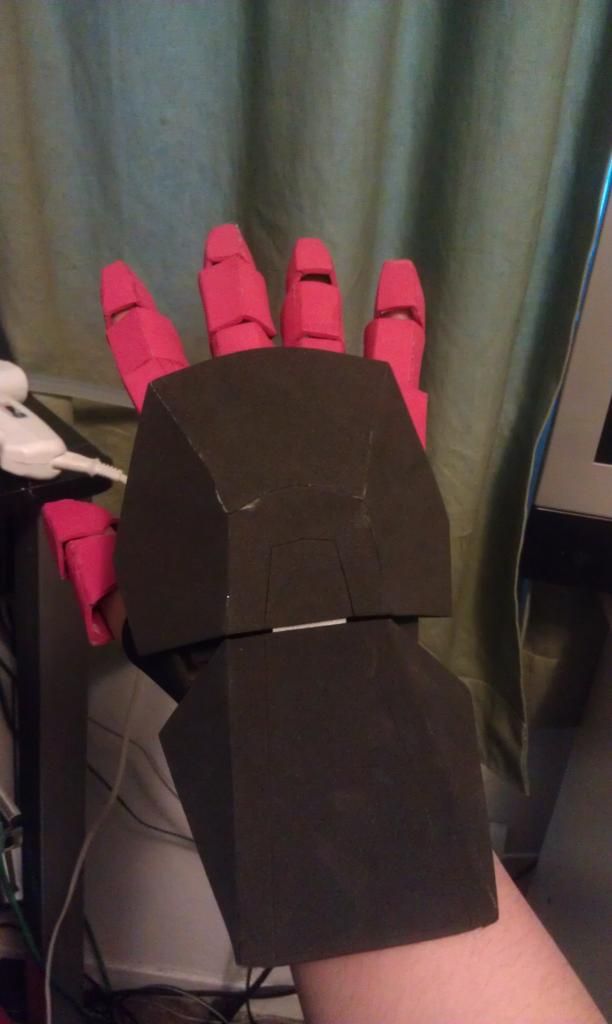
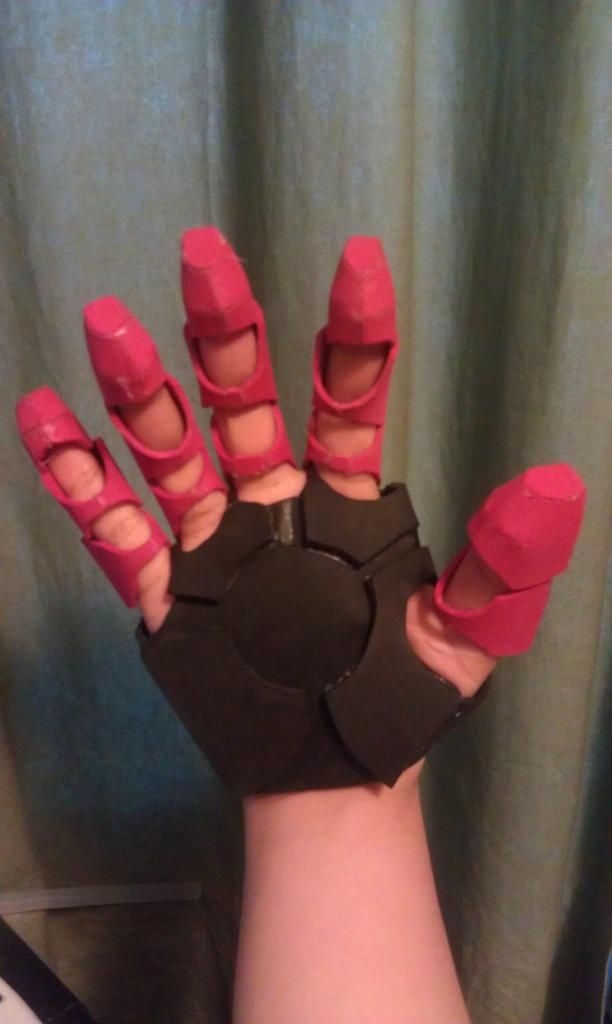
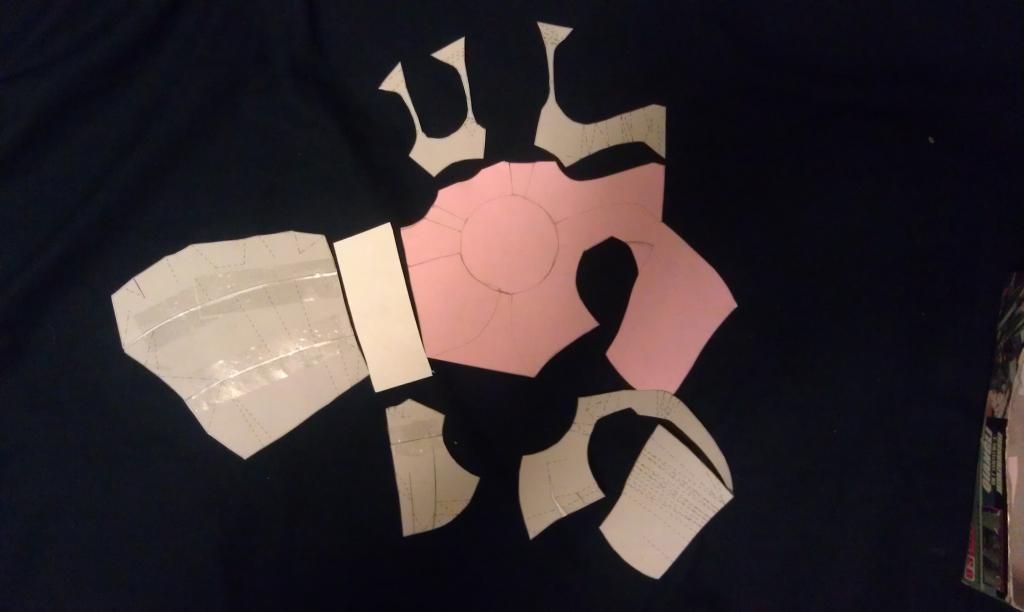
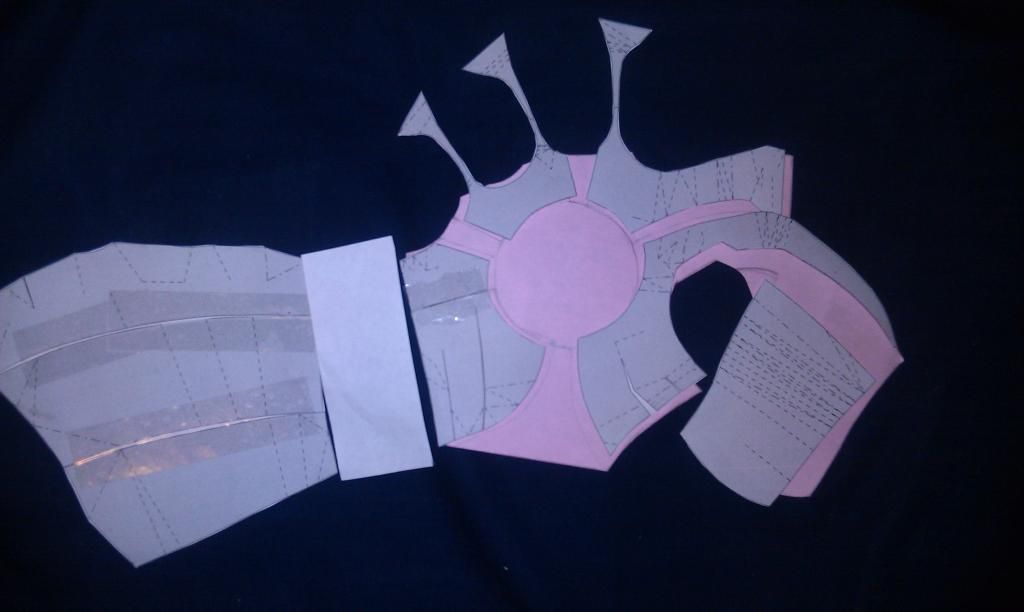
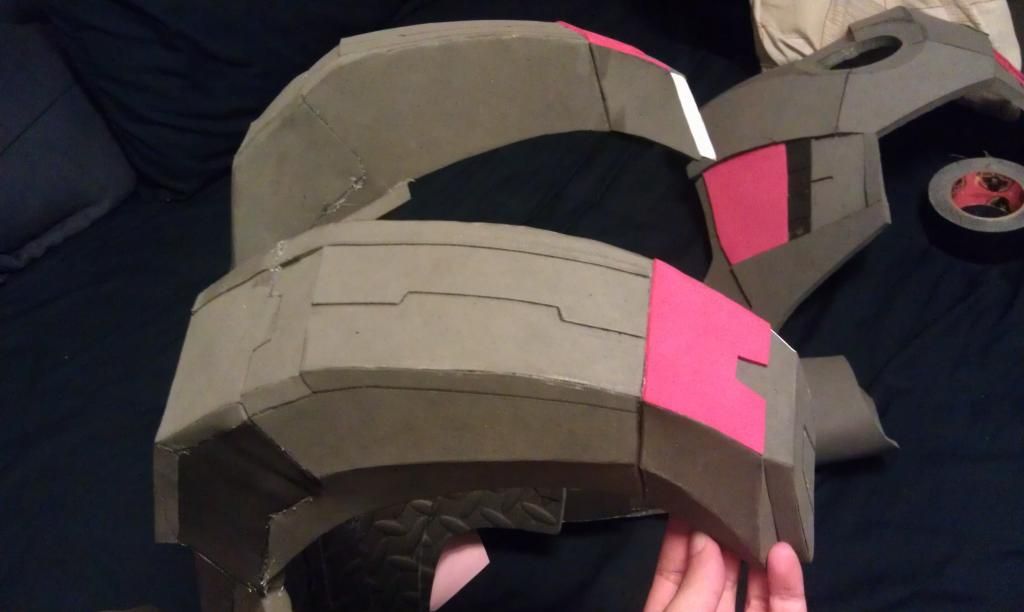
The hand files needed a bit of thinking on my part. I took Zabana's Hand file and moded it a bit for foam ease. i then took a bunch of pieces and stitched them together and then retraced them as one single piece i could use as a base for thin craft foam, that's the pink thing in the pictures below. the grey pep pieces became the raised pieces using thicker craft foam.

IMAG0111_zpse5ae6f7b.jpg

IMAG0113_zps0c9c8490.jpg


Here's an arm the pink stuff is bondo glazing putty, im experimenting to see if it fills in gaps and when washed over with a coat of mod podge will still be flexible.
IMAG0107_zpsf75e8453.jpg

IMAG0114_zpsc4182232.jpg


IMAG0122_zps1757ecda.jpg

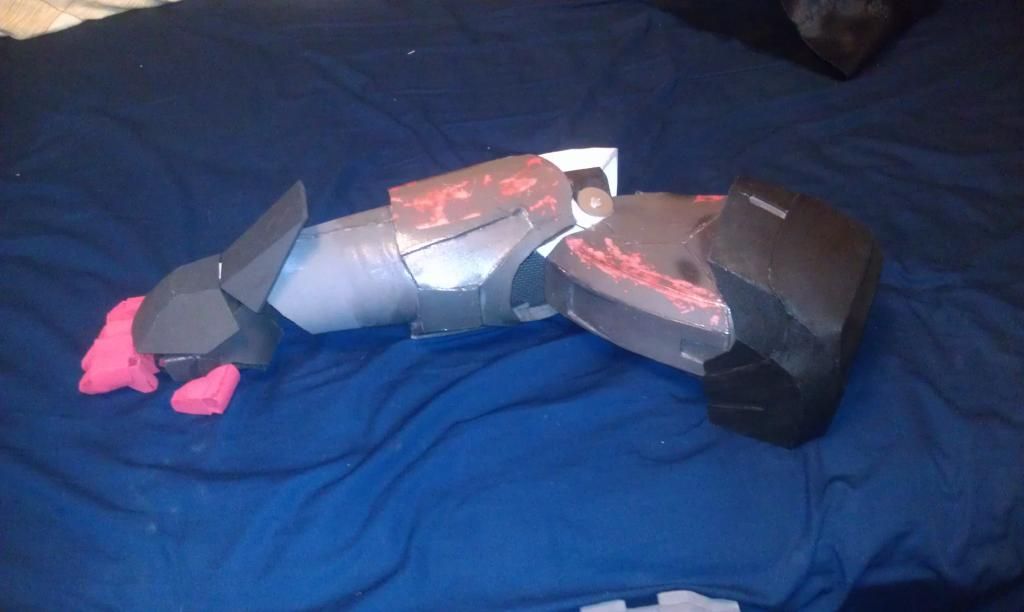
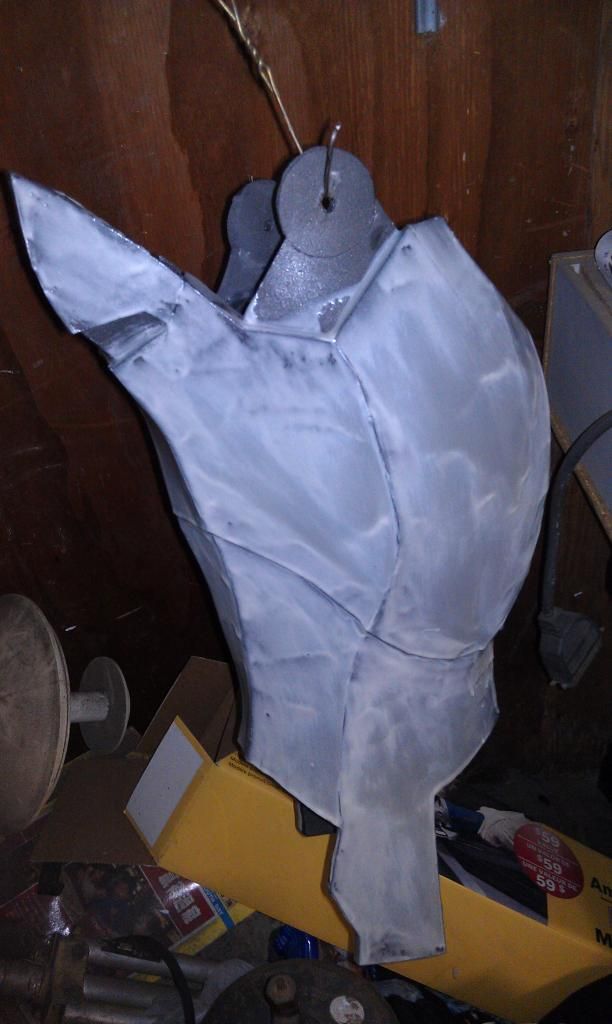
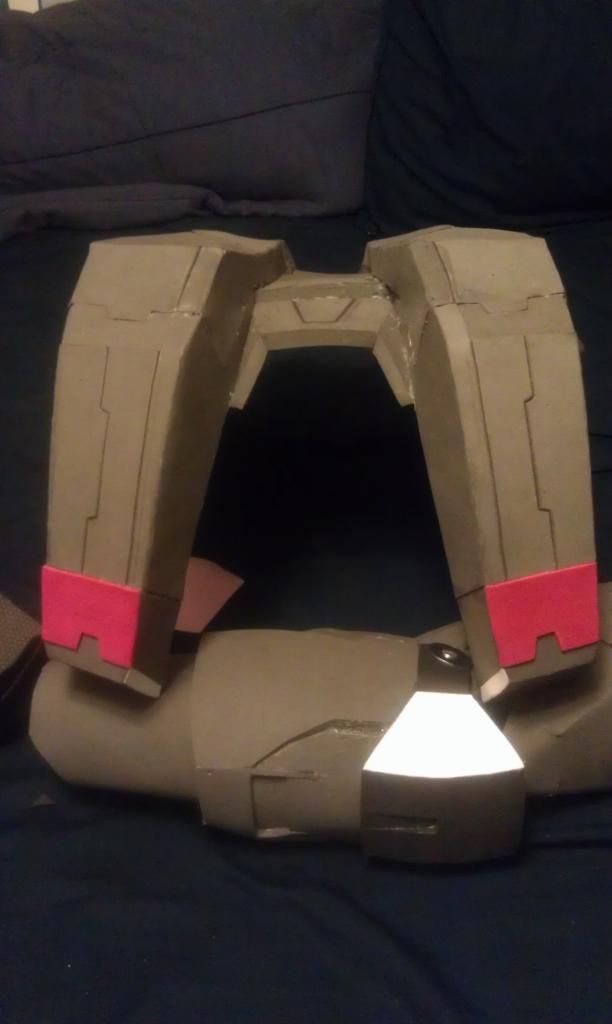
using the tip of the hot glue gun i loved how i got such clean lines to pop out on the shoulders
IMAG0123_zps6c18c1a1.jpg

IMAG0126_zpsf383abb5.jpg

IMAG0127_zpsa72db075.jpg

IMAG0128_zpsfc07c937.jpg
 
Thighs got done
IMAG0133_zps4539a554.jpg

IMAG0132_zps84b75fd3.jpg

For shoes I took the mark 42 boot from jackieisrockin file and took a cheap thrift store pair of shoes and glued foam to it.
IMAG0134_zpsa8bbb793.jpg

IMAG0137_zpse3517a46.jpg
 
Looks good
I'm working on the same file I only got the chest done so far
You back looks awesome hope mine turns out that good but this is my first foam so we will see
 
Looks good
I'm working on the same file I only got the chest done so far
You back looks awesome hope mine turns out that good but this is my first foam so we will see

yeah the back was a bit of a head scratcher because I intended to not include those flaps and have the thrusters stick out from the file but the back looked oddly flat so I put those flaps in to give it a better look, sad that I wont have thrusters sticking out cuz the flaps had to be glued down =/
 
Nice build so far!! What did you mean when you said you used the tip of the gluegun to get the back pieces so neat? Did you melt the foam with the gluegun?
 
Nice build so far!! What did you mean when you said you used the tip of the gluegun to get the back pieces so neat? Did you melt the foam with the gluegun?
i first cut the lines out with a blade and then ran the hot tip of the glue gun over the lines and it kinda heated the edges of those foam lines to curve a bit inward to bring out that line. Hope that helps.

Anyways I didnt like bondoing over the foam helmet too much because every time i create a layer and sand it down the layer is either too brittle/cracks or the sanding takes it back down to the foam layer, this makes it hard to get detailing done on the helmet so I decided to try mold making for the first time and decided to go cheap and make a silicone caulk mold, 5 tubes later and i got this:
IMAG0140_zpsbfe15b54.jpg


unforunately i screwed up on how i cut out the jacket mold and got very sloppy with the shell that the cast was warped and damaged a bit.

IMAG0142_zps30bab3c3.jpg

IMAG0145_zps6a877a18.jpg

since i dont wanna take the time to remake the mold i recast another one and will fix that one best i can. this is the second cast
IMAG0144_zps0217bc93.jpg

Here are the copies and the original
IMAG0143_zpsbdd11966.jpg

so now I will repair the one in the middle and get it ready for a final mold since my friend game me his extra mold making supplies for my birthday =D!
definitely learned from my mistakes for the next one so hope the next mold is better.
 
Cut out the Face plate and did some bondo and sanding work
IMAG0146_zps80cfa976.jpg

IMAG0147_zps9e26f036.jpg


I decided to also try xrobot's painting plastic onto the foam method and see how that'll turn out for me
IMAG0148_zps584f5c55.jpg
 
may i ask what "xrobot's painting plastic onto the foam method" is? link to a video or a post that explains it. i'm new here, so if there are tutorials that i missed please tell me.
 
My 65D just arrived yesterday--let us know your experience!
I don't have 65D because its some plastic my friend gave me leftover from his projects in prototyping but its working out decently so far. What i don't like so far with the plastic thing is since it self levels it kind of sets as its being runny so you get the drip patterns on the piece and that becomes kind of a sanding nightmare, and the plastic i have is pretty tough to sand as well. I decided to use some bondo/resin mixture after i coated the plastic to level it out since its not as runny and i can control the consistency, plus it has a longer pot life for me.

Now I have a week till BigWow in which im hoping to attend on sunday in this suit, but if not I got a spartan back up, and will for sure get this suit done by Fanime in San Jose.

here are some update pictures


Im only going to partially coat the backpiece and only the fingertips of the gloves to give them more strength and reduce the amount I have to sand, The abs are going to be plasti dip ->mod podge -> primer -> Paint because I don't have time to sand that piece either plus it looks smooth and level enough on its own that it doesn't require as much detail work.
 
Picture update! I am in full on panic mode since fanime is on friday! so here's to rushing what i got left!


got 1 day to figure out how to motorize and light the helmet @_@!
 
Well Fanime 2013 in San Jose California has come and gone, and i just barely managed to get my suit done, didn't have time to motorize anything but now that it's over I will continue to refine my suit. here are pictures and video of my walk on. compliments to the people that took the pictures! =)
IMG_1916-M_zps6a992b92.jpg

IMG_1909-L_zps70381cfc.jpg

so far this is one of my favorite shots taken
IMG_1900-L_zps8e84915e.jpg

photo2_zpsff37eacf.jpg

photo1_zps37e7bcfc.jpg


here are some fun shots from fanime:
IMG_1019_zps2d004a44.jpg

armor_up_by_moon_phantom-d66zghe_zpsc4b11dfa.jpg

ef1ff41a862f44838865d6d9355c1dc1_zps736d574d.jpg

2013-05-25-14_36_09_zps9d9ae115.jpg
 

Attachments

  • IMG_1916-M_zps6a992b92.jpg
    IMG_1916-M_zps6a992b92.jpg
    72.2 KB · Views: 93
  • IMG_1916-M_zps6a992b92.jpg
    IMG_1916-M_zps6a992b92.jpg
    72.2 KB · Views: 85
  • IMG_1916-M_zps6a992b92.jpg
    IMG_1916-M_zps6a992b92.jpg
    72.2 KB · Views: 82
  • IMG_1909-L_zps70381cfc.jpg
    IMG_1909-L_zps70381cfc.jpg
    108.9 KB · Views: 87
  • IMG_1909-L_zps70381cfc.jpg
    IMG_1909-L_zps70381cfc.jpg
    108.9 KB · Views: 82
  • IMG_1909-L_zps70381cfc.jpg
    IMG_1909-L_zps70381cfc.jpg
    108.9 KB · Views: 101
  • IMG_1900-L_zps8e84915e.jpg
    IMG_1900-L_zps8e84915e.jpg
    94.3 KB · Views: 91
  • IMG_1900-L_zps8e84915e.jpg
    IMG_1900-L_zps8e84915e.jpg
    94.3 KB · Views: 83
  • IMG_1900-L_zps8e84915e.jpg
    IMG_1900-L_zps8e84915e.jpg
    94.3 KB · Views: 93
  • photo2_zpsff37eacf.jpg
    photo2_zpsff37eacf.jpg
    341.3 KB · Views: 88
  • photo2_zpsff37eacf.jpg
    photo2_zpsff37eacf.jpg
    341.3 KB · Views: 92
  • photo2_zpsff37eacf.jpg
    photo2_zpsff37eacf.jpg
    341.3 KB · Views: 90
  • photo1_zps37e7bcfc.jpg
    photo1_zps37e7bcfc.jpg
    332.9 KB · Views: 84
  • photo1_zps37e7bcfc.jpg
    photo1_zps37e7bcfc.jpg
    332.9 KB · Views: 90
  • photo1_zps37e7bcfc.jpg
    photo1_zps37e7bcfc.jpg
    332.9 KB · Views: 89
  • IMG_1019_zps2d004a44.jpg
    IMG_1019_zps2d004a44.jpg
    267.6 KB · Views: 84
  • IMG_1019_zps2d004a44.jpg
    IMG_1019_zps2d004a44.jpg
    267.6 KB · Views: 89
  • IMG_1019_zps2d004a44.jpg
    IMG_1019_zps2d004a44.jpg
    267.6 KB · Views: 84
  • armor_up_by_moon_phantom-d66zghe_zpsc4b11dfa.jpg
    armor_up_by_moon_phantom-d66zghe_zpsc4b11dfa.jpg
    498 KB · Views: 88
  • armor_up_by_moon_phantom-d66zghe_zpsc4b11dfa.jpg
    armor_up_by_moon_phantom-d66zghe_zpsc4b11dfa.jpg
    498 KB · Views: 93
  • armor_up_by_moon_phantom-d66zghe_zpsc4b11dfa.jpg
    armor_up_by_moon_phantom-d66zghe_zpsc4b11dfa.jpg
    498 KB · Views: 89
  • ef1ff41a862f44838865d6d9355c1dc1_zps736d574d.jpg
    ef1ff41a862f44838865d6d9355c1dc1_zps736d574d.jpg
    158.8 KB · Views: 85
  • ef1ff41a862f44838865d6d9355c1dc1_zps736d574d.jpg
    ef1ff41a862f44838865d6d9355c1dc1_zps736d574d.jpg
    158.8 KB · Views: 94
  • ef1ff41a862f44838865d6d9355c1dc1_zps736d574d.jpg
    ef1ff41a862f44838865d6d9355c1dc1_zps736d574d.jpg
    158.8 KB · Views: 87
  • 2013-05-25-14_36_09_zps9d9ae115.jpg
    2013-05-25-14_36_09_zps9d9ae115.jpg
    319.6 KB · Views: 90
  • 2013-05-25-14_36_09_zps9d9ae115.jpg
    2013-05-25-14_36_09_zps9d9ae115.jpg
    319.6 KB · Views: 91
  • 2013-05-25-14_36_09_zps9d9ae115.jpg
    2013-05-25-14_36_09_zps9d9ae115.jpg
    319.6 KB · Views: 89
Last edited by a moderator:
Update: So I got an iron man helmet cast a couple months back and have been slowly working on it here and there. It's a mark 3 helmet but either way It's my first time working with a proper raw cast and it's been pretty interesting.


so I learned the hard way that Lacquer painting means no other paint can really stick to it so i ended up re sanding that down to reprimer and I tried to airbrush a gold on it but I've given up doing that until I get a better airbrush to play around with. So I just went back to spray cans and I like this gold a lot better than the gold I used on my first helmet! It could be just the lighting but it's still an improvement over the older shade.
 
So I have a question to the Iron Man builders out there with a Helmet cast. What grade of earth magnets do you use to hold the back plate to the helmet? N35/N45 higher? I want something thats about 5mm across and strong enough that it wont be knocked loose as i turn my head and it hits the neck piece. Also how do you glue or attach the magnets if heat demagnetizes them so hot glue is out.
 
Fanime 2014 is a month away so I'm starting to feel the pressure to get this done!

Painted the jaw piece


The back plate is being held by a bunch of 5x5x2 mm Neodymium N40 grades probably better idea to have gotten bigger blocks but i needed small ones for the places that connect to the jaw part. I put a bunch of them together and attached them to some thick steel wire then epoxy puttied that whole thing down. Just wanted to be thorough and have it stuck down and not come out on me. I put magnets on both the back piece that comes out and the helmet itself. When attached the piece will not come out if i pull directly from the back plate but it comes out nicely if i pull from the small magnets connecting it to the back of the jaw.


Took me a while to figure out the hinges for my own helmet. The resources on this forum are great for getting you the design idea but still requires some thinking to incorporate into your own helmet.


Used steel wire to go from the hinge to the jaw piece so it can drop as the face plate goes up


This thread is more than 10 years old.

Your message may be considered spam for the following reasons:

  1. This thread hasn't been active in some time. A new post in this thread might not contribute constructively to this discussion after so long.
If you wish to reply despite these issues, check the box below before replying.
Be aware that malicious compliance may result in more severe penalties.
Back
Top