MrPumpernickel
New Member
I recently found myself in posession of a Graflex large format camera, well by found myself I mean I bought one from eBay to do tintype photography, but that's another story. I think quite a few of you, especially the Star Wars fanatics among you, are familiar with the Graflex cameras since the flash handle is what Anakin's lightsaber was made from. Anyhow, I digress.
I needed a way to get it with me on a flight to Britain and finally back home to Sweden. As I didn't just want to shove it into my checking luggage, nor just throw it into my backpack for the carryon, I decided to build a proper wooden case for it.
Unfortunately I am absolutely horrible at taking in progress shots. Though a fair amount of doodling and 3d modeling (to make sure everything would fit properly) was done before reaching the finished product. Maybe it's not as much of a prop as it is a usable everyday carry.
Since I am somewhat of a Discworld fan, and since I wanted to do more with the box than just build it, so I adorned it with a sprinkling of Terry Pratchett's Discworld universe through custom made stickers and etched brass.
Before I go on to the pictures I want to thank Adam Savage of tested.com for his great video where he made a carry case for his replica Bladerunner pistol: One Day Builds: Adam Savage Makes Something Wonderful from Scratch - YouTube , as well as a video I can't remember now about how to etch brass using glossy inkjet paper and ferric chloride. Invaluable information!
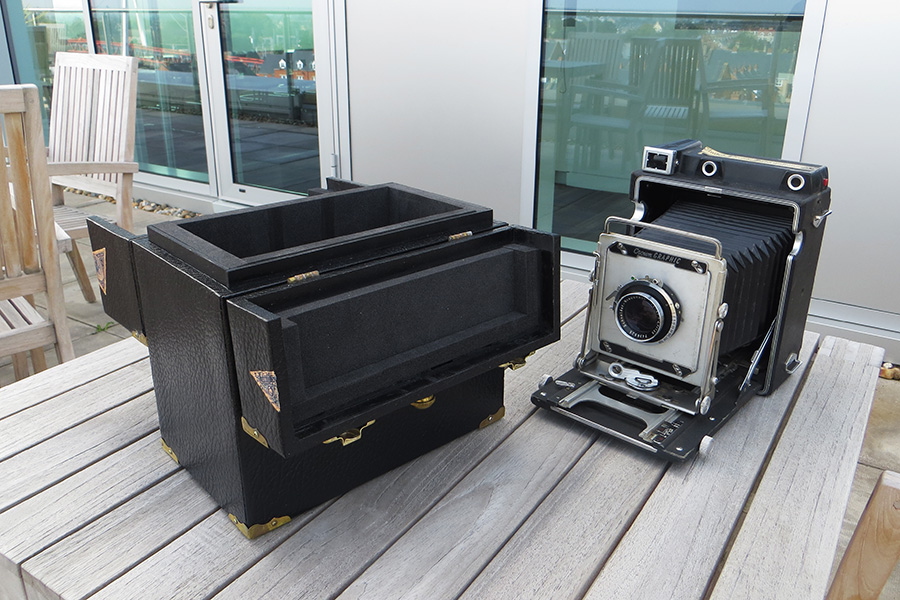
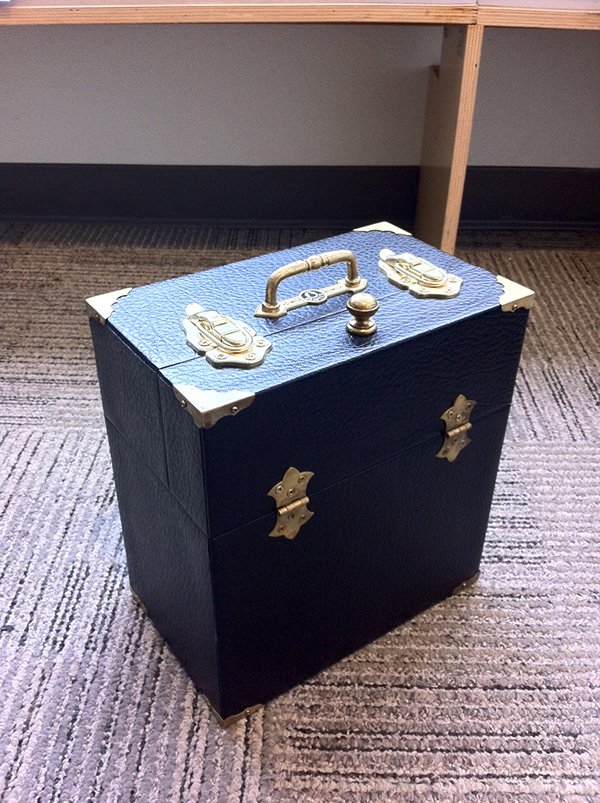
Anyhow, her she is, in all her beauty:
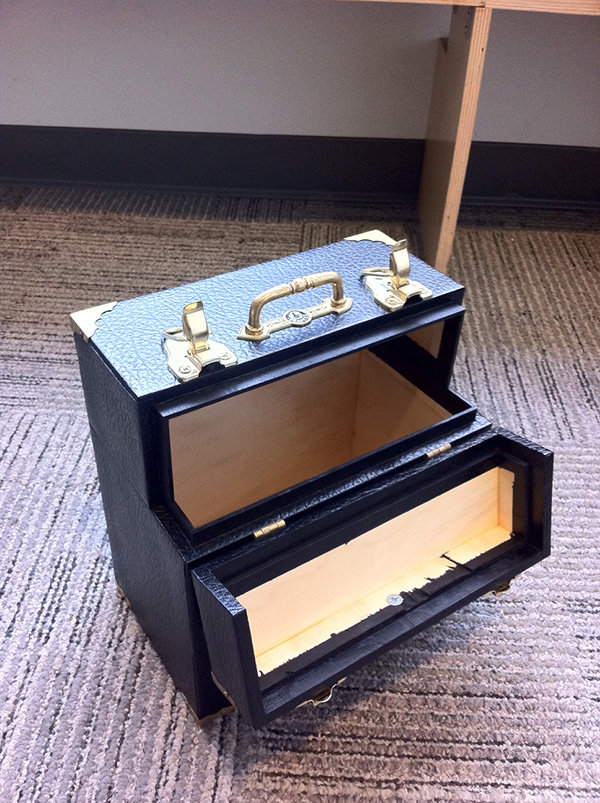
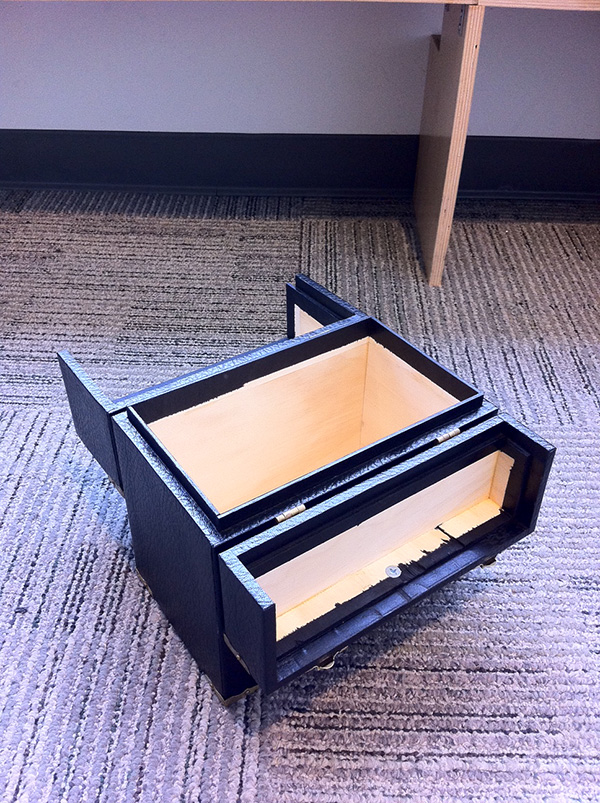
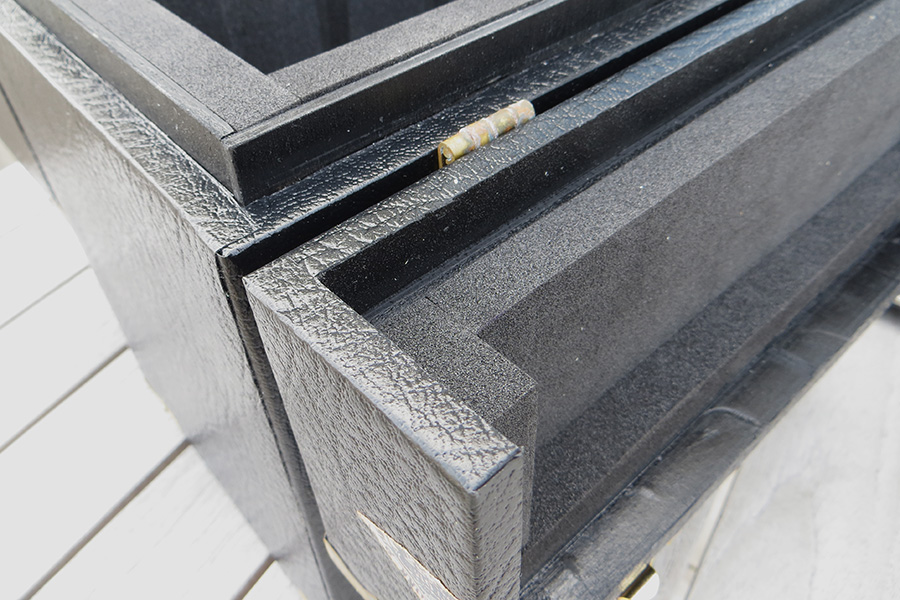
That's pretty much as good as the in progress shots get. The box itself is basically made from half inch plywood and covered in a fake leatherette made for covering books. The inside will eventually be clad in a camera sensitive high density foam called Plastazote once I have the opportunity, which is why the inside only has the rough plywood exposed at the moment.
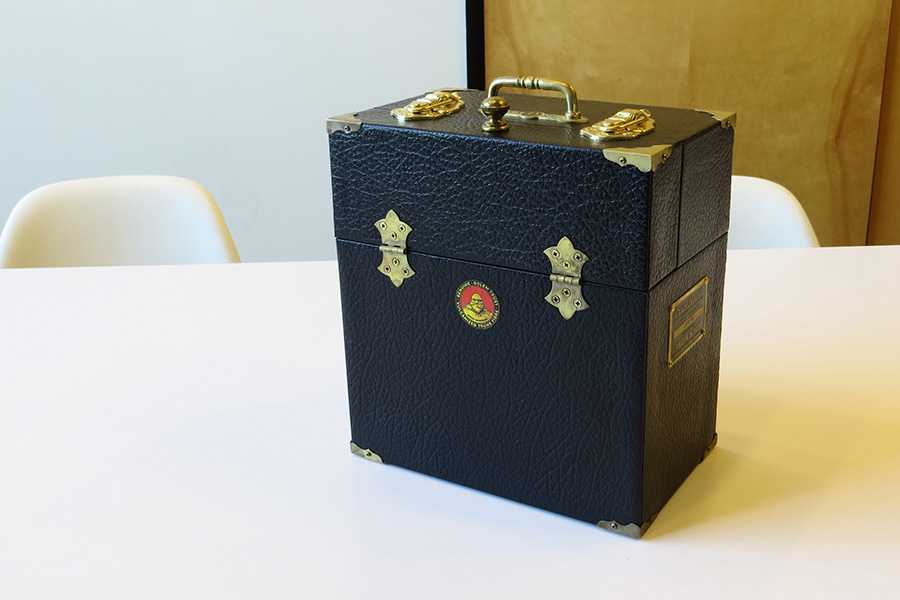
Front

Back
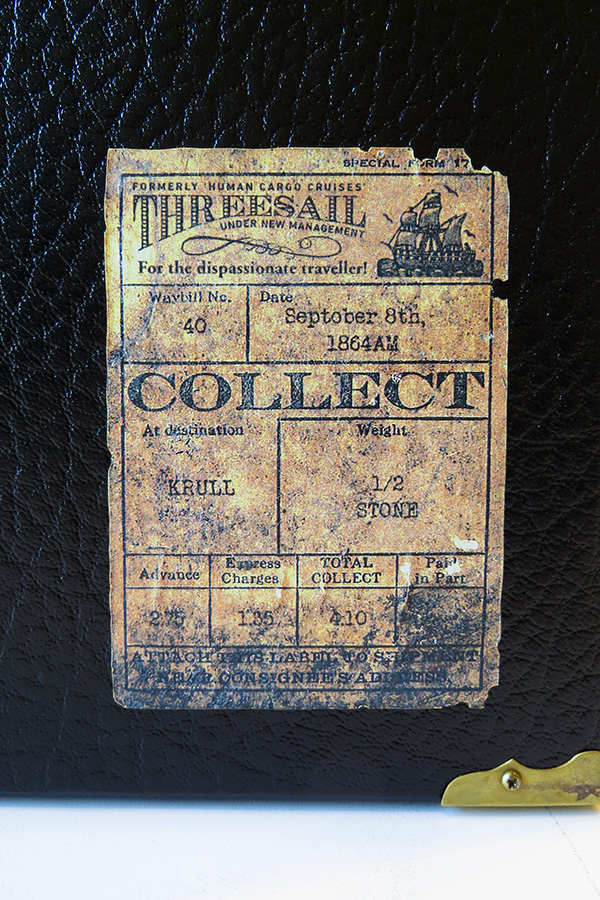
Shipping label

Warning!
(in the Discworld universe photographs, or iconographs, are not taken by a chemical process including light but rather by a small imp inside a box, painting a picture)
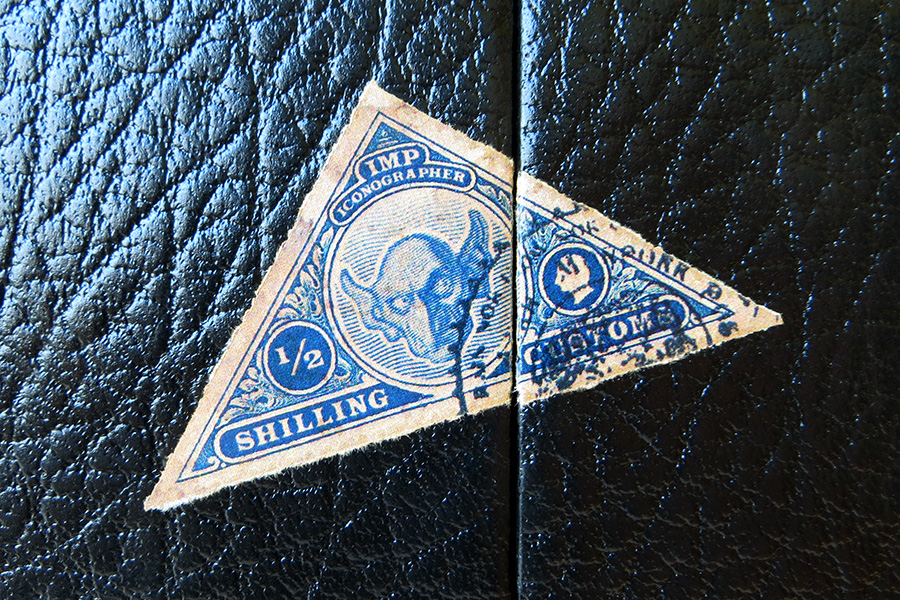
Customs tax stamp seal, broken upon reaching destination, I imagine.
Maker's label
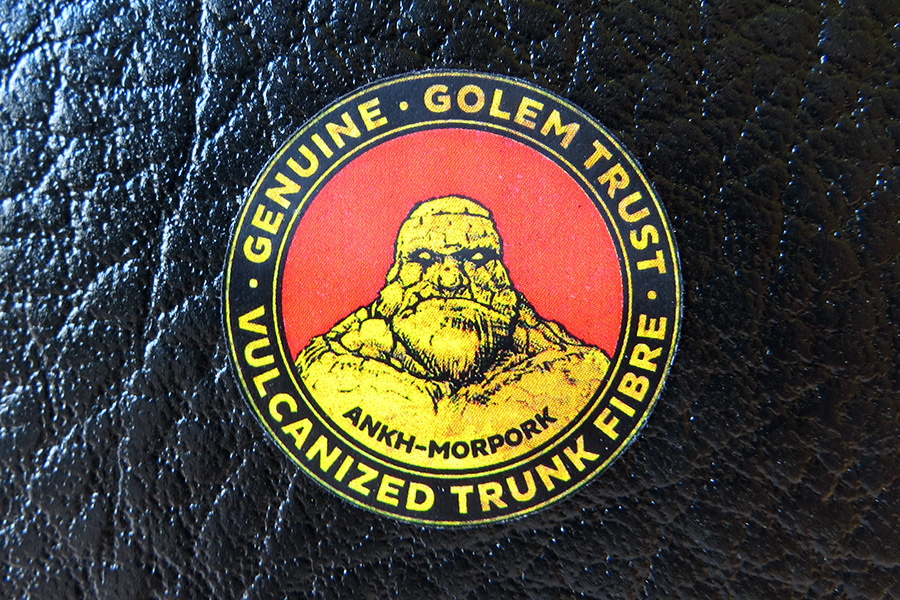
All the stickers were custom made, using elements of real world stamps or shipping labels, but with the pre-existing graphcis edited out and filled in with stuff to my own liking. Gotta love Photoshop! They were printed on regular shipping labels and the edges were colored in either with sharpie (as above) or with espresso coffee for the other labels to hide the glaring white edge of the sticker.
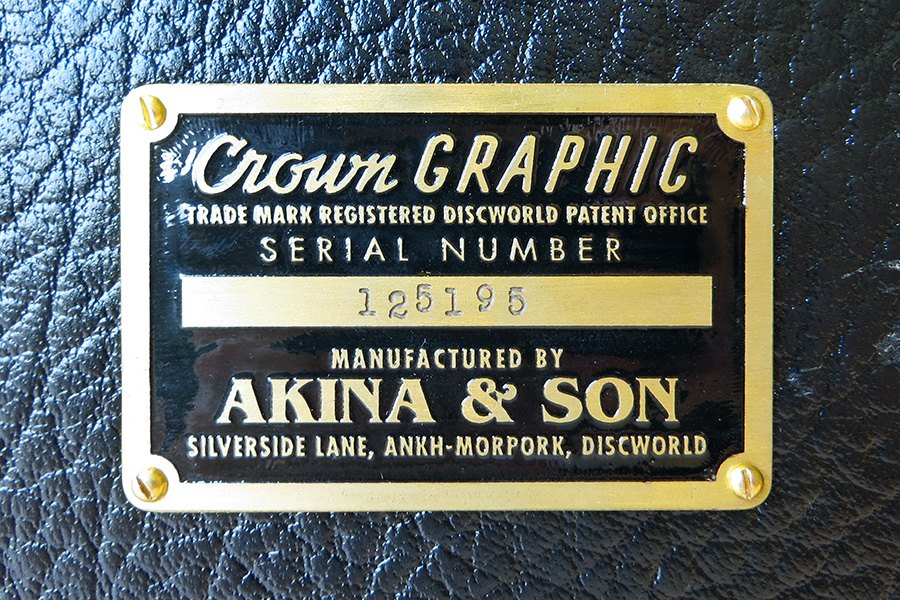
A plaque made based on an actual plaque fitted inside the camera. The name of the camera is Graflex Crown Graphic, but the text has obviously been Discworldized a bit.
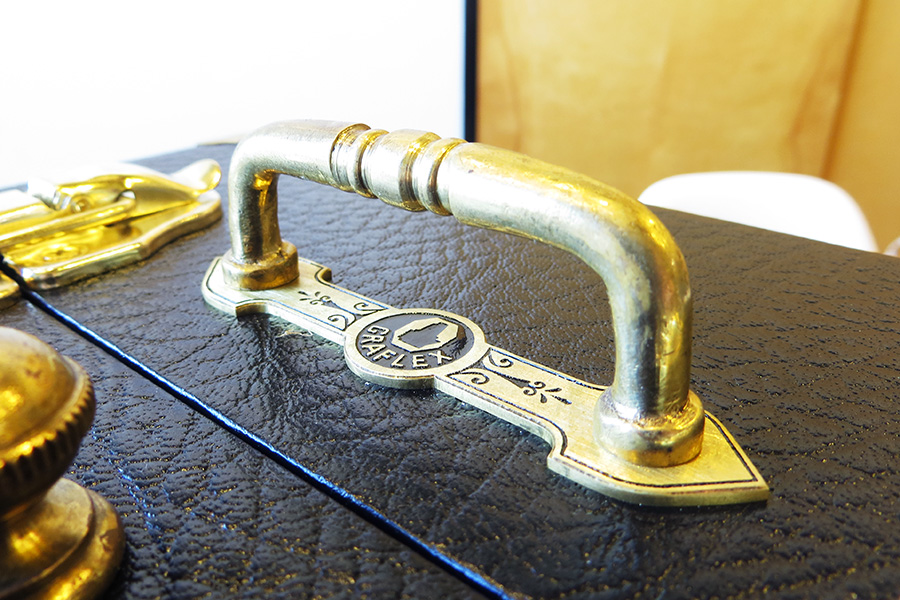
Handle was found at a thrift store, the plate under it was made from scratch from a piece of brass, etched with the Graflex logo and some ornaments.
The weathering of the brass elements was made by dipping them in a vinegar and salt solution for a short while and then heating them up briefly with a blowtorch. Might polish them up a bit when I have a chance to give them more of a used but polished kind of look. Still a huge improvement from the new, lacquer covered, brass details that I got from the hardware store. The downside to the latches is however that they're not brass, merely brass colored iron. Still I stripped off the lacquer in the hope that they will at least attract some surface rust over time.
Hope you enjoyed, it was great fun to build!
I needed a way to get it with me on a flight to Britain and finally back home to Sweden. As I didn't just want to shove it into my checking luggage, nor just throw it into my backpack for the carryon, I decided to build a proper wooden case for it.
Unfortunately I am absolutely horrible at taking in progress shots. Though a fair amount of doodling and 3d modeling (to make sure everything would fit properly) was done before reaching the finished product. Maybe it's not as much of a prop as it is a usable everyday carry.
Since I am somewhat of a Discworld fan, and since I wanted to do more with the box than just build it, so I adorned it with a sprinkling of Terry Pratchett's Discworld universe through custom made stickers and etched brass.
Before I go on to the pictures I want to thank Adam Savage of tested.com for his great video where he made a carry case for his replica Bladerunner pistol: One Day Builds: Adam Savage Makes Something Wonderful from Scratch - YouTube , as well as a video I can't remember now about how to etch brass using glossy inkjet paper and ferric chloride. Invaluable information!
Anyhow, her she is, in all her beauty:
That's pretty much as good as the in progress shots get. The box itself is basically made from half inch plywood and covered in a fake leatherette made for covering books. The inside will eventually be clad in a camera sensitive high density foam called Plastazote once I have the opportunity, which is why the inside only has the rough plywood exposed at the moment.
Front
Back
Shipping label
Warning!
(in the Discworld universe photographs, or iconographs, are not taken by a chemical process including light but rather by a small imp inside a box, painting a picture)
Customs tax stamp seal, broken upon reaching destination, I imagine.
Maker's label
All the stickers were custom made, using elements of real world stamps or shipping labels, but with the pre-existing graphcis edited out and filled in with stuff to my own liking. Gotta love Photoshop! They were printed on regular shipping labels and the edges were colored in either with sharpie (as above) or with espresso coffee for the other labels to hide the glaring white edge of the sticker.
A plaque made based on an actual plaque fitted inside the camera. The name of the camera is Graflex Crown Graphic, but the text has obviously been Discworldized a bit.
Handle was found at a thrift store, the plate under it was made from scratch from a piece of brass, etched with the Graflex logo and some ornaments.
The weathering of the brass elements was made by dipping them in a vinegar and salt solution for a short while and then heating them up briefly with a blowtorch. Might polish them up a bit when I have a chance to give them more of a used but polished kind of look. Still a huge improvement from the new, lacquer covered, brass details that I got from the hardware store. The downside to the latches is however that they're not brass, merely brass colored iron. Still I stripped off the lacquer in the hope that they will at least attract some surface rust over time.
Hope you enjoyed, it was great fun to build!