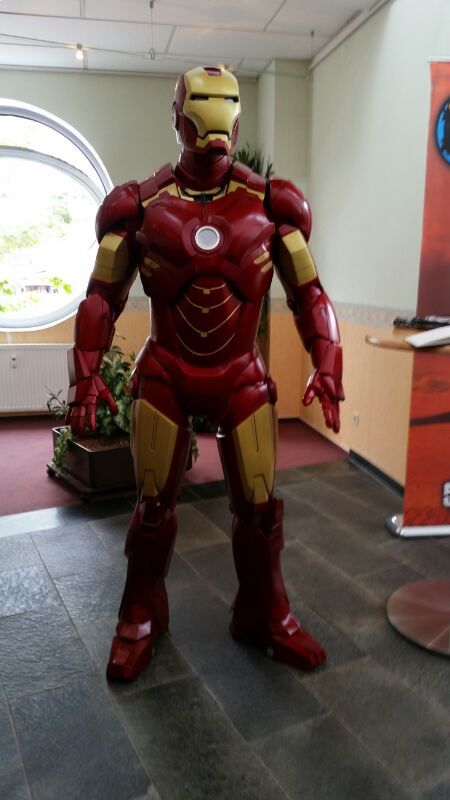
Iron Man MKIV full Fiberglass (Masked Rider)

dday

Sr Member
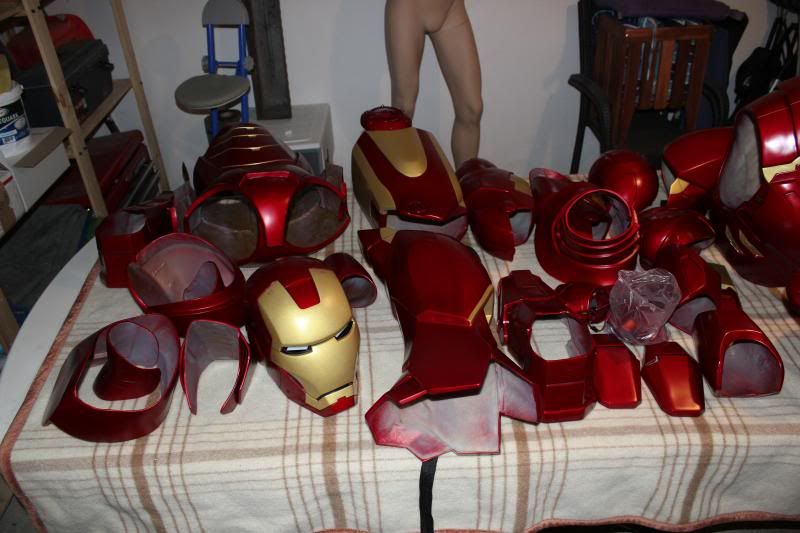
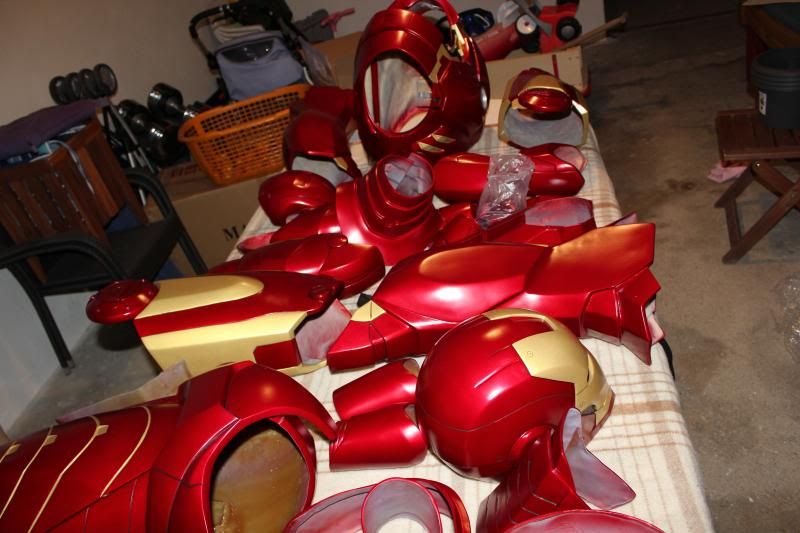
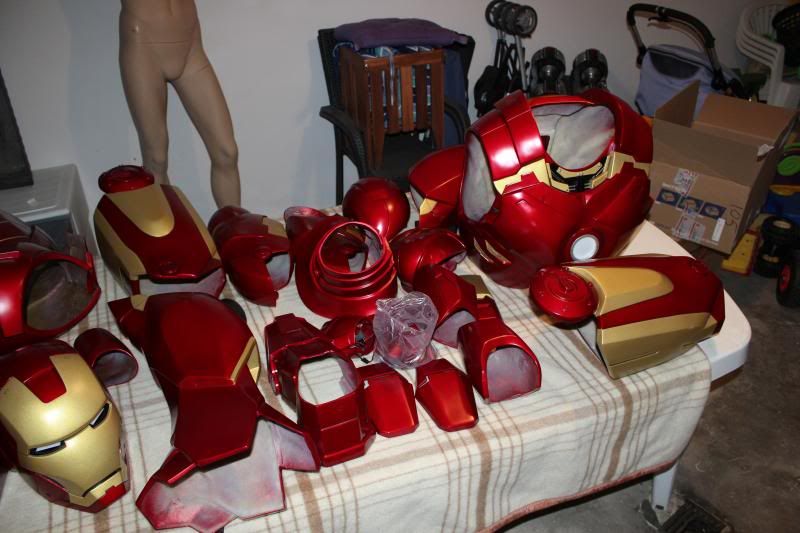
So the Masked Rider suit I ordered early this year has been sitting in my basement for a few weeks now, and I've been taking small trips down to look at it, but not been getting much done. However, as of yesterday and today, I changed that up and started doing things.
IMG_7274_zpsfb6320d9.jpg

IMG_7273_zps6fa2d826.jpg

IMG_7272_zps7200823b.jpg


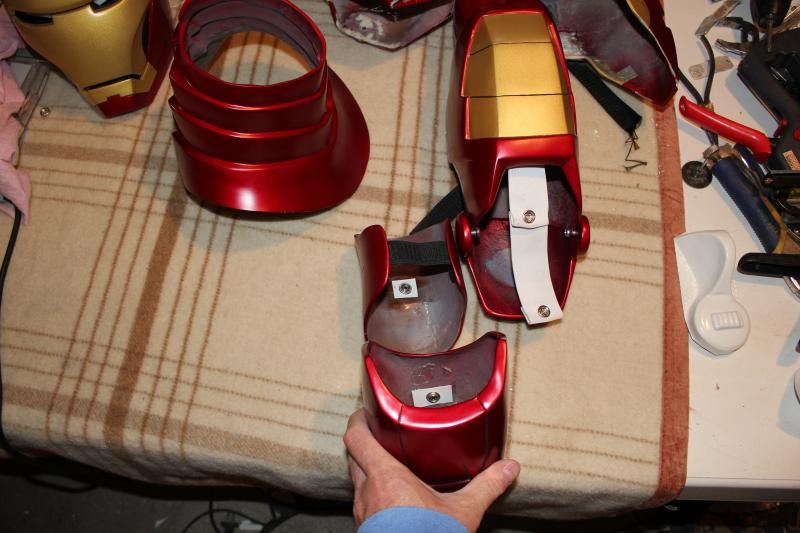
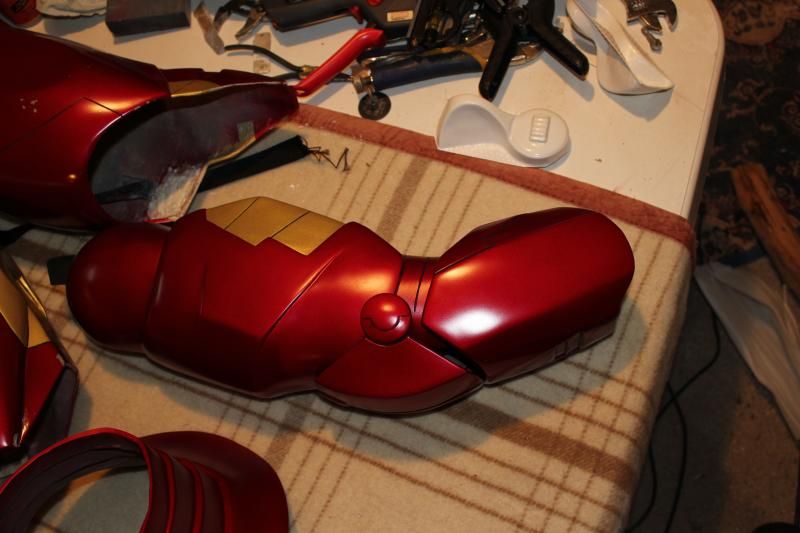
It is a bit overwhelming to get started on this thing. The kit is fully complete, comes with body belting to attach the parts, but this still take some work to attach the straps to the arms and legs, and the biggest piece of work I have is getting the connection between the thigh and shin pieces.

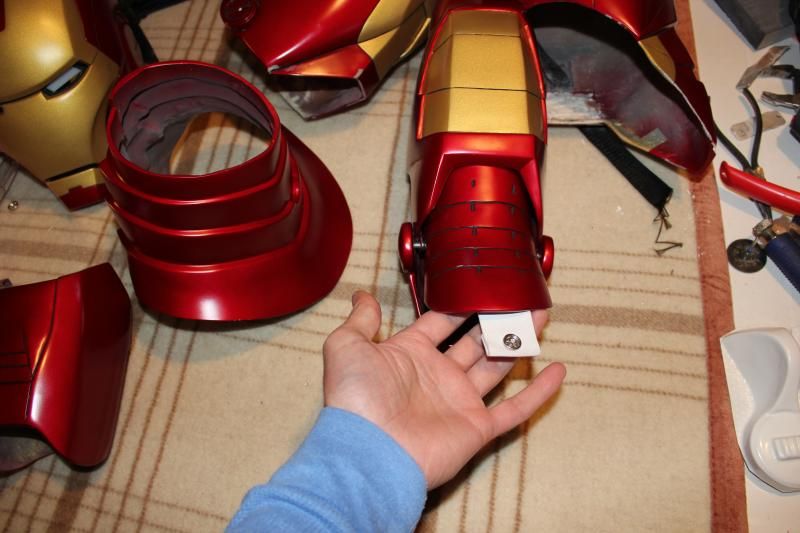
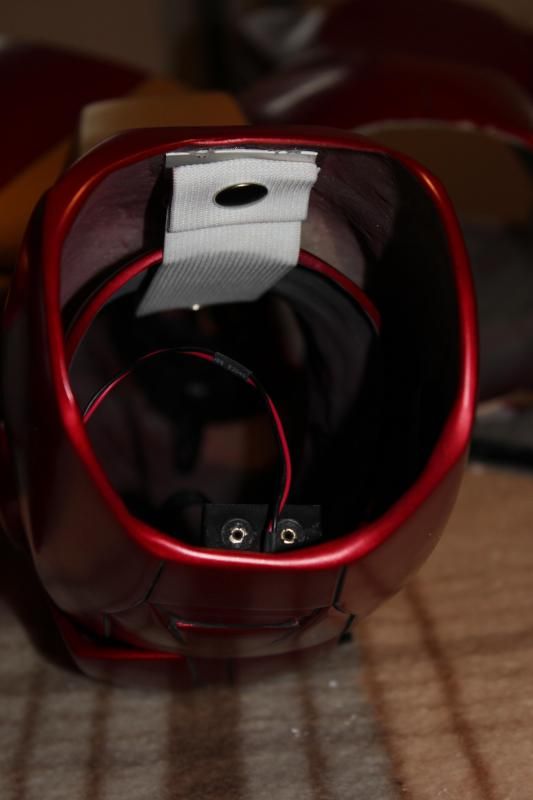
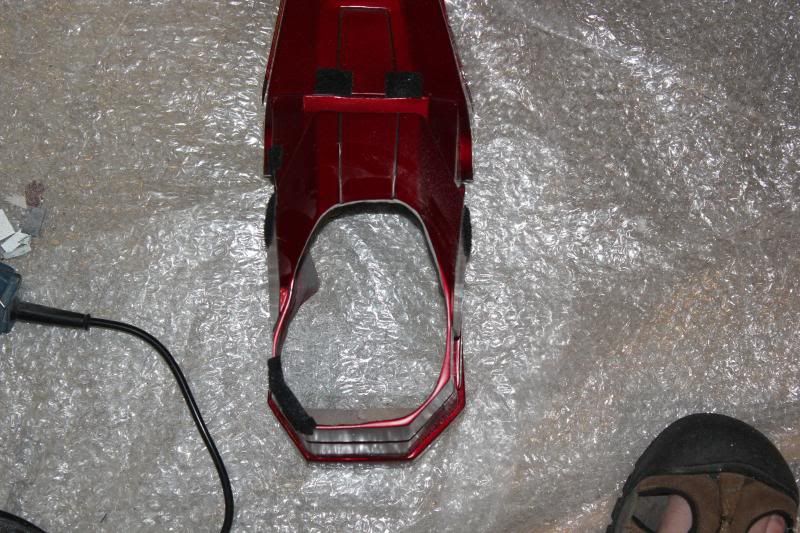
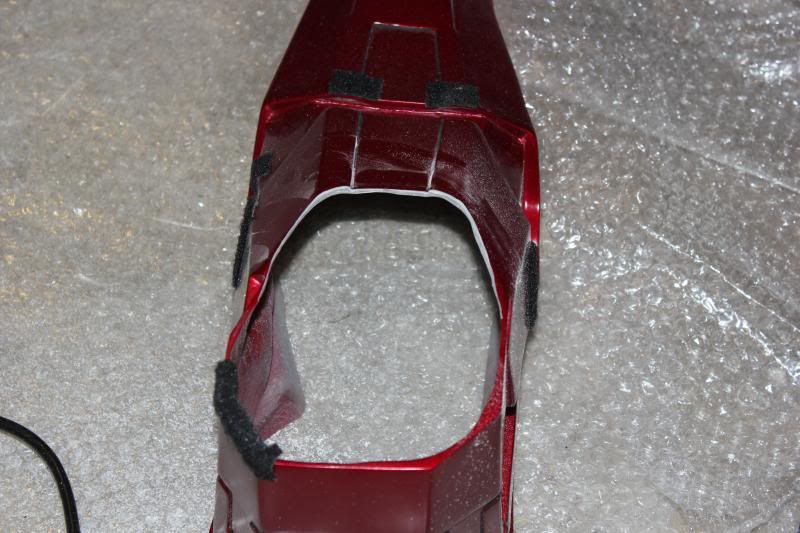
So I started working on getting the foot to actually fit my foot inside it. At delivered, the foot opening was too small, so a dremel and a few minutes later, viola!
IMG_7307_zpsb3ad7674.jpg

IMG_7306_zpse3e5ffcc.jpg


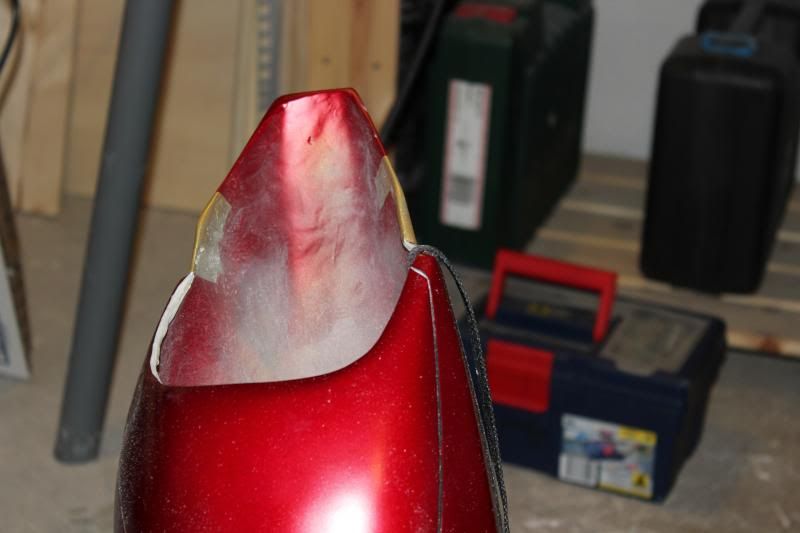
After the first time testing the thigh, shin and boot, I had lots of chipped paint where the shin and boot came into contact, so I used this chips as a good point to put some soft side sticky velcro to pad up the boot some, to stop future gouging. I should have checked this first... no worries though. As this thing if fiberglass and paint, it's going to get some weathering and battle damage right out the door.

Once my foot was able to go in and out ( I still need to get some boots but that is for another moment) I was energized to work on the connection pieces.

First, I had to enlarge the opening for the knee on the top and bottom of the shin and thigh.
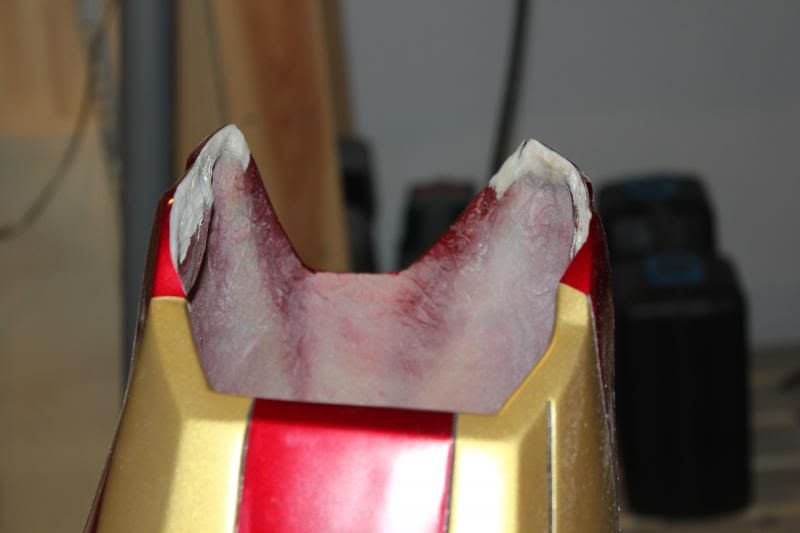
IMG_7298_zpsc0daed6e.jpg

IMG_7297_zps1c6b5767.jpg


So I saw in a the build by MTCOOLJ http://www.therpf.com/f78/iron-man-mark-vi-maskedrider-armor-kit-pics-updated-06-25-2013-wip-185729/ that he got some thoughts and advice to use a metal bar, with a hinge in it.

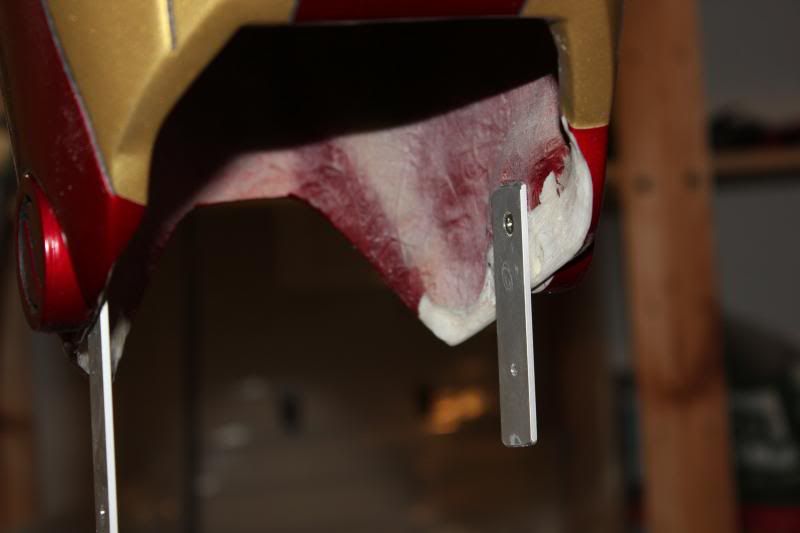
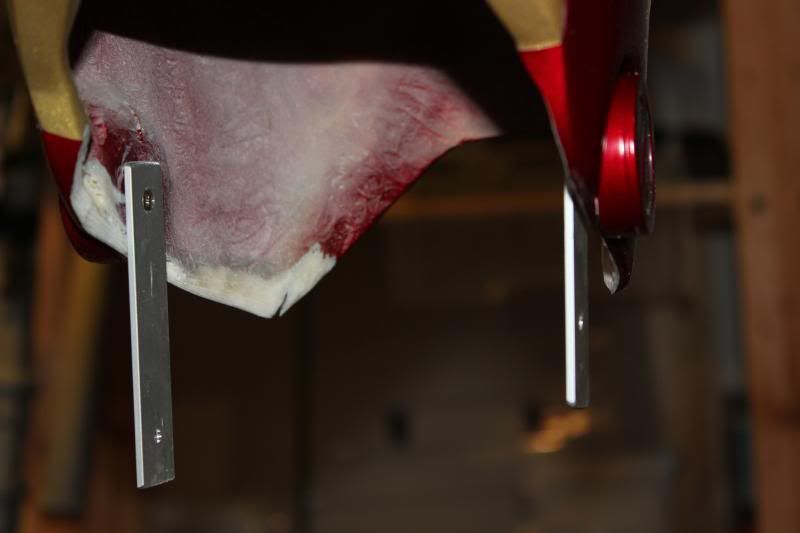
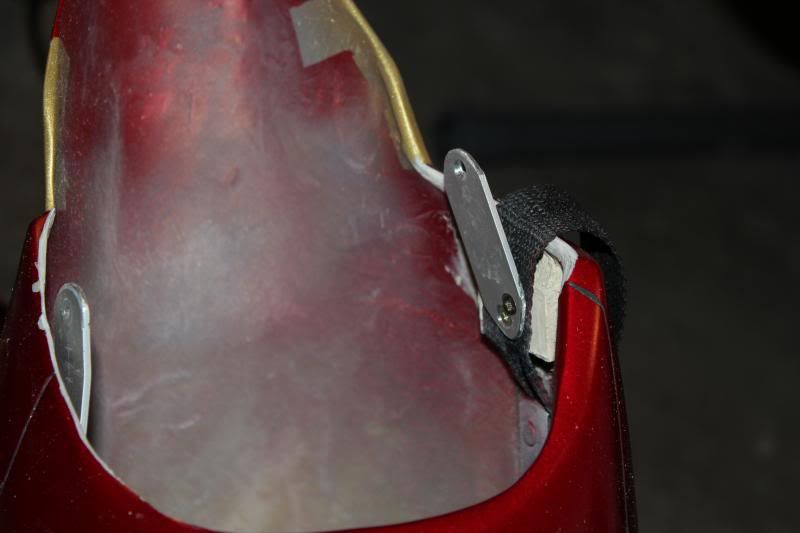
I didn't want to use a flimsy piece, I wanted something that would hold pretty well some of the weight from the thigh and add some structural strength. Luckily I had some 20x2mm aluminum strip I've used in several other projects I could use for this. So I figured it's pretty simple, cut 4 pieces, make a hole in each end of all pieces, screw together win. Well, it was kind of like that, but not entirely.

So first step was to find a good mounting point for these new pieces. For the thigh, it was easy, there are the knee bolts that were easy enough to remove and drill a hold through and into the resin bolt as well to put a nice screw threw from the inside. Plus, the interior was pretty flush, so it was a piece of cake.
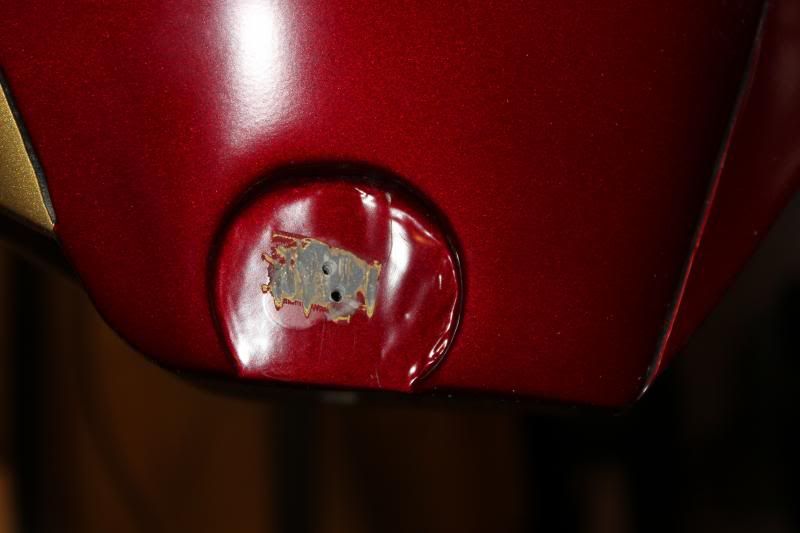
IMG_7300_zpsf9db94dd.jpg

IMG_7301_zpsc4100881.jpg

IMG_7302_zpsc7a365e8.jpg


The lower end was a bit harder. I had to cut a dowel about 1cm thick then bondoed it down on the inside of the shin, pre drilled, since the angle is bad inside these pieces for a drill.
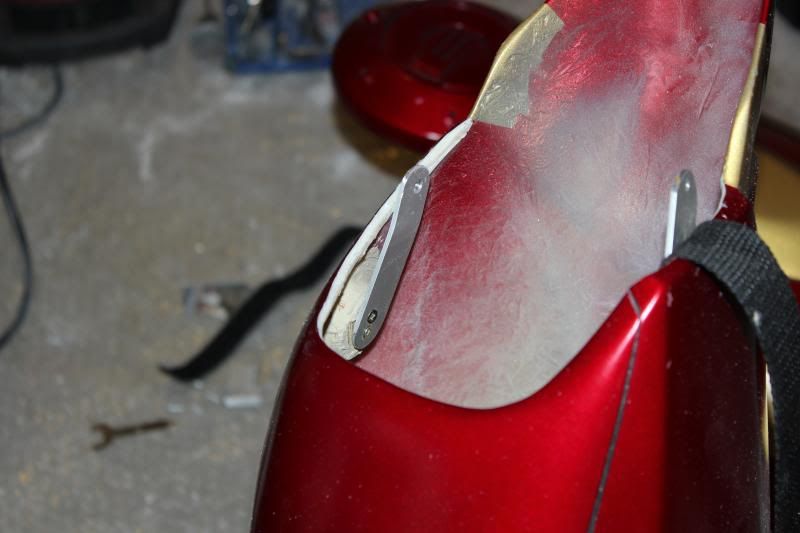
IMG_7304_zpsf19c02a5.jpg

IMG_7305_zps72fd2442.jpg


Now that all of the joints are sorted on the right leg, now it's to the left leg.... when I can get some time.

I put the entire leg and boot on and the movement was good, but it's hard to take a selfie with a SLR and actually getting a good shot of the leg, so the finished product you'll have to wait for.

More updates to come as I go.
 
All of the grinding I've done so far is not visible from the outside at all, so doesn't take away from the finished look.
 
That's an amazing set of armor pieces! Leslee is a master craftsman! This thread will be a life saver for newbies like me! Look forward to your updates!
 
I had to put this on pause for the moment as I am building a set of Storm Trooper armor for someone right now, I hope to be able to pick this up again in a week or two. My goal is to have it troop ready by July 5th.
 
Sorry that I'm doing this on my phone and can't find a way yo PM you, but any way you can get me the pantone it paint info that you use? Made a new upper arm, feet, hands, and am doing an ab section on my MKIII and would really like them to at least closely match without a full repaint for the $ spent, you know:)
 
Sorry that I'm doing this on my phone and can't find a way yo PM you, but any way you can get me the pantone it paint info that you use? Made a new upper arm, feet, hands, and am doing an ab section on my MKIII and would really like them to at least closely match without a full repaint for the $ spent, you know:)


The paint is from MR. He sent me a small container with some extra paint, but I have no idea the color.

I am going to have to paint new gauntlets and fingers, since the MR ones are a little too small for me.

I bought Darkside501st gauntlet and fingers so I will need to paint these so I will take a piece and the raw paint as well to a paint shop and have it matched. However, I'm in Germany and the mix I get won't be a mix you can easily find stateside.

Your best option is to take one of your already painted pieces to a shop that does custom paint, or a sherwin williams or whatever and have them match it the piece.
 
Have you figured out how to attach the shoulders, biceps and forarms?

I am working on mine now, have everything figured out expect basically the arm.
 
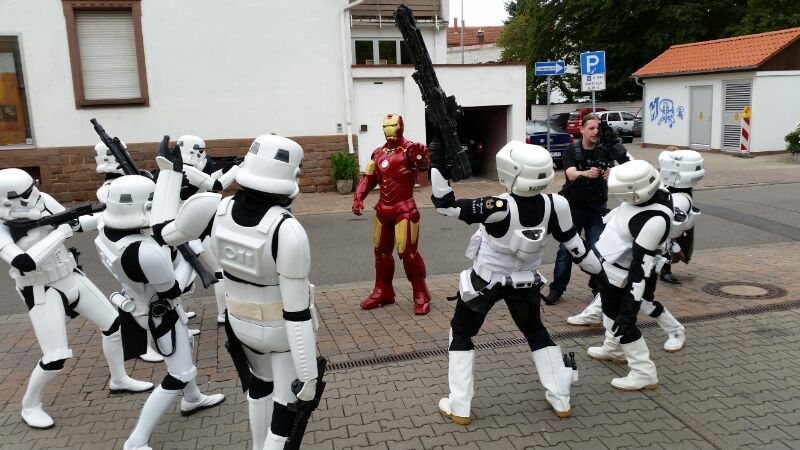
Ok, so I did't document the work I did as much as I would have liked, which basically means not at all...

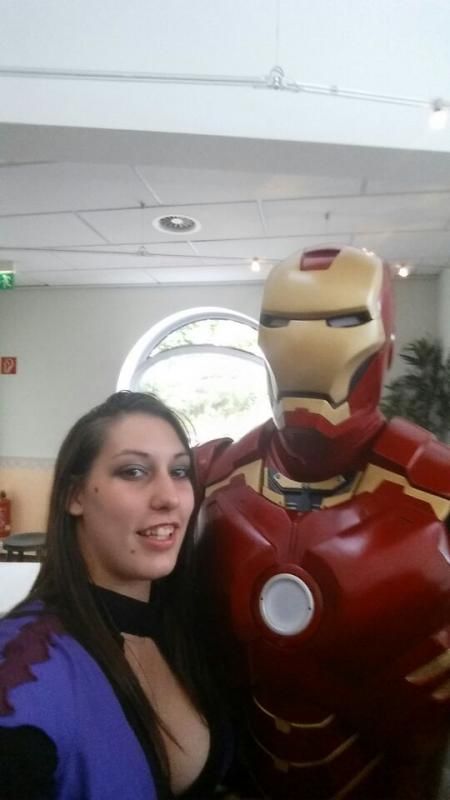
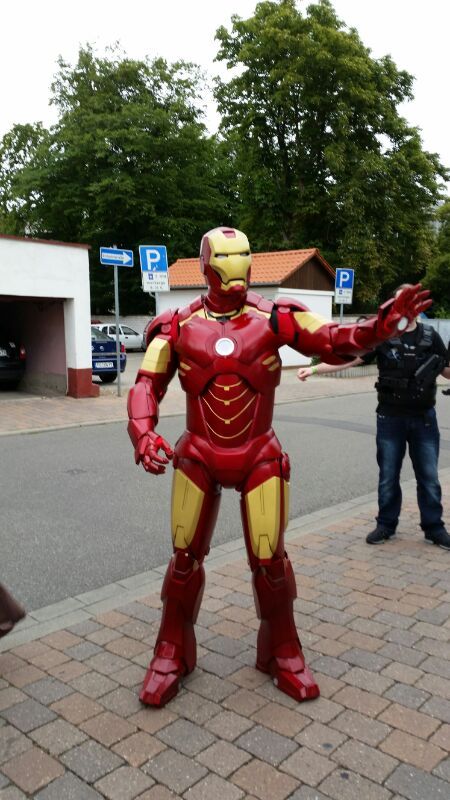
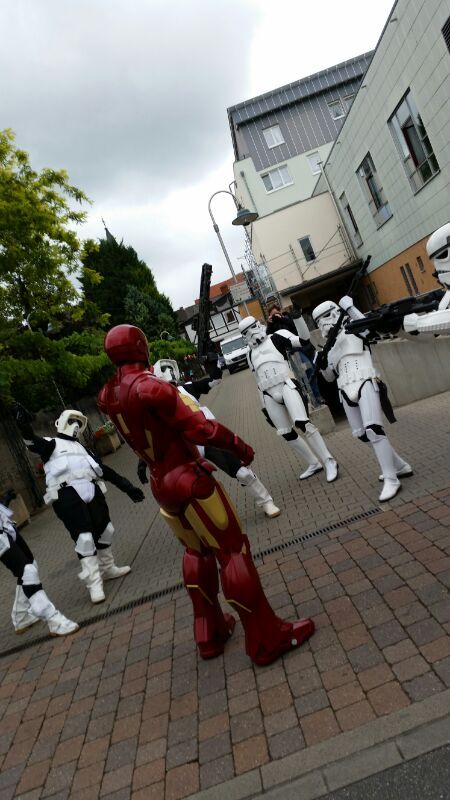
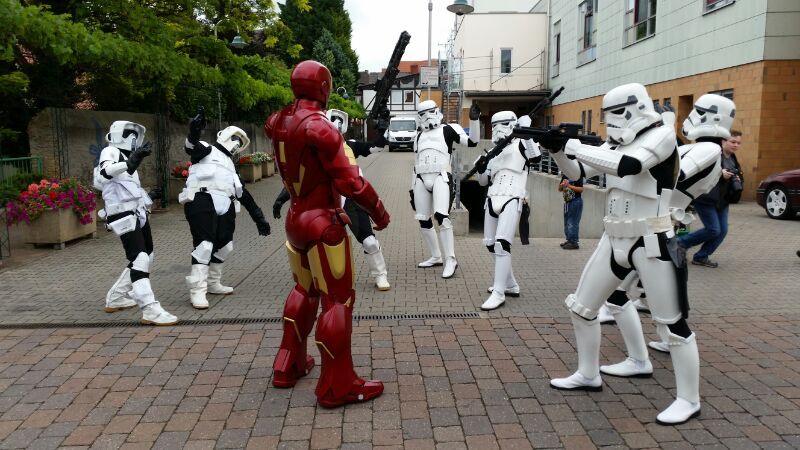
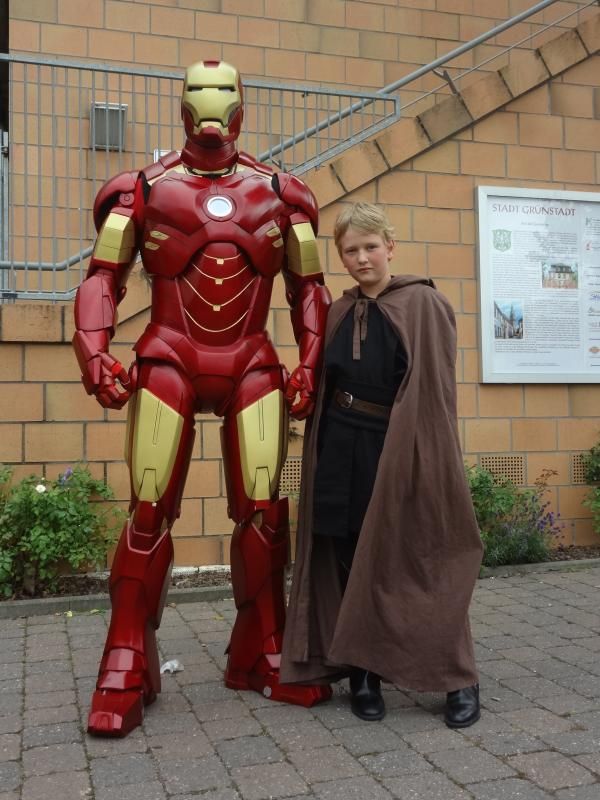
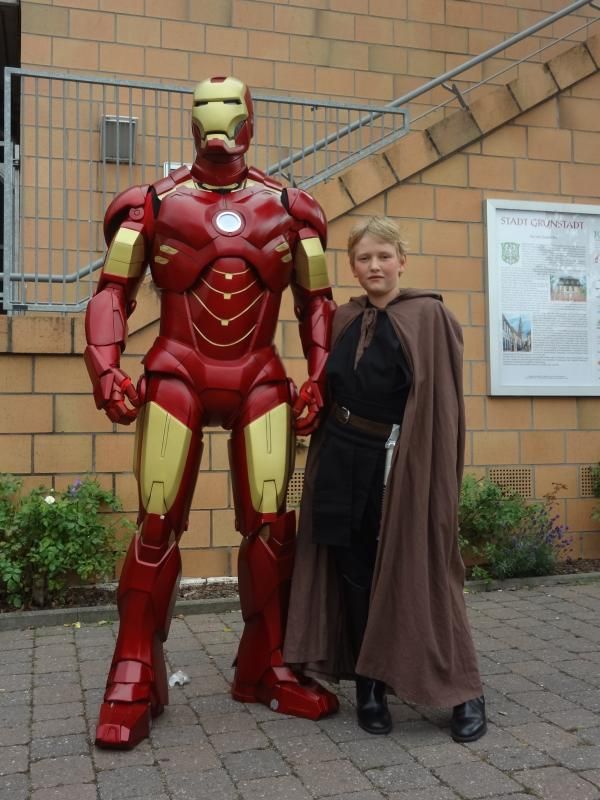
But I did get the suit wearable.

IMG_0396_zpsbe551863.jpg

IMG_0402_zpsd180fdf9.jpg

IMG_0404_zps8b16561b.jpg

IMG_0407_zps3346c3cf.jpg

IMG_0398_zpsf45559a1.jpg

IMG_0409_zpseb8d27f0.jpg

DSC06483_zps57d72abf.jpg

DSC06481_zpsb439c0d9.jpg


Updates to the original photos/threads.

The knee articulation was good, but it's hard to really sort it out. The joints I created were good, but they made the leg too long and too tight around my knees. I carved out as much material as I could to get my legs to fit in. In the end, due to time constraints, I removed the joint completely and just let the shins free float. Since the connection to the boot is so big, it holds the shin in place without any other support.

I moved the strapping anchor from the shin into the thigh, and clipped the thigh into the harness that came with the suit.

This thread is useless without photos I know...

I might consider re-adding the hinges on the legs, but I would have to rethink how they connect and making them muuuch shorter, I"m 6'6" and the thigh and shin need to be right next to each other to be the right length. I don't understand how anyone under a size 36 inseam could ever wear this without some boots with a 2 inch heel or higher.

Also, the torso needs to be strapped over the shoulders. The torso wants to slide down a little and that puts a lot of pressure on the velcro and eventually it wore out and wouldn't stick any more, even industrial with additional glue to hold it down.

All in all, it's a magnificent suit, it just needs someone who has some patience to really do the initial work to get it ready to head to conventions/shows. But I've already done that for this one, so it's ready to go now.
 
Wow, that armor is amazing! Enough can't be said about Leslee's incredible craftsmanship! And it fits you perfectly!

When you have a spare moment, could you please post photos of the insides showing how the upper arms and thighs are secured to the harness. And please also post photos of the over-the-shoulder straps that you mentioned. Also, are you wearing the original gloves that came with the suit?

I agree, that's one magnificent suit! Can't wait 'til mine is shipped! :D
 
I'll check into getting some photos, but I made some modifications on the inside because I didn't think the way it was setup worked very well for this suit.

I removed the clips from the harness that were to be used for the armor (I assume because they were the only other clips on the harness) because they were under the armpits. I removed them and did a simple across the back connection for the two arms. The arms are clipped to each other across my shoulders on my back and not attached to the harness at all.

The thighs are simply clipped into the harness at the hips where the clips are, and this works well.

The shins are not secured anywhere. Their connection to the boots is pretty tight and doesn't really need to be secured.

If I don't end up selling it (job and money reasons, I'd rather keep it TBH) I will revisit the hinge system I originally put in, I will just look at new ways to connect it and make the hinges shorter this time. This will keep the pieces in good relation to each other when moving.

The shoulders didn't attach well into the strapping system (or I did it wrong) so I ended up getting the shoulder bells into a strap/snap system connected directly to the shoulders of the chest armor and free floating. I ended up putting the shoulders on backwards, because any time I raised my arm up to do a repulser blast, the shoulder wouldn't come back down into the right place. So that will need to be looked at as well.

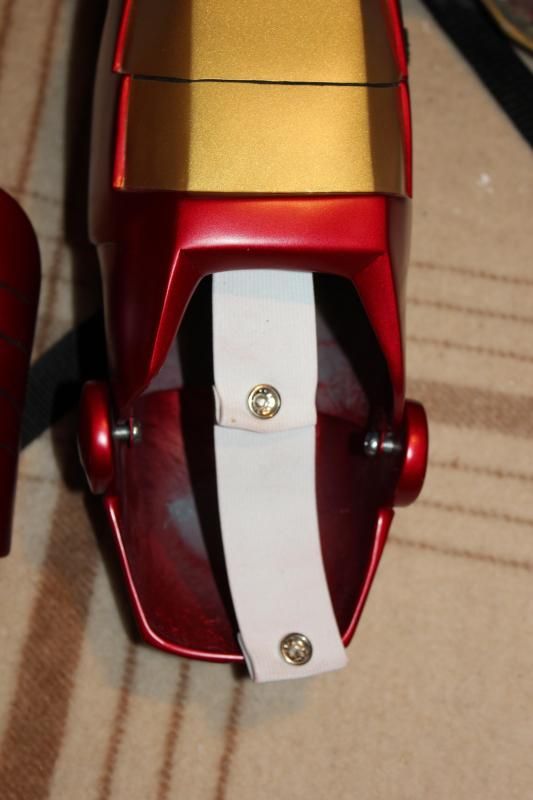
As far as the rest of the arms. I put in a strap/snap system where the inner elbow gap fillers snap into the strap, then the forearm snaps into that. Hinging the bicep and forearm would not be a good idea, because thats not the way our arms are naturally when hanging at our sides. Our biceps point out, but our forearms turn in. If those two armor parts were hinged, it would not look natural and you couldn't twist your arm to put it up for a blast shot. The strap method I put in allows the entire forearm to move independently from the bicep piece.

A very important thing to do, and the most important thing before wearing it again is to attach a strapping system into the torso. that either connects to the harness or just goes over the shoulders. The torso was always sliding down just a touch and eventually it put enough pressure on the lower edge of the side connections that it split open and wouldn't close again because the velcro came off. IT would be ok if the pressure wasn't there from slipping down slightly.

But everything I've detailed are pretty minor updates and part of tuning the armor to fit each person

Wow, that armor is amazing! Enough can't be said about Leslee's incredible craftsmanship! And it fits you perfectly!

When you have a spare moment, could you please post photos of the insides showing how the upper arms and thighs are secured to the harness. And please also post photos of the over-the-shoulder straps that you mentioned. Also, are you wearing the original gloves that came with the suit?

I agree, that's one magnificent suit! Can't wait 'til mine is shipped! :D
 
So I've gotten a few questions regarding the arm strapping and the way that snaps/straps were put into the suit to hold it together.

So here are some details.

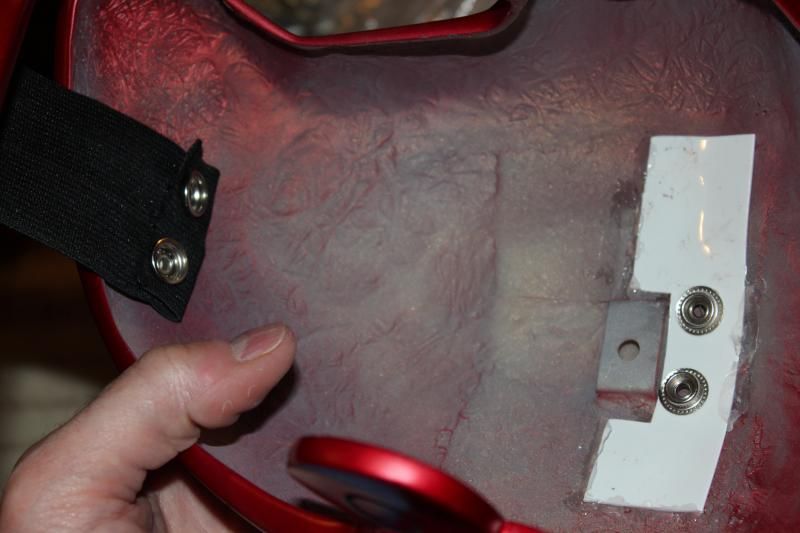
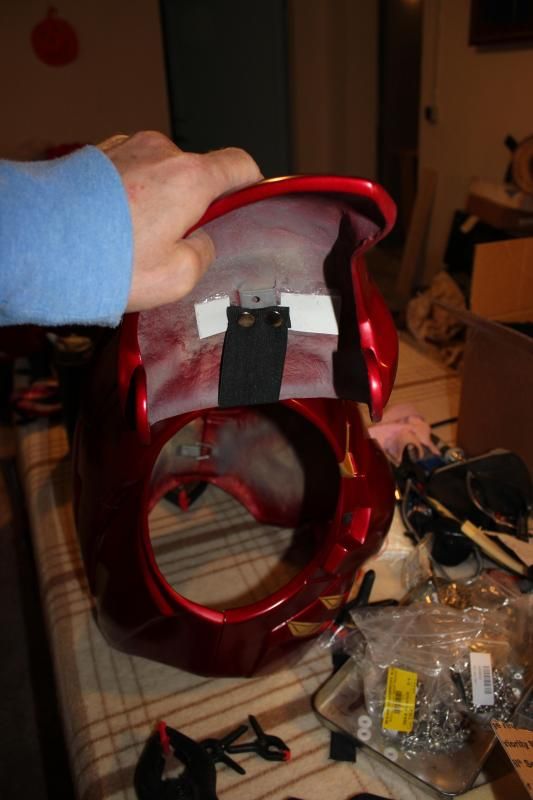
So, what I used to attach the strapping to the inside of the pieces is a glue called E6000, you should get a 3.7oz tube, it's amazing glue. You put it on, then it has to be clamped for 24 hours or so for it to dry. It is a very strong glue that will last nearly forever, but it also still has the ability to be peeled off and redone if something changed or needs to be adjusted. It is really a miracle of a glue.

You just put a healthy glob of E6000 on the strap then clamp it down to the fiberglass. For the snaps, just make sure you fold the strapping over once or twice and then pout the hole through the several layers of strapping so that the snap will not come out over time from the strap. For the snap plates on the inside of the armor, where you click the snaps into I used a strip of ABS plastic to attach the snap[s to, then use the E6000 to glue the ABS strip onto the inside of the armor.


IMG_7463_zps5e5112b1.jpg

IMG_7464_zpsdb45916f.jpg

IMG_7465_zps3055dc8c.jpg

IMG_7466_zpsde066e05.jpg

IMG_7467_zps833c1886.jpg

IMG_7468_zpsbe22f1ac.jpg

IMG_7470_zps38484769.jpg

IMG_7471_zps1c1bb724.jpg


- - - Updated - - -

In the time I wore it, the snaps didn't come off and held on pretty well. Doing it this way allows the forearm to move independently from the bicep, which is really important because the biceps do not move like your arm does, so if the forearm was fixes to the bicep, you would be in serious robot move and you would not be able to move your arm hardly at all, in any direction and it would looks pretty funny. You would def not be able to do a repulser blast pose!
 
Your work is outstanding, it looks simple but is actually genius. I really like the way it looks seamless and hardly any gaps at all
 
Your work is outstanding, it looks simple but is actually genius. I really like the way it looks seamless and hardly any gaps at all

Masked rider is the man behind the seamless parts, I just thought about a simple way to connect them that didn't add weight but still allowed for movement. A lot of suit do not have these transition parts, and with them, it makes for a much more believable costume.

The only thing it does do is make movement in the joints a tougher, since these transition pats aren't really easily flexible. But we're not in a movie or doing stunts... just standing there and posing for the fans!
 
I guess they could make the transition parts out of foam or fabric but they wouldn't look as good, who did you order from?
 
Last edited:
I guess they could make the transition parts out of foam or fabric but they wouldn't look as good, who did you order from?
This suit is from Masked Rider, here on the forums


Thanks for posting the photos, they are extremely helpful! I now have a better idea of how to approach this.
My pleasure! I PM'd you some details about the fingers, and I will be adding some more details to this thread once I can go take some photos.
 
Thanks again for this info! Can't wait for my suit to arrive so I can begin assembling it. This info will be a life saver!
 
Just a question, are you able to sit down in the suit without damaging it? As in sitting in the car to get where you're going or do you have to get changed there?
 
Back
Top