Some of you may have seen my original build here of Tony Stark's flight stabilizer from the first Iron Man movie. I made it as part of my Halloween costume a couple years ago. I received a lot of great feedback on the project, including a member which wanted to commission me to build another for a display he was working on.
This is what Brad (darthwhitey) had in mind:
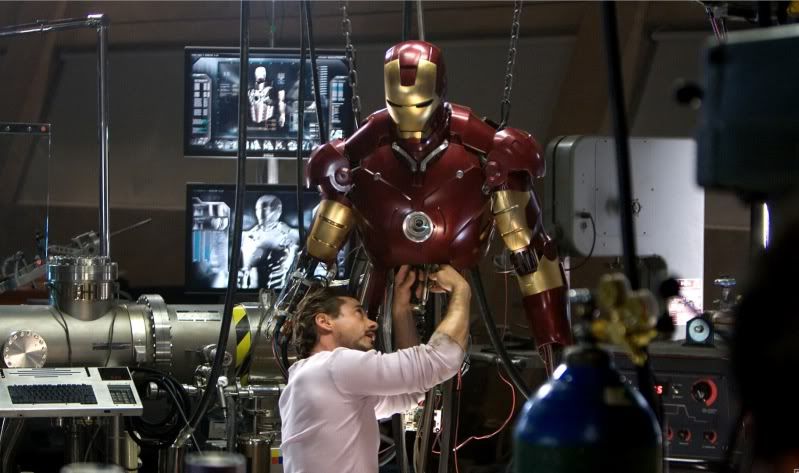
The armor is being cast and finished by Clinton (Finhead), and I'm getting the easy part of the job: the mechanical innards of the arm")
When complete, the display will be 1:1 in size.
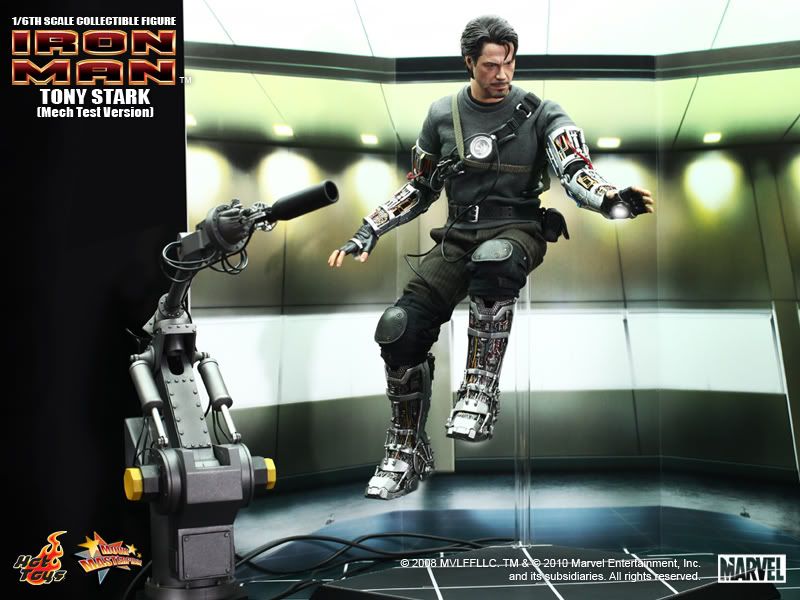
To start off, I did some digging to find as much reference material as I could. I gathered a few screen caps like the one above, and also of when Tony is first testing the repulsor. Another good source, though not completely screen accurate, is the Hot Toys "Tony Stark Mech Test" figure.

Once I gathered my reference material, I studied everything to see how I could improve on my first attempt. Immediately I knew I had to use a better, more substantial material. The thin aluminum roof flashing was OK for a Halloween costume, but this needed to have some heft to it. To keep it lightweight, I opted for aluminum. My concern was how I would be able to cut the pieces and retain a clean, finished edge. A few months back I had aluminum brackets water jet cut for my Captain America shield, and knew right then that this was the best route for me to take.
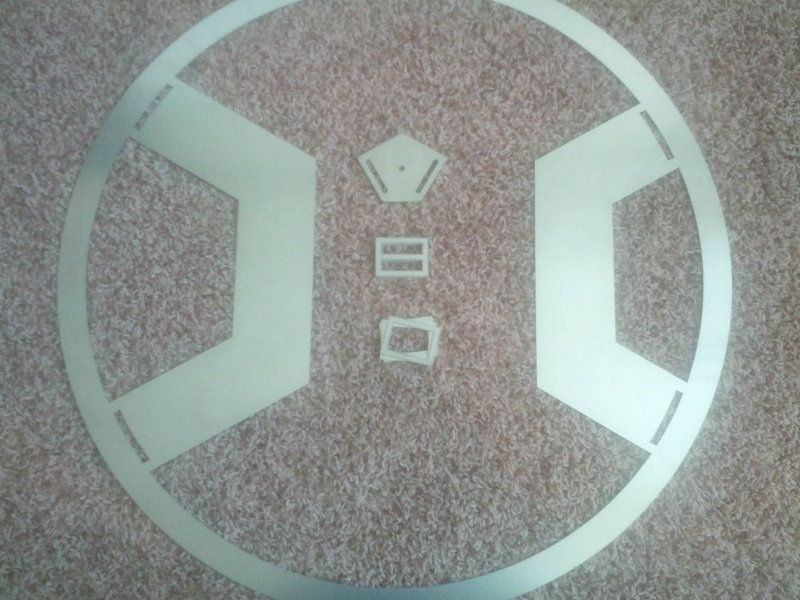
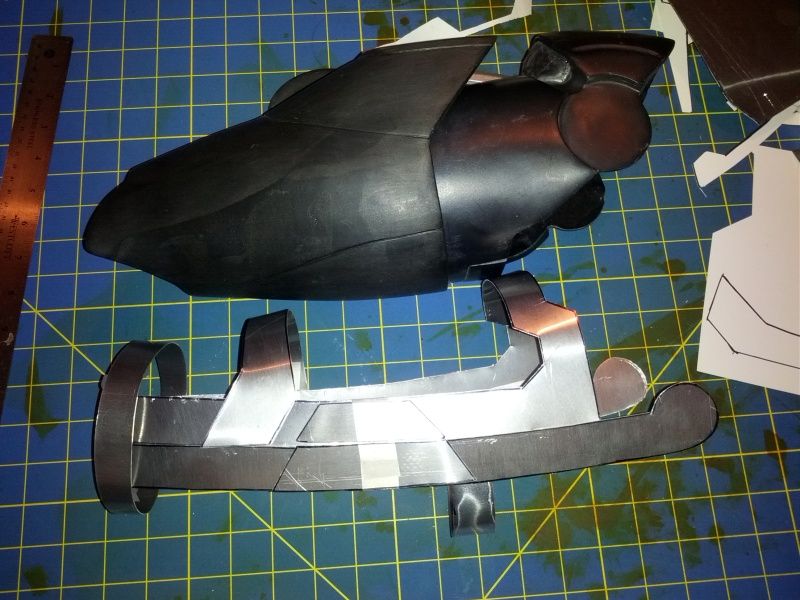
In order for me to get the pieces cut, I needed to create templates and then have those drawn up in CAD. This took several attempts to get right! To help with the scale, and to be sure everything would line up with the finished armor, Clinton lent me a cast of the Mk. III forearm. This way I knew my pieces would match up. First I started using 2mm craft foam to create the templates, but it wasn't quite working for me. I needed something that would hold shape and bend easily. So on my fourth attempt, I traced my templates onto some thin sheet aluminum, then cut them out with tin snips. Once I was happy with the shape of everything, I flattened everything back out and traced them onto paper to scan.
Now I was ready to get the templates I drew up translated to CAD drawings for the cutter. I turned to Andrew, your friendly neighborhood squirl (epilepticsquirl), to help me out with the CAD files. (Andrew also helped out with the Cap shield brackets too! :thumbsup)
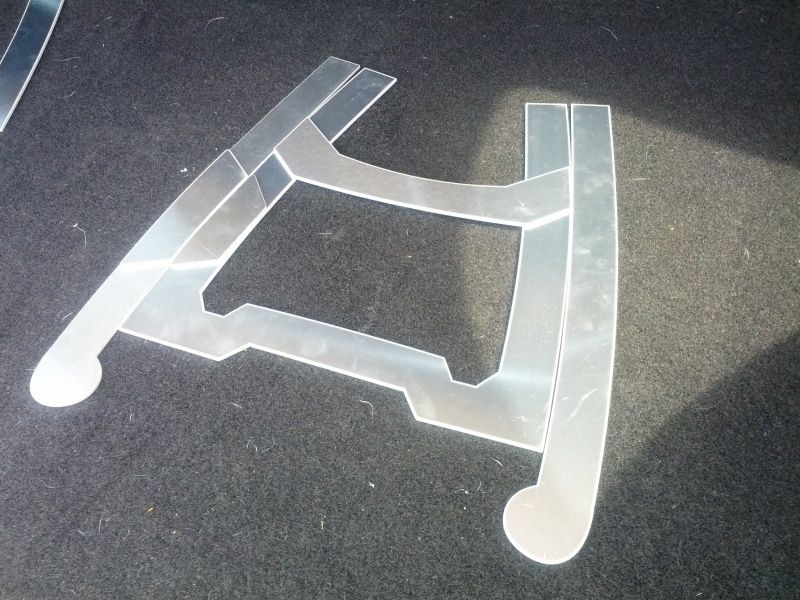
Once the templates were ready, I sent them over to my local water jet guy to have them cut. The pieces were cut out of .080" aluminum, which is just thick enough to work with. Picked up the pieces last Friday, and I knew right then that this build was going to fun!
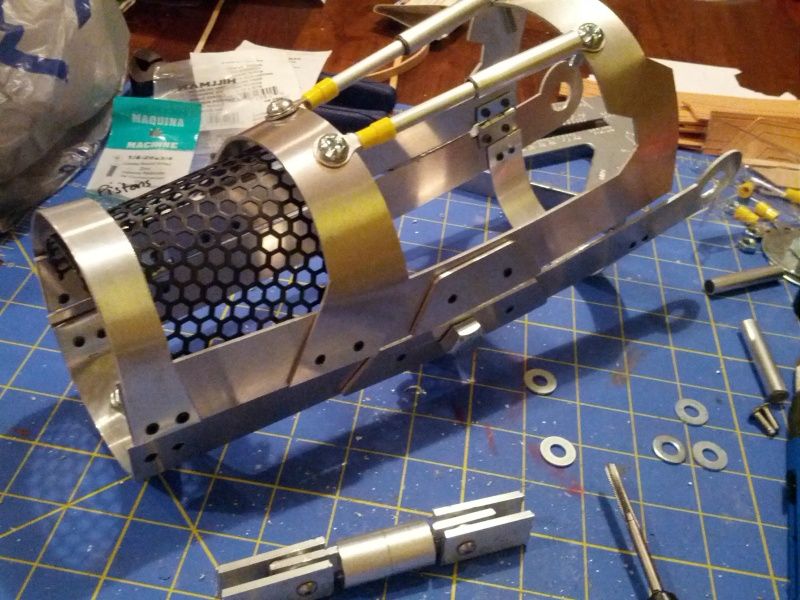
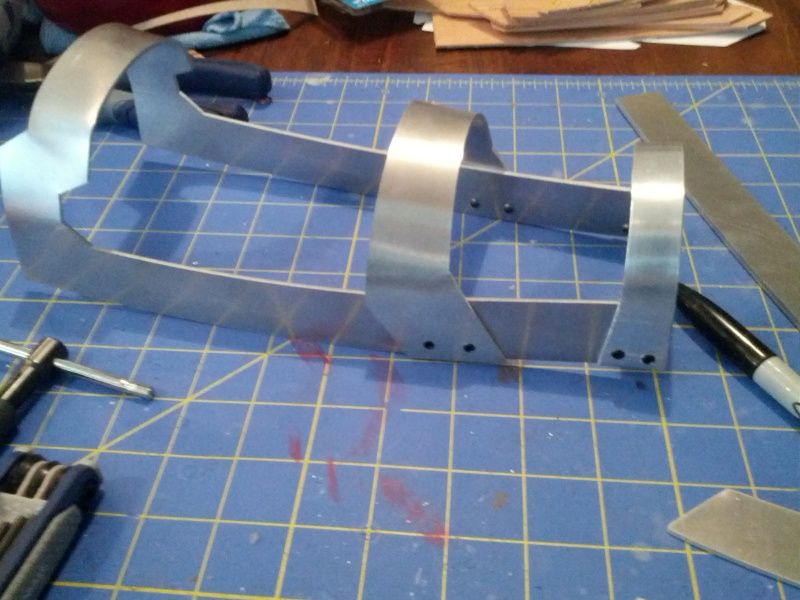
Over the last few days I've begun working this into shape. I had the day off work today, so I was really able to make a lot of progress. I bent the pieces into shape first, and then started fitting. Once everything was where I wanted it, started to drill and tap holes. I used 10-32 set screws to hold everything together. Here are a few progress shots from today, where the project stands.

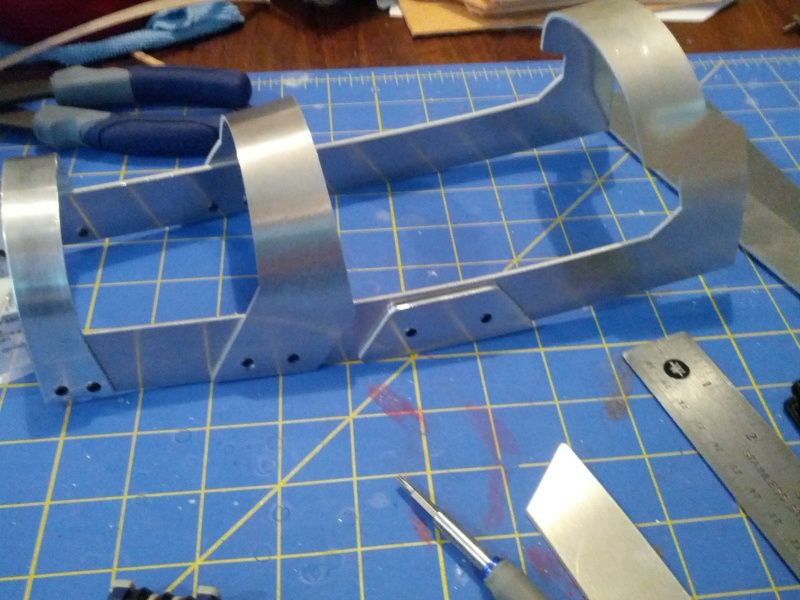
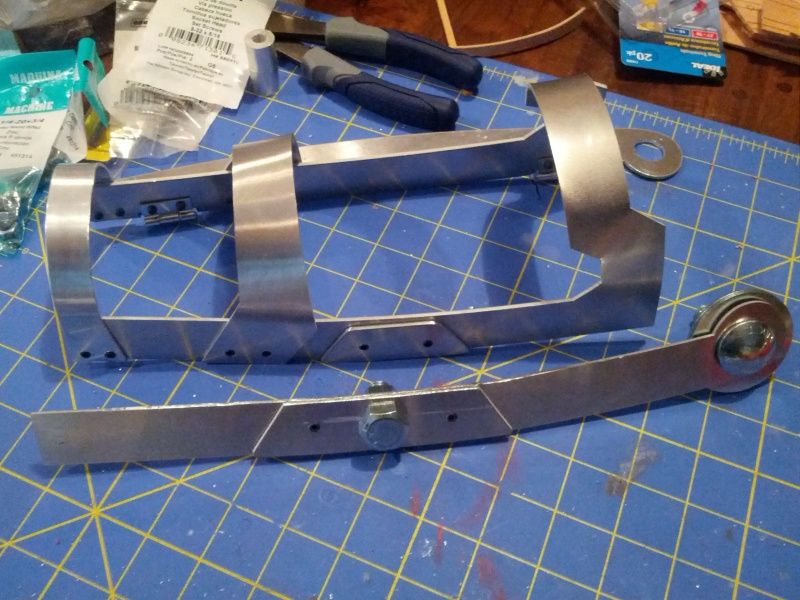
Still need to cut, shape, drill and tap the bottom support pieces. After that, it is on to the details: brass tubing, pistons, and wires! Stay tuned for more :thumbsup
This is what Brad (darthwhitey) had in mind:
The armor is being cast and finished by Clinton (Finhead), and I'm getting the easy part of the job: the mechanical innards of the arm
When complete, the display will be 1:1 in size.
To start off, I did some digging to find as much reference material as I could. I gathered a few screen caps like the one above, and also of when Tony is first testing the repulsor. Another good source, though not completely screen accurate, is the Hot Toys "Tony Stark Mech Test" figure.
Once I gathered my reference material, I studied everything to see how I could improve on my first attempt. Immediately I knew I had to use a better, more substantial material. The thin aluminum roof flashing was OK for a Halloween costume, but this needed to have some heft to it. To keep it lightweight, I opted for aluminum. My concern was how I would be able to cut the pieces and retain a clean, finished edge. A few months back I had aluminum brackets water jet cut for my Captain America shield, and knew right then that this was the best route for me to take.
In order for me to get the pieces cut, I needed to create templates and then have those drawn up in CAD. This took several attempts to get right! To help with the scale, and to be sure everything would line up with the finished armor, Clinton lent me a cast of the Mk. III forearm. This way I knew my pieces would match up. First I started using 2mm craft foam to create the templates, but it wasn't quite working for me. I needed something that would hold shape and bend easily. So on my fourth attempt, I traced my templates onto some thin sheet aluminum, then cut them out with tin snips. Once I was happy with the shape of everything, I flattened everything back out and traced them onto paper to scan.
Now I was ready to get the templates I drew up translated to CAD drawings for the cutter. I turned to Andrew, your friendly neighborhood squirl (epilepticsquirl), to help me out with the CAD files. (Andrew also helped out with the Cap shield brackets too! :thumbsup)
Once the templates were ready, I sent them over to my local water jet guy to have them cut. The pieces were cut out of .080" aluminum, which is just thick enough to work with. Picked up the pieces last Friday, and I knew right then that this build was going to fun!
Over the last few days I've begun working this into shape. I had the day off work today, so I was really able to make a lot of progress. I bent the pieces into shape first, and then started fitting. Once everything was where I wanted it, started to drill and tap holes. I used 10-32 set screws to hold everything together. Here are a few progress shots from today, where the project stands.
Still need to cut, shape, drill and tap the bottom support pieces. After that, it is on to the details: brass tubing, pistons, and wires! Stay tuned for more
:thumbsup
Last edited: