FettFreak80
New Member
First off, Ive never used or posted anything on a forum. So cut me some slack. Yep Im a noob, doesnt really bother me. But i really have no idea what Im doing haha. If anyone wants to give me constructive criticism or advice I would appreciate it alot! AND this is written in my weird shorthand so if you have any questions please ask!
I havnt made any props for about 10 years - I was a professional special effects make up artist from 1999-2003 in Australia. I built and fabricated many projects professionally and for personal projects. Long story short I have been a tattoo artist since then and have been dying to get back into making props etc on the side. Yes Im very late to the party but I have had an extremely busy year and havnt had much time to do this build /mod.
In retrospect it wouldve made so much more sense to just buy a kit from a reputable builder...As the amount of work I have put into the mod to get it more screen accurate is ridiculous. BUT I love a challenge so I just went ahead with it. Yes the basic shape of the BS helmet is great, but the more I looked at the BS and researched it, the more work I knew it would take to get it somewhat screen accurate. Yep the plastic that makes up the dome area is such dog****. The amount of frustration and hard work expelled just to give it a nice finish was questionable. Ill explain as we go along....
Anyway Ill keep my post as interesting as possible, and avoid repeating what many people have already shown/ spoken of in similar threads. Ill thank TridCloudwalker, @Jamestan for inspiring me with the ideas and techniques that really helped me

K so heres the obligatory side by side, Disney mask and BS helmet comparison. Time to tear these guys up!!


I tore all the insides out as per the million other people who have done this mod before me - Sanded the two exposed edges a bit then used some two-part epoxy to glue them together. Then I used a soldering iron to melt that seam together just to really make sure they would stay put. BUT even then I thought stuff it and put a layer of fibrglass inside, it also filled up the massive gaps left from those voice changer buttons. It gave it some weight too, which just felt better. And less cheap!!
The jaw section (including the face plates) from the Disney mask were cut off and put aside for later


Then I started the long arduous journey of sanding that ****ty texture off the dome section. Getting it back to a somewhat flat finish wasnt too hard BUT it goes a weird furry texture that I just knew would not take spray paint well at all (I did some small tests to make sure). I had a friend who paints cars help me out and explained I would be better off sealing it first. SO after some reserach I found this great product - Motospray Plastic Fill. Its used to repair plastic car bumpers. I noticed alot of people on this forum used the standard car body filler but by its chemical base, its not going to properly adhere to the plastic well at all. That and it will eventually crack from all the movement this plastic will at some point make (its pretty damn flimsy). I applied a fairly thick coat over the whole area, let it dry and started sanded it flat. I hit it with rough sandpaper down to a fine grit, then four grades of wet and dry. This worked a treat! I knew the spray texture would fill in most of the sanding marks, so I just got it to this point and put it aside for painting.

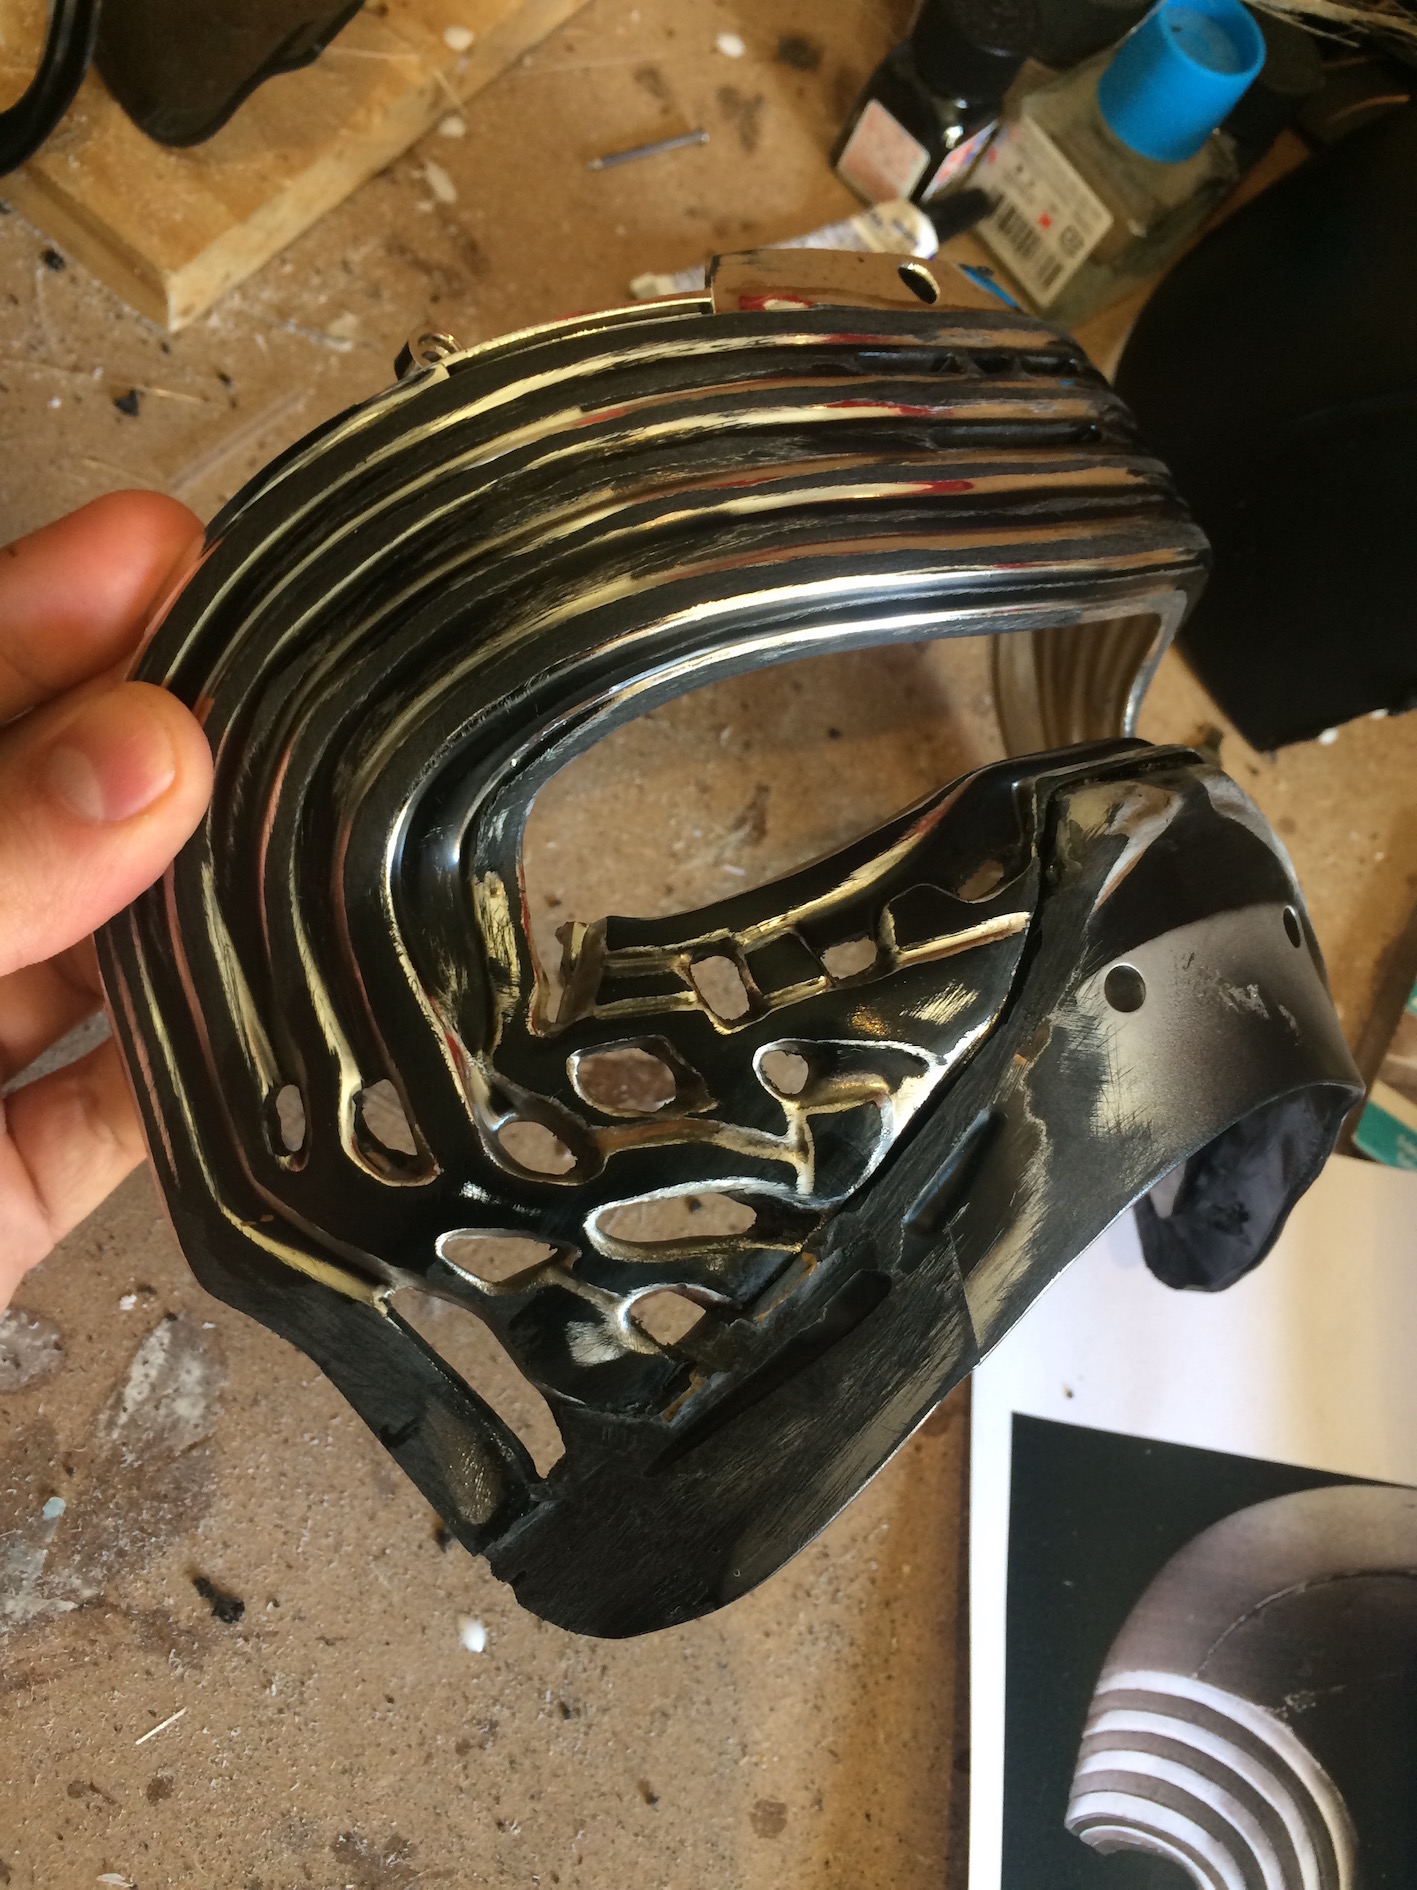


Onto the face plate section... I decided the best way to approach it was to cut off that bottom section(from the Disney mask)and line it up with the filigree (for lack of a better term) section from the BS helmet. Then heat and shape the cheeks properly. I kinda knew this alone would ruin the chrome finish, so I figured I would just re-paint it later...Plus the more I looked at it, the chrome was too cheap looking and really rounded, so I sanded the whole area to flatten it out...I went ahead and cut the bottom bit as close to the filligree section as I could get it. I used the heat gun and slowly heated the appropriate areas, pushed them in til I got them right, then I ran the piece under cold water.
Next I super-glued the parts together. I then used some of this amazing apoxie sculpt and started getting rid of that seam. Also used it for refining and building up most of the plate section. I wont explain just take a look at the pics, you'll get the idea. Apoxie Sculpt is an absolute gem and works so well - you can really create fine details. Yes it looks really rough here but once I give it a coat of paint I expected it to come up sweet.


So after hours of sculpting and sanding I was happy with the surface finish, then hit it with a couple of coats of primer. Was really happy with how this was looking.


I took the face plates from the Disney store mask, gave them a couple of layers of primer and let them dry. I looked through as much reference of the helmet as possible and its obvious that the helmet has a subtle texture to it. Countless nerds with zero experience with film production and cinematography will cry out that there is not.. but just look at these close up pics (from Prop Shop, Celebration Day close ups, anavos) The texture is there. Its called subtlety kids (it doesnt look like its in shots from force awakens because the film is editied and contrast is jacked up so you barely see it, especially in medium/long and wide shots) Its a texture spray that is usually applied after the primer coat( (Ill find the brand and post it asap). Then its sanded back until its almost gone. Then wet and dry sanded to smooth it out and the color spray applied next...Actually as soon as I posted this I decided I will sand that finish down a bit more and apply a final coat of matt black


I havnt made any props for about 10 years - I was a professional special effects make up artist from 1999-2003 in Australia. I built and fabricated many projects professionally and for personal projects. Long story short I have been a tattoo artist since then and have been dying to get back into making props etc on the side. Yes Im very late to the party but I have had an extremely busy year and havnt had much time to do this build /mod.
In retrospect it wouldve made so much more sense to just buy a kit from a reputable builder...As the amount of work I have put into the mod to get it more screen accurate is ridiculous. BUT I love a challenge so I just went ahead with it. Yes the basic shape of the BS helmet is great, but the more I looked at the BS and researched it, the more work I knew it would take to get it somewhat screen accurate. Yep the plastic that makes up the dome area is such dog****. The amount of frustration and hard work expelled just to give it a nice finish was questionable. Ill explain as we go along....
Anyway Ill keep my post as interesting as possible, and avoid repeating what many people have already shown/ spoken of in similar threads. Ill thank TridCloudwalker, @Jamestan for inspiring me with the ideas and techniques that really helped me
K so heres the obligatory side by side, Disney mask and BS helmet comparison. Time to tear these guys up!!
I tore all the insides out as per the million other people who have done this mod before me - Sanded the two exposed edges a bit then used some two-part epoxy to glue them together. Then I used a soldering iron to melt that seam together just to really make sure they would stay put. BUT even then I thought stuff it and put a layer of fibrglass inside, it also filled up the massive gaps left from those voice changer buttons. It gave it some weight too, which just felt better. And less cheap!!
The jaw section (including the face plates) from the Disney mask were cut off and put aside for later
Then I started the long arduous journey of sanding that ****ty texture off the dome section. Getting it back to a somewhat flat finish wasnt too hard BUT it goes a weird furry texture that I just knew would not take spray paint well at all (I did some small tests to make sure). I had a friend who paints cars help me out and explained I would be better off sealing it first. SO after some reserach I found this great product - Motospray Plastic Fill. Its used to repair plastic car bumpers. I noticed alot of people on this forum used the standard car body filler but by its chemical base, its not going to properly adhere to the plastic well at all. That and it will eventually crack from all the movement this plastic will at some point make (its pretty damn flimsy). I applied a fairly thick coat over the whole area, let it dry and started sanded it flat. I hit it with rough sandpaper down to a fine grit, then four grades of wet and dry. This worked a treat! I knew the spray texture would fill in most of the sanding marks, so I just got it to this point and put it aside for painting.
Onto the face plate section... I decided the best way to approach it was to cut off that bottom section(from the Disney mask)and line it up with the filigree (for lack of a better term) section from the BS helmet. Then heat and shape the cheeks properly. I kinda knew this alone would ruin the chrome finish, so I figured I would just re-paint it later...Plus the more I looked at it, the chrome was too cheap looking and really rounded, so I sanded the whole area to flatten it out...I went ahead and cut the bottom bit as close to the filligree section as I could get it. I used the heat gun and slowly heated the appropriate areas, pushed them in til I got them right, then I ran the piece under cold water.
Next I super-glued the parts together. I then used some of this amazing apoxie sculpt and started getting rid of that seam. Also used it for refining and building up most of the plate section. I wont explain just take a look at the pics, you'll get the idea. Apoxie Sculpt is an absolute gem and works so well - you can really create fine details. Yes it looks really rough here but once I give it a coat of paint I expected it to come up sweet.
So after hours of sculpting and sanding I was happy with the surface finish, then hit it with a couple of coats of primer. Was really happy with how this was looking.
I took the face plates from the Disney store mask, gave them a couple of layers of primer and let them dry. I looked through as much reference of the helmet as possible and its obvious that the helmet has a subtle texture to it. Countless nerds with zero experience with film production and cinematography will cry out that there is not.. but just look at these close up pics (from Prop Shop, Celebration Day close ups, anavos) The texture is there. Its called subtlety kids (it doesnt look like its in shots from force awakens because the film is editied and contrast is jacked up so you barely see it, especially in medium/long and wide shots) Its a texture spray that is usually applied after the primer coat( (Ill find the brand and post it asap). Then its sanded back until its almost gone. Then wet and dry sanded to smooth it out and the color spray applied next...Actually as soon as I posted this I decided I will sand that finish down a bit more and apply a final coat of matt black
Last edited by a moderator:

")