ave4uevoli
Sr Member
Some people may have realized that I've taken a small break in posting and updating my collection thread. (Most people probably stopped clicking on it because it was just getting silly). The reason why I slowed down a bit is because there was a major disaster in my collection where Yoda (sculpted by Cyberman and finished (?) and received by Natty15d) broke! :cry
I don't know what happened - I woke up one morning and went over to wish Yoda "good morning" only to find Yoda doing a face plant on the floor. I was absolutely devestated. Believe it or not, I really do try and care for my props and when something breaks I feel very disheartened.
Anyways, Yoda was a complete mess. I have spent the last month or two trying to repair it. I have attached pictures and the story behind it to help those who have suffered similar accidents.
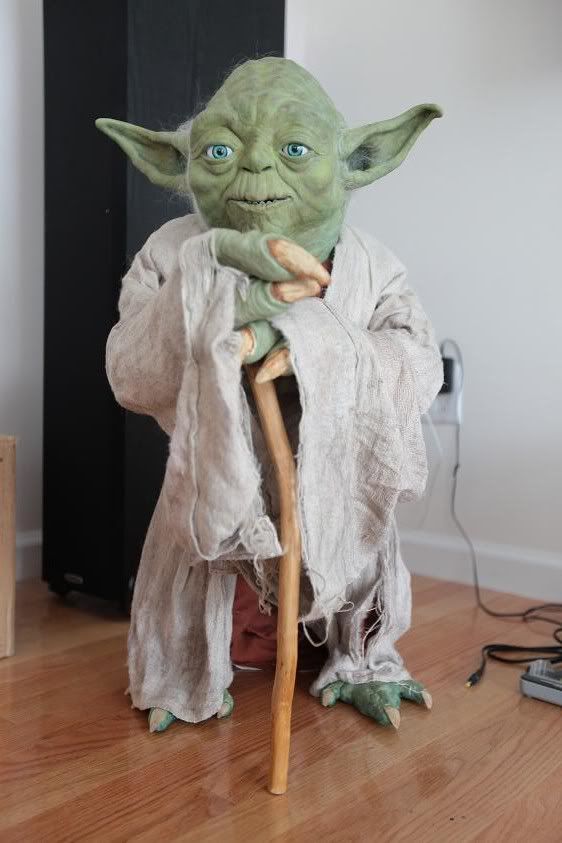
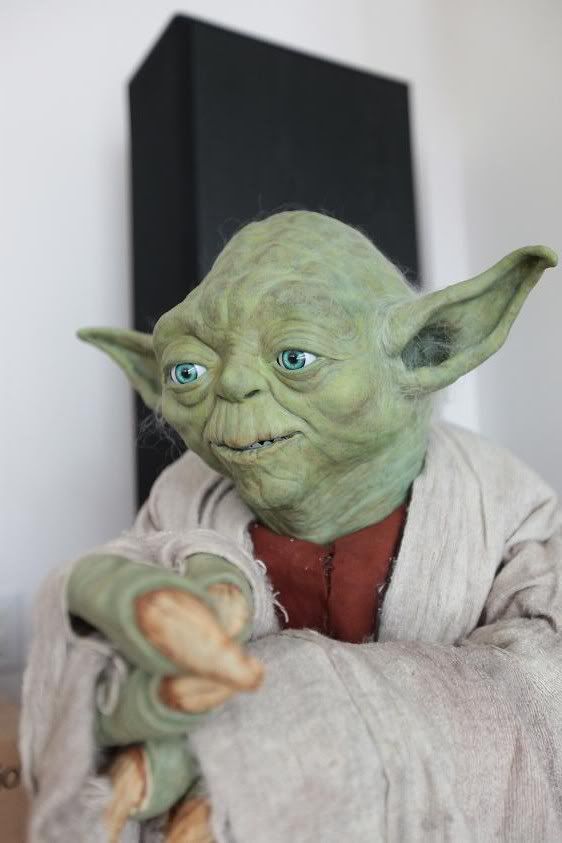
Some of you may remember my yoda display before the accident. I really loved the little guy:

Then I woke up one morning and found him on the FLOOR - uGH! This is what I woke up to: Yoda didn't even have a face left!! There were pieces of resin and green bits all over my floor. I found eyeballs underneath my sofa.. It was one of the worst days of my prop collecting life.
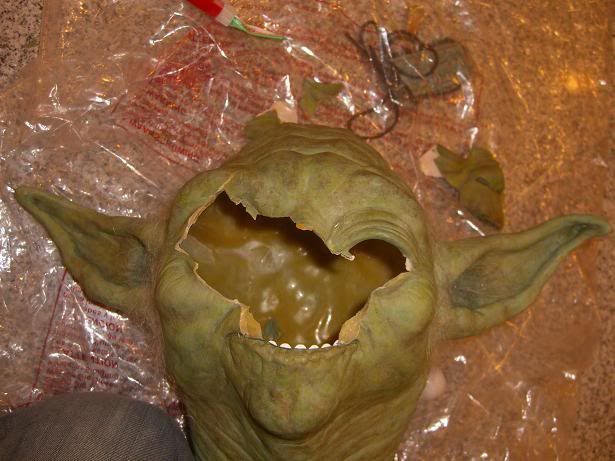
So, I tried to fix yoda. I gathered up as many little pieces as I could and tried to fit them back on with Krazy glue. I've had to do some minor repairs to fiberglass and resin. Krazy glue actually works pretty well to bond those materials together. This was like a jigsaw puzzle from HELL. The face really just completely shattered.
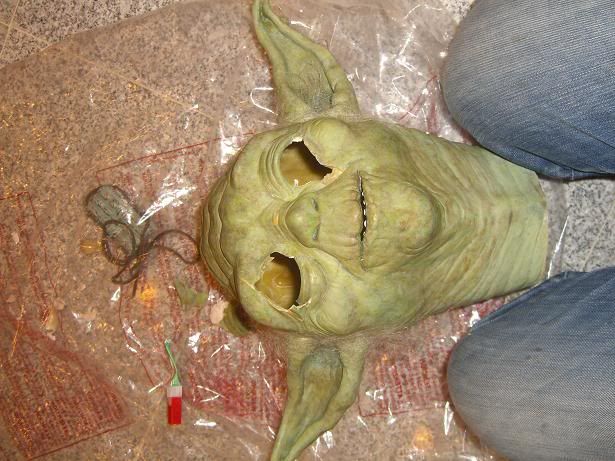
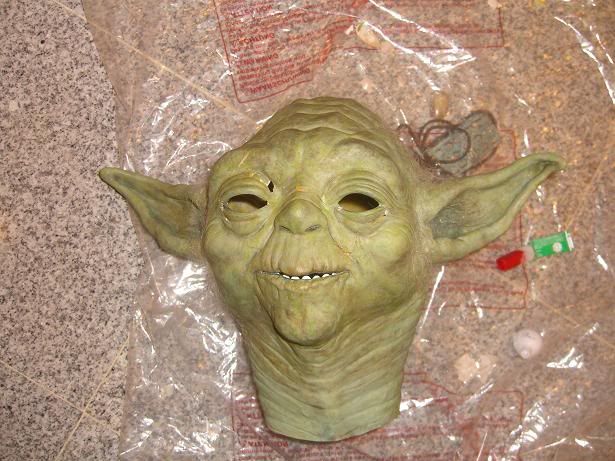
So I got as many pieces that I could find and fit back on- At least Yoda has a face now but there were still serious cracks and holes all around that needed to be filled.
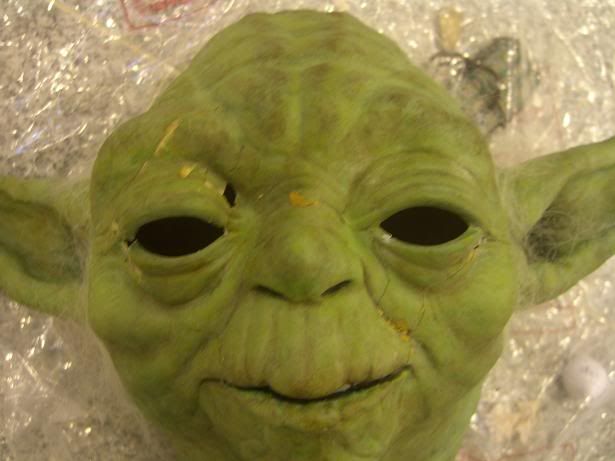
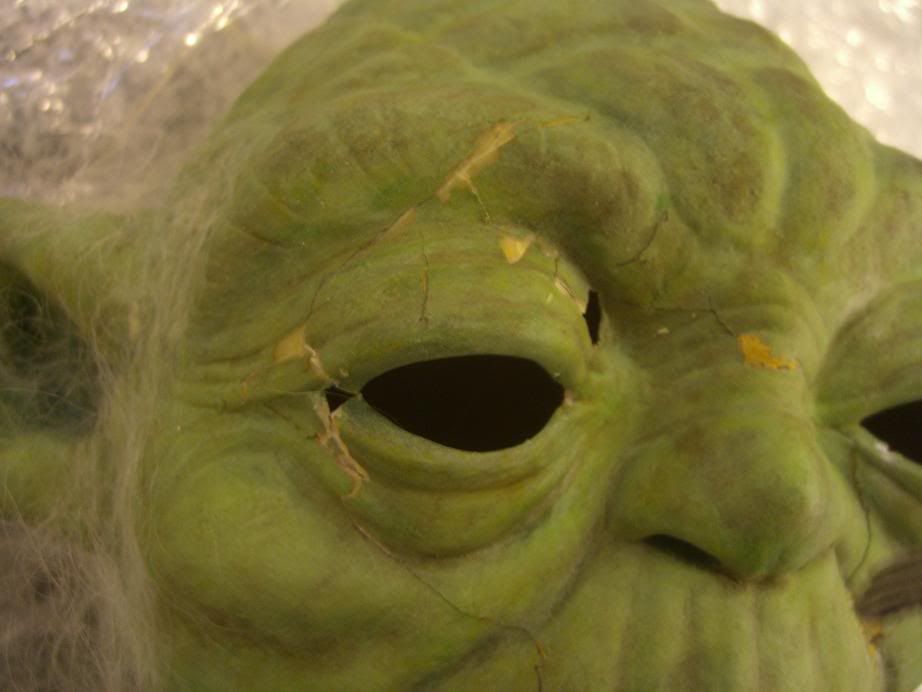
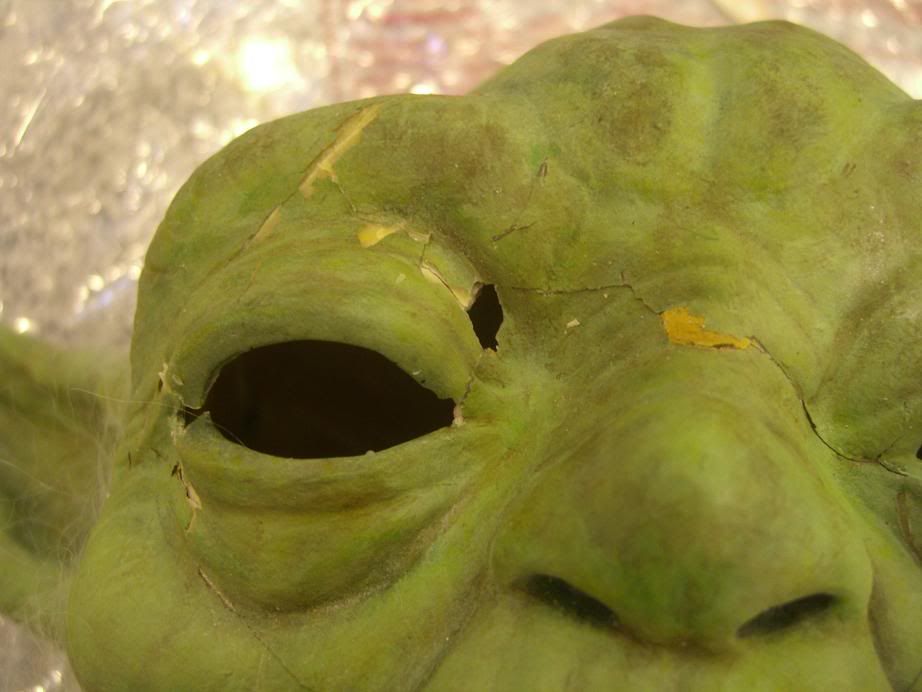
Obviously I couldn't leave such an exceptional piece looking like this. So I went and started filling up the holes with bondo. I actually applied it by hand and then sculpted it to match with a toothpick and a eyeglass screwdriver. I didn't want to screw up the existing surrounding paint job near the cracks so I had to do some precision sculpting so I didn't have to sand afterwards.
The little cracks couldn't take the bondo, it was too thick and it wouldn't seep into the cracks. So, after looking and reading all those topics on the SS thread I decided to give Zap glue a try. According to other posters here, it's very watery and will seep into the crack and fill them up. Guess what? That's exactly what it did. I had to use my lighter to stretch out a piece of plastic until it was really really thin. Then I "wicked" the ZAP glue into the cracks. I did this a few times and sure enough, it filled up real quick.
Sigh - well that got the cracks filled - but they still showed.. Drat. So I bought a set of pastels. My pastels were in the shape of a pencil. I figured that I would be able to smudge it and make it blend. Plus, the pencil shape will give me the control for precise touchups.
That FAILED. Turns ot pastels don't stick to shiny smooth superglue. Who knew :angel. It stuck to the bondo, but my bondo "precision sculpting" wasn't as smooth as I would have hoped so the pastels didn't go on smooth.
So I went online and purchased small bottles of green acrylic paint. Which green shades did I get? ALL OF THEM. I didn't know what green would work with Yoda so I purchased 8 different shades of green. 1 shade of brown, 1 light blue, 1 grey... I ended up only using the green colors. I mixed them up in a combination that I couldn't even remember and I tested it on the rim of Yoda until I got a color that matched.
Yoda's head is a real pain to match. There are SO many different colors and layers of paint I was very surprised. I found a little trick very helpful when painting. I took a cuetip and dipped it into each paint bottle. I pulled them all out and put them into a disposeable cup. That became my palet. The paint started to mix on its own on the bottom of the cup, but if I needed some more yellow green i would dab the paint brush on the yellow cue tip which I left in the cup... or if I needed some darker green I would dab my paint brush on the darker green cue tip. If I needed a mix of the two, I would dab my paint brush in between the two cue tips. ... well - you get the idea.
After getting down a good base, I still wasn't completely satisfied so I went back and used pastels again for a bit of weathering. The pastels took to the paint well. I used all sorts of random colors (green, yellow, brown, grey).
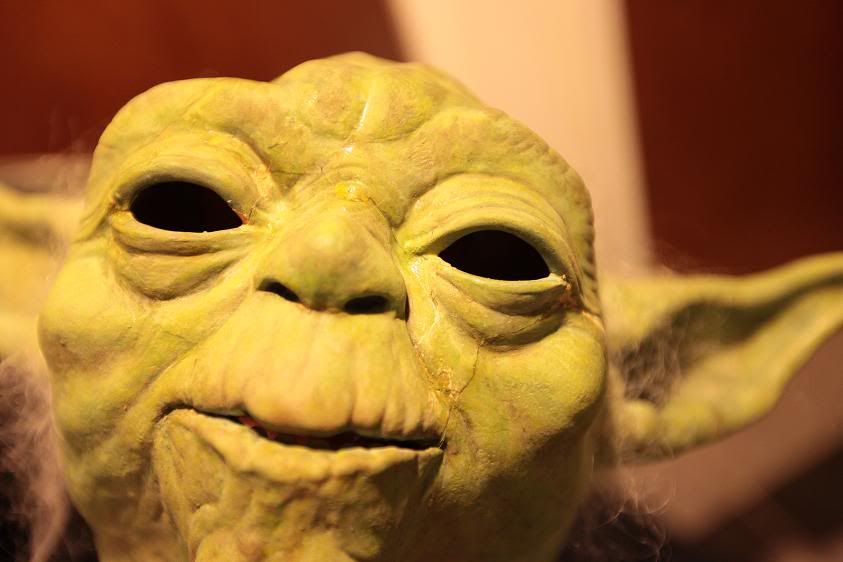
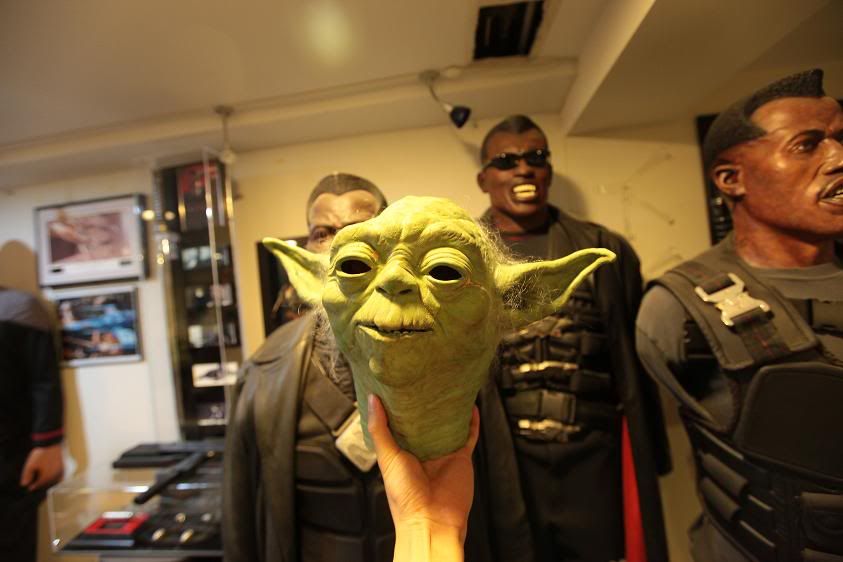
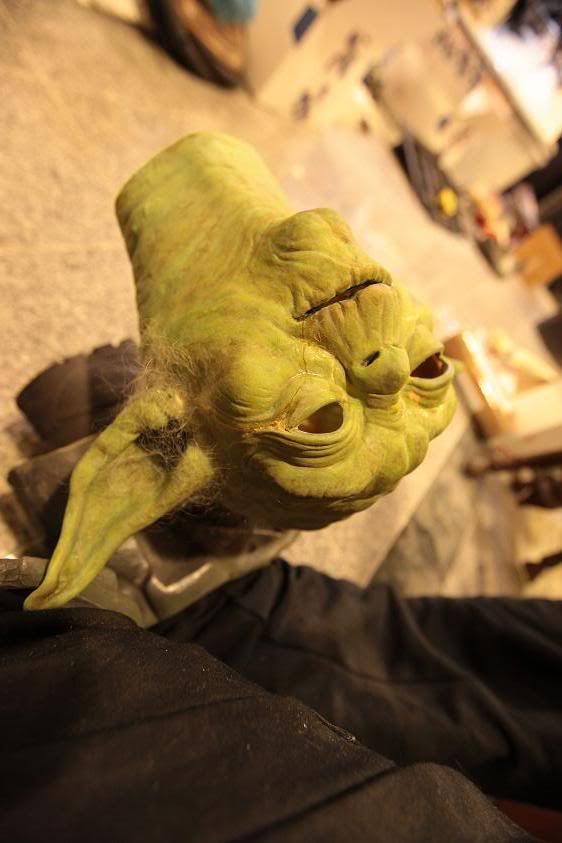
So here is Yoda now - i still need to spray some dullcote on the new paint parts. I think I did a fairly good job getting the paint to match. Heck - I'm just happy I didn't totally ruin it. It's not perfect, I know, after looking at the pictures I've been tweaking the coloring of the paint with pastels (especially Yoda's left cheek). It actually looks even better now than in the pictures below.


Thanks you guys for sharing your builds and your info. Hopefully I put some of the info that I learned here to good use with this project. I couldn't have done it without you guys. :thumbsup
I don't know what happened - I woke up one morning and went over to wish Yoda "good morning" only to find Yoda doing a face plant on the floor. I was absolutely devestated. Believe it or not, I really do try and care for my props and when something breaks I feel very disheartened.
Anyways, Yoda was a complete mess. I have spent the last month or two trying to repair it. I have attached pictures and the story behind it to help those who have suffered similar accidents.
Some of you may remember my yoda display before the accident. I really loved the little guy:


Then I woke up one morning and found him on the FLOOR - uGH! This is what I woke up to: Yoda didn't even have a face left!! There were pieces of resin and green bits all over my floor. I found eyeballs underneath my sofa.. It was one of the worst days of my prop collecting life.

So, I tried to fix yoda. I gathered up as many little pieces as I could and tried to fit them back on with Krazy glue. I've had to do some minor repairs to fiberglass and resin. Krazy glue actually works pretty well to bond those materials together. This was like a jigsaw puzzle from HELL. The face really just completely shattered.


So I got as many pieces that I could find and fit back on- At least Yoda has a face now but there were still serious cracks and holes all around that needed to be filled.


Obviously I couldn't leave such an exceptional piece looking like this. So I went and started filling up the holes with bondo. I actually applied it by hand and then sculpted it to match with a toothpick and a eyeglass screwdriver. I didn't want to screw up the existing surrounding paint job near the cracks so I had to do some precision sculpting so I didn't have to sand afterwards.
The little cracks couldn't take the bondo, it was too thick and it wouldn't seep into the cracks. So, after looking and reading all those topics on the SS thread I decided to give Zap glue a try. According to other posters here, it's very watery and will seep into the crack and fill them up. Guess what? That's exactly what it did. I had to use my lighter to stretch out a piece of plastic until it was really really thin. Then I "wicked" the ZAP glue into the cracks. I did this a few times and sure enough, it filled up real quick.


Sigh - well that got the cracks filled - but they still showed.. Drat. So I bought a set of pastels. My pastels were in the shape of a pencil. I figured that I would be able to smudge it and make it blend. Plus, the pencil shape will give me the control for precise touchups.
That FAILED. Turns ot pastels don't stick to shiny smooth superglue. Who knew :angel. It stuck to the bondo, but my bondo "precision sculpting" wasn't as smooth as I would have hoped so the pastels didn't go on smooth.
So I went online and purchased small bottles of green acrylic paint. Which green shades did I get? ALL OF THEM. I didn't know what green would work with Yoda so I purchased 8 different shades of green. 1 shade of brown, 1 light blue, 1 grey... I ended up only using the green colors. I mixed them up in a combination that I couldn't even remember and I tested it on the rim of Yoda until I got a color that matched.
Yoda's head is a real pain to match. There are SO many different colors and layers of paint I was very surprised. I found a little trick very helpful when painting. I took a cuetip and dipped it into each paint bottle. I pulled them all out and put them into a disposeable cup. That became my palet. The paint started to mix on its own on the bottom of the cup, but if I needed some more yellow green i would dab the paint brush on the yellow cue tip which I left in the cup... or if I needed some darker green I would dab my paint brush on the darker green cue tip. If I needed a mix of the two, I would dab my paint brush in between the two cue tips. ... well - you get the idea.
After getting down a good base, I still wasn't completely satisfied so I went back and used pastels again for a bit of weathering. The pastels took to the paint well. I used all sorts of random colors (green, yellow, brown, grey).
So here is Yoda now - i still need to spray some dullcote on the new paint parts. I think I did a fairly good job getting the paint to match. Heck - I'm just happy I didn't totally ruin it. It's not perfect, I know, after looking at the pictures I've been tweaking the coloring of the paint with pastels (especially Yoda's left cheek). It actually looks even better now than in the pictures below.


Thanks you guys for sharing your builds and your info. Hopefully I put some of the info that I learned here to good use with this project. I couldn't have done it without you guys. :thumbsup
