You are using an out of date browser. It may not display this or other websites correctly.
You should upgrade or use an alternative browser.
You should upgrade or use an alternative browser.
Honey I Shrunk The Kids SHRINK RAY
- Thread starter SPENGLER87
- Start date
RagnarokandRoll
Active Member
Some more things worth mentioning.
There are three sections of cable wrap around the "barrel" of the machine.
These sections are comprised of steel braided cable and thin copper pipe, as seen here:

The copper piping terminates in cable clamps attached to red wire.
Liquid nitrogen was pumped through the steel braided cable. There were 3 of these cables; They start at the NO2 tanks, snake up through the ceiling, and wrap around the barrel in those three sections. The ends are tied to the armature, as seen here:


You might notice that they look different from shot to shot...this is because as NO2 was pumped through them, Ice began to form on the metal. This fact confused me for years.
Mike, since you're working on the nose cone, here are more images to help you:


More to come.
- Brian
There are three sections of cable wrap around the "barrel" of the machine.
These sections are comprised of steel braided cable and thin copper pipe, as seen here:
The copper piping terminates in cable clamps attached to red wire.
Liquid nitrogen was pumped through the steel braided cable. There were 3 of these cables; They start at the NO2 tanks, snake up through the ceiling, and wrap around the barrel in those three sections. The ends are tied to the armature, as seen here:
You might notice that they look different from shot to shot...this is because as NO2 was pumped through them, Ice began to form on the metal. This fact confused me for years.
Mike, since you're working on the nose cone, here are more images to help you:
More to come.
- Brian
SPENGLER87
New Member
On to the nose cone, The nose cone maybe one of the most important parts in this build. The size of it dictates what the size of the forward assembly parts are, from the clear acrylic tube to the rear cap that the copper tubes from the barrel plug into. To begin building it I went to Lowes's pluming/ pvc section.
Found the parts!
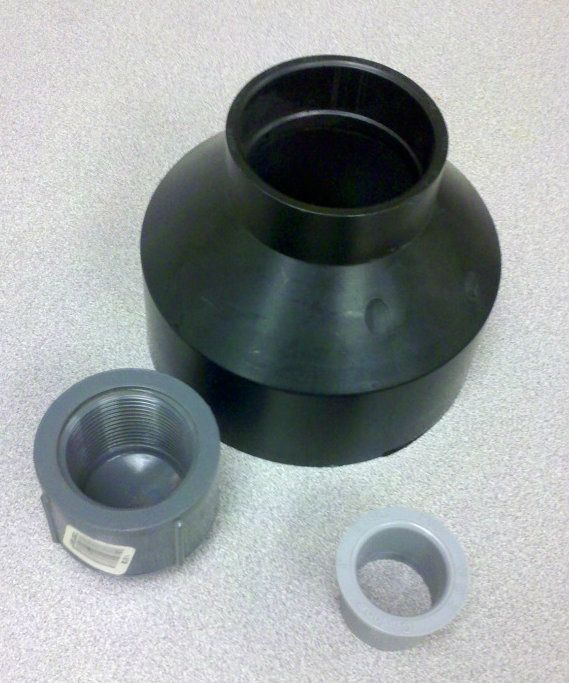
Doing a test fit
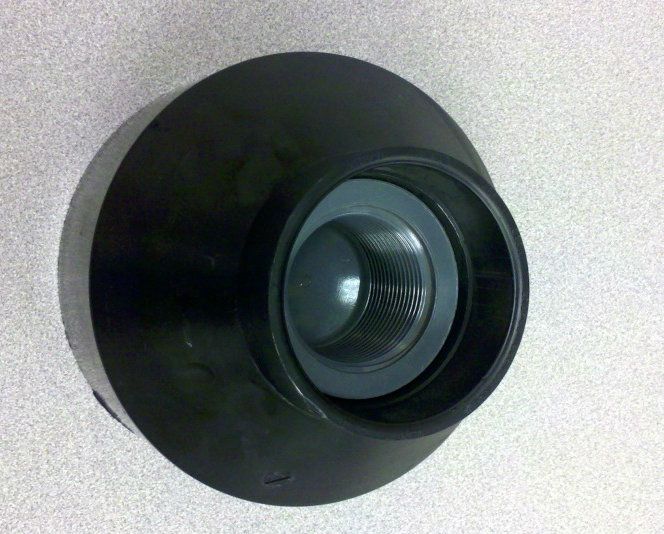
After some cutting and sanding
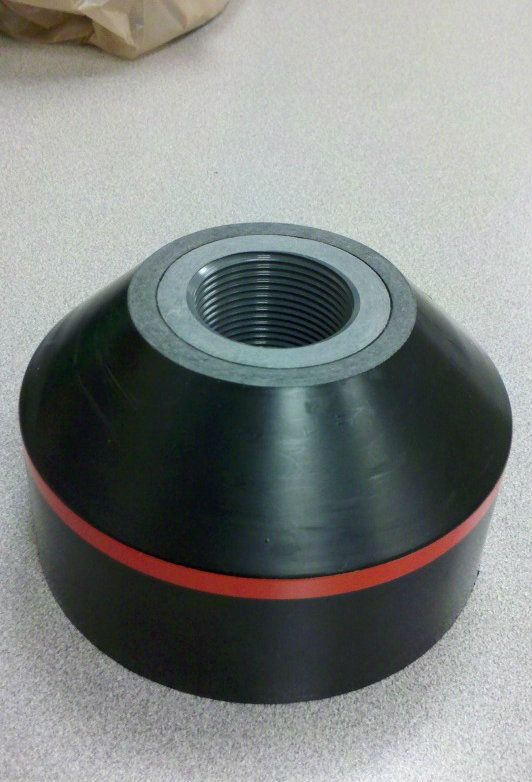
I will be cutting away the plastic under the red line
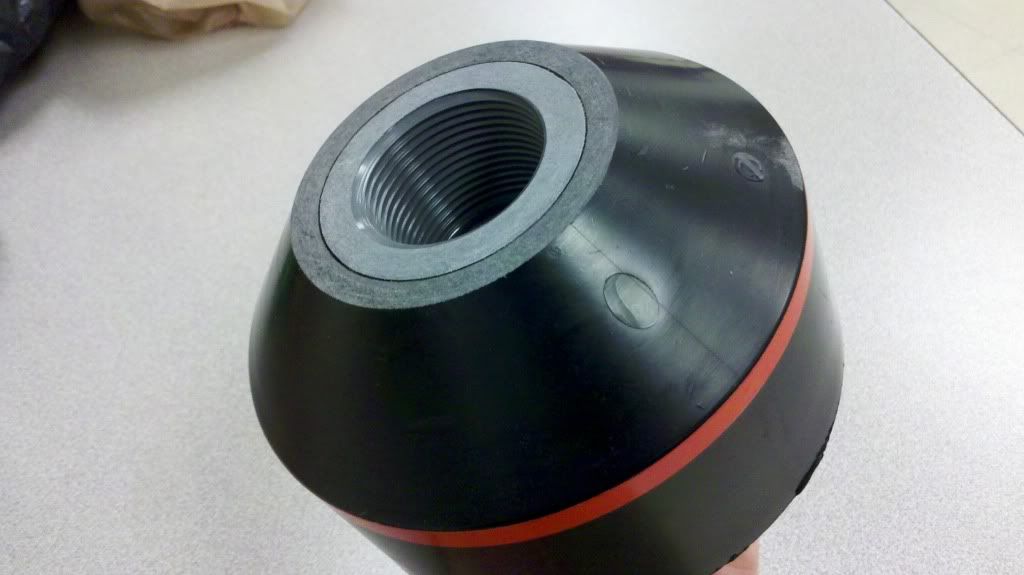
At the moment that's all I have to show, Next up is drilling the holes that go around the nose.
Found the parts!
Doing a test fit
After some cutting and sanding
I will be cutting away the plastic under the red line
At the moment that's all I have to show, Next up is drilling the holes that go around the nose.
RagnarokandRoll
Active Member
nice going!!
I have begun to calculate dimensions based on both my own in-person approximations and the pictures I have.
At the Backlot tour, I've often paced out how long the "barrel" is, and I'm using 5 feet as a good standard approximation (we'll never be sure until someone can get through the mesh that guards the machine and use a tape measure).
Based on a 60" barrel length, I've come up with the following measurements:
The diameter of the 8 copper tubes that comprise the barrel (7 around the perimeter and 1 in the middle): 4"
Gray cylinders that make up the emitter: 5"
(when I used the 5" approximation on the dead-on screen shot of the machine, it produced the following exact measurements which I think are close to accurate):
Nose cone diameter: 3"
beam opening: 1"
There are two black squares that section off the machine.
They appear to be approx. 5.5" wide. The back one extends downward slightly farther than the front one, because it attaches to the heat sink directly with a kind of L bracket, rather than via a little square piece like the front one. I'm pretty sure the front one is close to 5.5" square, and the back is 5.5" x 6.25", based on my measurements.
The little box on top that houses the stablizing rod is 1.5" x 1.75", and the stablizing rod itself is 3/4". I used the 3/4" assumption to glean ALL of these other measurements, and they all fall perfectly into place. I tried them with an assumed stablizing rod measurement of 1", and that made everything else way too big. Plus you can clearly tell from screen grabs that the stablizing rod is not 1", which is the ghostbusters proton gun handle size (one gets used to how big that looks after building 7+ proton packs!)
I've seen the machine in person, and it's possible to walk astride it and estimate it's length that way. There is simply no way it's longer than 5 feet. When you doubt yourself and think you're making things too small, remember that the screen always makes props look bigger than they are, especially in this case.
I think you should keep going with your nose cone, even though you said yourself it was slightly too large, because the alternative is to machine a perfect nose cone and we all can get that PVC piece. It looks great so far!
Capacitors come in mm, and using the Nose cone estimation I came up with an appox. dia. of .9 inches for the capacitors, which is almost perfectly equal to 22 inches, one of the largest ceramic disc capacitor sizes.
Likewise, I used the 3/4" stablizing rod measurement to come up with the following measurements for the heat sink.
It's about 15.5" wide, with a base of 1" and 3/4" fins. It's approx. 26" long. I'm guessing the guy who built it (I can't remember his name ATM) went to a surplus house like APEX and found a bunch of stuff lying around. No telling where the heat sink originally came from...
I'm making a new rendering in sketchup based on all of these fresh measurements (I did the one in anim8or back in 2007). Here's a glimpse:

I'm going to use the new rendering to create plans.
About the gear situation:
I always imagined basically fabricating an approximation of the gears and scissoring arms, and mounting it on a black metal arm so that you couldn't tell it wasn't functional...maybe this is the best course? Unless you're an engineering wizard in which case help me/us?
I have begun to calculate dimensions based on both my own in-person approximations and the pictures I have.
At the Backlot tour, I've often paced out how long the "barrel" is, and I'm using 5 feet as a good standard approximation (we'll never be sure until someone can get through the mesh that guards the machine and use a tape measure).
Based on a 60" barrel length, I've come up with the following measurements:
The diameter of the 8 copper tubes that comprise the barrel (7 around the perimeter and 1 in the middle): 4"
Gray cylinders that make up the emitter: 5"
(when I used the 5" approximation on the dead-on screen shot of the machine, it produced the following exact measurements which I think are close to accurate):
Nose cone diameter: 3"
beam opening: 1"
There are two black squares that section off the machine.
They appear to be approx. 5.5" wide. The back one extends downward slightly farther than the front one, because it attaches to the heat sink directly with a kind of L bracket, rather than via a little square piece like the front one. I'm pretty sure the front one is close to 5.5" square, and the back is 5.5" x 6.25", based on my measurements.
The little box on top that houses the stablizing rod is 1.5" x 1.75", and the stablizing rod itself is 3/4". I used the 3/4" assumption to glean ALL of these other measurements, and they all fall perfectly into place. I tried them with an assumed stablizing rod measurement of 1", and that made everything else way too big. Plus you can clearly tell from screen grabs that the stablizing rod is not 1", which is the ghostbusters proton gun handle size (one gets used to how big that looks after building 7+ proton packs!)
I've seen the machine in person, and it's possible to walk astride it and estimate it's length that way. There is simply no way it's longer than 5 feet. When you doubt yourself and think you're making things too small, remember that the screen always makes props look bigger than they are, especially in this case.
I think you should keep going with your nose cone, even though you said yourself it was slightly too large, because the alternative is to machine a perfect nose cone and we all can get that PVC piece. It looks great so far!
Capacitors come in mm, and using the Nose cone estimation I came up with an appox. dia. of .9 inches for the capacitors, which is almost perfectly equal to 22 inches, one of the largest ceramic disc capacitor sizes.
Likewise, I used the 3/4" stablizing rod measurement to come up with the following measurements for the heat sink.
It's about 15.5" wide, with a base of 1" and 3/4" fins. It's approx. 26" long. I'm guessing the guy who built it (I can't remember his name ATM) went to a surplus house like APEX and found a bunch of stuff lying around. No telling where the heat sink originally came from...
I'm making a new rendering in sketchup based on all of these fresh measurements (I did the one in anim8or back in 2007). Here's a glimpse:
I'm going to use the new rendering to create plans.
About the gear situation:
I always imagined basically fabricating an approximation of the gears and scissoring arms, and mounting it on a black metal arm so that you couldn't tell it wasn't functional...maybe this is the best course? Unless you're an engineering wizard in which case help me/us?
Talyn626
Active Member
When I first found the forum one of the first things I did a search for to see if there was any information was the shrink ray. It's such a unique piece. Anything I found on the forum or was able to google basically said it was so complex and there was apparently no documentation on it's construction. I laughed at the "improvements" made in "Shrunk Oursleves" as the copper pipes used to direct the ball reminded me of a bedside guardrail that I had as a child. I think I recall even seeing the guardrail in the rafters or on a pile of boxes when Wayne starts unpacking the machine. I have a couple of questions/thoughts about some details that might help.
Any chance the nose/emitter is a found part or is it more likely it was specifically machined?
How many copper pipes that run the length of the machine have you guys figured there are? I'm assuming there are 7 and they line up with the openings in the nose/emitter but in the shots they all jumble up and I can't quite tell.
Is it possible to find the manufacture of the table the machine is mounted to? Maybe that could help with sizing.
Finally, just a reminder. Don't forget the baseball to block the laser.
RagnarokandRoll
Active Member
Correction: heat sink has a base of 1/2", not 1". Ooops...
RagnarokandRoll
Active Member
There are indeed 7 around the perimeter, with one in the center, but there are only 6 red holes/openings in the "nose cone"...
I haven't a clue as to whether or not the nose cone is found, but man I wish it were. It would help with the measurements so much.
Basically, from what I can tell and what the prop master who made this said, the machine wasn't mounted to the same table in the first and second movies. They moved it to a gurney like tray for van mounting, and instead of the little table with wheels (You can see the motor for left and right panning mounted underneath it in certain shots), the machine was moved to a big pegboard like metal plate, under which is a small tray for the L/R motor, upon which it still sits today. So basically it hasn't been mounted to that table since the first film...but I digress. Gleaning measurements from that table might help tremendously.
When I first found the forum one of the first things I did a search for to see if there was any information was the shrink ray. It's such a unique piece. Anything I found on the forum or was able to google basically said it was so complex and there was apparently no documentation on it's construction. I laughed at the "improvements" made in "Shrunk Oursleves" as the copper pipes used to direct the ball reminded me of a bedside guardrail that I had as a child. I think I recall even seeing the guardrail in the rafters or on a pile of boxes when Wayne starts unpacking the machine. I have a couple of questions/thoughts about some details that might help.
Any chance the nose/emitter is a found part or is it more likely it was specifically machined?
How many copper pipes that run the length of the machine have you guys figured there are? I'm assuming there are 7 and they line up with the openings in the nose/emitter but in the shots they all jumble up and I can't quite tell.
Is it possible to find the manufacture of the table the machine is mounted to? Maybe that could help with sizing.
Finally, just a reminder. Don't forget the baseball to block the laser.
RagnarokandRoll
Active Member
I tried, Contec, but the problem in every shot is one of perspective.
I can use those shots to check against what I've already approximated, and see how it matches up, but I'm afraid I'm not going to be personally satisfied until I can touch the machine with my own hands and measure it myself...
Plus, no way of knowing if the baseball was regulation or some kind of odd kiddie size.
SPENGLER87
New Member
Is the machine really that small in person? Im still amazed at the screen grabs you've posted, so many details I've never noticed. For one I never noticed the camcorder or the fact that there are 7 outer tubes making up the barrel. On the topic of the barrel tubes it's obvious that there are different sized tubes used, what sizes do you think are used? looks like 1/2 and 3/4? I'll ask a friend of mine who has a machine shop to make me a new nose cone based on your measurements. After doing some sizing and part hunting I've decided not to use mine, the front assembly would've been too big once put together. Another alternative would be to find an oil filter that looks the part.
When I was originally prototyping the barrel I came up with plans similar in size. For the barrel support squares I was thinking that they were about 1/4 thick. Also is it me or does the front square look like its red in some scenes and black in others?
When I was originally prototyping the barrel I came up with plans similar in size. For the barrel support squares I was thinking that they were about 1/4 thick. Also is it me or does the front square look like its red in some scenes and black in others?
RagnarokandRoll
Active Member
The edges were red in the first movie...not sure about the sequel. For the third, they painted them black, but in some of my pictures you can see where the paint has chipped off, exposing the original red color...yeah, 1/4" is what I estimated and it looks good in the sketchup model.
For the barrel tubes, I think you're right in that they're 3/4 and 1/2...I currently have 1" and 3/4" in my sketchup model and they look big compared to the corresponding screen shots. I'd like a second opinion though...
If you're going to have the nose cone machined, you should take into account the rings around it...I'm not sure what they signify, but since you're taking the trouble you might as well (see the angled closeup I posted).
I'd keep that nose cone you were making...you never know. I'm only approximating...but yeah, trust me when I say that EVERY time I see the machine in person, I immediately think: "Whoa, I gotta remember how SMALL it is in person!". In fact, I distinctly remember "pacing" down the length of the machine and only coming up with 4 1/2 paces, approx, but the 5' (aka 60") measurement makes more sense. Yup...it's SMALL. I think it tends to look bigger on screen because (1) all props look bigger on screen than in real life, and if you've ever sat in a Delorean you know exactly what I mean (the only exception to this I've ever personally seen was Ecto-1...I've touched the original while on a little excursion on the Sony lot and let me tell you, that thing is frakkin HUGE), and (2) All the wires and greeblies and circuit boards and whatnot make it look much bigger than it's basic structure mandates...
RagnarokandRoll
Active Member
Evidence of chipped edges showing how they used to be red, further demonstrating that this sad heap was once the original machine:

My ex-gf's mom standing as close to the machine as one can get, showing how small it really is...

Lastly, an updated glimpse of the sketchup model:

My ex-gf's mom standing as close to the machine as one can get, showing how small it really is...
Lastly, an updated glimpse of the sketchup model:
Contec
Master Member
A bit over 10 years ago, when people was not able to measure the original starwars costume pieces up close they made a devices that could.
By attaching 2 or more laserpointers to a piece of board a couple of inches apart, they could when pointed against the armor of boba fett and at the same time photographing the armor get pretty accurate dimensions. The lasers measurement don't change over a distance , Thus they could measure the armor from behind a glass cage. (because they knew how far it was between the laser dots)
By attaching 2 or more laserpointers to a piece of board a couple of inches apart, they could when pointed against the armor of boba fett and at the same time photographing the armor get pretty accurate dimensions. The lasers measurement don't change over a distance , Thus they could measure the armor from behind a glass cage. (because they knew how far it was between the laser dots)
RagnarokandRoll
Active Member
A bit over 10 years ago, when people was not able to measure the original starwars costume pieces up close they made a devices that could.
By attaching 2 or more laserpointers to a piece of board a couple of inches apart, they could when pointed against the armor of boba fett and at the same time photographing the armor get pretty accurate dimensions. The lasers measurement don't change over a distance , Thus they could measure the armor from behind a glass cage. (because they knew how far it was between the laser dots)
Good call. I've actually heard of this and have definitely considered making such a device...but I guess the only thing stopping me - other than the fact that when I'm there I'm on vacation and don't typically have the desire to do anything even remotely resembling work - is the thought of security taking issue with a mysterious device I'm trying to bring in to the park. My desire to not be subject to a cavity search far outweighs my desire to build a replica of this prop...but maybe one of you is more open to the idea than I am?
protonpack
Active Member
Disney seems to allow backpacks and camera bags, so it might not be that hard to bring in a collapsible ruler with the two or more laser pointers attached to it ahead of time into the park.
SPENGLER87
New Member
@ragnarockandroll here are the measurements for the viewfinder,
top
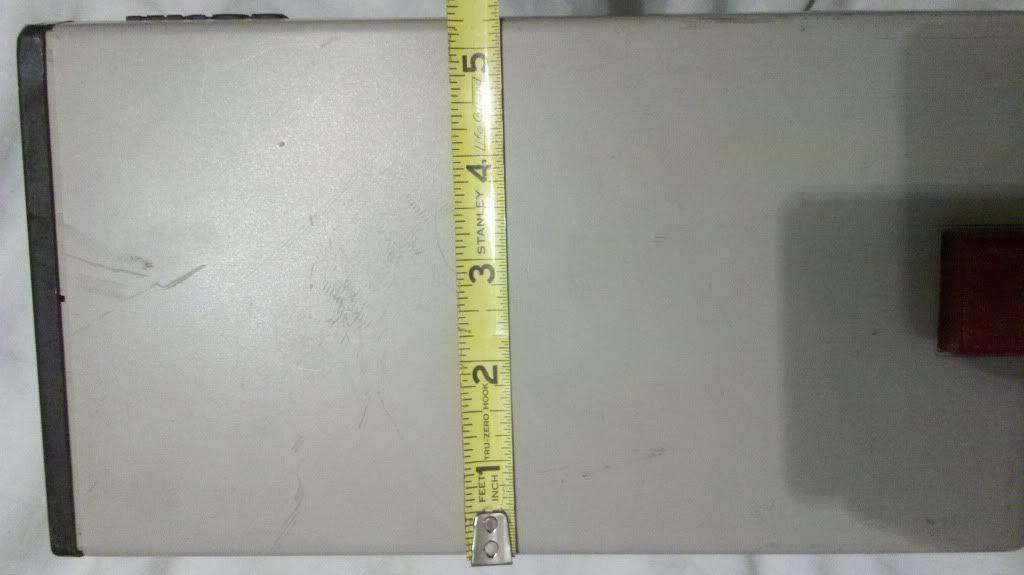
side height
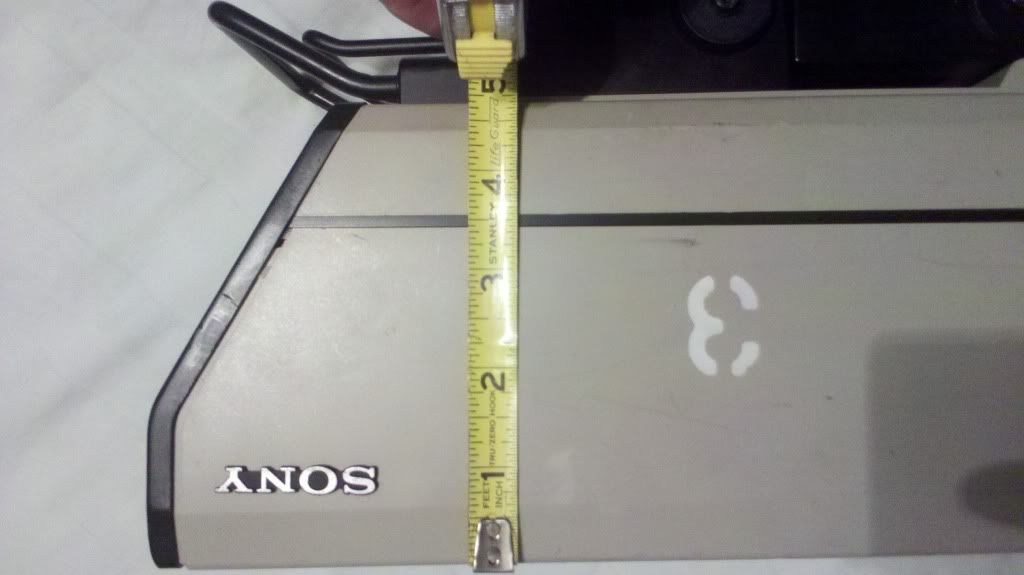
side length, barely over 11 1/2 inches
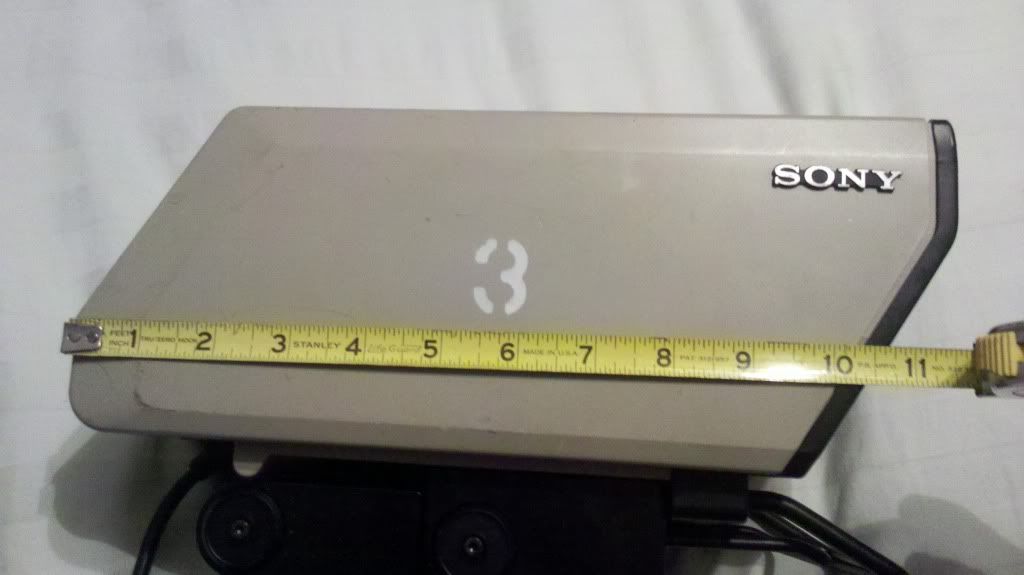
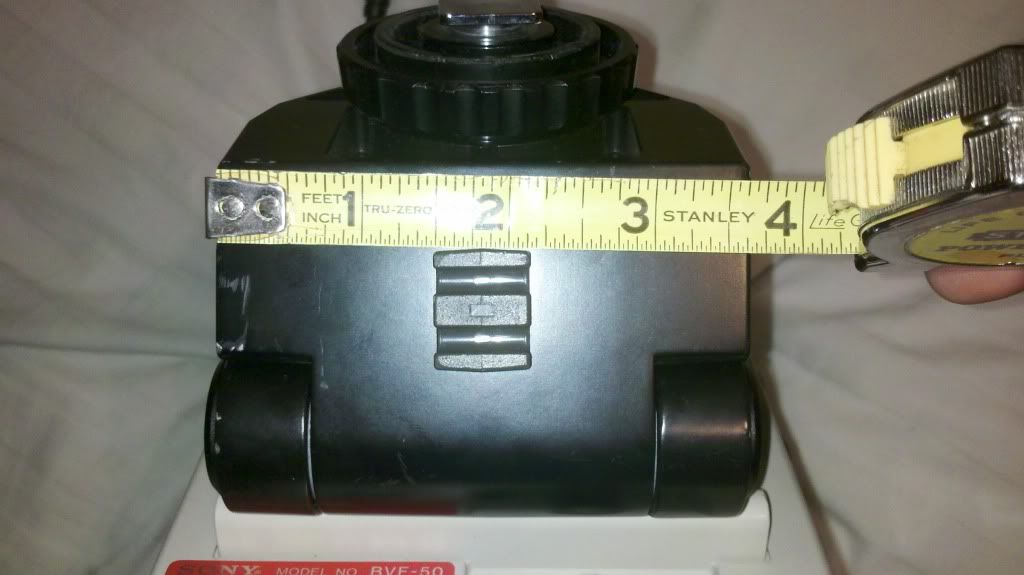
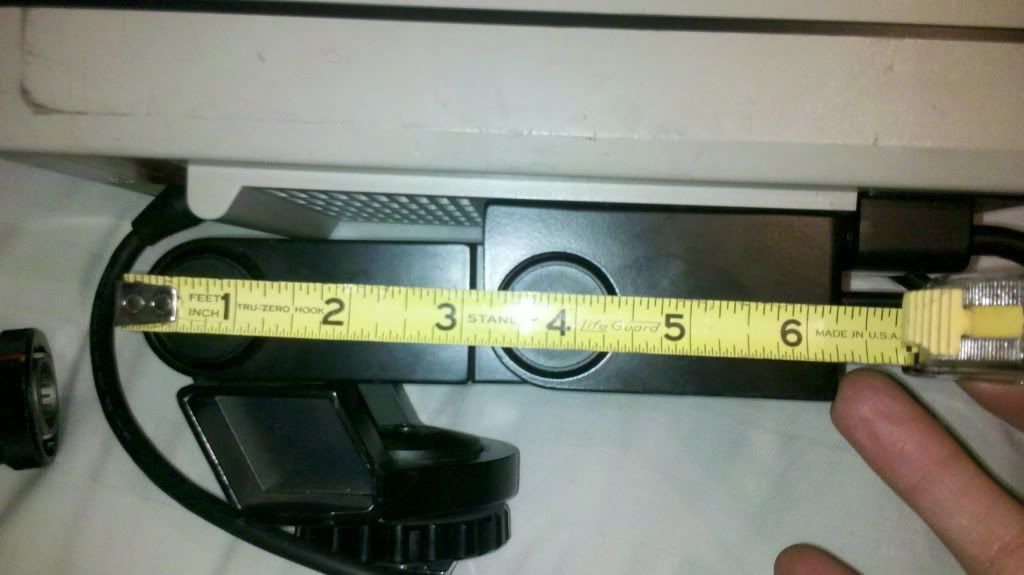
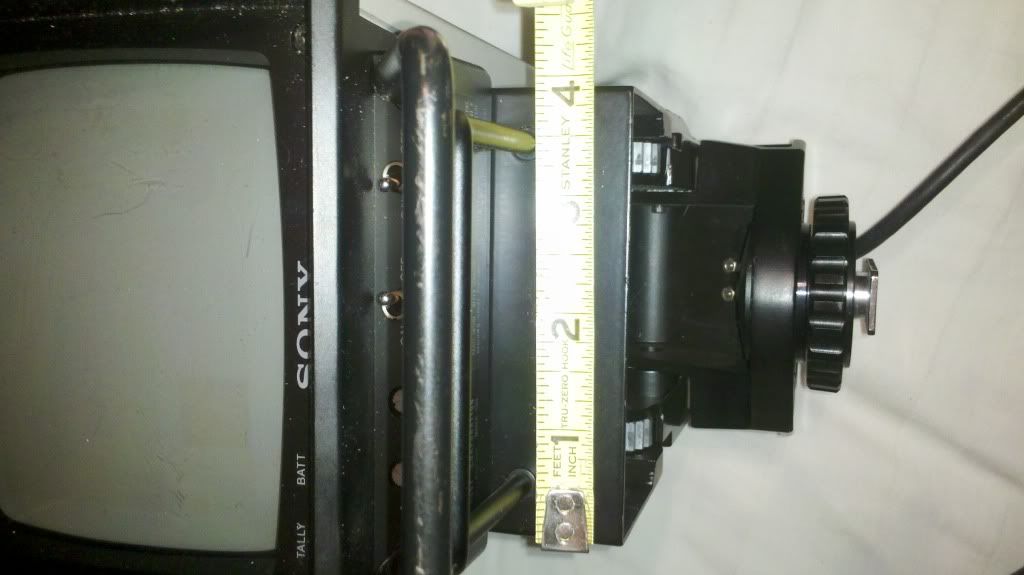
Hope these help with your plans.
top
side height
side length, barely over 11 1/2 inches
Hope these help with your plans.
Similar threads
- Replies
- 4
- Views
- 1,613