Homemade Tailor Form

Spider M Mann

Active Member
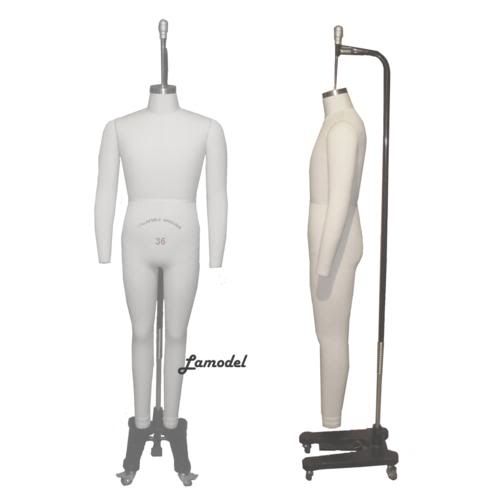
For those of us who make our own clothing or costumes, a Tailor form (also known as a dress form, dressmaker form, or body form) can be a valuable tool to own. Unfortunately, these forms are made either to a standardized size (e.g. 36, 38, 40, 42, etc.), or they can be custom made to the chest/bust, waist and hip measurements provided by you. Either way, they won't be exactly your shape. And they can also be costly. For example, a Male Full Body Tailor Form from Mannequin Store - available in only 6 sizes - runs $669.99. And getting a custom made form fit to your dimensions can be much, much more.

While very nice, those options are, for myself, way outside my budget. A much cheaper alternative is to make a "Duct Tape Dummy," an option I have seen used many times on this site and others. But while cheap, this type of body form can have... issues. They smell like Duct Tape (something I'm not particularly fond of), cannot be pinned to without getting your pins all gooey, and after they heat and cool a few times (say, in sunlight, or just a hot summer day), will eventually sag a bit, and develop a "stickiness" when the tape shifts. Most people, I assume, just chuck the form after a while and make another.

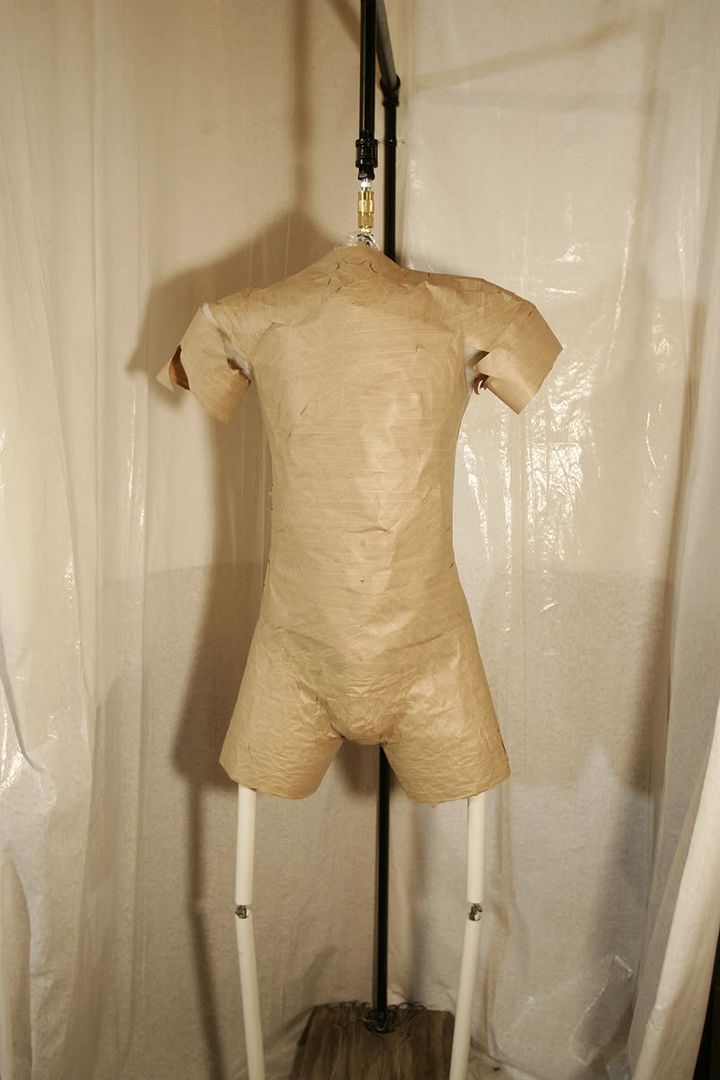
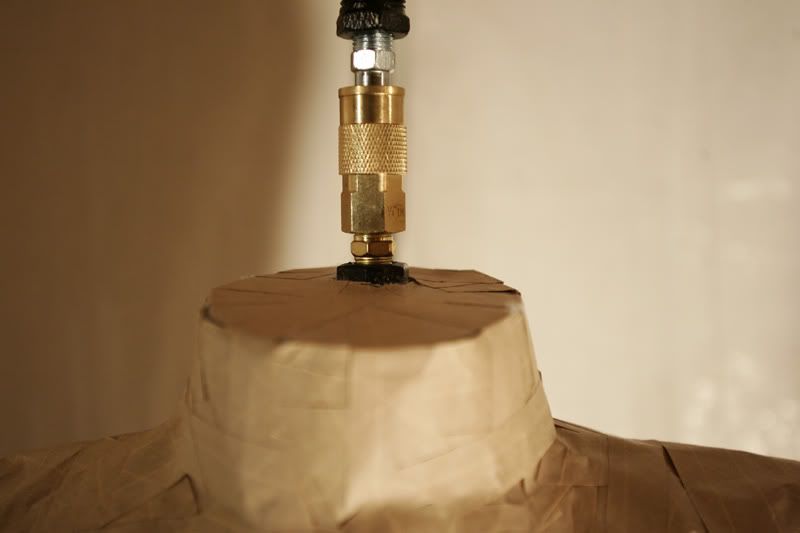
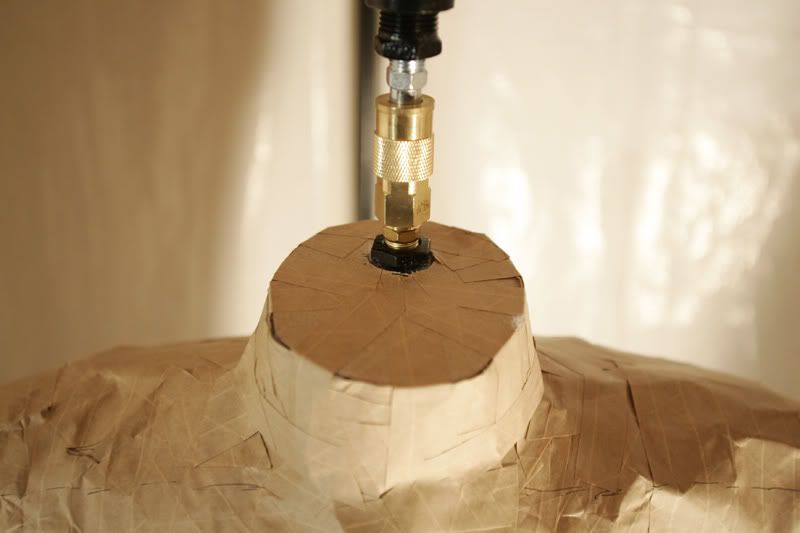
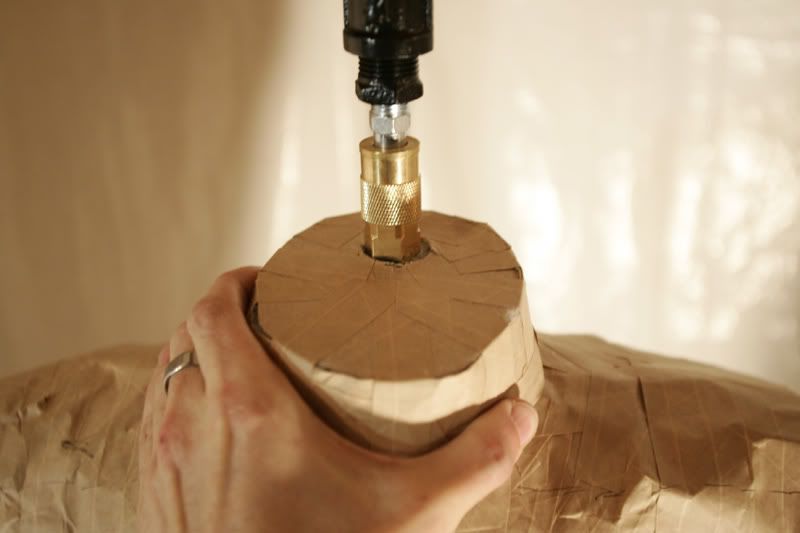
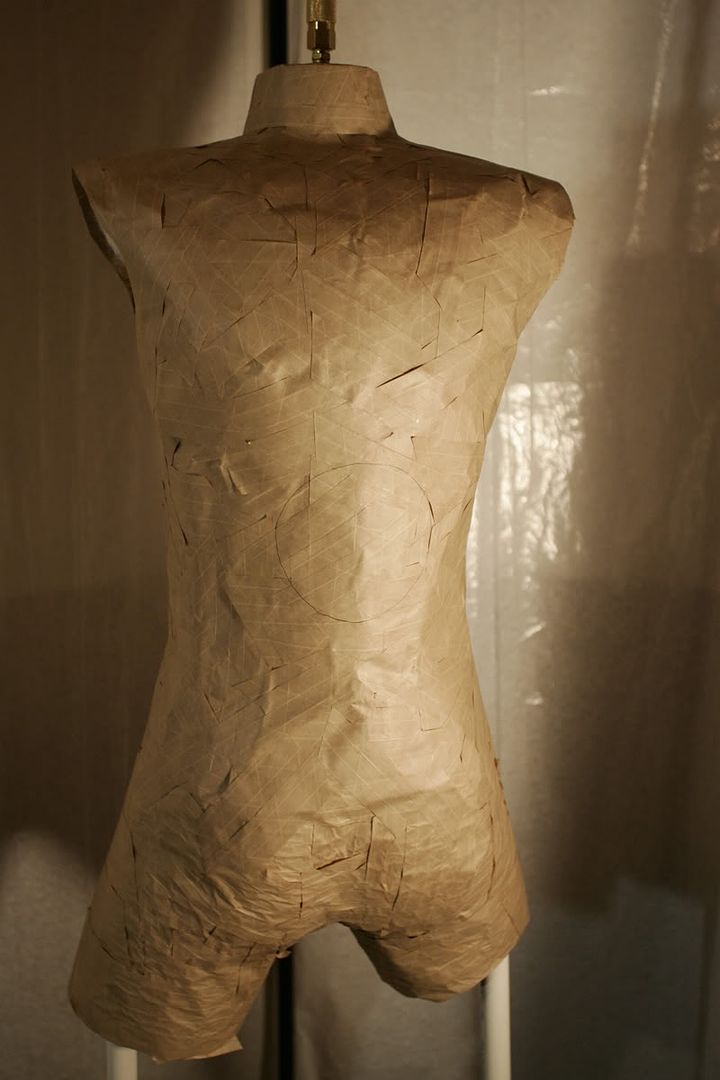
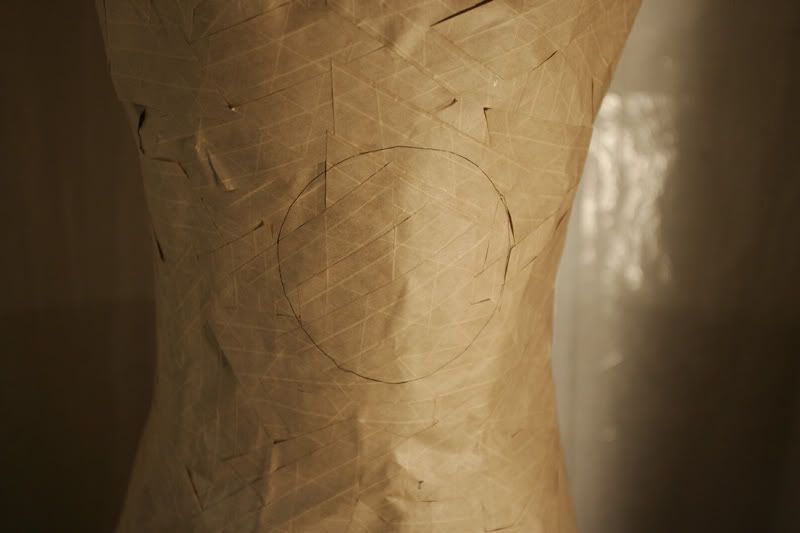
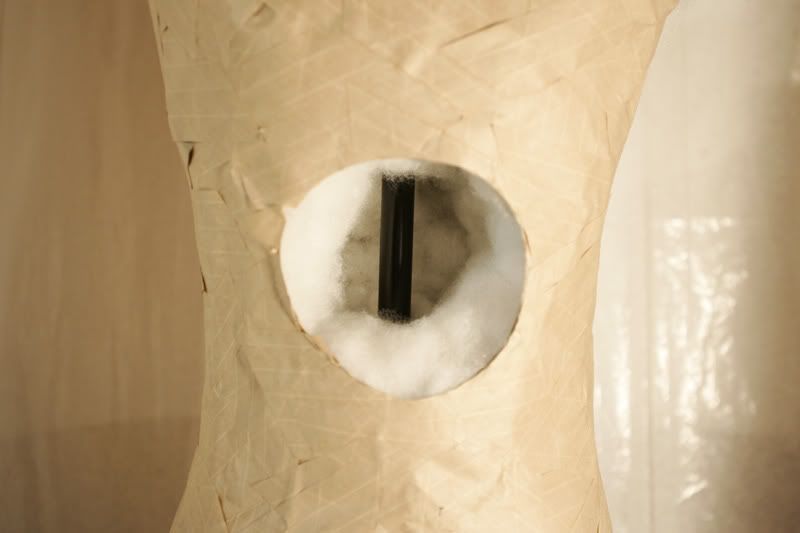
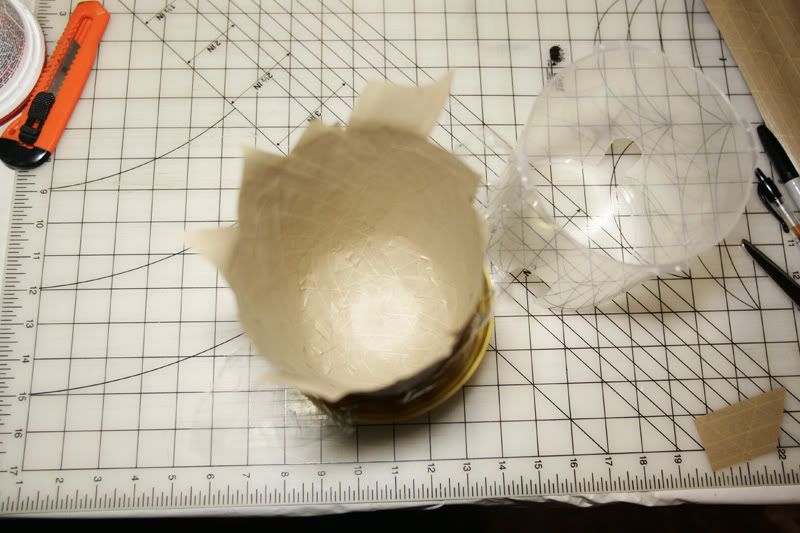
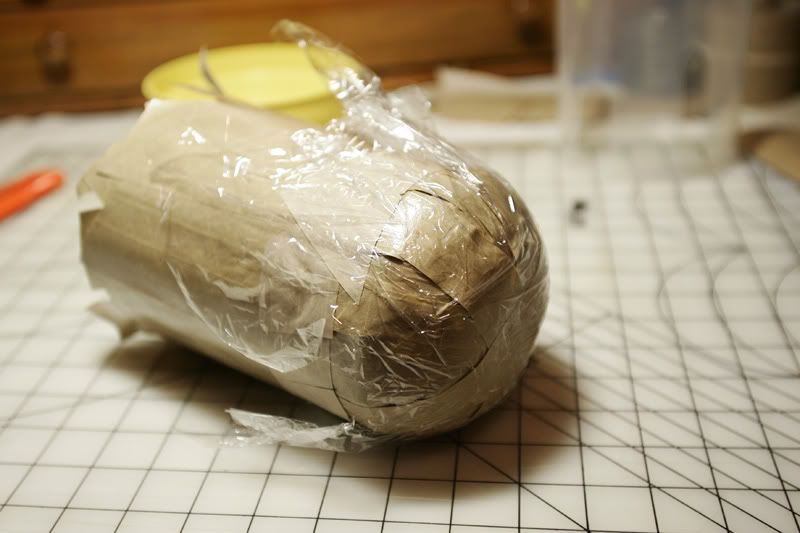
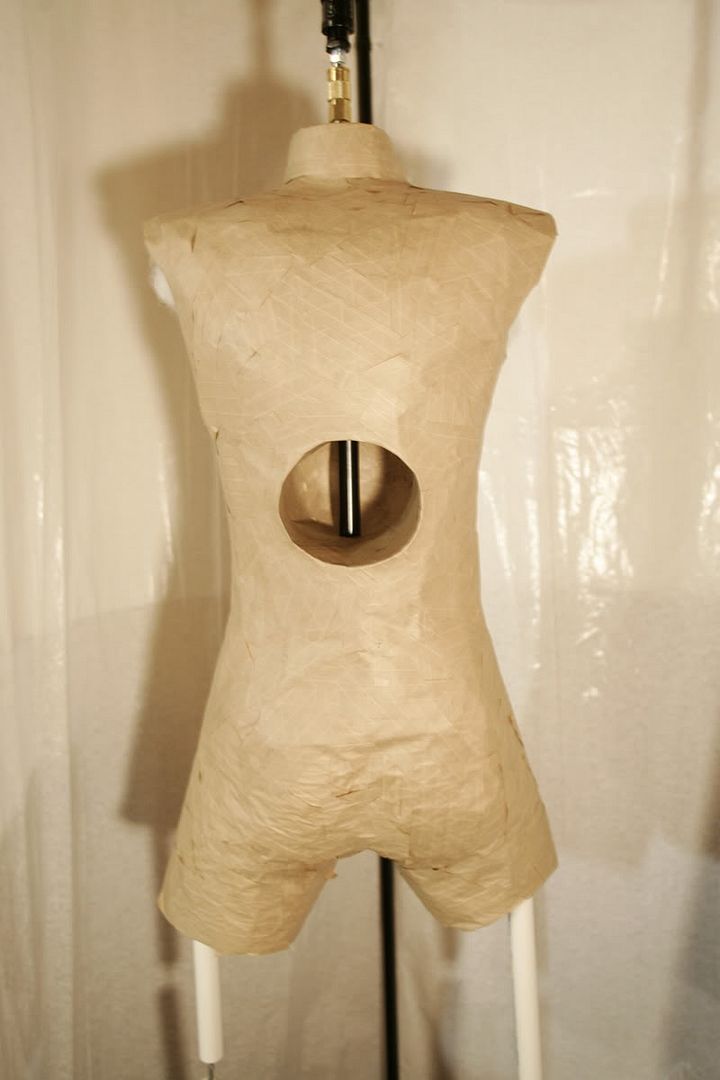
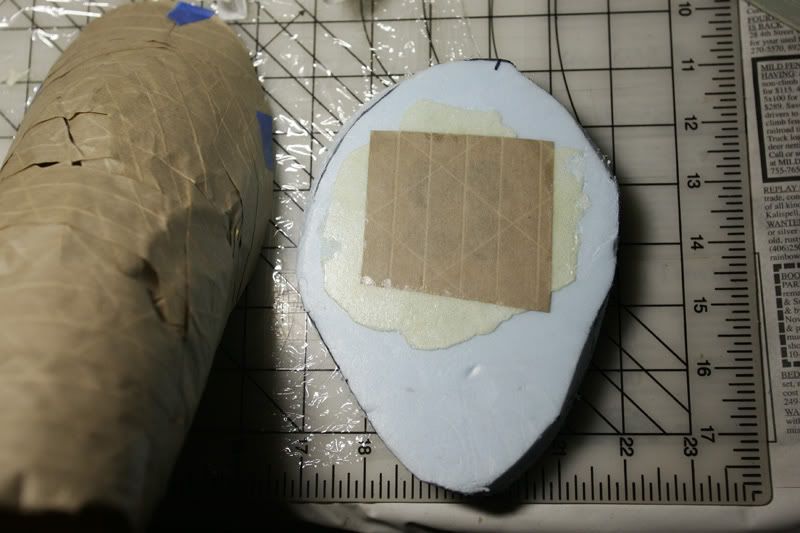
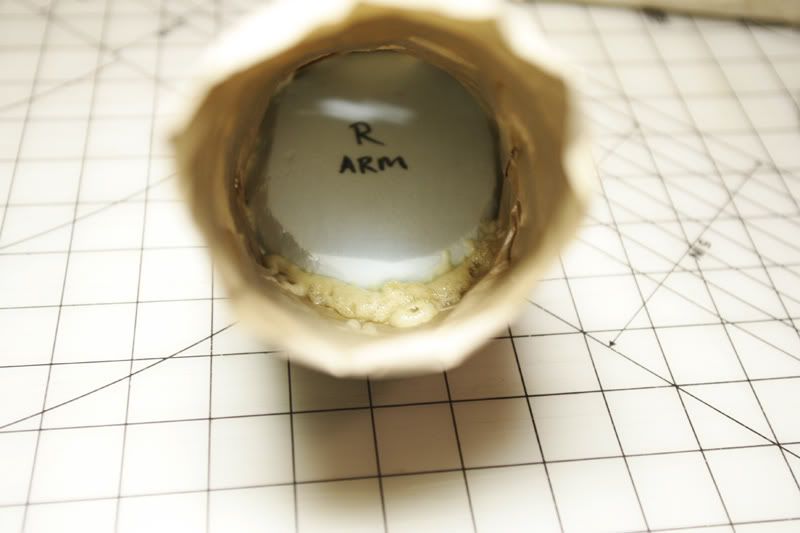
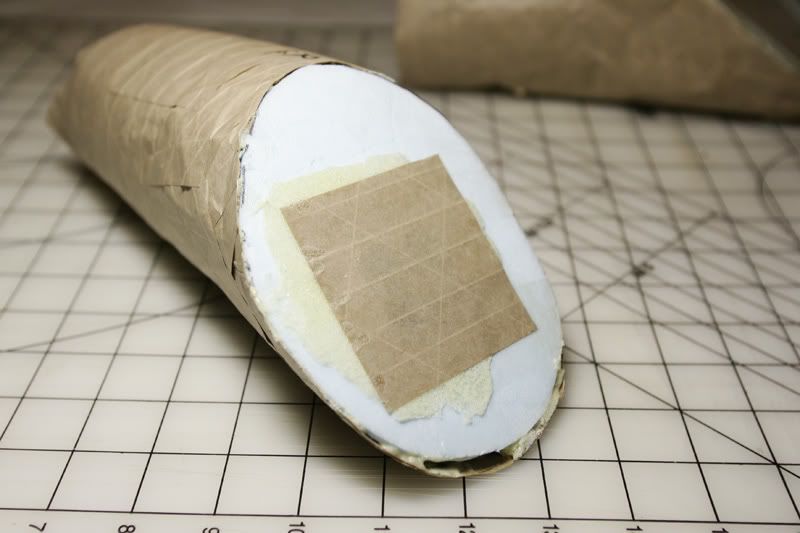
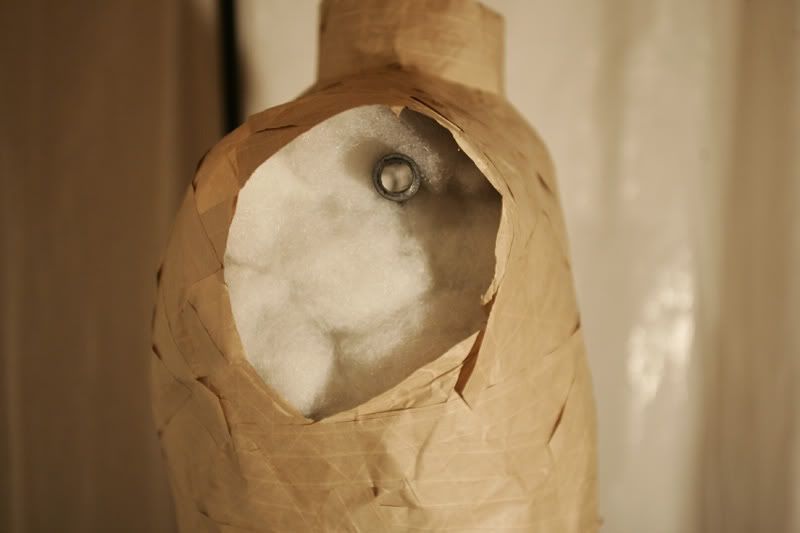
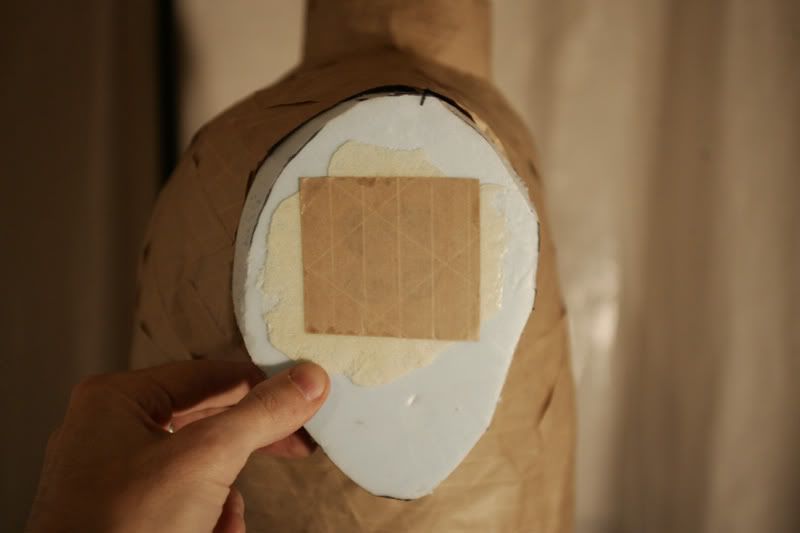
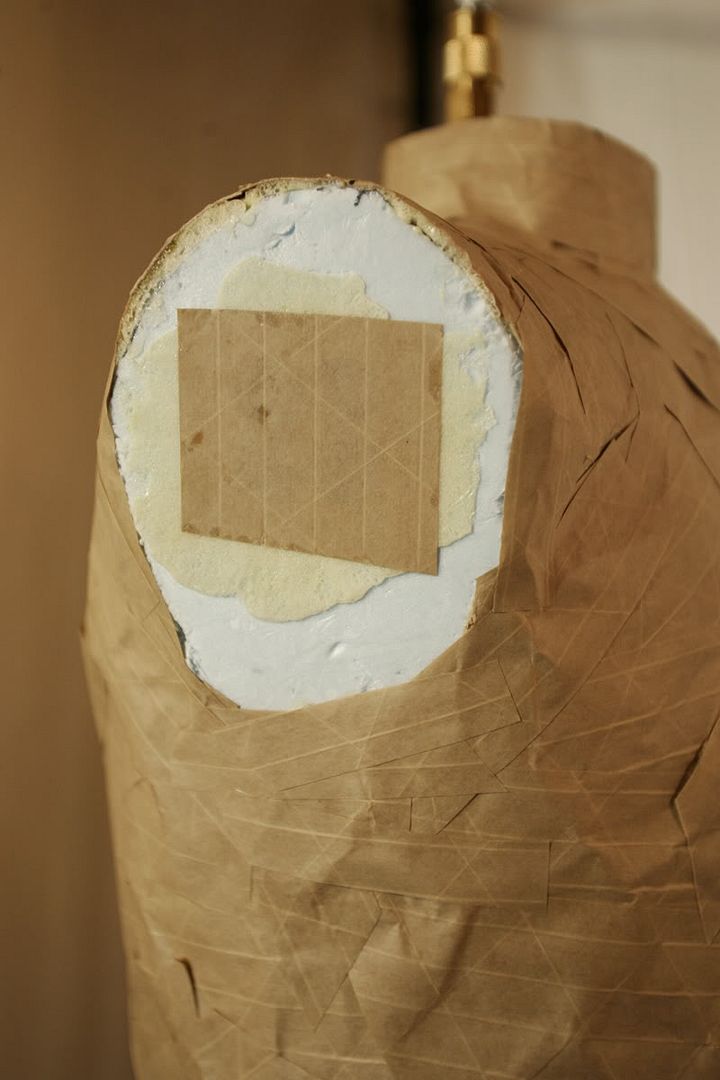
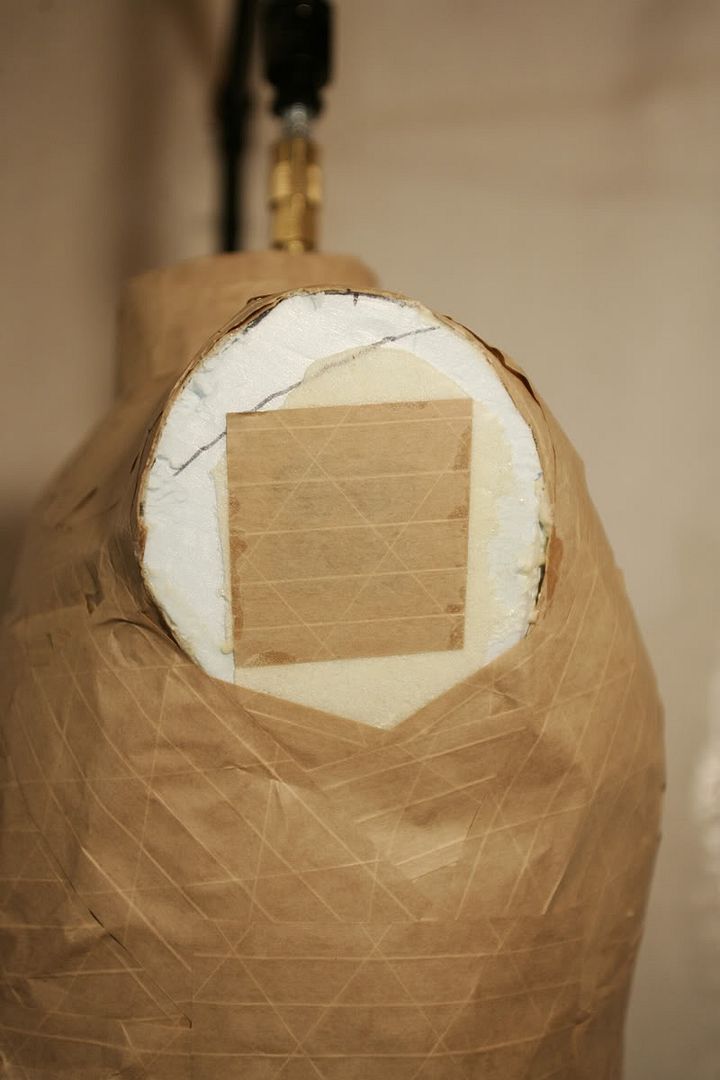
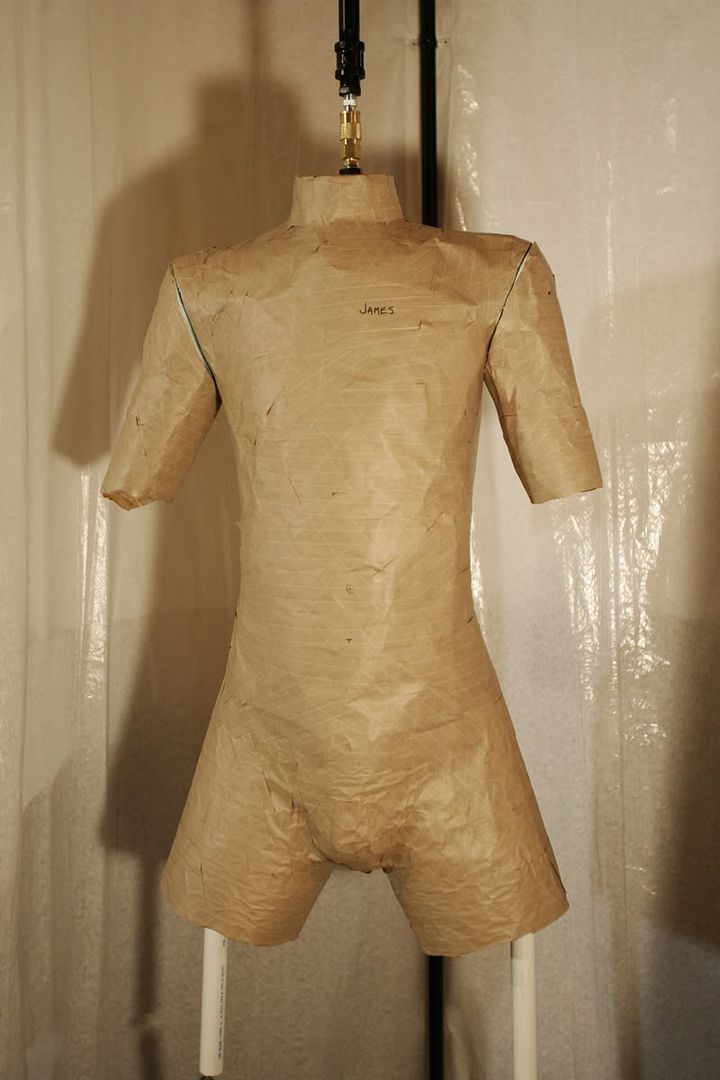
I'm much more fussy, and prefer a more permanent solution. So I did some research, and came upon the time-tested Paper Tape dress form, made using that water-activated, gummed, brown paper packaging tape found at office supply stores. Basically, it's the same concept as a Duct Tape Dummy, but turns out more like a traditional paper-mache dress form. Much more long lasting and stable. Joined with some other techniques used in making museum exhibit display "floating forms," and some other odds and ends, the result should be a custom, full body Tailor form, made to my exact dimensions, for about a hundred dollars or so.

I will fully document my sources and methods in this thread as I go, so anyone interested can follow along as I put together my Tailor form - hopefully you can make use of this process if you would like to make your own Tailor or Dressmakers form. If you have any questions, please feel free to ask.

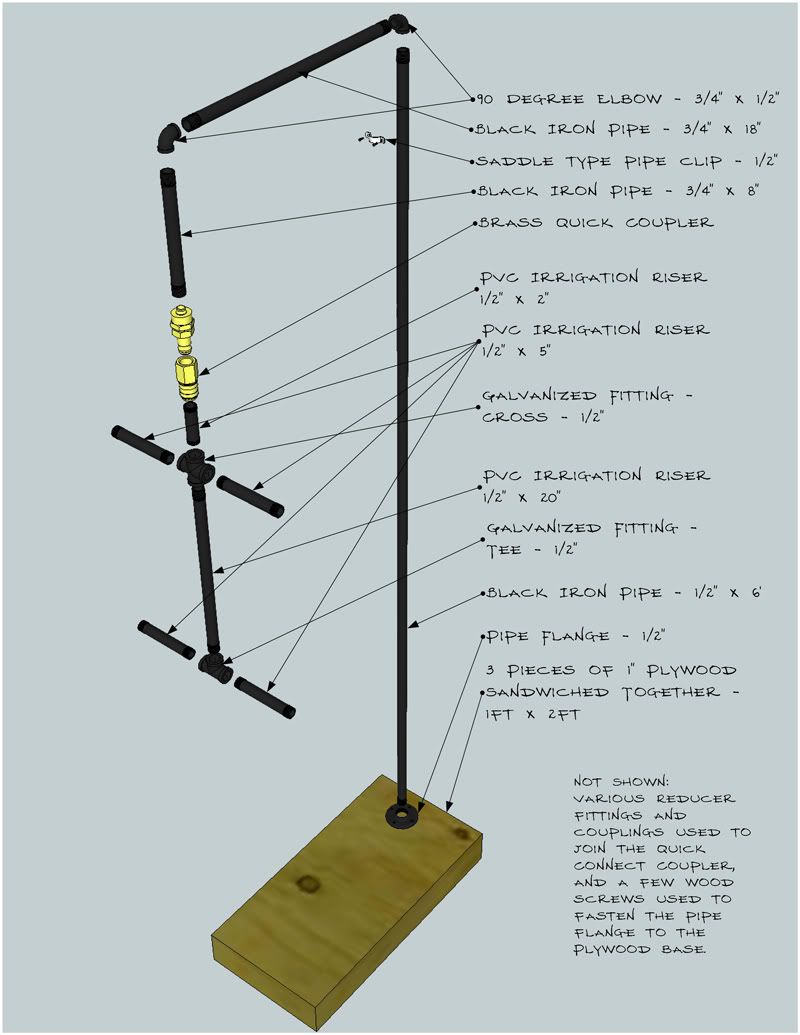
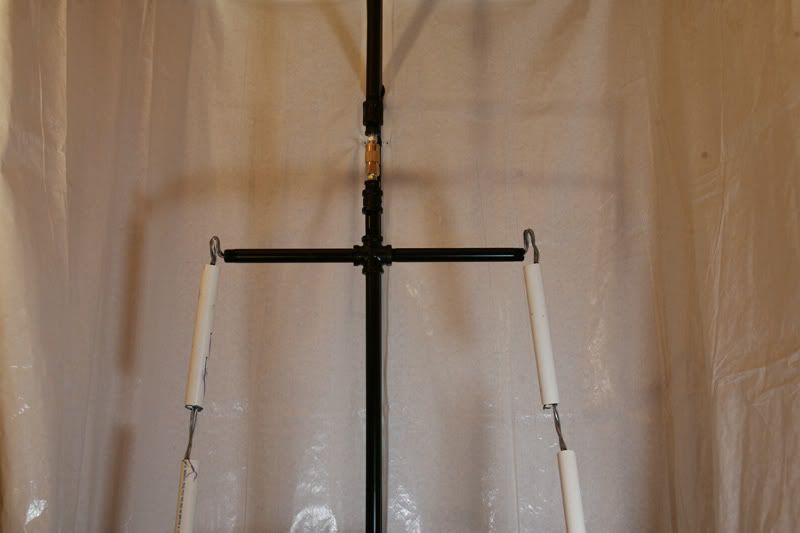
Next up; The Beginning: Building the Stand

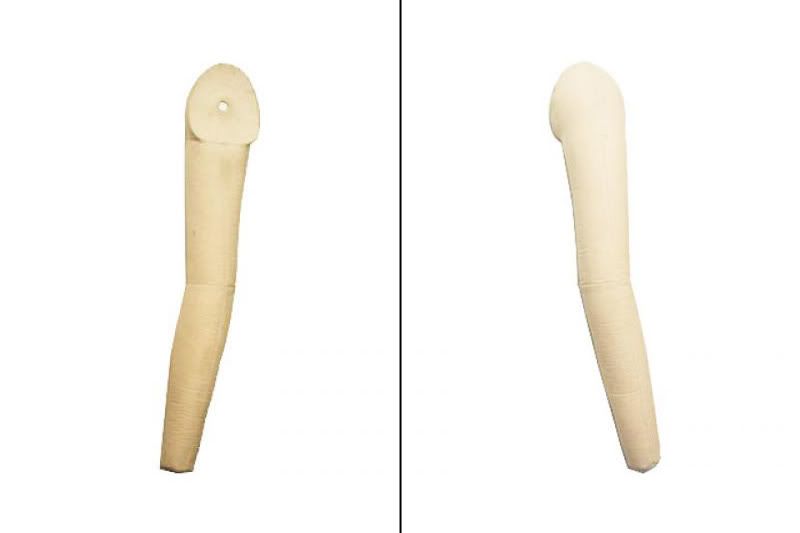
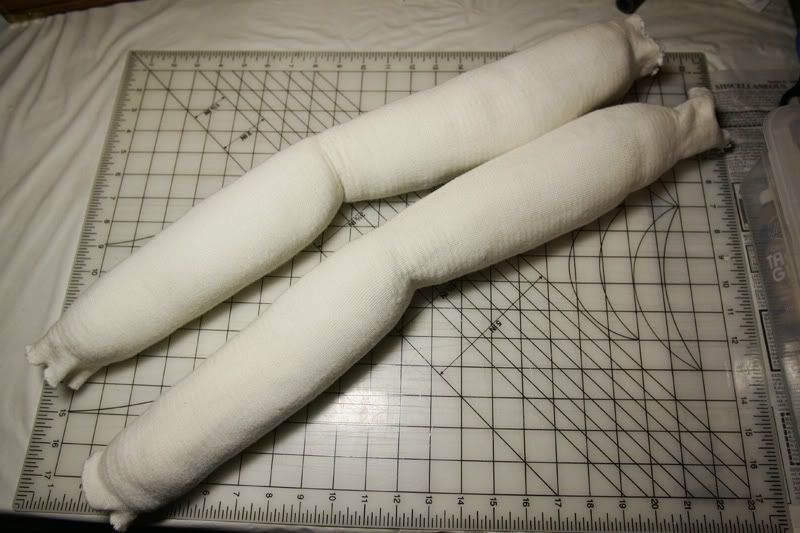
An example of what I will be replicating:

tailor_form_00.jpg
 
Last edited:
The Beginning: Building the Stand

The first step was to take some thorough measurements of my body for reference. I measured... pretty much everything I could think of - overall height from neck to the ground, neck to front waist, neck to back waist, waist, abdomen, hip, bust/chest, under-bust, neck to shoulder, shoulder to elbow, shoulder to wrist, etc, etc. I can post a full listing if anyone wants it - just ask and I'll put them up.

Then, using my torso measurements as my guide, I went to The Home Depot and got a bunch of different lengths of black iron pipe (used primarily for natural or propane gas runs) and black PVC irrigation riser pipe, along with various fittings, two 90 degree elbows, a pipe flange, and one of those quick connect fittings used for pneumatic tools. These items were for the stand from which the form would hang.

The quick connect fitting will allow the "body" to spin in place, so one can turn the Tailor form in order to work easily on the back of the garment, and also to allow the form to be removed from the stand. More on that later.

[Please note: I made a hanging form - but this can also be made to be a standing form. Ask the Internets for ideas on how you can do that. I'm just detailing how I did mine. Feel free to modify my design to suit your situation and tastes.]

Here is a quick schematic of the items I used for my stand, and their configuration (I'll attach a high-res version to the bottom of this post, as this one is a bit hard to see the details):

tailor_form_00a.jpg


If you use this image in order to make one of these for yourself, make sure to adjust the lengths of the various pipes so that it conforms to your body and your height - don't use mine, or it may come out too short or too long. Use your best judgement; I just guesstimated on most of it and it came out great.

One design flaw, though: the "shoulder" and "hip" pipes should have been shorter - I measured to the outside width of my shoulders and hips, when I should have measured to the mid-points, so that the end of the pipe sits where the socket of the limb would be. I later needed to trim the shoulder pipes back a couple of inches in order to keep them inside the form's armless shoulders (the arms are removable, so the width of the shoulder frame needed to be about the same as the width of the top of the chest). It was too late to do the hips by the time I realized the flaw - now they sit crammed against the outside of the form's hips.

Please also note that the topmost black iron pipe is thicker than the rest (3/4" as opposed to 1/2") in order to add a little strength. Also, I used the PVC irrigation riser pipe for the lower, internal parts, in order to save on weight - and to save some cash, as the PVC is cheaper than the iron pipe.

The image above should explain fairly well how I put the stand together, so I won't elaborate too much more on it. If you guys need a more thorough run-down, let me know, and I'll detail exactly what I did. Or if you have any specific questions, don't be afraid to ask; I'll be happy to clarify.

Just a couple quick notes: be sure to wash the iron pipe with warm, soapy water, and allow to dry, before you use it - it comes covered in a protective coating of some kind of oil. I also hit mine with flat black spray paint to prevent rust and make it pretty. Remember to cover the threads if you paint yours.

I used a saddle type pipe clip, long drywall screws, and a small piece of wood behind the pipe and pipe clip near the top to secure the six foot pipe directly to the wall. I guessed that the frame may need a little help supporting any additional weight I put on the body form in the way of heavy costuming (military garb, etc.). I didn't want the pipe to bend, or to snap off at the pipe flange on the base - I figured there might be quite a bit of lateral stress there. It should be fine without it, but I just wanted a bit of insurance. YMMV.

Also, speaking of the base, I just glued together a sandwich of a few pieces of one inch thick plywood, cut to one foot by two feet, to get a big, heavy base that raised the form up a few inches (mine came out to 3.5 inches). If you come up with something more suited to your particular situation, go for it - I just used what I had on hand. The important thing was that it allowed the form to hang suspended off the ground a few inches for clearance (don't forget to include the legs in your height allowances!). Make sure to leave yourself some toe clearance beneath the body form in the front, for later when working with the Tailor form.

Below is a close-up of the completed frame detailing how I used the quick connect fitting. Please disregard the wire and white PVC "arms," they were an early design inclusion that needed to be "revised" (i.e., removed), along with trimming back the black PVC pipe (with a tubing cutter) so that I could make the arms removable. Sorry I don't have any more shots of the completed frame, I didn't start taking progress pictures until later. Hopefully the schematic above is demonstrative enough.

tailor_form_01.jpg


To construct the structure for the legs, I used some heavy wire and some spare PVC pipe. The picture above shows the general technique. I threaded the wire through the lower "hip" part of the stand and foot-long pieces of PVC (one at each thigh and one at each shin), making stratigic bends where I wanted the PVC to sit, being careful to measure where the natural bends and bones are in my leg. This allows the legs to bend a bit at the knee and still be rigid where the bones are.

The type of wire I used is used in fencing (since I live on a farm and had some spare), and is called "Barbless Wire." It's 12-1/2 Gauge and is 2-strands wound together. I just cut about 6 feet worth and bent it to the shape I needed. Measure twice, cut once.

I think any type of heavy wire would work, even coat hanger type wire should work - it's about the same gauge. I basically just wanted something that would be a structure that I could wrap quilt batting around to get a leg shape. I will detail exactly how I do that later, when I get to the arms.

I wanted to make sure the leg armature was through the frame before the paper tape form was put on - getting the wire up through the leg holes and then through the hip tube and back down through the other leg hole would be a bear. So if you are making one of these, rig up something you are comfortable with, and then you can get on to the fun part - encasing yourself in tape!

Next up; Forming The Body
 
Forming The Body

In order to figure out the best way to make my Tailor form, I needed to do some research. Here is a list of some of the best sites detailing the process of making a paper tape "clone" of yourself that I found, along with some personal observations;

This Threads Magazine article was what convinced me in the first place to use this method. It was a good jumping off point - a quick, simple explanation.

But I needed more details, so I dug around some more and came across a post by a girl named Katie at her site Jejune;

Paper Tape Dressform

Great details, and I really liked the way her assistant crosshatched the tape for strength. Don't miss the clarifier comment by her husband/assistant in the comments section.

But I still had a some misgivings until I read how Teal at Tea for Teal did hers. Here it is, in four parts:
Chapter 1
Chapter 2
Chapter 3
Chapter 4 (This part details the stand - unneeded for me, but included for the sake of completeness)

[EDIT] I saw after I wrote all this that Teal's references are nearly the same as the ones I listed above. Great minds, and all that! [/EDIT]

Teal's method was nearly identical to how I ended up doing mine (minus the inner re-enforcement). I'll detail the differences and other tips next.

--- NOTES ---

Firstly, instead of running a damp rag over the glue, or running the tape over a moist sponge, I used a spray bottle to lightly mist the gummed backing - to make sure I didn't lose any glue and to ensure the best adhesion. Plus I'm cheap and want every last bit of what I pay for. Or something.

Secondly, my first attempt failed. Not because of this technique, but because I nearly passed out from overheating. I saw all over the Interwebs other people who have made Duct Tape forms that simply wrapped themselves in plastic wrap, or a plastic trash bag or the like, and went to town, wrapping themselves from neck to thigh and down the arms; encasing themselves in Duct Tape.

Well, I must be really sensitive to overheating or something, because when I wrapped my upper body in plastic (covering my armpits and back), I soon began to swoon and nearly passed out. Only the quick scissor skills of my assistant saved me from keeling over. So consider yourself warned, and use caution if you do this.

I ended up making mine in two pieces - upper and lower - which I joined together later, in order to mitigate the overheating issue. I still used plastic wrap to make the "shorts" section, which covered from mid-thigh to just above my hip bones. I then used a tight-fitting t-shirt for the upper torso area.

The "shorts" section I did myself, to spare my assistant the indignity of sculpting my nether-regions. It turned out nicely, despite a bit of "bow-leggedness" in the final product. Nothing I can't live with though.

The upper torso went well, but I still overheated a bit near the end. I made sure to instruct my assistant to move quickly (read: "Hurry up!"), as I figured I could fix any flaws caused by haste. You probably won't have the same problem, but I just wanted to share so that you would be aware of the risk.

Third, If you make yours like the ladies linked above, i.e., like a dress, open at the bottom, or if you are just making a form of the torso on a stand with no legs, you could probably cut the form all the way from top to bottom when you remove it. But for anyone who wants to include the legs as part of the form, you should probably make a cut from the back of the neck to (excuse me) the plumber's crack, and then scoot the form down over your legs.

I didn't join the form back together right away when I finished, either, after I cut it away from my body (remember, it still needs to be put around the pipe armature of the stand). Also, I let it dry for a few minutes and then carefully peeled away the cut t-shirt from the inside. That's about the time I deviated from Teal's method, above.

Once I had it off, I put it onto the pipe frame the same way I took it off my body - I threaded the legs through the leg holes and pulled it up over the shoulders of the frame. Then I just used some more paper tape to join it back together. If you do one of these, make sure to check the dimensions of your new form as you join it together - I made mine just slightly smaller than my actual measurements so as to not eat any ease.

In order to get the frame to sit correctly inside the body form, I needed to use a package of Poly-Fil Fiberfill stuffing. Any brand will do - that's just the stuff I used. It helps to secure the form and frame together, essentially making it a single unit.

I stuffed the Fiberfill between the shoulder part of the frame and the shoulders of the body form in order to lift the shell up, so that the end of the pipe on the frame sits right where the shoulder socket would be on my body. I also packed the hips tightly to prevent the frame from "swimming around" inside the form. Then I filled the rest in around the center part of the trunk.

When I was happy with the way it sat on the frame, I used a few more pieces of paper tape to fix any major imperfections I found and to strengthen any thin spots (there is more work to be done to the form, so don't consider this the "finish" layer). I got it fixed up to "good enough" status, and then let it dry thoroughly. And by thoroughly, I mean a good couple of days. The tape is a real pain to cut if it's not completely dry, and I needed to do some trimming.

Next up; Fixing A Design Flaw

Here is a look at it at this stage (more pictures and less words next time, I promise!).

tailor_form_01a.jpg
 
Last edited:
Fixing A Design Flaw

Soon after I had closed up and stuffed the body form, I whipped up a "neck" addition by using a 32 oz. joint compound container as a form, turned upside-down. I then covered it with a barrier of plastic wrap, and wrapped pieces of paper tape around it into the correct shape and height. I just measured the circumference of the container and found where the measurement conformed with my actual neck measurement.

Once it dried a bit, I pulled it off of the container and attached it to the form. Then I used a piece of non-corrugated cardboard (from a soda box) cut into a circle as the top. I just needed to snip a small hole for the hangar pipe near the back edge. Some more paper tape to secure the whole thing, et voilà!

tailor_form_03.jpg


This is when I found the flaw in my design. James Joyce once said "Mistakes are the portals of discovery." How true. I needed to remove the body form from the stand in order to do something [I can't remember what], and noticed that the only way to remove the form was to wrap one arm around the form, with a hand between its "cheeks" to support it, while using the other hand to undo the quick connect coupling. It was not only awkward to lift it that way, but it was also that the whole body form "shifted" a bit vertically when I lifted up on it.

These pictures show where the form should sit, right below the lip of the reducer nut, and how the form rides up:

tailor_form_04.jpg


tailor_form_04a.jpg


Normally, that's probably not a big deal, but I knew that over time, the neck would get trashed. I needed to come up with a "handle" of some sort. So I hacked a hole into the back of the torso, calculating that I could use the inner vertical "spine" pipe as the handle. Here are the pictures of how I marked and cut the hole, removing the stuffing:

tailor_form_06.jpg


tailor_form_07.jpg


tailor_form_08.jpg


Now I needed to close up the opening inside so the stuffing wouldn't fall out. I needed a form, so I used the cover sleeve of one of those bulk CD spindle things, with the flat top cut out. It just happened to be the right size and length. That took care of the tube part, but I needed a hemispherical shape for the back wall: a plastic cereal bowl, of course!

tailor_form_09.jpg


tailor_form_09a.jpg


tailor_form_11.jpg


Note that these were built "inside out," meaning the sticky side of the tape was on the outside, and the finished side was on the inside, where the hand will go. I made the hemisphere part and the tube part separately, joining them together after. Here is a picture of the tube installed around the new handle:

tailor_form_12.jpg


Now, the form can be held up with one hand while disconnecting the quick connect coupling with the other. The photos above also show the trimming I did at the shoulders, cleaning up the arm holes a bit. I'll detail how I dealt with the shoulder and arm attachment in the next installment.

Next up; Crafting Removable Arms
 
Last edited:
That's brilliant, very well done wip as well. I love when people take the time to help out others as I'm sure this thread will.
 
Thanks! Very kind words indeed.

I certainly hope others will find this useful. It's been a very rewarding project. Stay tuned for more!
 
Crafting Removable Arms, Part 1

When first considering the overall design of the Tailor form, I knew I wanted to have arms and legs as part of the final product, instead of merely a torso. The arms are important in the testing of sleeves and elbows for length, ease, and movement. And I wanted the legs, obviously, for pants and the like.

The first variant of the limb design took the form of the wire and PVC pipe shown in the photo showing the inner frame, above. That worked fine for the legs, which will always remain on the body form and basically just hang there. The arms, on the other hand, will need to be removable, in order to place garments onto, or remove garments from the form.

Realizing that the arm armature needed to be removed prompted a revision in my original design. And it left me with a quandary; how in the world would I connect the arms in order to have them be removable?

I originally thought about using a metal slide-in flange connector, like those used on mannequins, or maybe a "post and keyhole" type socket. But eventually began to realize that I would need a much more substantial shell structure to hold those types of connectors securely.

So I looked around a bit and saw that the newer Tailor/Dressmaker forms are using a magnetic attachment system. Perfect! Here is a picture of a commercial magnetically mounted dressform arm, used for reference:

tailor_form_12a.jpg


Now I just had to figure out how to mount the magnets...

I came up with a system using a "housing" for some ceramic magnets made from blue insulation foam, glued into the shoulder opening. That meant I would need a corresponding "arm" shell made from paper tape for the arm's foam housing. A little plastic wrap, and a bit more paper tape, and I got a set of arm sections. They turned out a bit wonky - I made them by myself, one-handed. It was kind of a pain, but they turned out acceptably enough. I'll clean them up and add a few more layers of paper tape later, when I do the final finish for the torso.

I first thought of just using magnets on the shoulder and a big metal washer for the arm, but after some weight testing I saw I would need magnets on both sides to get the strength needed - there will be a couple of layers of paper tape and a fabric cover between the coupling, so I had to step it up. Here are the arm sections with their foam inserts. They have been trimmed and fitted to the torso at this point (disregard the washers):

tailor_form_13.jpg


And here is the final design; the foam inserts for the arms and shoulders, the magnets used, the "settings" for the magnets (carved using a Dremel with an aluminum oxide grinding stone bit), along with the glue I used:

tailor_form_14.jpg


In the case of the shoulder openings and the arm shells, there are big voids and gaps between where the foam ends and the shell begins, as well as some odd join angles. I needed a glue that was strong, and could fill the gaps. I tested all the types of glue I had on hand - the solvent-based types ate the foam, white glues and CA types were too thin (they just ran out the holes), and so on. I had never used Gorilla Glue before, so I was pleasantly surprised when I tested it and found out it acted like expanding foam, and was super sturdy when it dried. We had a winner!

I started by gluing the magnets into the foam housing. By the way, if you do your connections like this, make sure you always keep the orientation of the magnets the right way, otherwise your arms and shoulders may repel each other - not something you want. I just marked my magnets with a marker so I wouldn't forget which side was which, and which way was up.

The instructions on the Gorilla Glue bottle say "damp it, glue it, clamp it." So I sprayed the "setting" holes lightly, gooped in a bunch of glue, set the magnets, sprayed and laid a piece of paper tape over the top of the opening, and pressed the housings between two pieces of flat wood, weighting the top with a heavy weight to provide the clamping pressure.

A little while later, I came back to check on it. To my chagrin, I discovered that I now had four pieces of foam glued to a piece of wood! Oh no, too much glue! Foamy squeeze out had outflanked me! Thank the crafting Gods that the top piece of wood that I happened to use to cover the glued parts was an old shelf from one of those pre-fab cabinets, and it had a smooth laminate veneer on it. A little persuasion with a putty knife and it popped off. Whew!

Here's what it looked like:

tailor_form_15.jpg


After the housings had completely dried, it was time to set them into the arm. I set the housing with a good amount of glue, counting on its expanding nature to fill all the gaps and voids. It worked out well - it's super strong.

Here's a few shots detailing what it looked like; the first is while it was clamped (with blue painters tape), and then the next two were taken after they had dried, one showing the inside, when the glue had expanded all the way, and another after I had cleaned it up with an X-Acto knife:

tailor_form_16.jpg


tailor_form_17.jpg


tailor_form_18.jpg


Now the shoulders. Same song, second verse:

tailor_form_19.jpg


tailor_form_20.jpg


tailor_form_21.jpg


tailor_form_22.jpg


And one last one showing the arm shells attached to the torso:

tailor_form_23.jpg


I gave it a temporary name tag too; apparently the female forms are called "Judy," and the male forms are called "James." Any ideas on what I should name him? Maybe "Roy," as in my own personal replicant...

This is getting long, so I'll divide it into two parts. More on the arms in the next installment.

Next up; Crafting Removable Arms, Part 2
 
Crafting Removable Arms, Part 2

Once I had solved the attachment problem, I could get on with the construction of the actual arm. This is what I came up with: wire for the armature, PVC pipe for the "bones," quilt batting for the structural fill, and something called "stockinette" to cover it all.

Waaaaay back in the first post of this thread, I linked to an article about museum exhibit display "floating forms." In that article, the Collection Manager of the museum used stockinette to cover the display forms and their arms. That's where I got the idea, and that's what I used to cover my form's arms.

Stockinette, by the way is a type of tubular bandaging made with cotton and elastic, used as a barrier layer next to the skin under casts, as well as other uses. It's sold anywhere that medical supplies are sold. They sell it by the foot. The stuff is great, but it's not cheap. I got enough stockinette of differing sizes for both arms (4 ft.), both legs (5 ft.), and also for the torso (2 ft.). That cost $40. Ouch. And I live in a state with no sales tax.

After I had bought the stockinette, I saw some rib knit stretch fabric at Jo-Ann for like eight bucks a yard. Much more economical, and almost the same thing. If I had it to do over, I would just use the stretch knit and live with a seam down the arms and legs. So in the overall cost department, I just went over the $100 mark for the Tailor form quoted in the first post.

But hindsight being 20/20, I'll use the cost of the stretch knit as the cost of the covering - call it the "idealized price." Even including the cost of the stockinette, it's only about $150 total for the form. Still not too bad.

OK, less talk, more pictures. [I know, I passed the TLDR barrier a loooooong time ago. :confused]

Here's a good shot of the armature of the arm. Notice the spring coil in the wire, in the center between the PVC bones. That is there in order to give the arm the ability to flex, or bend in a natural way at the elbow:

tailor_form_25.jpg


Here is the structure of the arm, showing all the layers and components except for the paper tape housing, which still needs a final layer of tape. I'll do that at the same time I do the final layer on the torso, and then I'll join the paper tape housing with the arm proper, sew the ends of the stockinette up, and they'll be done.

tailor_form_26.jpg


tailor_form_27.jpg


tailor_form_28.jpg


tailor_form_29.jpg


Next up; The Form Takes Shape
 
Loving the detailed steps here. The hole in the torso reminds me of Death Becomes Her. And the engineering to make removable arms/legs etc is really great.

You are not the only one to have problems with overheating/passing out. I did a Duct Tape form once and I was fine, but recently tried to use plaster strips to make a mold that was super accurate that I would fill with foam. We tried twice and both ended up with me waking up on the floor. Very very curious as to what actually causes it. The first time we started at my hips and I only lasted about 20 minutes. Second time I lasted over an hour, but as soon as we hit the hips/crotchal region down I went again. So I guess I was either overheating, overcooling, hitting a pressure point, or locking my knees at that point.

I ended up getting a Uniquely You dress form, which isn't actually so uniquely me even with the cover tailored. The whole point of me wanting a dress form was so I could fit things exactly to my body, so trying to sew a cover tailored exactly to me was kind of a chicken-before-the-egg proposition.

Would love to try this again, using your method. Maybe the tape will be ok for me since the Duct Tape was. I used a t-shirt instead of plastic.

And just think, when you're all done you'll be able to play a killer game of Hangman :)
 
If you ever decided to go a different route on the attachment method here is a way I have been building pose-able dummies for different halloween props over the years.

Exploded view
dlhinge.jpg


Assembled.
dlhinge1.jpg
 
...You are not the only one to have problems with overheating/passing out. [...] Very very curious as to what actually causes it.

You know, I'm really not sure. I'm thinking that it's because the skin can't breathe. If the skin can't radiate heat to the air, your temperature may rise too quickly, leading to weakness, dizziness, and a quick trip horizontal. But I'm no doctor, so take that with a big grain of salt. I'm also curious to know for sure (and how to prevent it).

My helper almost refused to go for a second try, worried about permanent damage, but I prevailed.

I ended up getting a Uniquely You dress form, which isn't actually so uniquely me even with the cover tailored. The whole point of me wanting a dress form was so I could fit things exactly to my body, so trying to sew a cover tailored exactly to me was kind of a chicken-before-the-egg proposition.

Would love to try this again, using your method. Maybe the tape will be ok for me since the Duct Tape was. I used a t-shirt instead of plastic.

I just couldn't afford to pay that much for a professional Tailor form. Also, I was worried that to make my own would be too difficult, but eventually I just said "what the heck," and gave it a try. I wanted to share the process so that others, who may be intimidated like I was, that it really isn't that hard. And pretty cheap, too.

You say (kindly) "...using your method," but I can't take credit for any of this, really. The paper tape form idea has been around since 1938, and the rest comes from all of the other sources I linked to. They deserve all the credit - all I did was to smash all the ideas together.

I say give it a try - the paper tape form is really cool. I can't wait to finish and start using it! I'm dying to make myself a decent shirt that fits correctly.
 
A Quick Update - Reconstructive Surgery

Just a quick update. First up; I got a final layer of paper tape on the arm housings, and got them mated to the arms proper. To be honest, I kind of just jammed the end of the arm into the housing, letting the batting hold it in place. Works great - nice and solid. The arms and their coverings still need to be finished up and finalized, but they are pretty much set, unless something catastrophic happens. Here's a detail shot:

tailor_form_30.jpg


Then I decided that I actually couldn't live with the "bow-leggedness" of the body form, so it was time for some reconstructive surgery. I cut a thin, crescent-shaped wedge out of the area of the inner thigh, high up where the leg meets the top of the in-seam. It was about an inch's worth of material at the innermost point of the top of the leg, tapering out to nothing at the ends, about three-quarters of the way around the front and back of each leg.

That allowed me to push the outside of the leg inward, straightening up the leg a bit, giving the form a more natural "stance." A bit more paper tape to join it, and it's like I was never there.

Not a drastic change, but maybe you can see the difference (with arms too!):

tailor_form_31.jpg


Thanks for looking!
 
This thread is more than 11 years old.

Your message may be considered spam for the following reasons:

  1. This thread hasn't been active in some time. A new post in this thread might not contribute constructively to this discussion after so long.
If you wish to reply despite these issues, check the box below before replying.
Be aware that malicious compliance may result in more severe penalties.
Back
Top