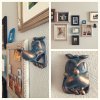
Awhile back I bought a resin cast of an original sculpt by rpf member rustyj depicting goofy as the door knocker from Disney's Christmas carol. I had so many other projects going on I just didn't have time to work on it until recently. The sculpt is fantastic and the cast was pretty clean, there was only one seam that needed some heavy sanding. I did everything in one day so it was a fun diversion from other projects. After sanding I primed with a thick coat of filler primer then brush painted on two coats of sophisticated finishes blackened bronze. This is an acrylic paint with metal powder mixed in. The paint is thick and covers very well, it's the same stuff that I used for my dragon priest mask.

At at this point I could have used the patina solutions to give it a real patina but I found that with my dragon priest mask the patina was very delicate and rubbed off with even the lightest handling and unfortunately clear coat destroys the patina's nice variation. So this time around I used the same technique as described by Rylo in his YouTube video for weathering his haunted mansion props. I mixed up a wash of a couple different teal acrylic paints in a spray bottle and gave it five or six coatings letting it dry in between. After the acrylic wash was dry it is completely fine to handle unlike the real patina. Next I hit the high points with antique gold rub and buff.


I was was going to put this on my daughters bedroom door but it came out a bit too creepy so I mounted it on the living room wall instead. It was a fun little project and I learned a few things in the process.


At at this point I could have used the patina solutions to give it a real patina but I found that with my dragon priest mask the patina was very delicate and rubbed off with even the lightest handling and unfortunately clear coat destroys the patina's nice variation. So this time around I used the same technique as described by Rylo in his YouTube video for weathering his haunted mansion props. I mixed up a wash of a couple different teal acrylic paints in a spray bottle and gave it five or six coatings letting it dry in between. After the acrylic wash was dry it is completely fine to handle unlike the real patina. Next I hit the high points with antique gold rub and buff.


I was was going to put this on my daughters bedroom door but it came out a bit too creepy so I mounted it on the living room wall instead. It was a fun little project and I learned a few things in the process.

