Fujimi Deckard Sedan with Randy Cooper Backdrop

Jargonking

Active Member
I've not been on here for a while and was just reading the build thread of the Randy Cooper Sandcrawler. That prompted me to thinking that I never posted my build here of his Blade Runner building so here goes....

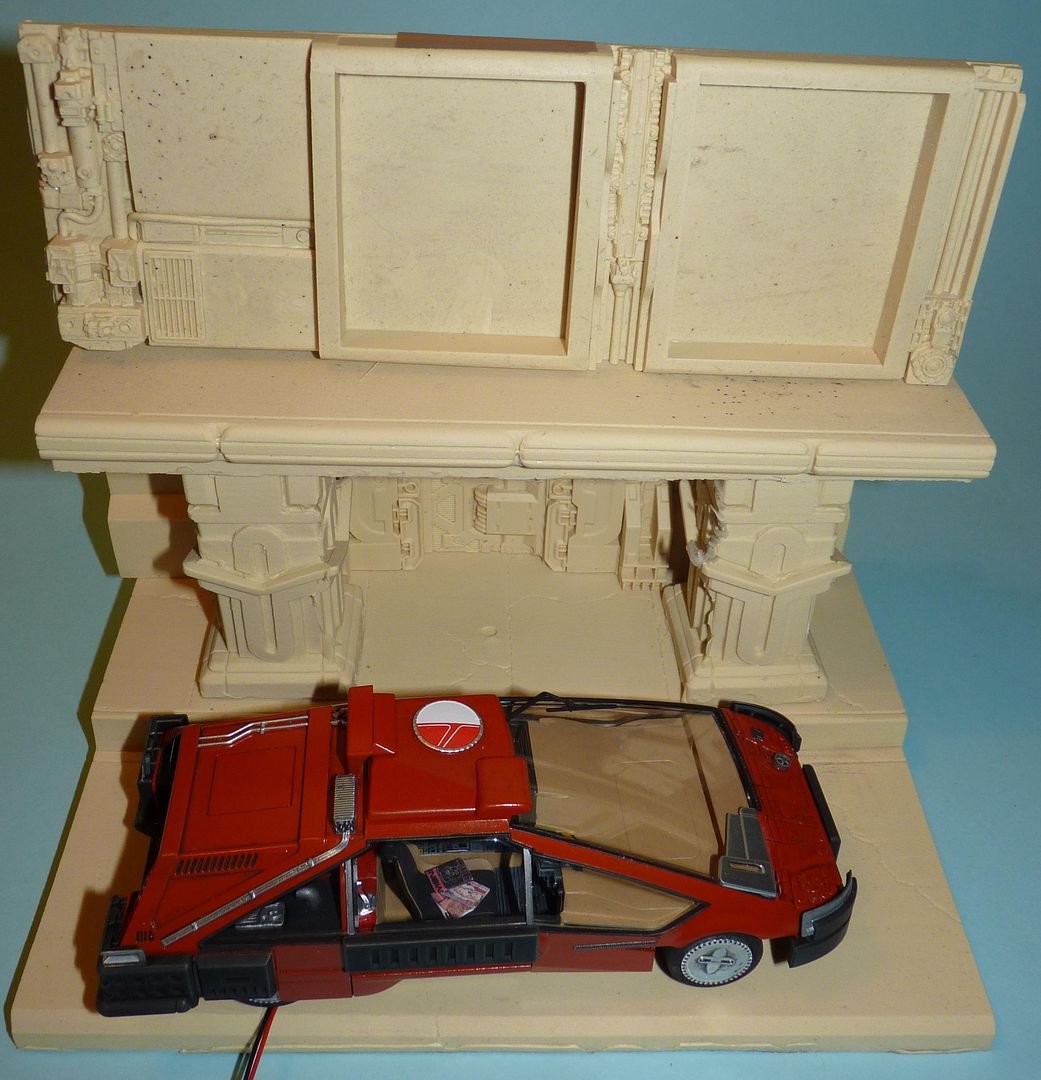
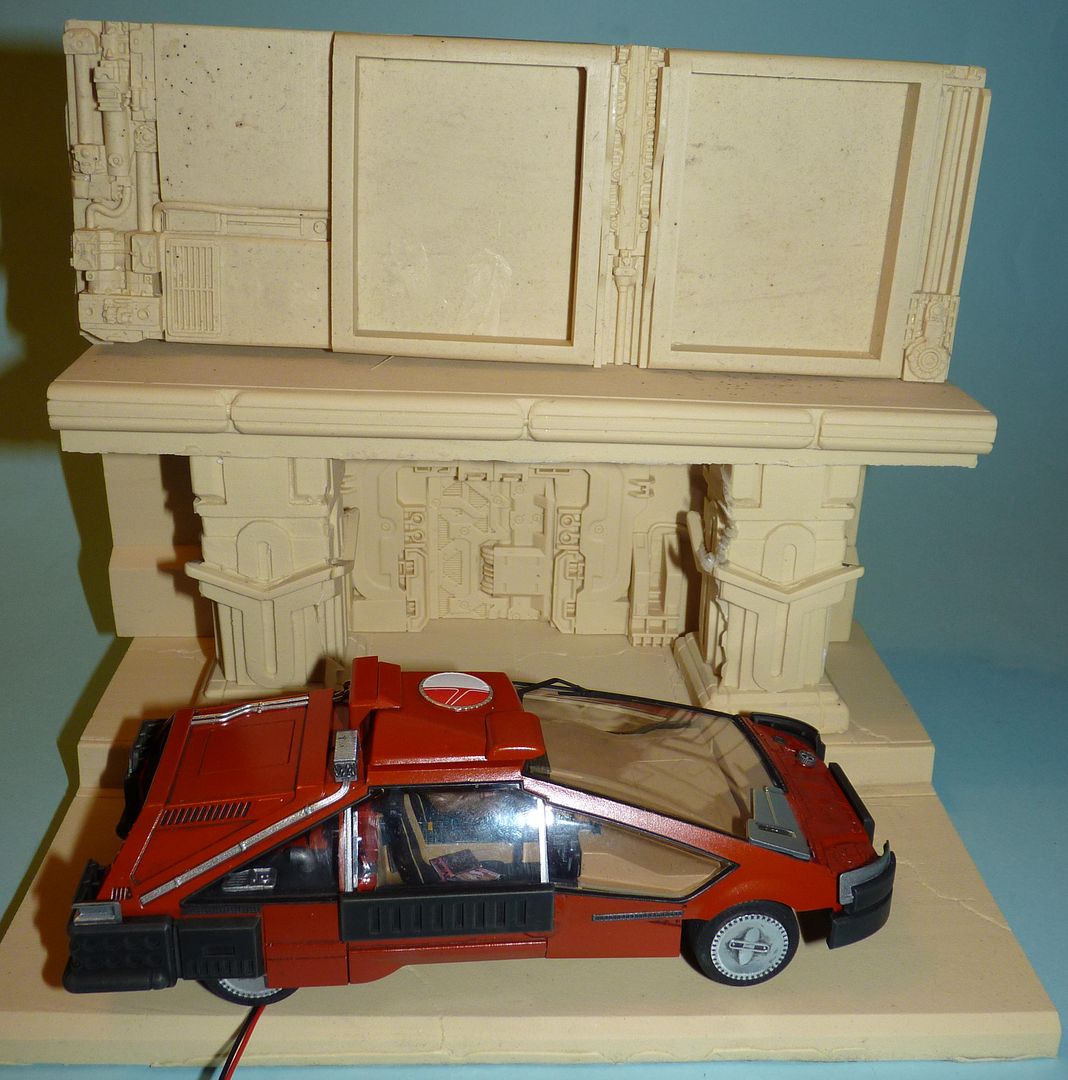
First up, the Deckard Sedan upgraded using the Paragrafix etch kit....
P1020734.jpg


P1020735.jpg


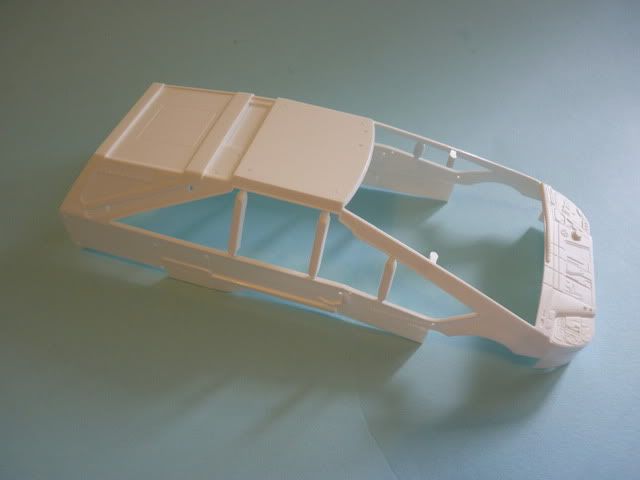
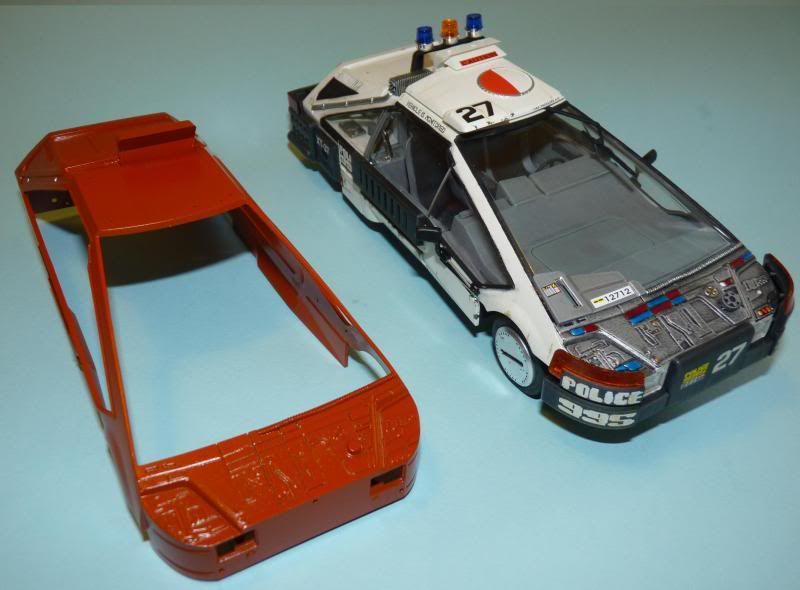
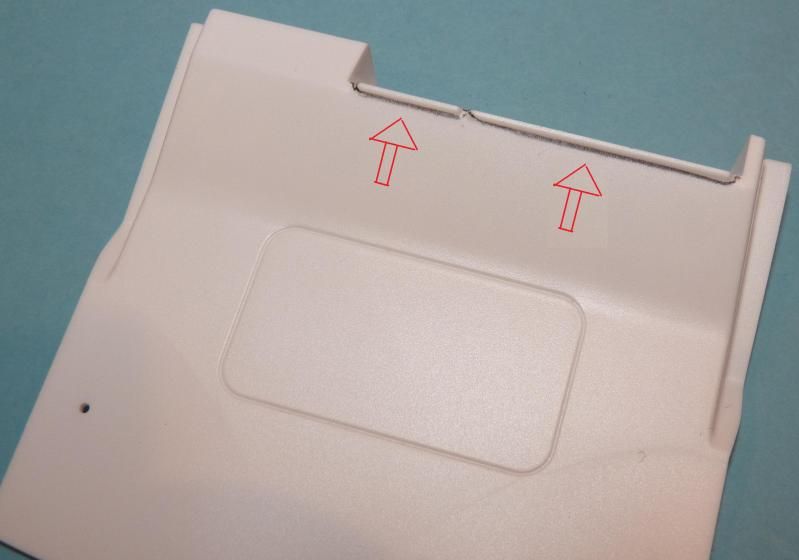
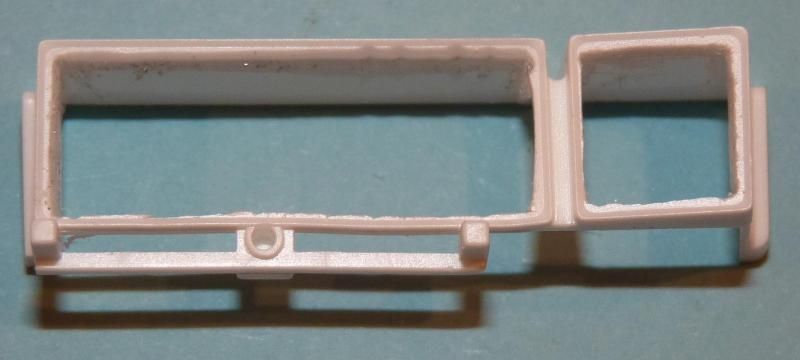
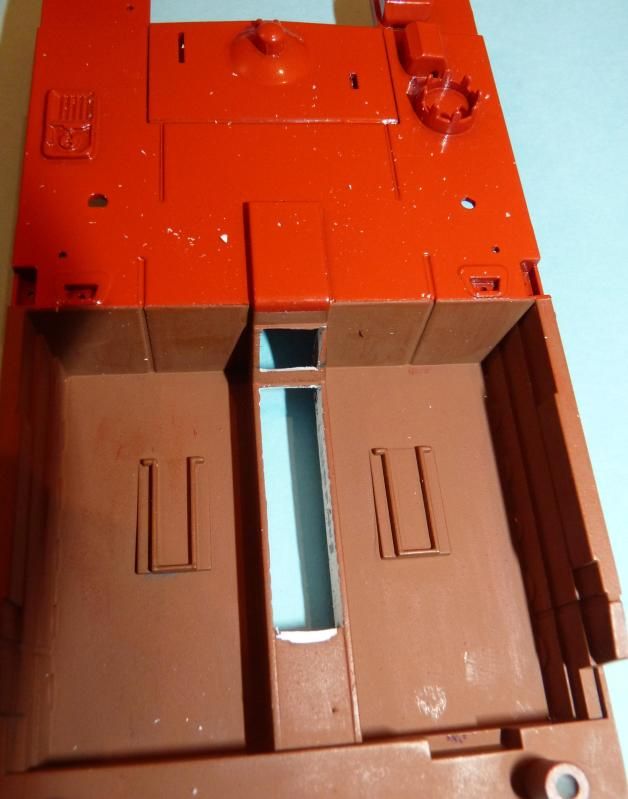
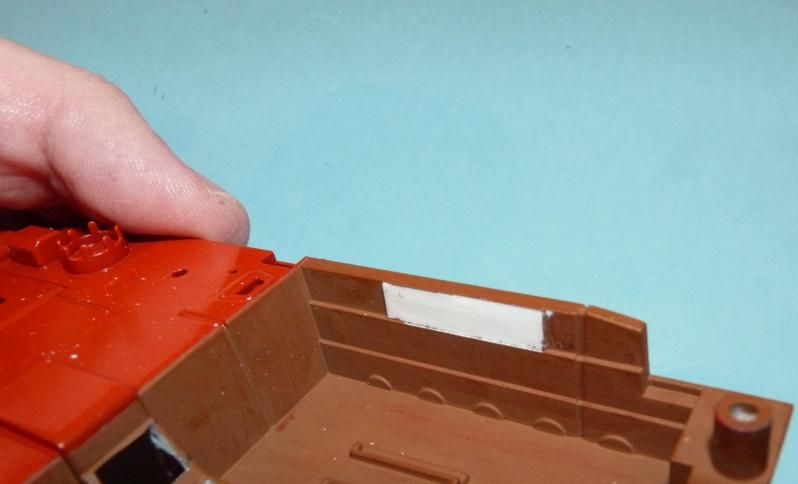
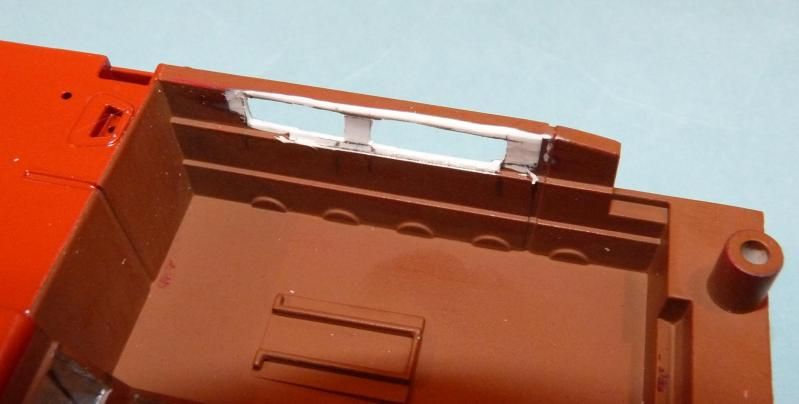
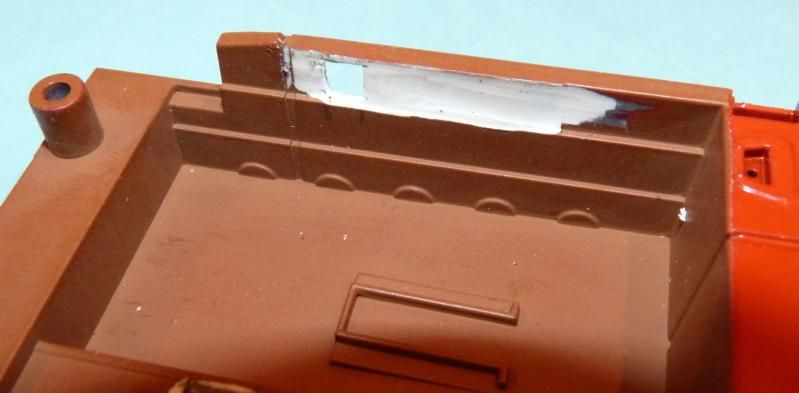
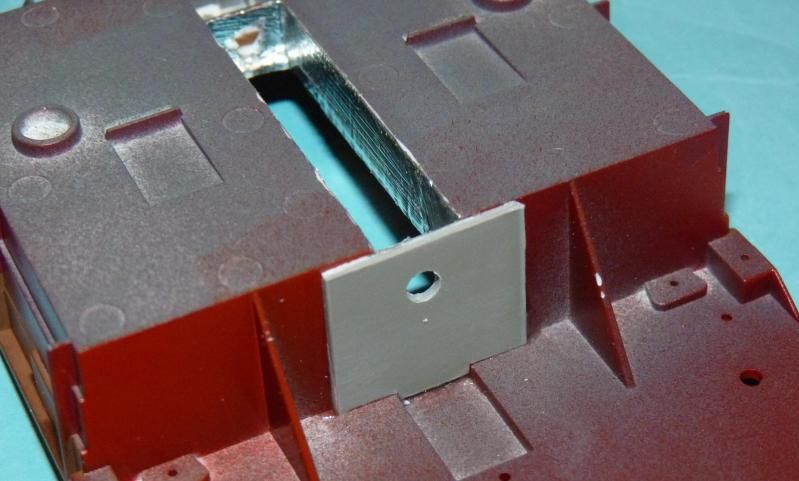
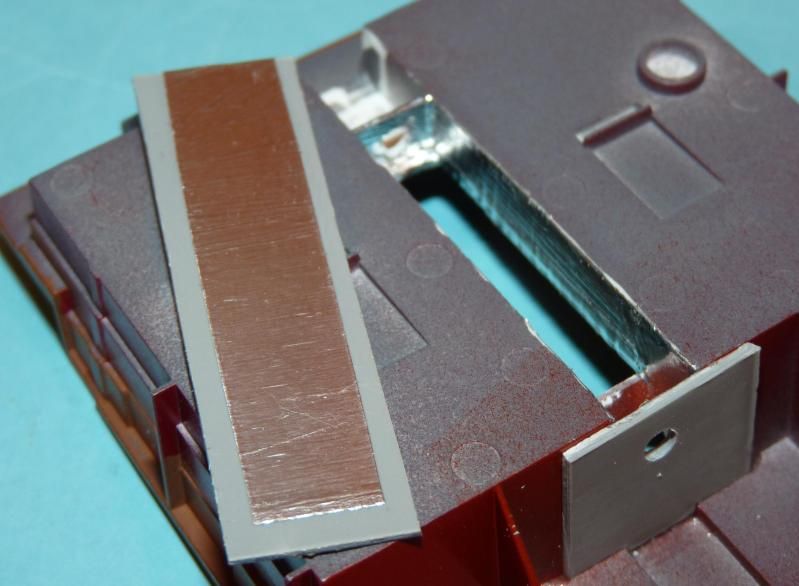
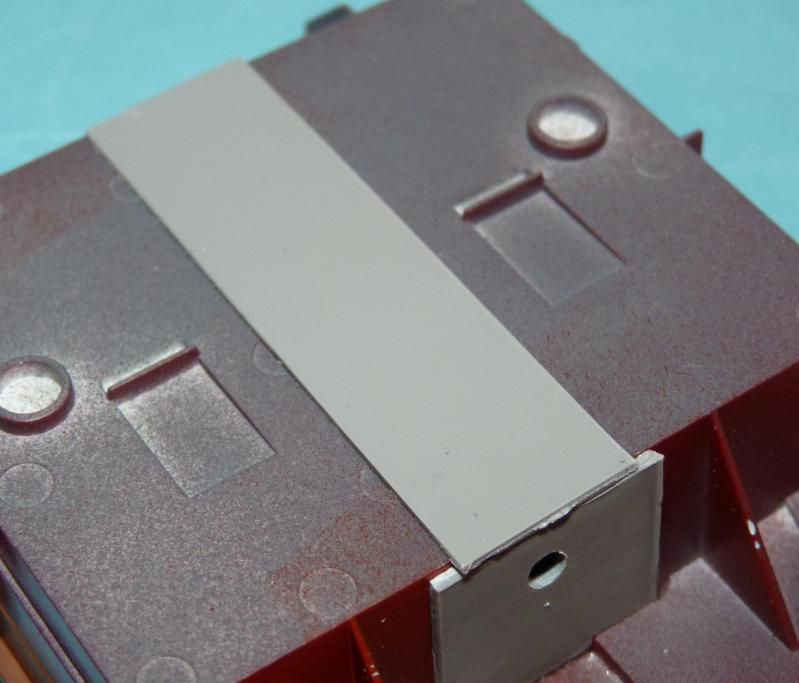
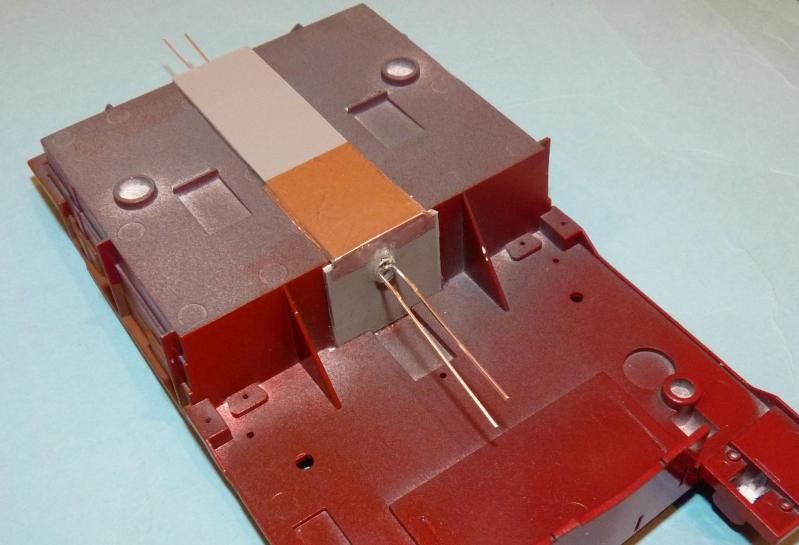
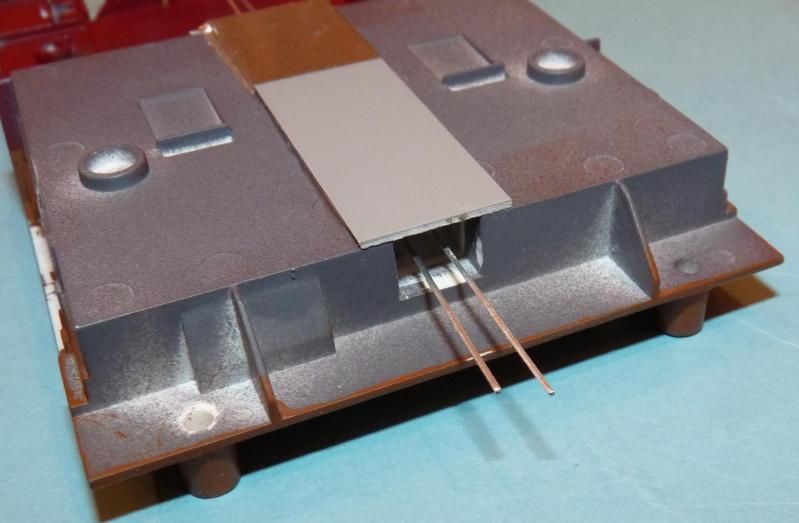
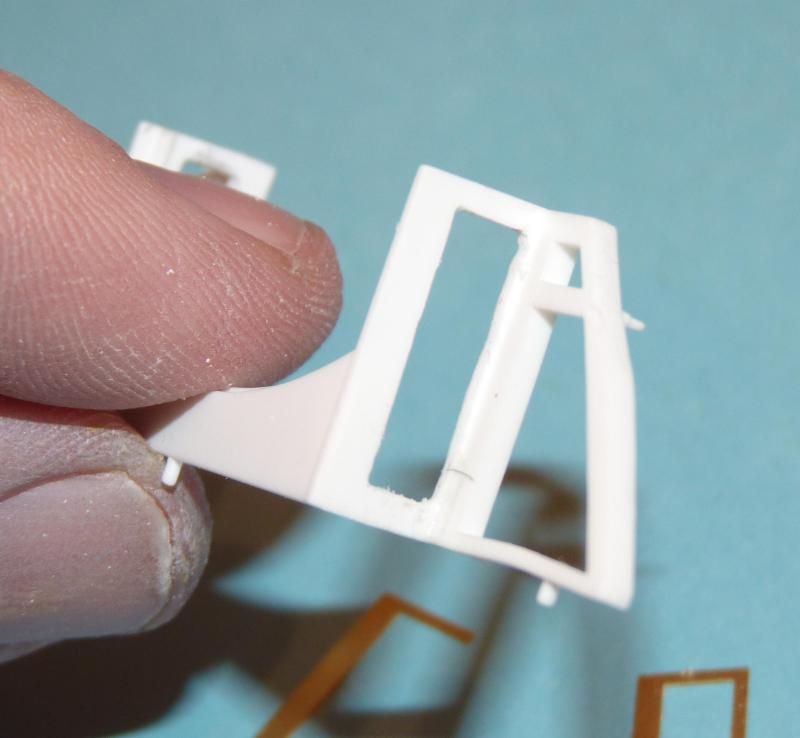
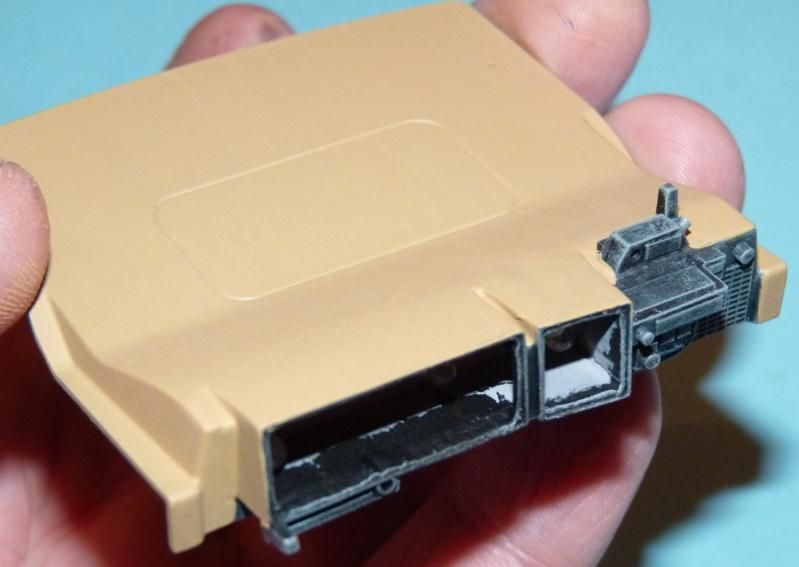
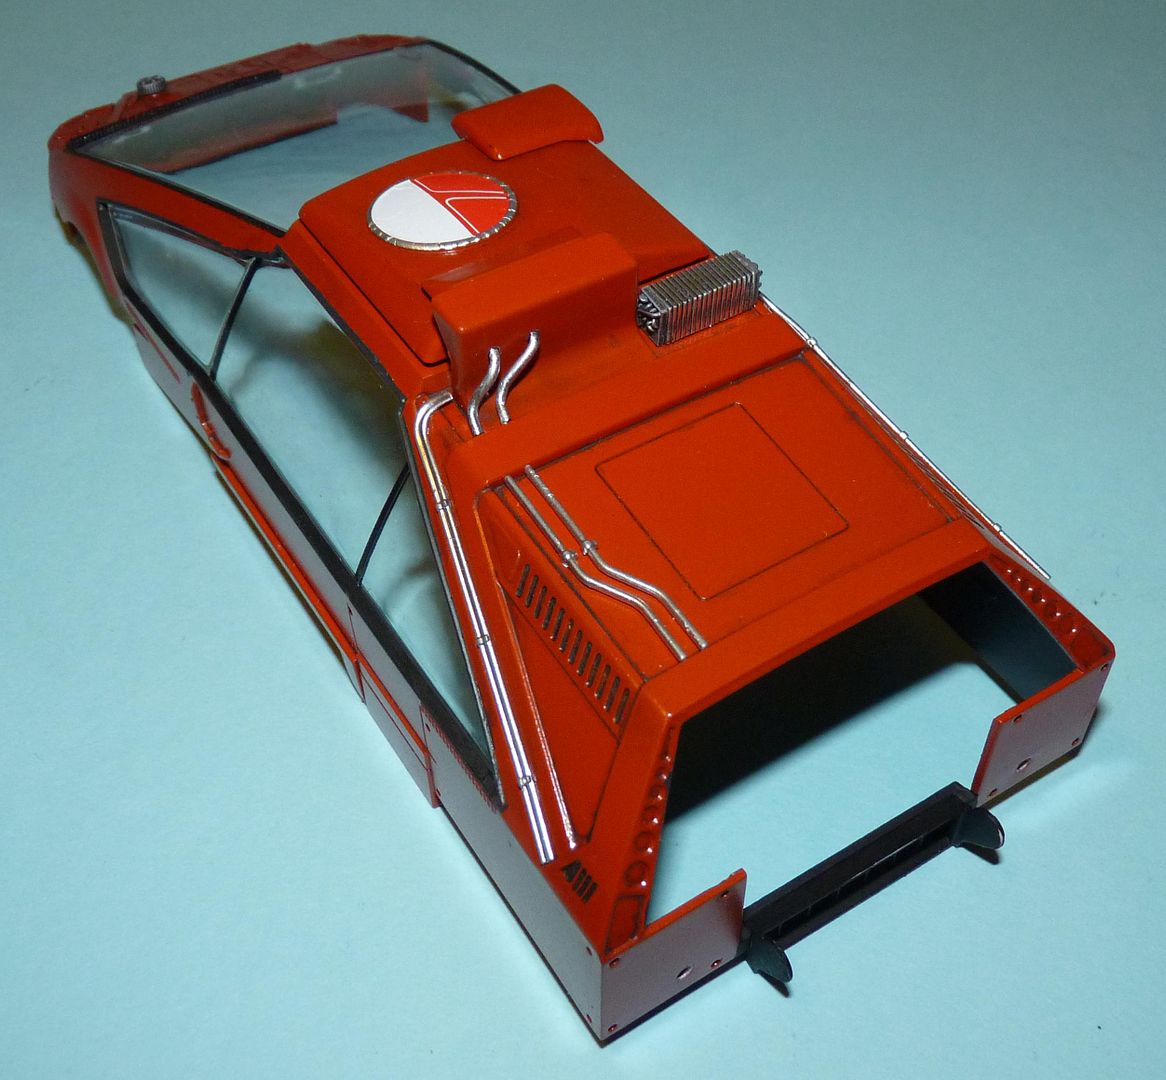
Bodyshell is perfectly moulded and the kit features lots of separate panels to apply to the basic shell making masking and painting of dissimilar colours easier...

P1020739.jpg


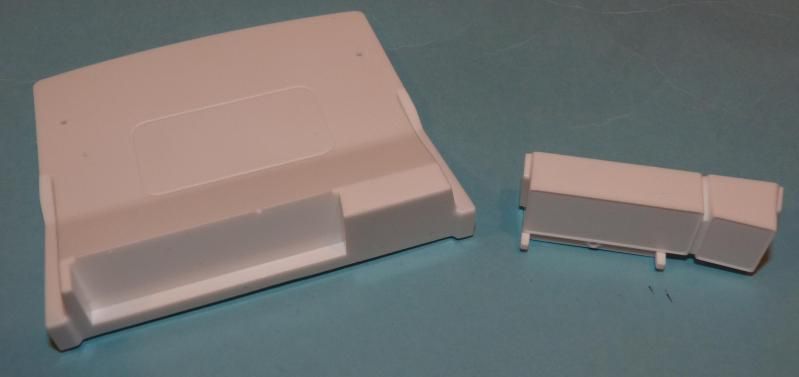
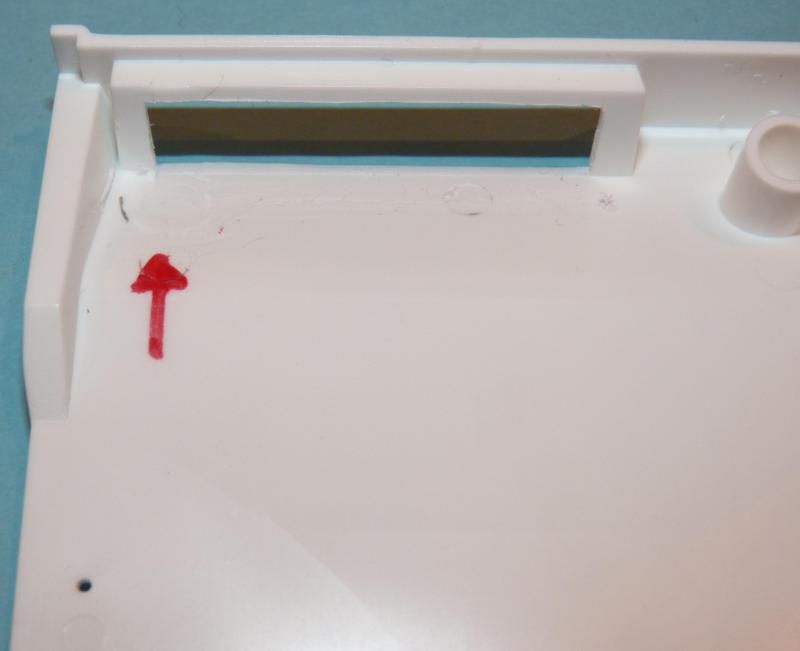
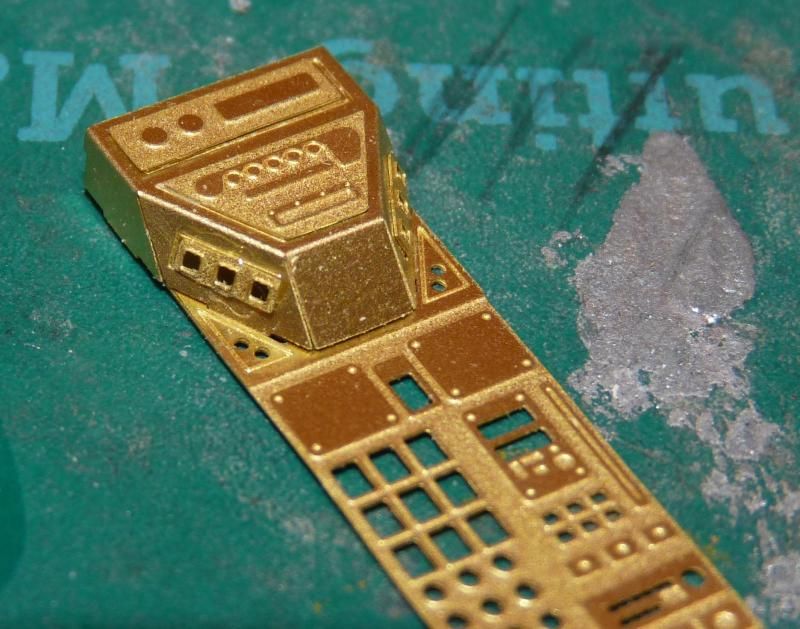
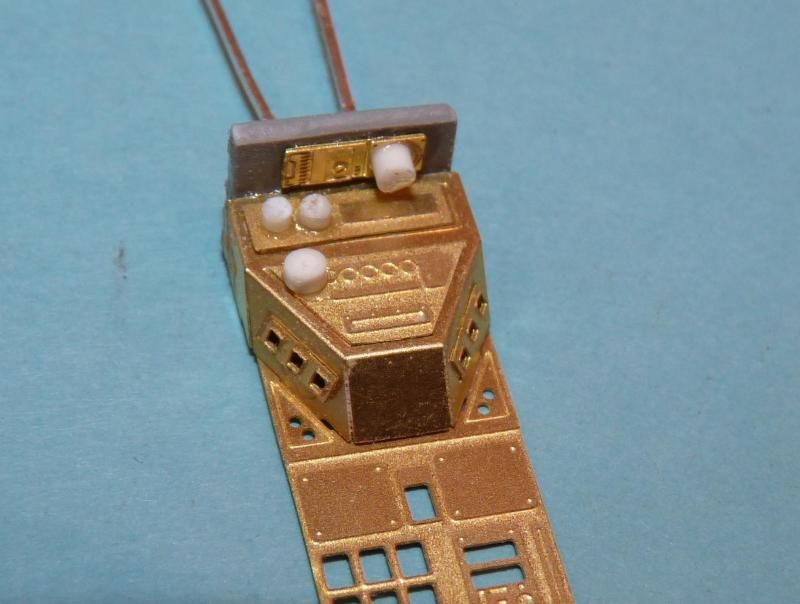
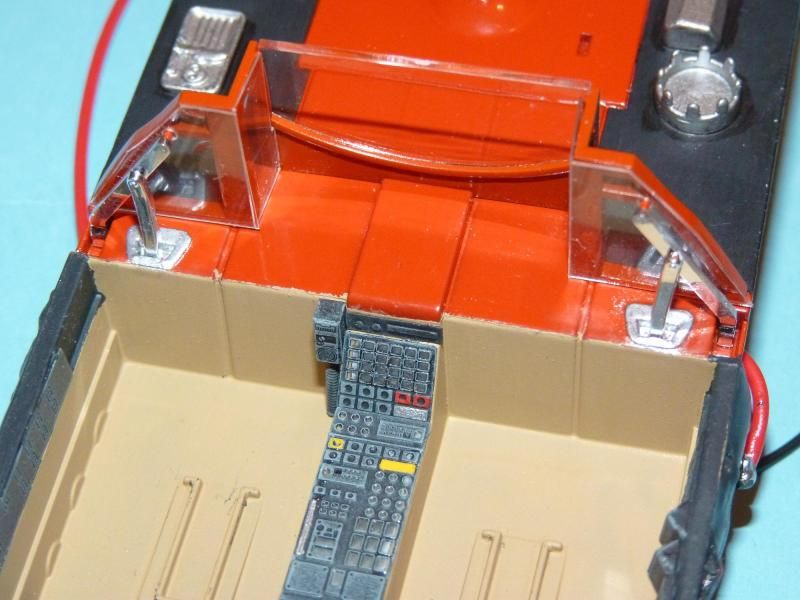
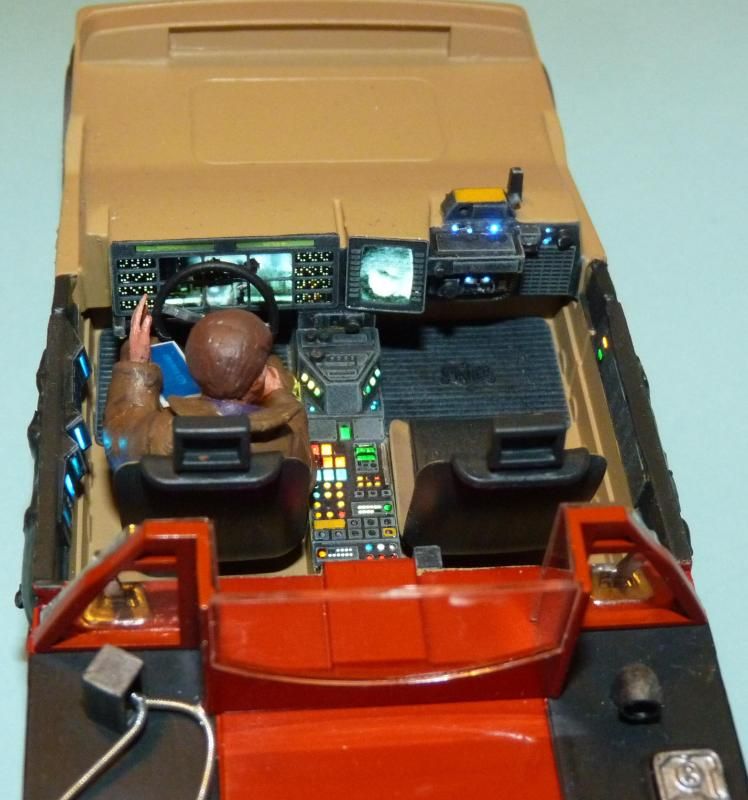
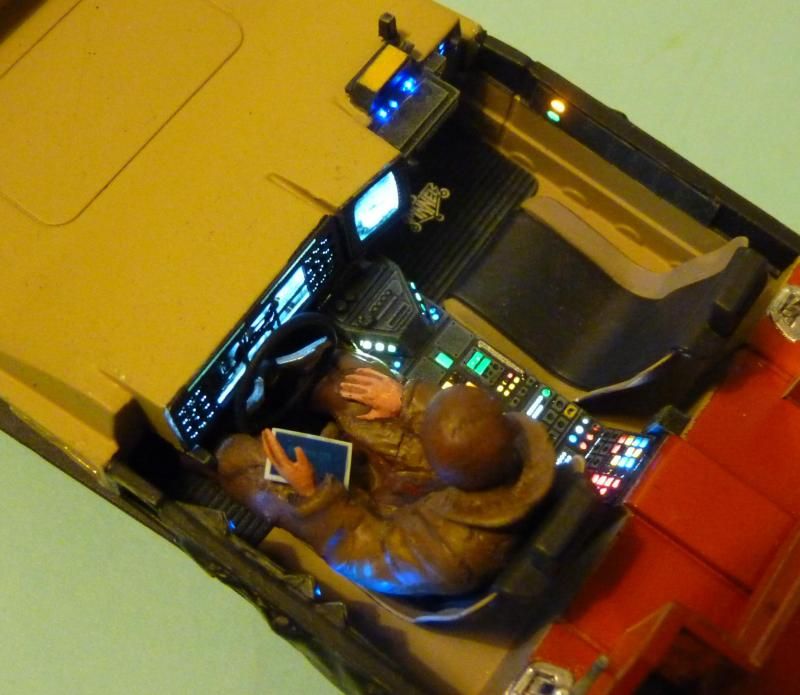
The front end features some really fine detail....

P1020736.jpg


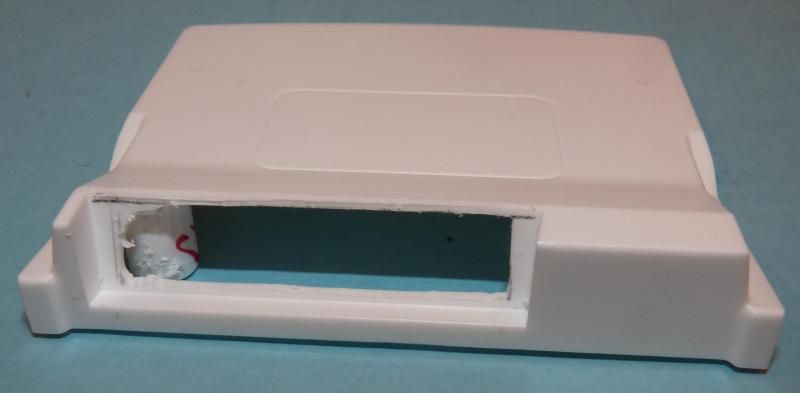
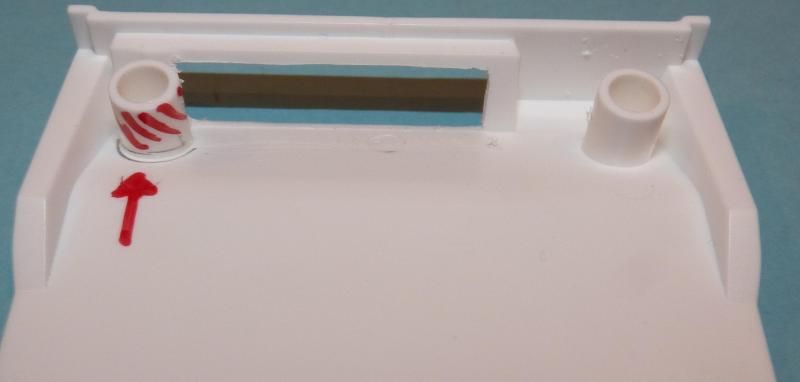
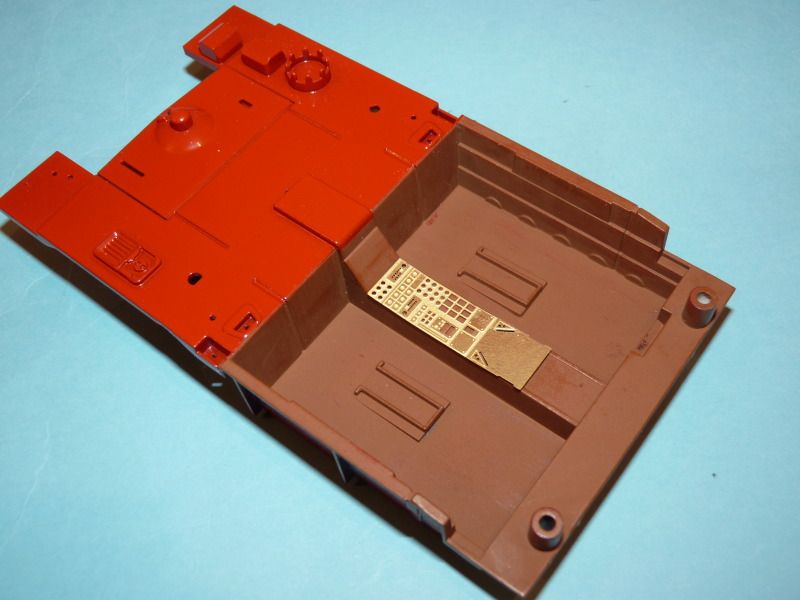
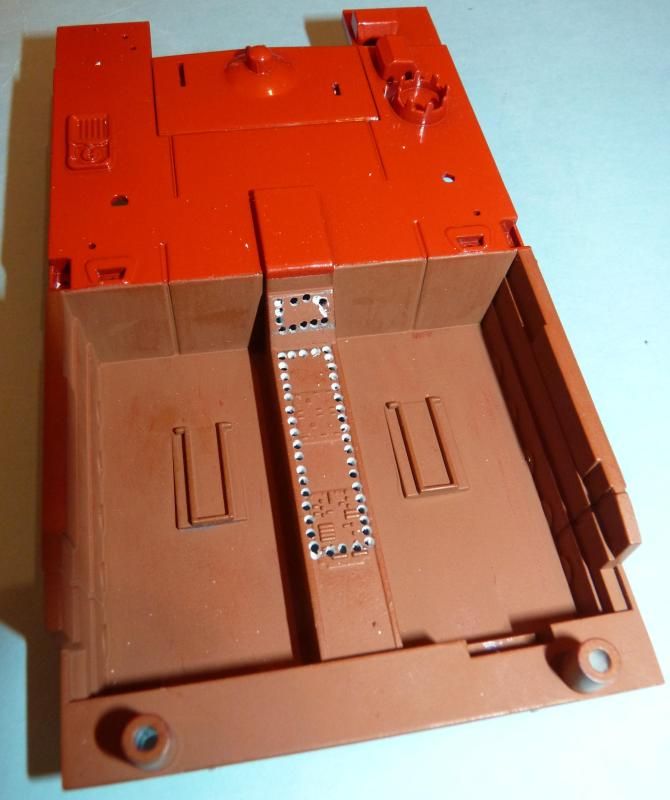
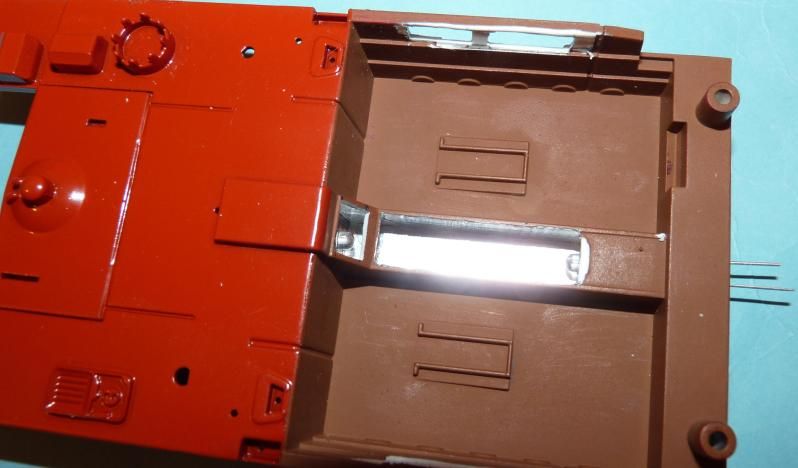
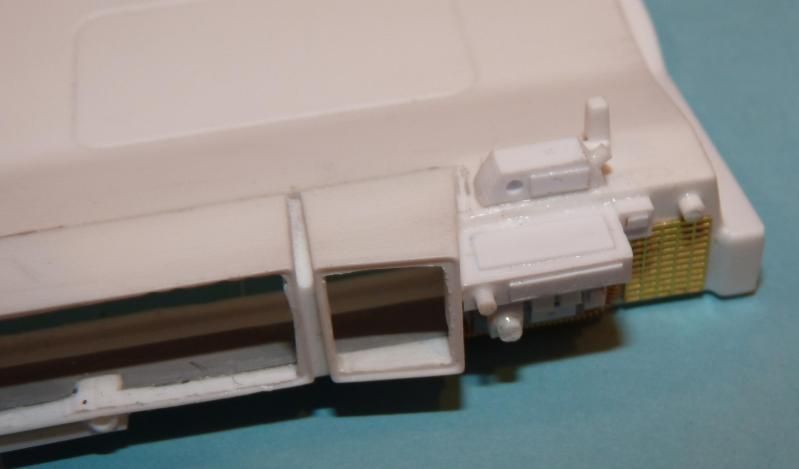
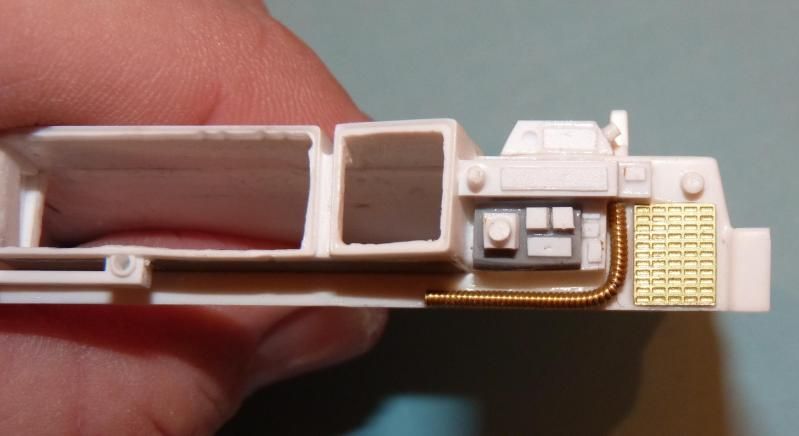
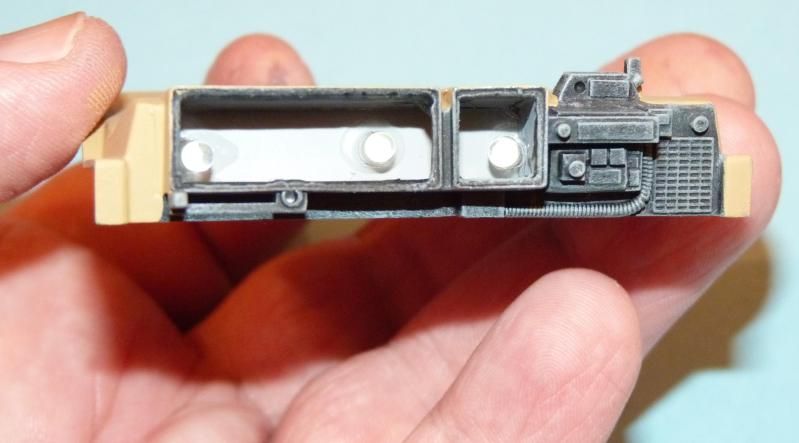
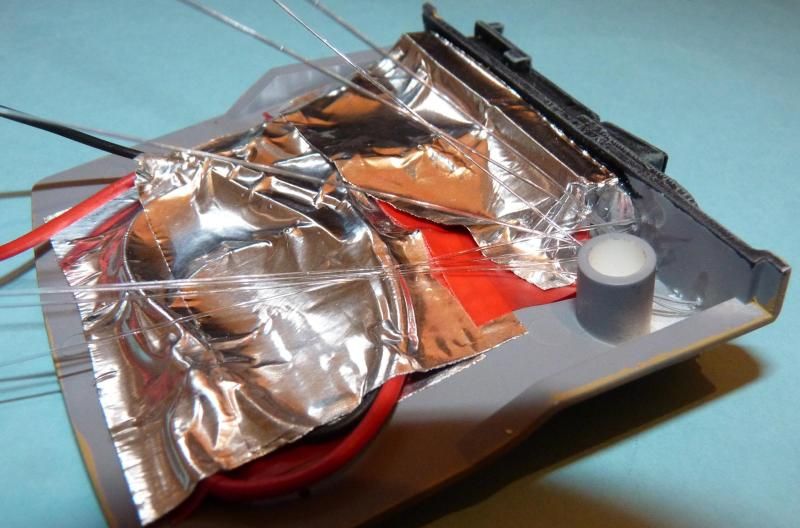
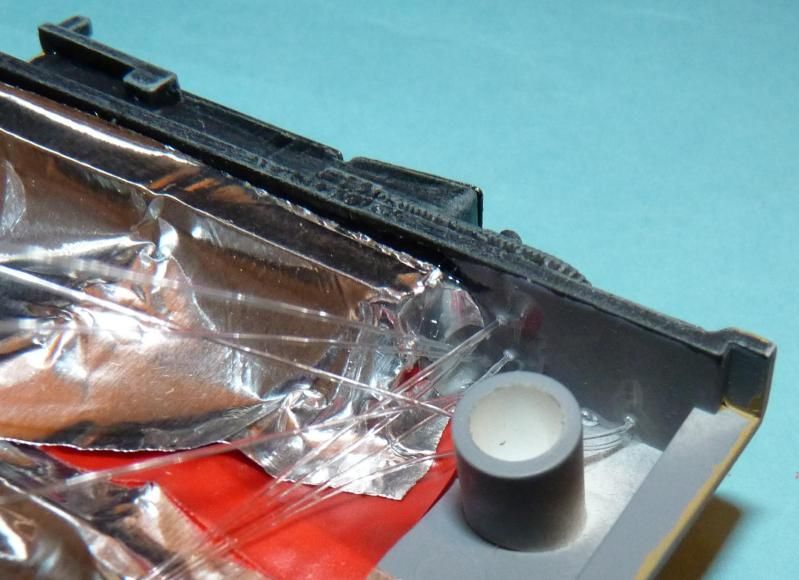
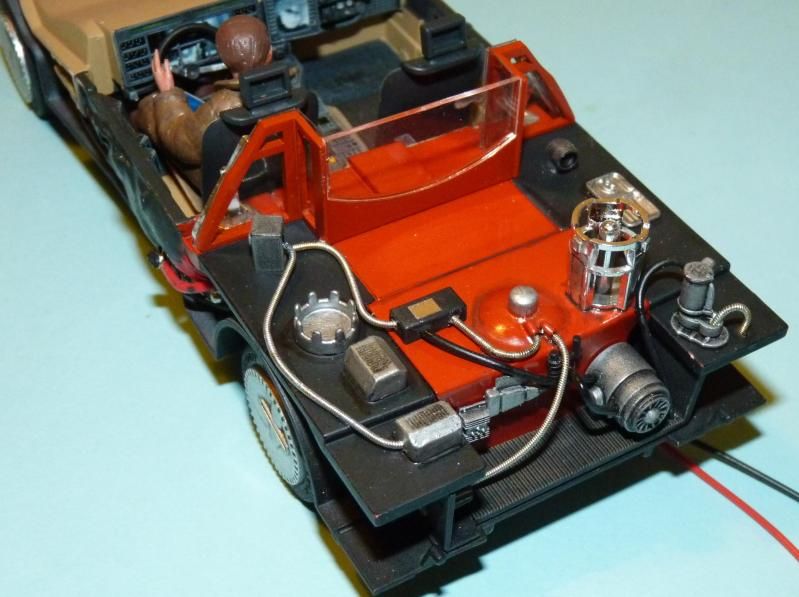
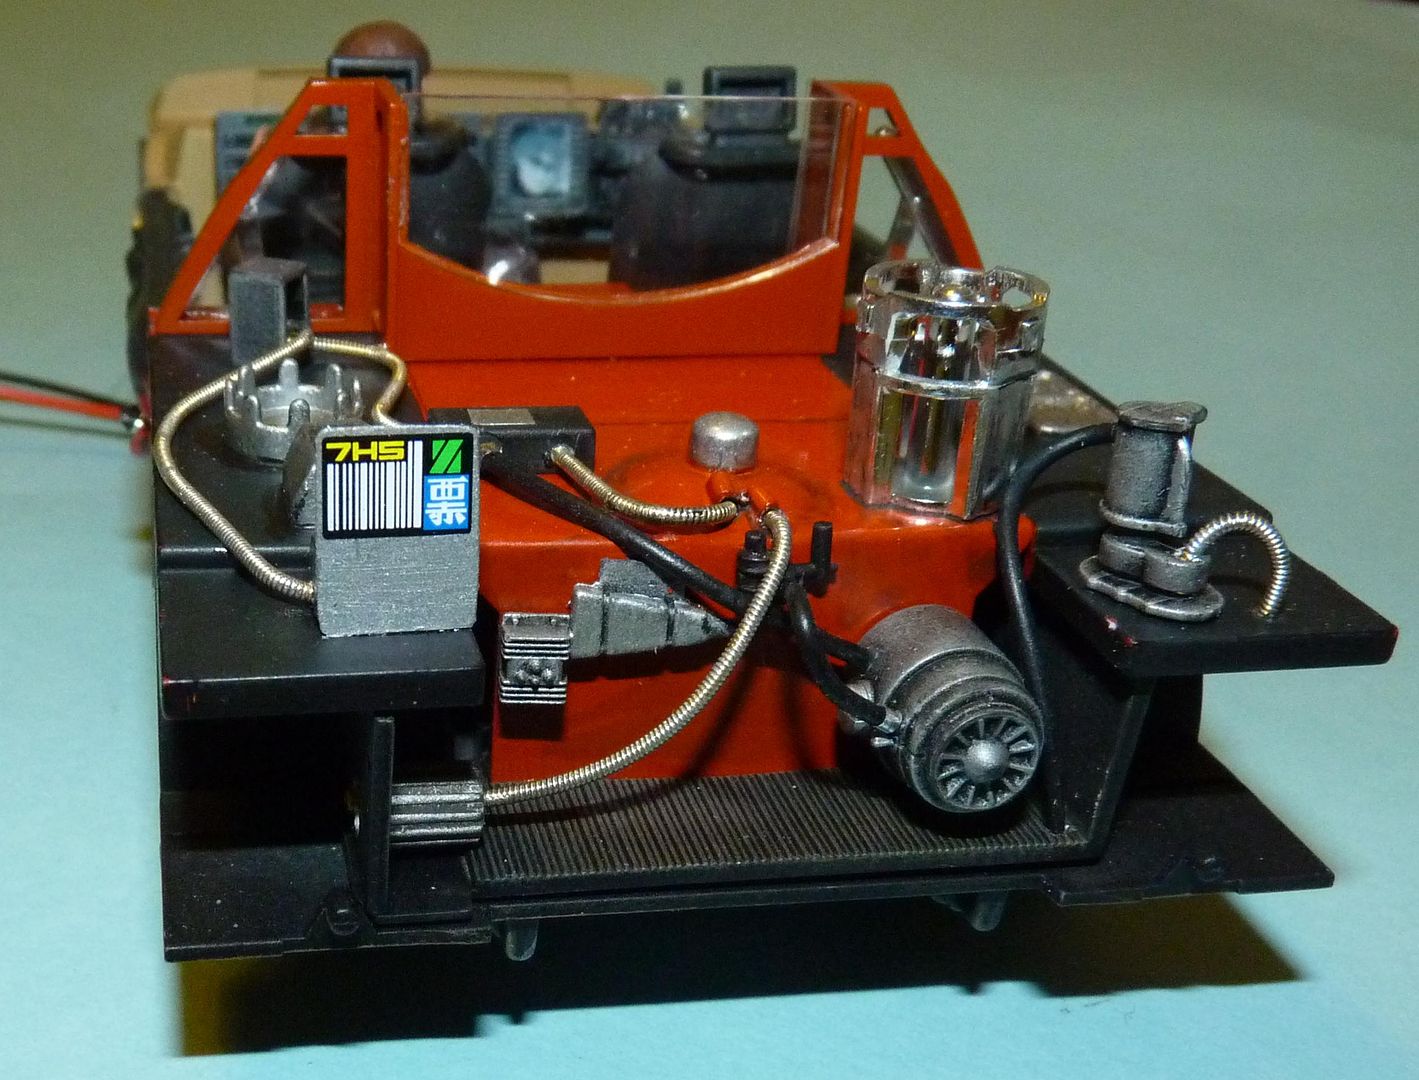
The car is rear engined and features a lot of detail in that area....bright chrome and vinyl tubing are included for this....

P1020747.jpg


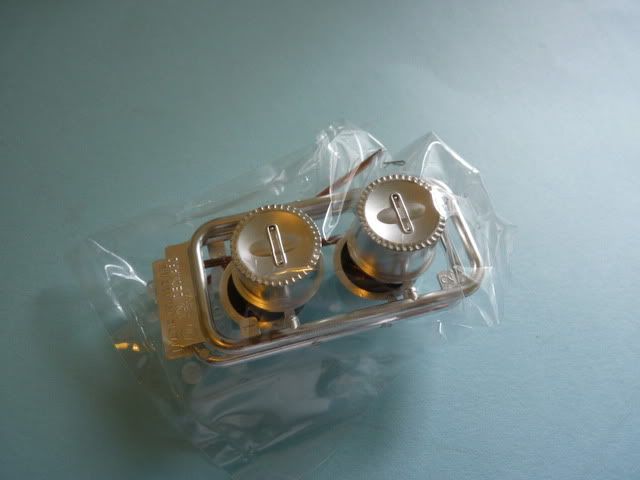
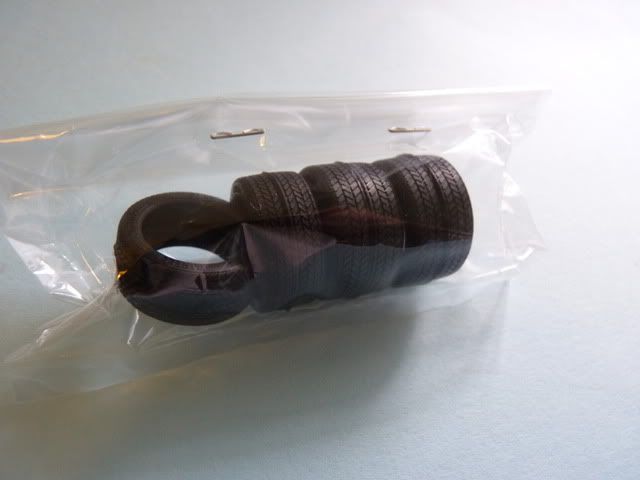
Wheels are in satin chrome with vinyl tyres and metal axles...

P1020741.jpg


P1020742.jpg


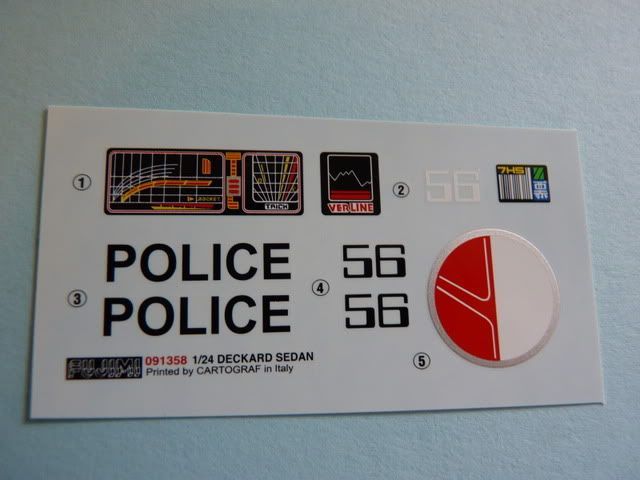
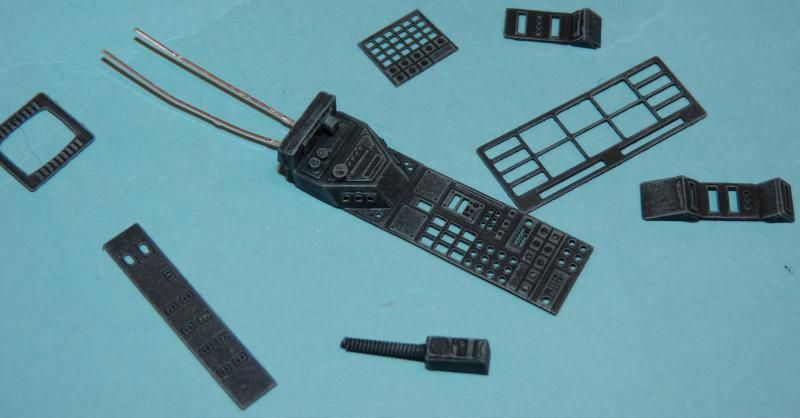
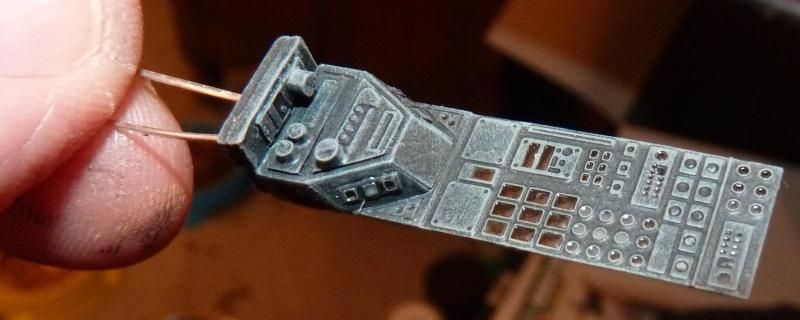
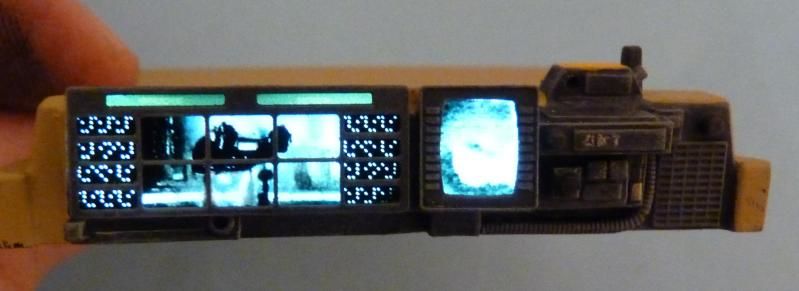
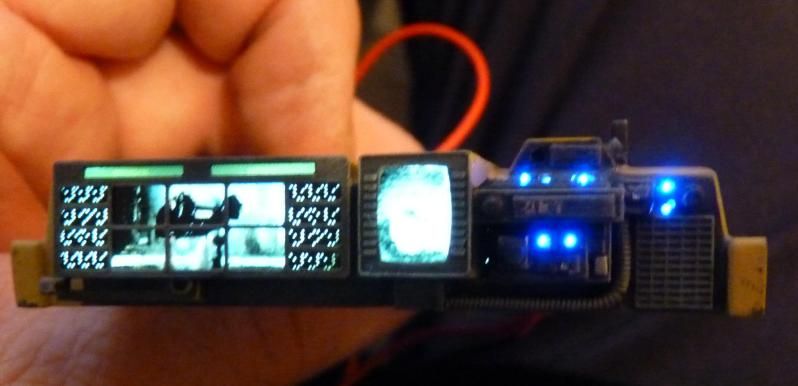
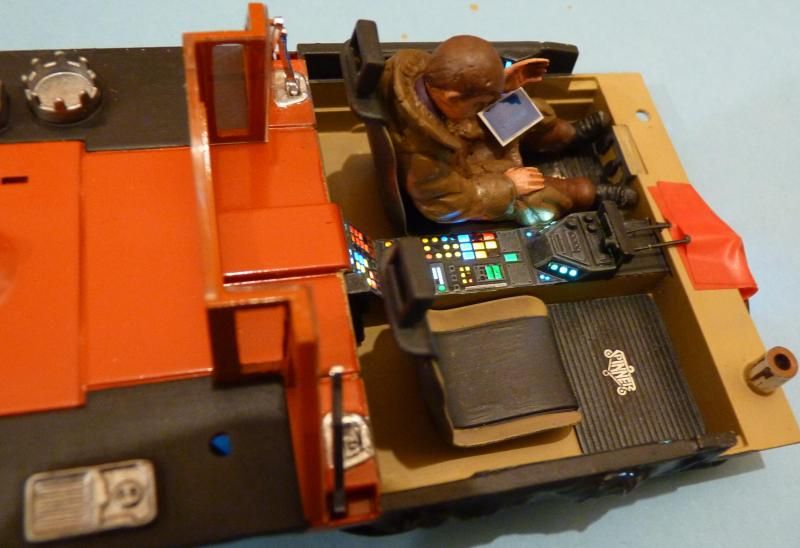
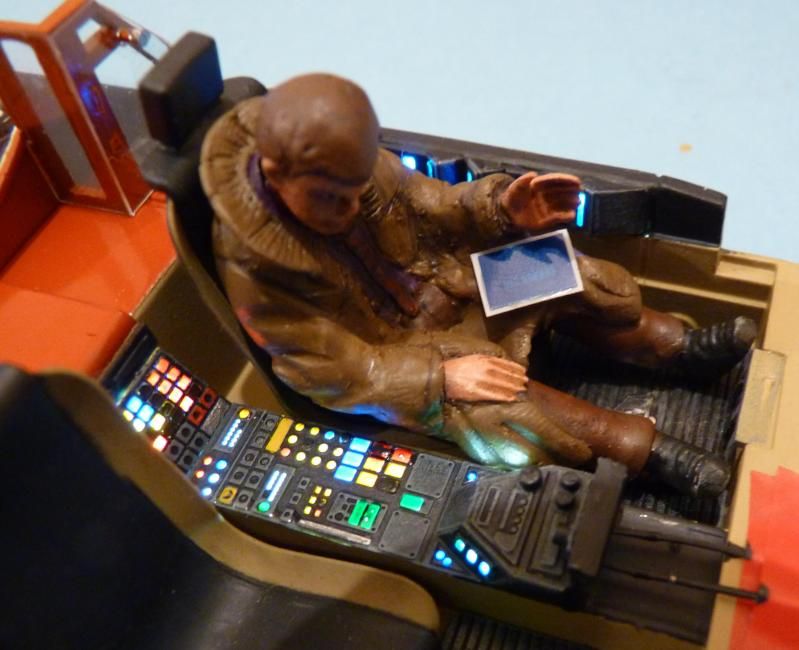
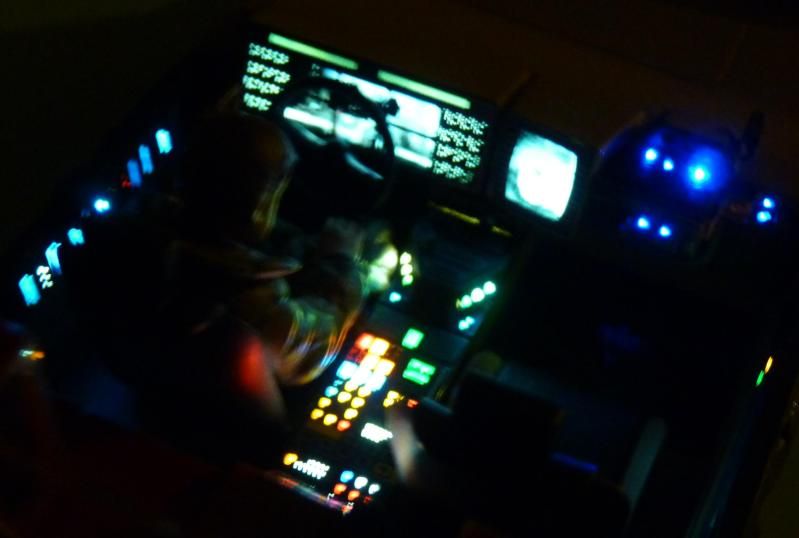
Decals are perfectly printed by Cartograf and feature internal monitors and barcode license plate...

P1020744.jpg


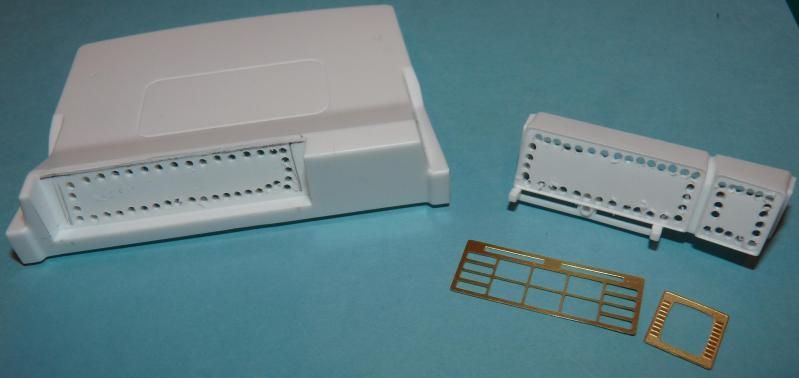
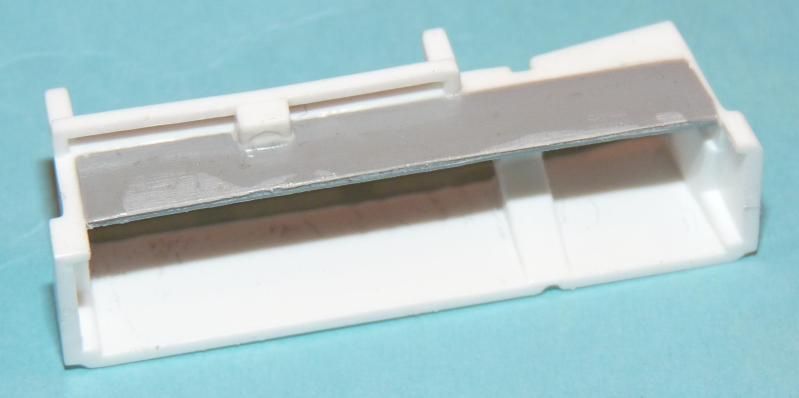
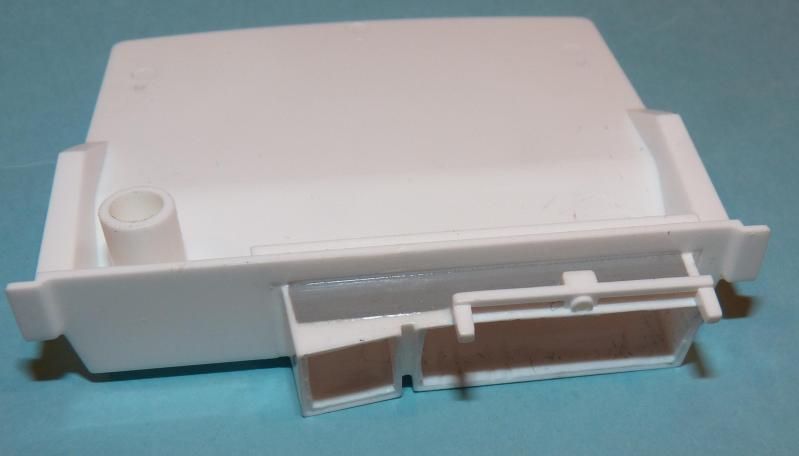
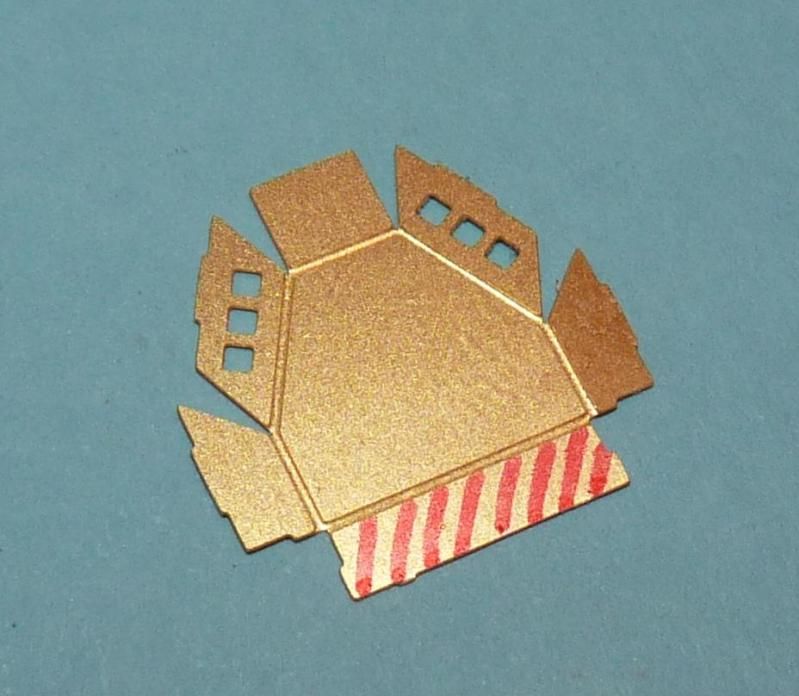
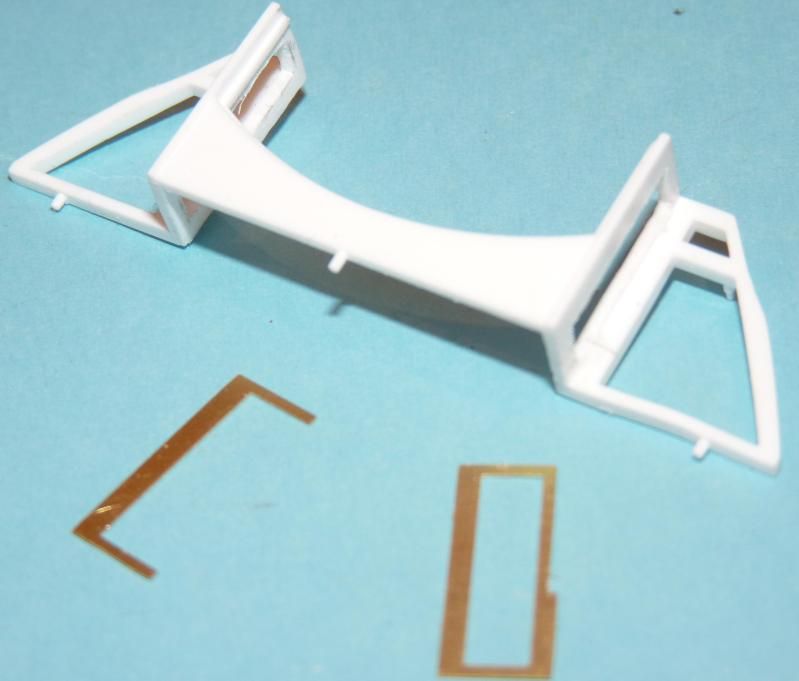
Oddly the etched fret from the Spinner kit is included but there are no references to it in the instructions...

P1020743.jpg


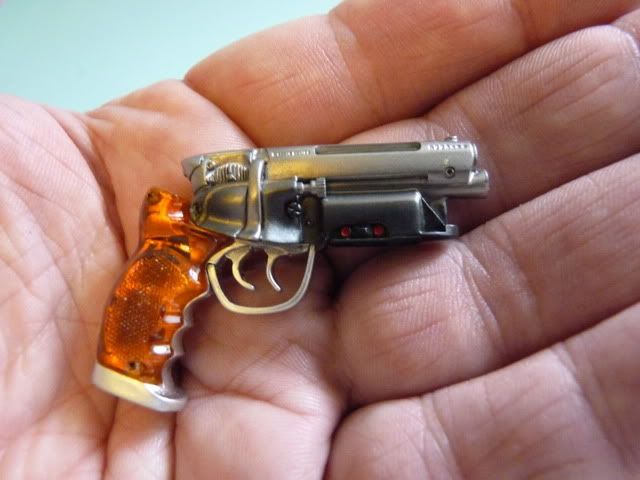
As a bonus the first run of kits includes Deckard's blaster to around 1/4 scale. It might have been nice to have this in 1/24 too...

P1020745.jpg


P1020746.jpg


The colour I opted for is Rover Orange Blaze and is actually less bright than the flash makes it appear.....it's a compromise as the bronze colour used on the original makes the model look like a toy and in a lot of scenes it appears an orange brown anyway...

P1020868.jpg


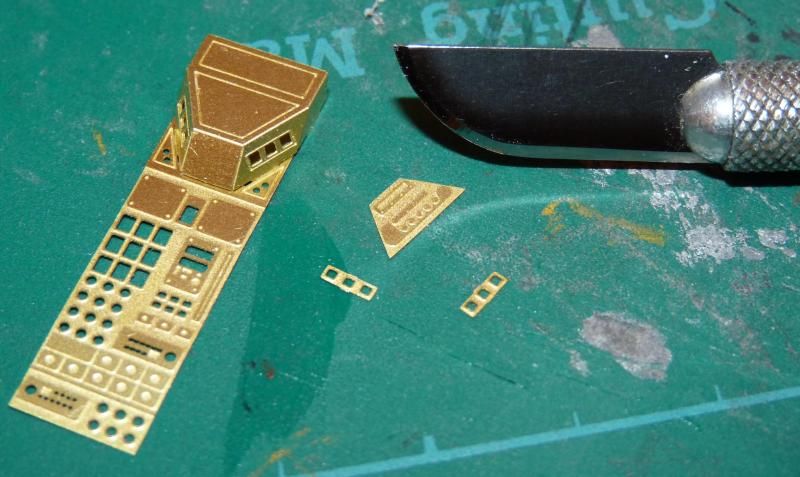
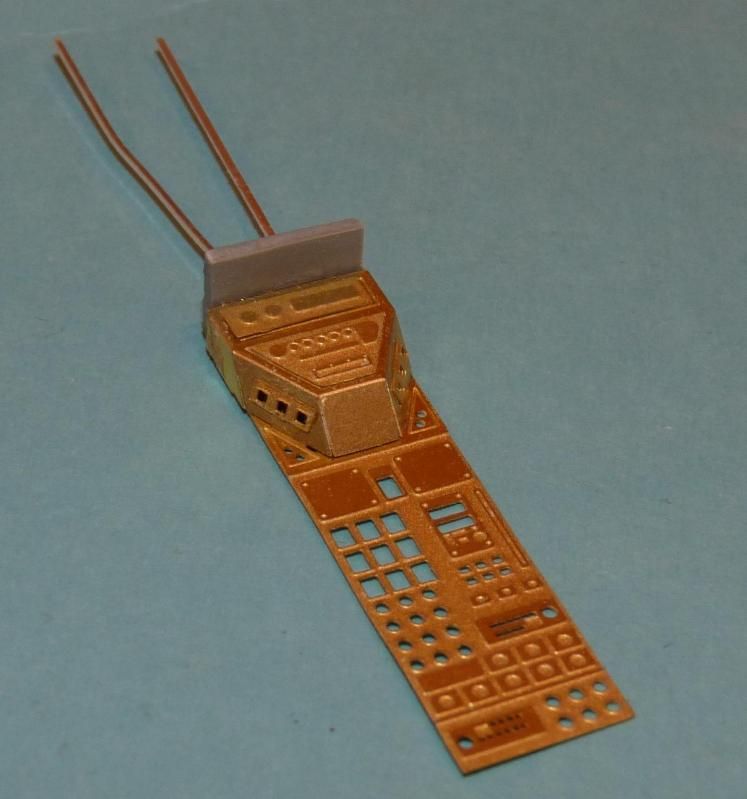
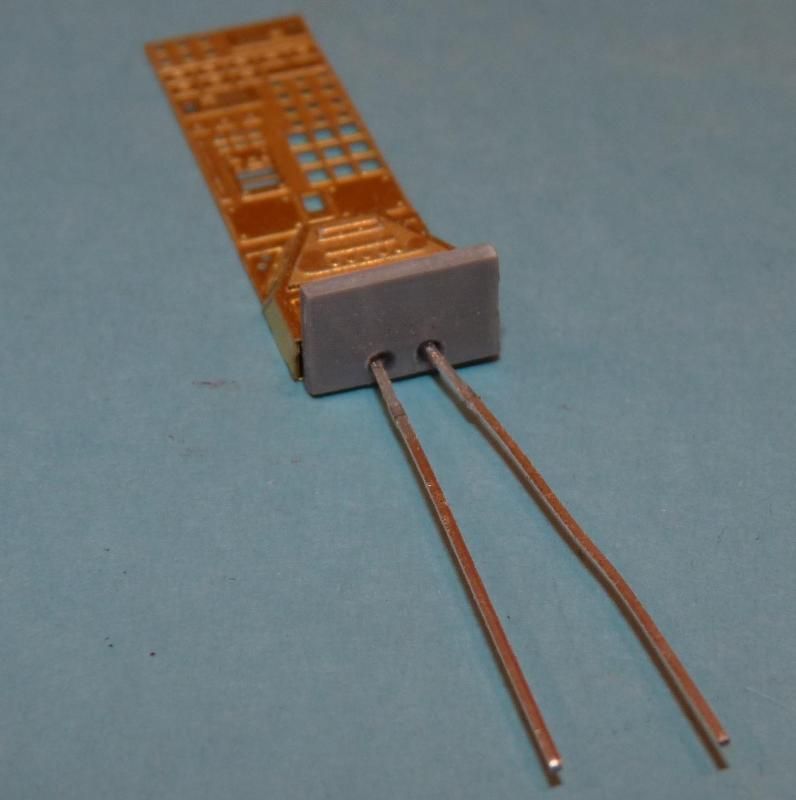
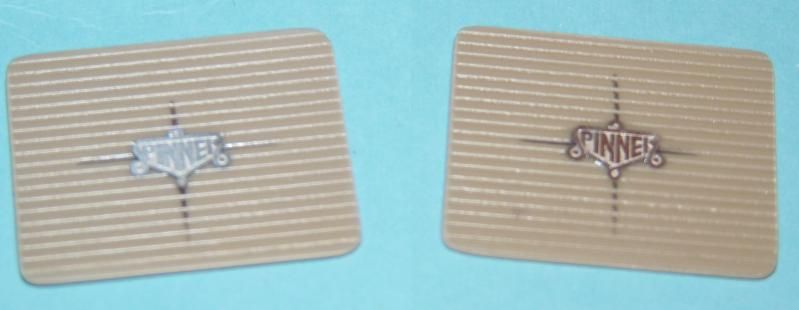
I ordered two ParaGrafix sets....

P1030096.jpg


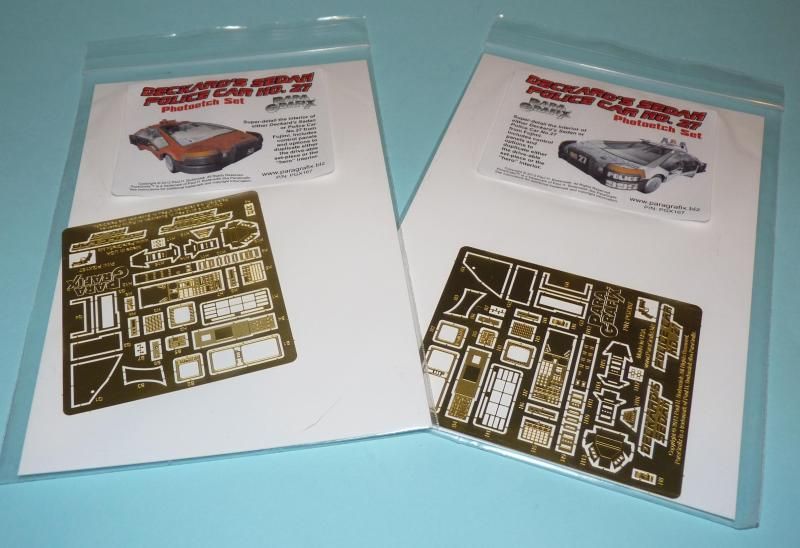
Despite having different labels, both sets are identical and provide parts for both the standard cars as seen driving around and the hero interior depicted when Deckard is behind the wheel.
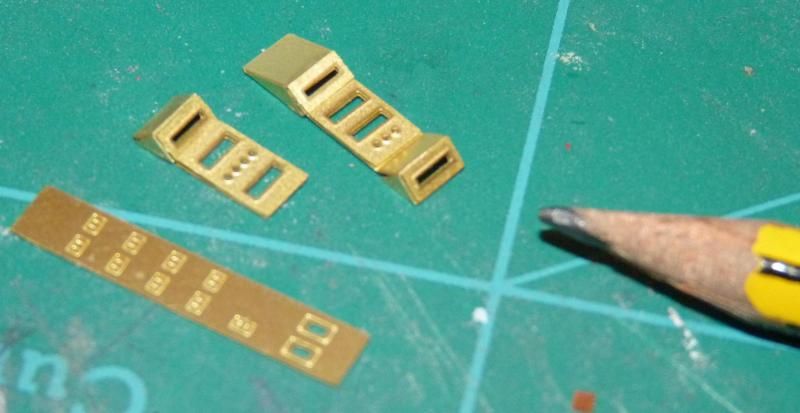
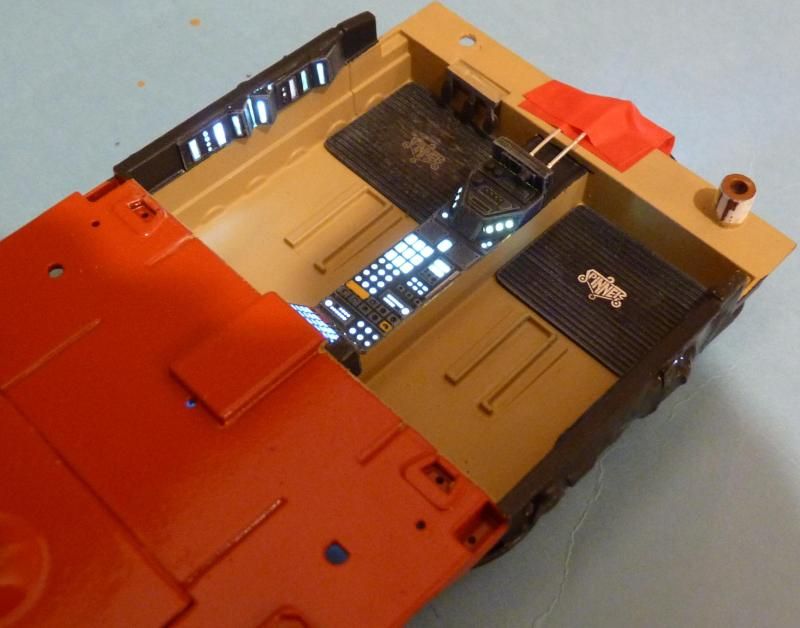
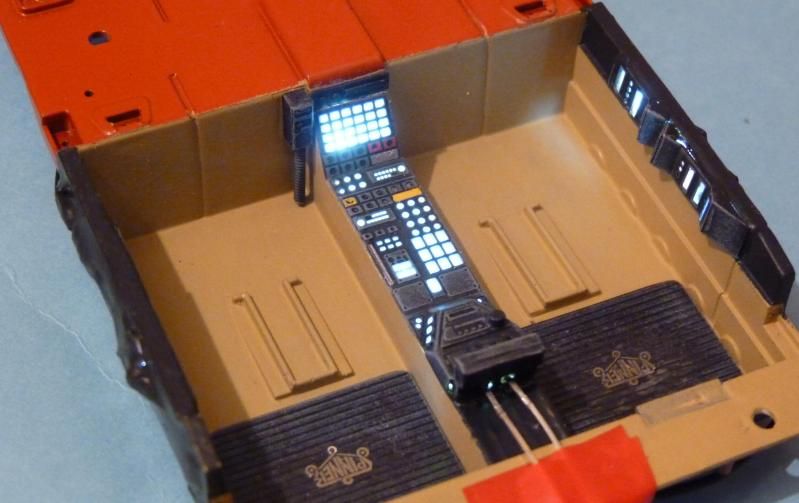
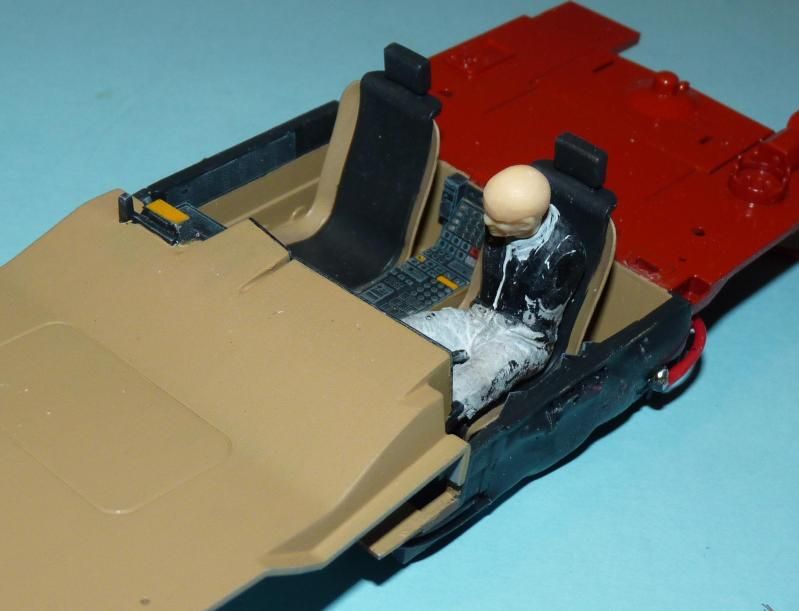
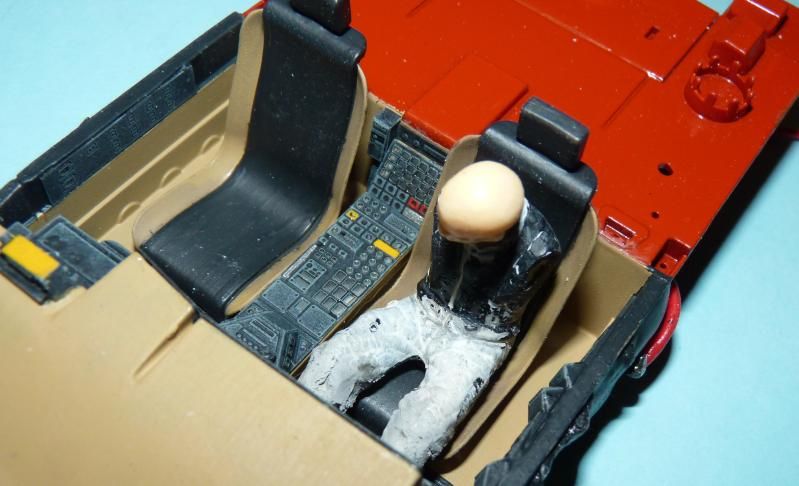
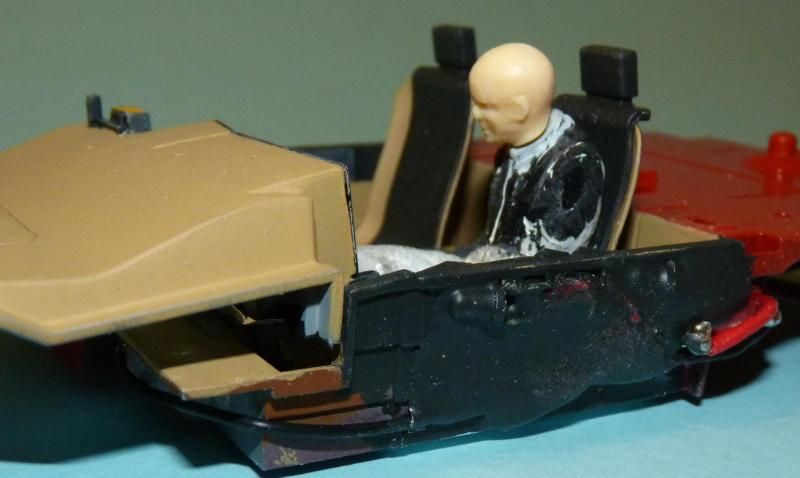
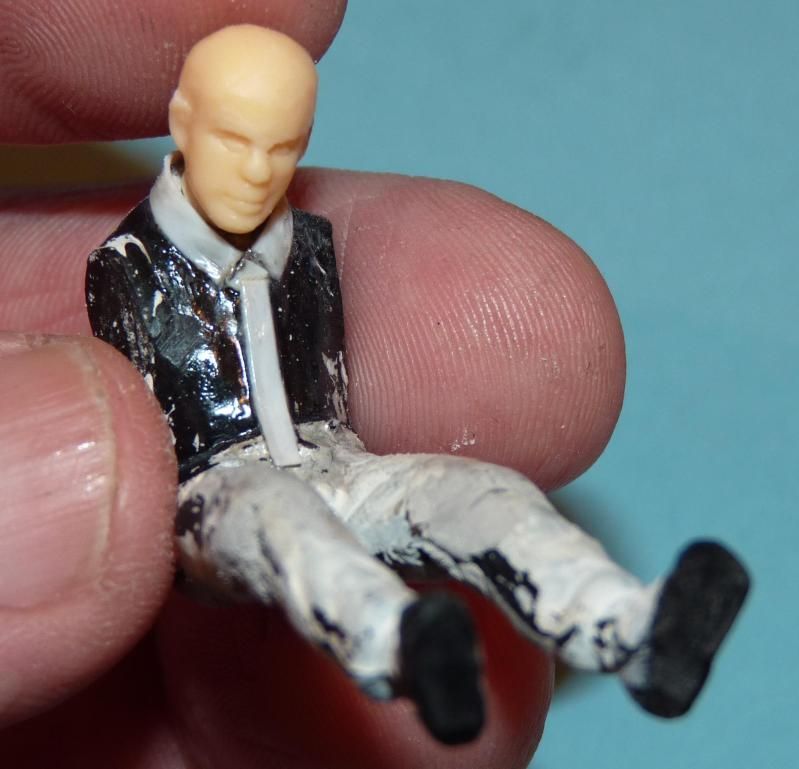
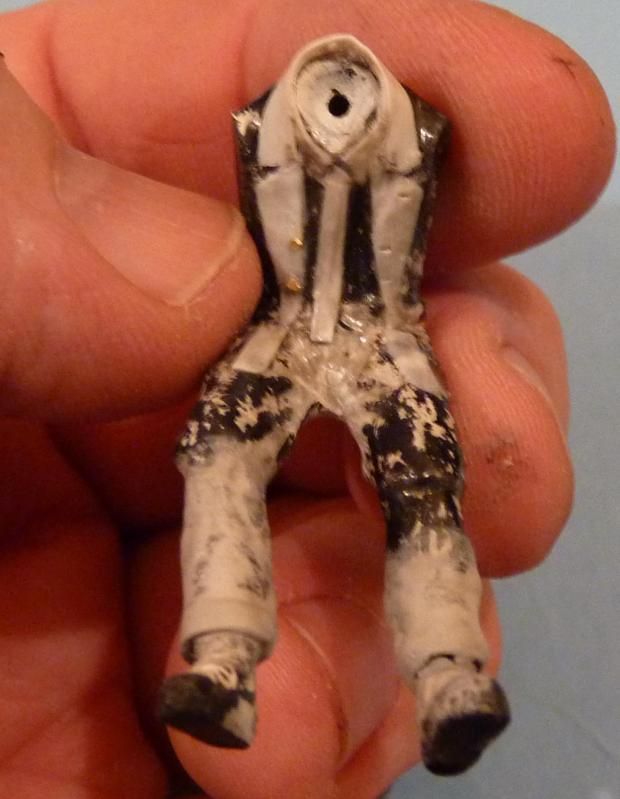
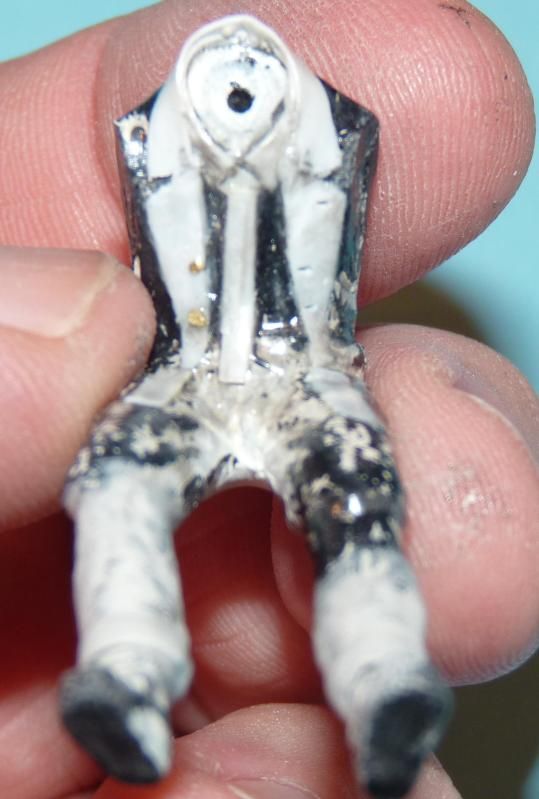
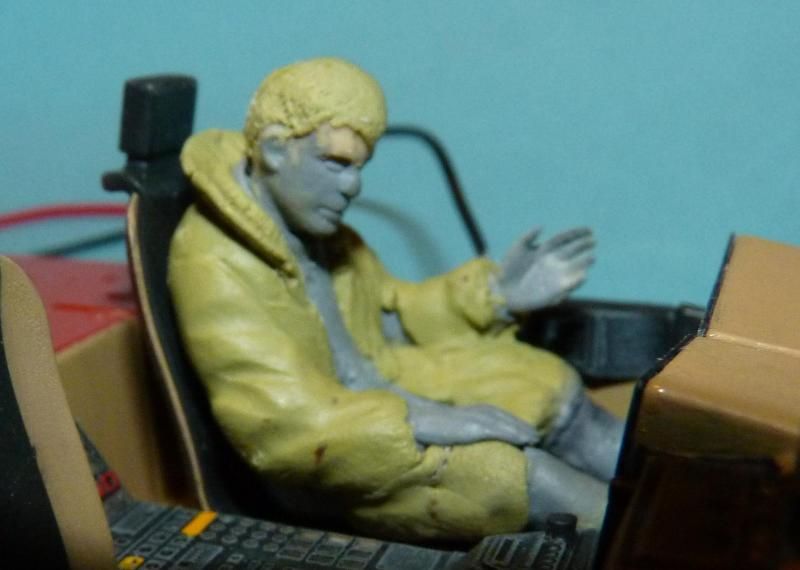
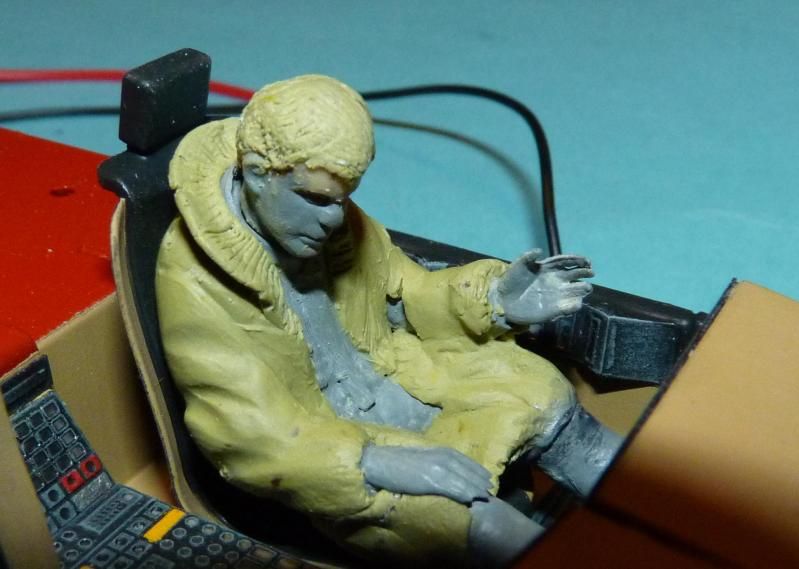
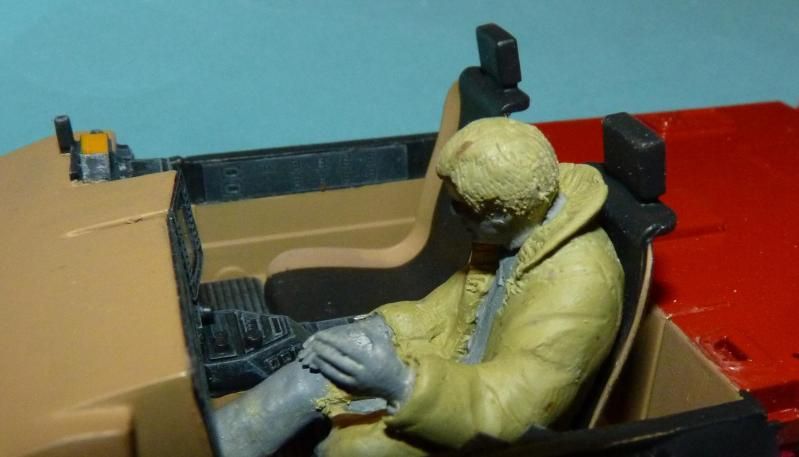
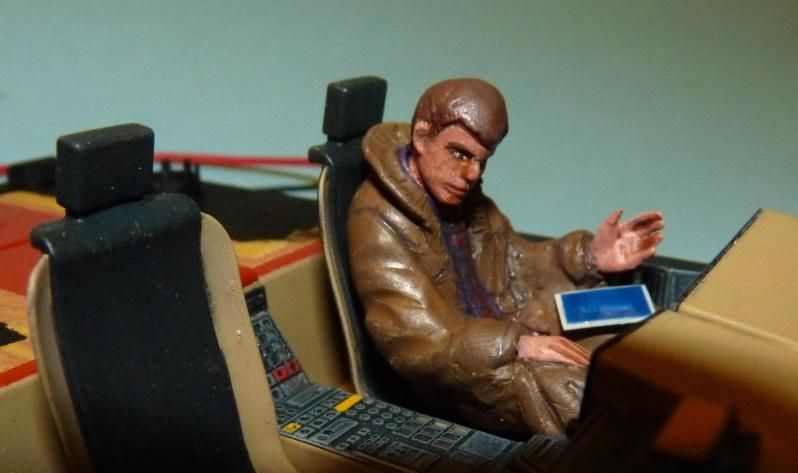
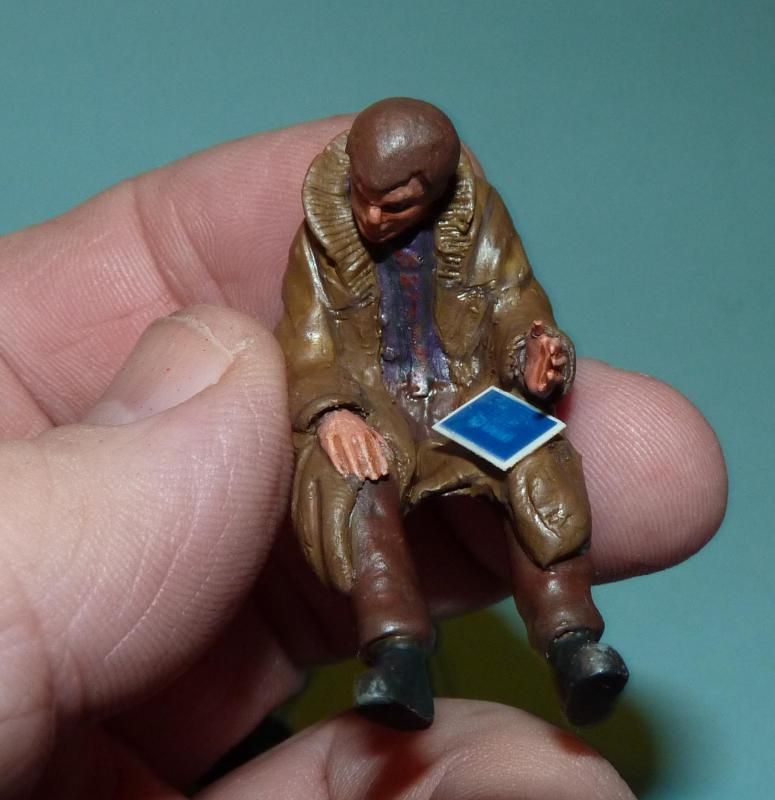
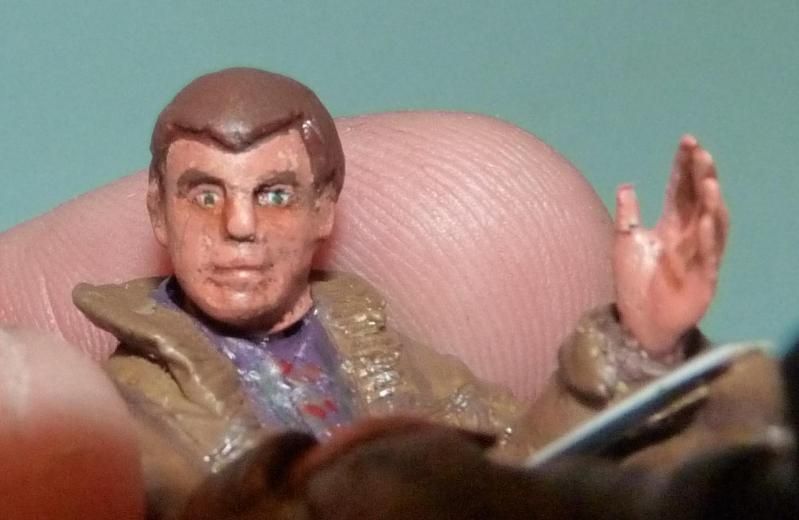
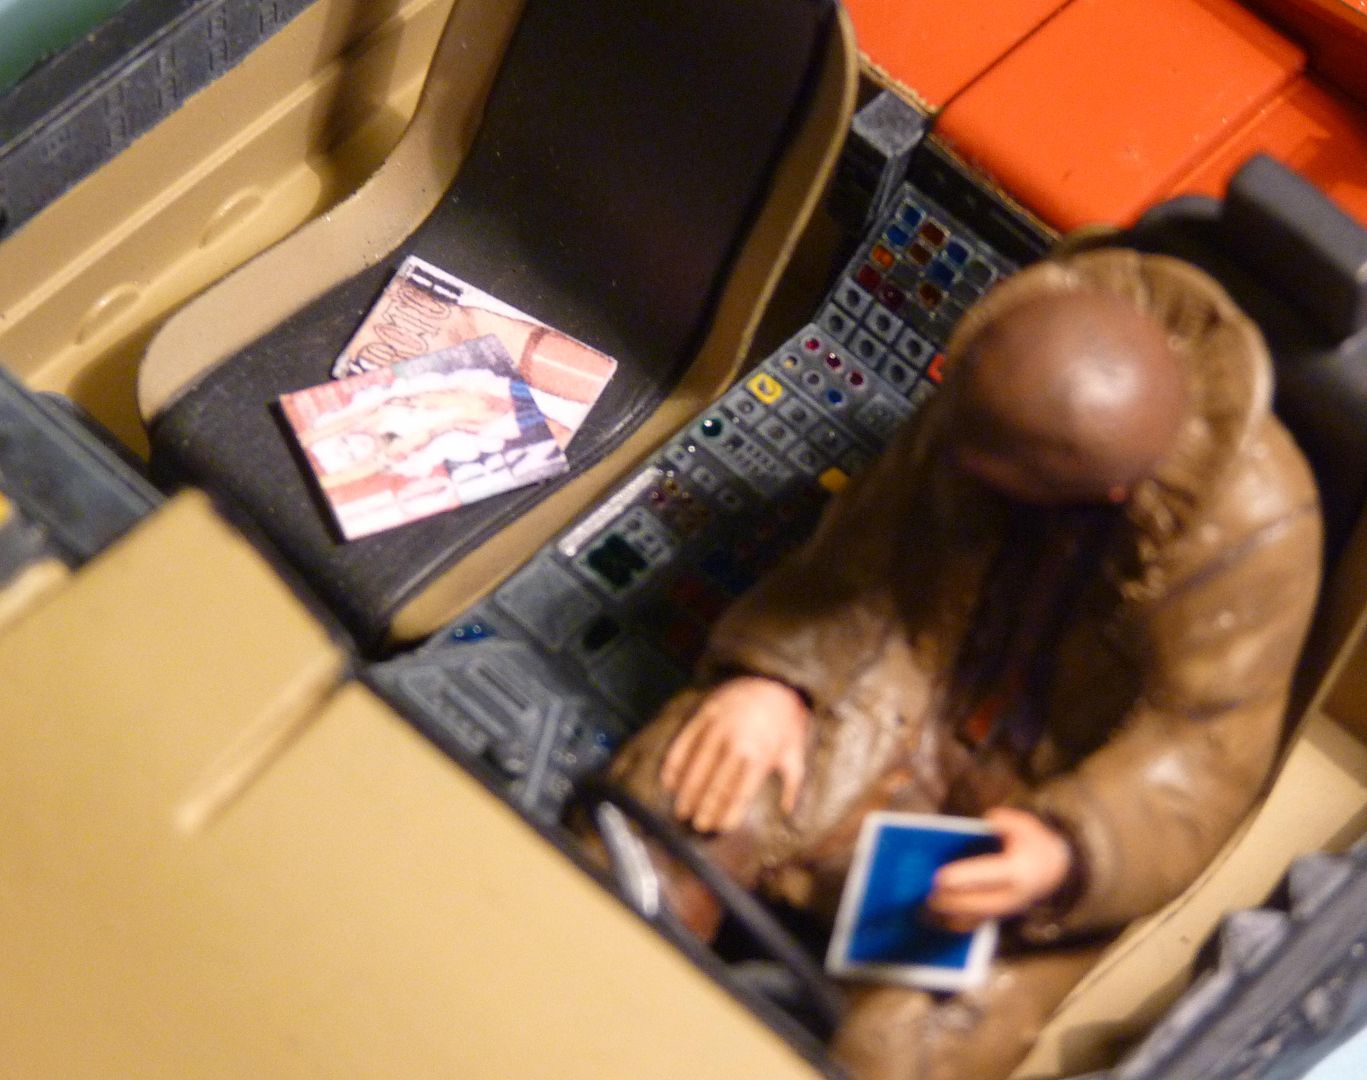
One set was to upgrade the existing Sedan interior to model Deckard sitting in the car making the call to Pris.
I'm going to use the second set to build a Police version with an open door.....
I also have some plans for a Police Bike to match....watch this space....
 
Last edited:
Here's the basic dashboard components....

P1030112.jpg


First job was to remove the prominent lip moulded onto the top edge....

P1030114.jpg


This joint should be seamless when the screens are in place so a little filler and sanding will be needed here.
Next I cut the two etched screen parts from the fret and test fitted them to determine where to remove the plastic....note the area of the main dash piece that also needs surgery....These parts were then chaindrilled and the excess plastic removed...

P1030117.jpg


On chopping out the dashboard I discovered that the assembly socket that mates with the interior tub was visible and might interfere with the lighting so I removed it using side cutters and a sharp blade...

P1030119.jpg


P1030120.jpg


P1030124.jpg


I then very carefully removed the excess plastic from the screens...you need to be super-careful here as the process doesn't leave a lot of material along the bottom edge of the main screen...I used a blade that was sharp but not too sharp to avoid removing too much material. Once the screens are fixed to the dash however there is scope to reinforce this area with sheet styrene....

P1030122.jpg


Next it was onto the main interior tub which had already recieved a coat of paint at the rear end....the dark matt brown in the seating area is just a base coat for the eventual beige colour.

First I test fitted the brass for the centre console to determine where the lights would be going....It's worth mentioning here that this is the 'hero' version which is the one Deckard sits in outside the Bradbury.

P1030125.jpg


More chaindrilling and cutting resulted in two neat openings.....

P1030126.jpg


P1030128.jpg


Another job is to level the door panels prior to testfitting the door controls....the white area is where the plastic has been scraped flat, level with its surroundings

P1030129.jpg


When assembled to the dash, the monitors have a large gap underneath...not an issue in the basic kit but obviously a problem if you intend to light it...so a piece of scrap styrene was cut and fixed in place...note the notch to allow for the steering mount...

P1030133.jpg


P1030135.jpg


Also some holes need cutting into the door linings to allow light through to the etch....

P1030152.jpg


P1030153.jpg


As with any lighting job it's important to plan ahead as to where the lights are fitted and to ensure that the kit will still fit together after modification. I lined the centre console with aluminium tape to prevent light leaks and also to bounce the light around inside so that it projects through the etch. A simple bulkhead was installed at the rear of the console and a hole drilled to take a 3mm white LED....

P1030142.jpg


A similar hole was drilled in the front end and a piece of styrene fabricated to seal the bottom of the transmission tunnel....

P1030144.jpg


P1030145.jpg
 
The LED's were then glued in place....by having them light the box horizontally from either end this provides a more even light avoiding 'hot spots' through any particular area of etch....

P1030146.jpg


P1030148.jpg


P1030149.jpg


Back onto the etch and the instructions say to remove the end panel of the raised portion of the centre console and replace with styrene to allow you to insert a light within....the hatched portion was simply bent back and forth till it snapped off....

P1030136.jpg


The part is then folded and attached to the main panel....before being clad in some truly tiny pieces...

P1030138.jpg


P1030139.jpg


It's a similar story with the parts for the door panels....

P1030151.jpg


Next was a styrene replacement for the brass piece I removed from the centre console to accomodate an LED inside. The styrene piece was made overheight so it meets the underside of the dash. The LED within was carefully sanded to allow it to slide into the narrow aperture...as long as you take care not to expose the 'element' then it will still work fine....

P1030155.jpg


P1030156.jpg


I also took the opportunity to add some styrene rod to the etch to give it some extra dimension....

P1030158.jpg


I scratched some additional instruments for the passenger side using Evergreen strip and a length of guitar string....this would later have a few more bits here and some random fibre optic lights....

P1030159.jpg


P1030160.jpg


Then a quick test fit with the dashboard in place.....

P1030161.jpg


The upgrade set provides cutting guides to open up the two missing windows in the rear bulkhead...

P1030163.jpg


It's a fiddly job and you need to take care not to put too much pressure on the rather delicate framework but it's well worth the effort....

P1030165.jpg


As mentioned previously, in every Sedan/Police Car 27 kit Fujimi kindly supply the etched fret that comes with the Spinner kit bearing the Spinner logos...presumably because Deckard's car is supposed to be a grounded earlier version of the Police fliers.

P1030167.jpg


There's no evidence of this logo being used on the actual Sedan in the movie but I thought it might be fun to use it somewhere that might still remain in the grounded version. So I cut some ribbed Evergreen sheet to fit the footwells....(sorry about the dark pic)....

P1030168.jpg


I then applied the logos....

P1030169.jpg


After some painting and scraping back the face of the logos I had some neat looking mats...just the thing to keep that acid rain from ruining your carpets....note the wear on the drivers side...

P1030177.jpg
 
Meanwhile the interior etched pieces were first primed then painted matt black before being drybrushed with various shades of grey...

P1030170.jpg


The dashboard is a mixture of black and desert yellow....

P1030173.jpg


Here it's just about ready for the detail painting...note the LED's for the monitors...I'll used some diffuser material to even out the light from these behind the screens....

P1030171.jpg


Here's the centre console prior to detail painting....note I filled the open holes that let the light through using Microscale Kristal Klear (PVA or white glue works too) which dries transparent...these are then tinted using Tamiya clear colours...

P1030179.jpg


Initial lighting test...still got some leaks on the edges of the panels but easily fixed....

P1030180.jpg


Note that none of the individual holes have been colour tinted yet...

P1030183.jpg


Console rear....

P1030182.jpg


Here's the dashboard unlit....for the main screen I went with the Spinner lifting off after Deckard has explained who he is to the cops, the smaller screen has Pris answering Sebastian's phone....

P1030185.jpg


And lit...this pic doesn't really do it justice....to the naked eye it looks great...

P1030187.jpg


I added some fibre optics to the passenger side dash....

P1030190.jpg


I got the fibres from a cheap Halloween toy and simply drilled out the dash using a 0.5mm drill and fed them through...what I didn't realise was that the CA glue I used to secure them reacted with them and actually melted the fibres!...nothing for it but to remove the damage, redrill them and then secure this time using 5-minute epoxy....

P1030191.jpg


I fed them using a 3mm blue LED and the result was worth the hassle....

P1030194.jpg


Meanwhile, after a trawl through my spares boxes I came across the remains of what I think was the navigator from a Tamiya rally car...I was also lucky to find a 1/24 head, just about the only one I had that wasn't wearing a crash helmet.

P1030197.jpg


I did some surgery on the legs as the Sedan seats are really low to the floor. I also carved away the racing harness on the torso. The challenge now was to create the shirt, tie, jacket and trenchcoat....

P1030198.jpg


P1030199.jpg


P1030200.jpg
 
I started out by adding a shirt collar and tie from thin styrene sheet applied with copious amounts of Plastic Weld cement to soften it and make it conform....

P1030202.jpg


It's surprising how much better the figure looks just by those simple additions...

P1030203.jpg


I then added some lapels and another collar to represent his suit jacket...I also added cuffs to the bottom of the trousers to disguise the rally driver origins...

P1030204.jpg


The buttons were made from some of the etched ignition keys that come with Pauls upgrade set....

P1030208.jpg


My figure sculpting skills are not the best but I roughed out the trenchcoat then left it to set before fine tuning the edges and adding some more detail. Given that the eye will be drawn more to the lights than to the figure, I was reasonably happy with the resemblence...

P1030211.jpg


P1030212.jpg


P1030210.jpg


Painted up I was pleased with him considering figure sculpting is not my forte. The camera flash makes him appear shiny when in fact he is dead matt, here he is test fitted in the driving seat....

P1030216.jpg


I gave him a sort of laptop made from a piece of styrene topped with an offcut of one of the spare slides from the upgrade set....

P1030217-1.jpg


Close up he doesn't bear much resemblance to Harrison Ford, in fact in a strange way he looks more like Mark Hamill....

P1030218.jpg


As well as giving you templates to cut out the missing windows in the rear bulkhead, the etched set also provides templates for cutting the 'glass' out of transparent sheet....

P1030224.jpg


These were duly installed in the bulkhead along with the kit transparency and the whole assembly cemented in place....

P1030226.jpg


I also painted in the lights using Tamiya Clear colours...

P1030228.jpg


P1030229.jpg
 
I finally attached the dashboard to the interior tub and did the final wiring to leave just a single set of feeds. These are way overlength and feed out through the bottom of the chassis behind the rear wheel...they then feed through the base and on to the power supply. The whole interior assembly was then glued to the chassis.
I then added the various engine parts which had been pre-painted. These were then connected up using a mixture of the kit-supplied vinyl tubing, some slightly thicker black wire and some wire-wound guitar string to simulate the cables seen in the pics of the real vehicle.

P1030241_zps40e9f423.jpg


P1030242_zps6113d692.jpg


P1030243_zpsc22599fe.jpg


Here's a couple of views of the lights on the completed interior....I chose to mount the steering wheel with the spokes horizontal which is at odds with the instructions and also the real car but it means the screen displaying the spinner taking off is not obscured....

P1030244_zpsb1fd687d.jpg


P1030246_zps22e3f270.jpg


Here's a slightly blurry shot of the interior in darkness showing just how bright those lights are.....

P1030249_zpsda0b7c1c.jpg


here's the rear license plate installed...

P1030261_zpsf51c4a05.jpg


The only other decal to apply was the red/white circle on the roof....the decals are by Cartograf and respond well to Microsol. Still some touching in to do on the window rubbers....

P1030263_zps01146863.jpg


Rear view....note the two pipes going into the 'intake' on the roof, these are closer to the real car and not how they are shown in the kit instructions. A light spirit wash was applied made up of used thinners and MIG 'Starship Filth' oil colour. The overall colour of the Sedan appears much redder in these pics than to the eye....

P1030264_zps2ff46f0c.jpg


More scale insanity....the detail in Blade Runner is staggering...Ridley Scott went to the trouble of getting the art department to create magazines to populate a news stand which is barely glimpsed in the final film.
I thought it would be fun to have some of these on the passenger seat so found the images online and shrank them before printing them off. A copy of Finescale Modeller gave me the dimensions of a typical US magazine size....275mm x 210mm which equates to 11.46mm x 8.75mm at 1/24 scale.
Here's the finished articles...I've not pictured the third mag, delightfully titled 'Krotch', to spare any sensitivities here....

P1030270a_zpsdf87231b.jpg


They have back covers too, not that you'll see them, featuring Japanese drinks adverts...note the Johnnie Walker ad which is a brand featured in the movie...

P1030271_zpsf380d86e.jpg


Here they are on the seat....

P1030273_zpsc1a6701c.jpg


So, on to the Randy Cooper backdrop...this is it straight out of the box with no cleaning up....

P1030288_zps43f8fb7b.jpg


It's based on the building where Batty and Leon stand watching Deckard and Gaff search the apartment at 1187 Hunterwasser. The columns and door are really finely detailed and the parts extremely well cast...

P1030289_zps9afd6544.jpg


Close up of the doorway detailing...

P1030291_zpsdcedec6b.jpg


Detail on the pillar....

P1030292_zpse9804246.jpg


The diorama base as it comes is great but I wanted to make some minor adjustments...
Firstly, the pillars were too close to the door for my taste...

P1030299_zpsd03cc5e8.jpg


I built a small section of additional flooring from sheet styrene to allow the rear wall to move back....

P1030293_zps6a4e5d3e.jpg


P1030296_zps4f7b54f6.jpg


This gives a greater gap from the wall to the pillars....

P1030298_zpsd5ed39c6.jpg


I also wanted to add downlights to the underside of the canopy to illuminate the entrance. I had a slight issue with the canopy piece as the thickness wasn't constant along it's length. If I was building the kit stock then this would be virtually unnoticeable but it was a problem with the lighting in mind....

P1030301_zps2ce6273b.jpg


I overcame it by glueing a strip of styrene along the underside of the front edge....

P1030304_zps44bc8435.jpg


I then built up the underside with strips of increasing thickness...

P1030316_zpsfcb073ac.jpg


Holes were carefully drilled through the canopy to house the LED downlights....

P1030306_zps5b2ebeb6.jpg


A piece of styrene sheet forms the new underside of the canopy...this is deeper than the original piece to allow for the rear wall being pushed back.
I obtained these brass portholes from my local model shop....

P1030308_zps3354737c.jpg


They are rebated on the back to allow them to drop into a pre-drilled hole...

P1030312_zps7bb69531.jpg


And here they are fitted....

P1030319_zpsb470d51c.jpg


I also started fitting out the two roof-mounted advertising signs for lighting. I attached a strip of styrene around the inside edges to allow a transparent sign to be dropped in....note also the foil backing to reflect the light forwards...

P1030317_zpse658efb0.jpg
 
The main elements painted and partially weathered...still some detail painting to do around the door and the various bits of ducting....

P1030322_zps58855d87.jpg


P1030323_zpsaccdae5f.jpg


The underside of the canopy....I painted this with a rust red enamel and as soon as it was dry oversprayed it with an acrylic red which reacted with the first coat to give a crackled, distressed look...just what I was after.
I inserted six 5mm white LED's into the downlights then filled up the rest of the hole with epoxy resin that dried a milky white...

P1030327_zpsccfd8a7d.jpg


Here they are lit....

P1030334_zpscfca71b4.jpg


And placed in situ....

P1030330_zpsdbd5193a.jpg


Here's a couple of moody night shots in the dark....

P1030331_zps78e91b55.jpg


P1030332_zps7df9a9eb.jpg


The door piece after a lot of detail painting...remember this is a single piece of resin....

P1030336_zps4933bb59.jpg


I found some Japanese posters and newspapers on Google and shrunk them to scale before printing them off...they were then glued to the wall using white glue and weathered...

P1030337_zps890d553b.jpg


Close up of the posters....

P1030339_zps30344672.jpg


P1030340_zps9dab2b75.jpg


The door received two Japanese characters at the top and some fibre optics at the centre...hard to see in this pic but quite bright in reality...

P1030341_zps4dfb8ea5.jpg


I also made my own copy of the Los Angeles Times ( it's dated 3rd November 2019) with a suitable headline from just prior to the events in the movie....

P1030345_zps7af60b52.jpg


Also printed are some actual signs from the movie....

P1030346_zps435653a4.jpg


An hour in front of the computer produced this cut out appliance box....

P1030347_zpse32dd34d.jpg


Assembled and weathered....note the product description, they've moved on from microwaves....

P1030349_zps21772b8f.jpg


In situ on the pavement....

P1030350_zps513cea7e.jpg


Finally got the top wall in place with the screens....I played around with japanese adverts downloaded from Google and shrunk to fit the screens...here's a Sapporo beer one....

P1030351_zps7e856875.jpg


The flash washes out a lot of the effect...here's a shot in natural light...

P1030352_zps141b3002.jpg


Here's the other screen with a girl advertising a herbal drink...

P1030355_zpsce6cfb1a.jpg


And in the dark....note that the images are only printed on paper...the final images will be printed on acetate...

P1030356_zpse1d73545.jpg
 
Finally installed the screens....they are printed on plain paper, the experiments with the translucent paper didn't work, but I sandwiched them between clear acetate (front) and very thin styrene sheet (behind) and I'm pleased with the results....


Made some miniature garbage bags from actual bin liners....


Here they are placed in the corner.....


Miniature newspapers scattered across the street....


Close up....note the headline....


Sedan in place.....


And that's where I'm at to date....apologies for the mammoth first posts but I'm moving on to dirtying up the street now and possibly adding another figure....
 
Very nice, very extensive !!!! Looking forward to seeing more.

Really should get me those Spinner/Sedan kits before they become scarce.

Cheers,
Wasili
 
This is a very impressive build! Great job on the sedan! Love all the added periodicals strewn about.
 
That's a nice looking kit. The blaster looks to be the right size for a keychain or mini display, would have been nice for it to be in scale with the car so you could put it in as a set piece.
 
That's a nice looking kit. The blaster looks to be the right size for a keychain or mini display, would have been nice for it to be in scale with the car so you could put it in as a set piece.

I know...I wish Fujimi had supplied one in scale, there is a brass etched one in the Paragrafix set which is a good basis for making a 3D one by adding sections of styrene to the brass...I'll have a go at that when I get a minute....
 
Back
Top