superjedi
Sr Member
Hello intrepid RPFers!
It's been a while since I've had something to show, and I wanted to share some pics of my most recent Boba Fett helmet commission.
This was my first FPH2 helmet. It's a beautiful kit with excellent proportions and very sharp castings. For anyone who's not
familiar with this product, the ears, range finder and Borden are all separate castings. The range finder is a 4-piece design, which makes
painting a breeze! It's a fiberglass helmet, but not cold-cast, so I used my standard topical painting method on this one. I completed
this just a few days ago and it's already on its way to its owner, a member of TheDentedHelmet.
Here are some finished pics, along with brief descriptions of some of the work.
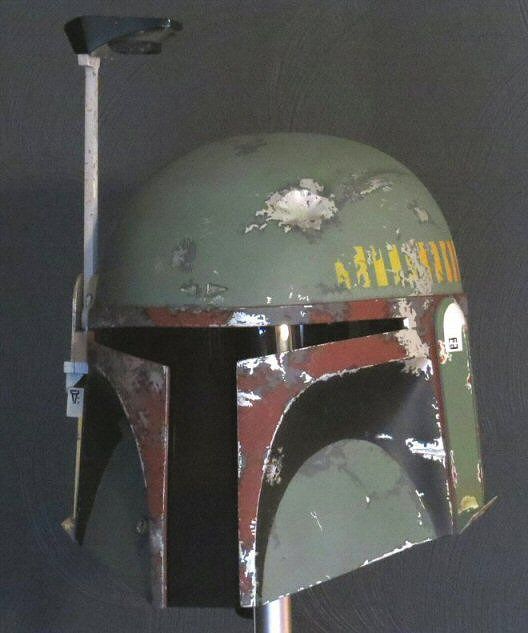
Overall, the paints used are Polly Scale acrylics, along with a few Tamiya and Model Master acrylics.
My clients generally request the screen-used appearance, so the helmet doesn't feature any of the
"extra" damage that is seen in exhibit photos. Weathering includes airbrushing, paint spattering,
and pastel powders.
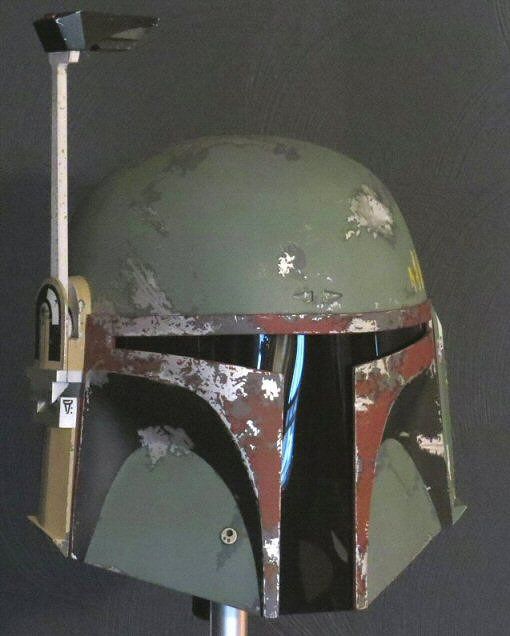
I do the majority of the detail work with some very small brushes, mainly size 3/0 and 5/0. The small
markings on both ears are done using rub-on lettering. I find that these are thinner than vinyl decals
and have a nearly painted-on appearance after they're applied. The range finder stalk is solid aluminum
and it received some simulated rust spotting and a light rusty wash. I install the visors on my
commissions with two custom aluminum tabs that are drilled and tapped for finishing screws. The tabs
are epoxied into the cheeks and the finishing screws hold the visor tightly against the inside of the helmet.
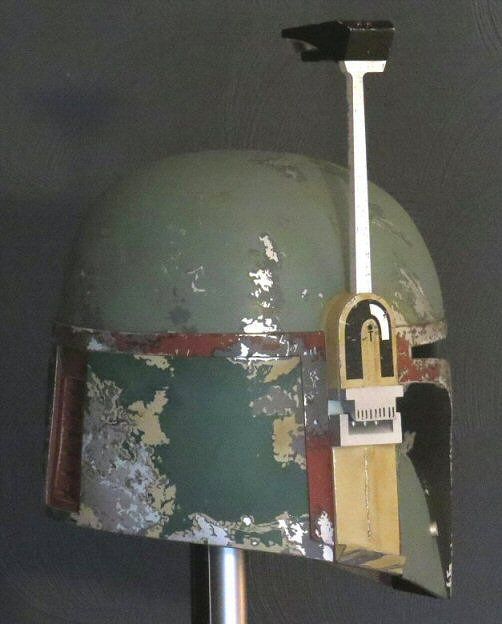
Some of the pale contrasting gray can be seen here within the silver. This is an interesting feature
of the ESB helmet. Also, some of the "grease stains" can be seen on the back of the dome. There's
also a lot of very fine scratches on the back of the dome (as well as a few in other areas) and I do
these using a combination of fine lines of silver and actual physical scratches through the paint.
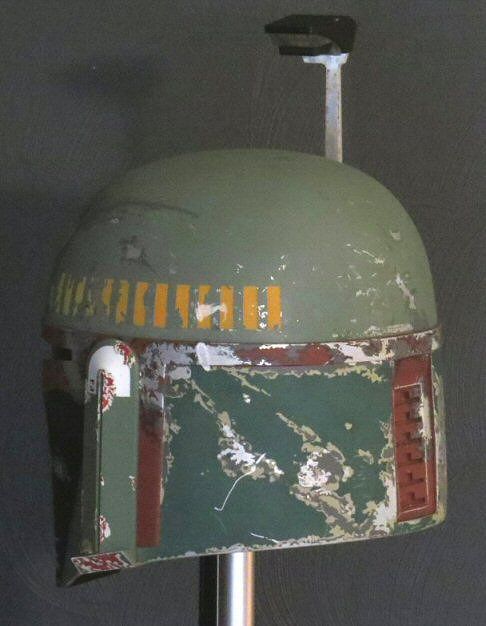
The ESB killstripes feature a subtle fade from a yellow tinged with an orangey shade at the back, to
a more pure yellow at the front. The white thumbprints are also seen here. Another strange feature of
the ESB helmet, but they are visible in screen caps.
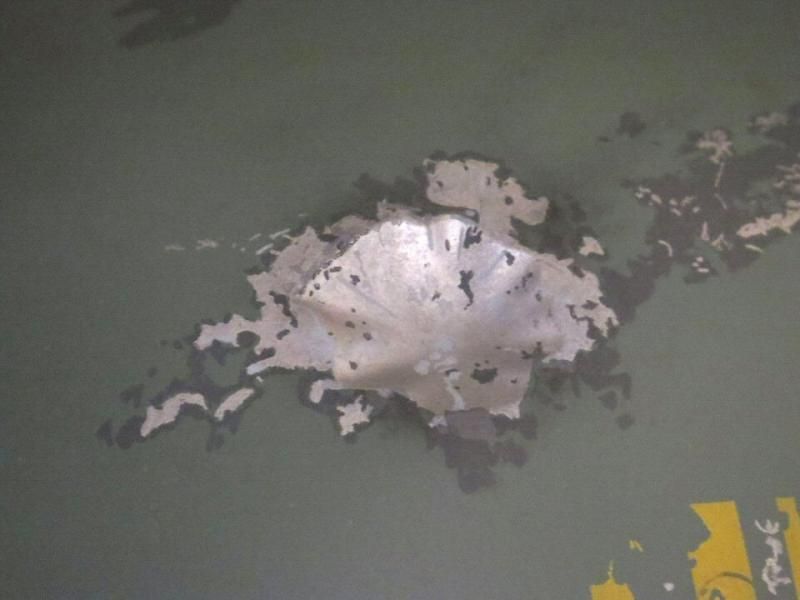
A close-up of the dent area. More of the contrasting pale gray can be seen here, along with some
of the pastel weathering. This is of course one of the most recognizable features of Fett's lid.
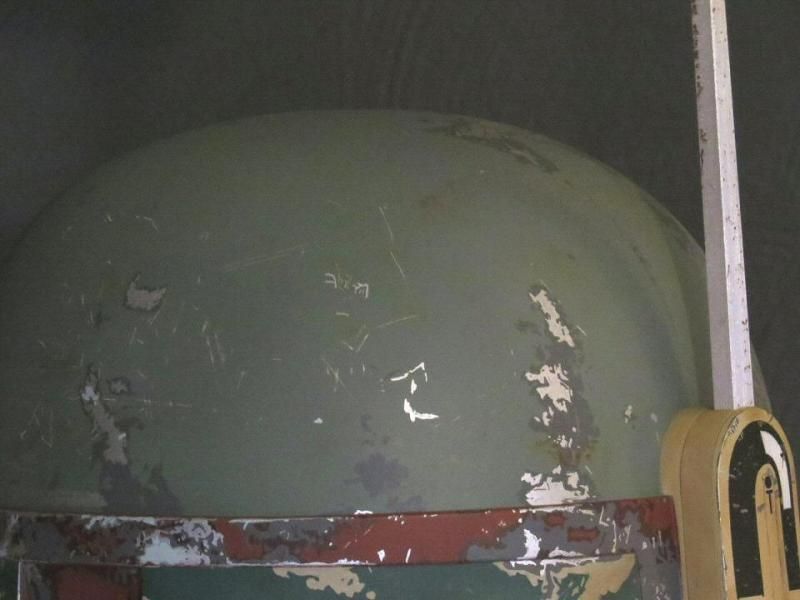
Finally, a closer view of the rear of the dome. This shows some of the color variation and the grease stains.
This was a 43 day project, the latest of many ESB helmets I've done. I think this is one of the coolest, most iconic costume
pieces in movie history! I just love it.
You can check out a complete start-to-finish of this helmet on my CounterFett Creations Facebook page here if you like:
https://www.facebook.com/pages/CounterFett-Creations/1454779188105078?ref=hl
Thanks for looking!
Eric
It's been a while since I've had something to show, and I wanted to share some pics of my most recent Boba Fett helmet commission.
This was my first FPH2 helmet.
familiar with this product, the ears, range finder and Borden are all separate castings. The range finder is a 4-piece design, which makes
painting a breeze! It's a fiberglass helmet, but not cold-cast, so I used my standard topical painting method on this one. I completed
this just a few days ago and it's already on its way to its owner, a member of TheDentedHelmet.
Here are some finished pics, along with brief descriptions of some of the work.

Overall, the paints used are Polly Scale acrylics, along with a few Tamiya and Model Master acrylics.
My clients generally request the screen-used appearance, so the helmet doesn't feature any of the
"extra" damage that is seen in exhibit photos. Weathering includes airbrushing, paint spattering,
and pastel powders.

I do the majority of the detail work with some very small brushes, mainly size 3/0 and 5/0. The small
markings on both ears are done using rub-on lettering. I find that these are thinner than vinyl decals
and have a nearly painted-on appearance after they're applied. The range finder stalk is solid aluminum
and it received some simulated rust spotting and a light rusty wash. I install the visors on my
commissions with two custom aluminum tabs that are drilled and tapped for finishing screws. The tabs
are epoxied into the cheeks and the finishing screws hold the visor tightly against the inside of the helmet.

Some of the pale contrasting gray can be seen here within the silver. This is an interesting feature
of the ESB helmet. Also, some of the "grease stains" can be seen on the back of the dome. There's
also a lot of very fine scratches on the back of the dome (as well as a few in other areas) and I do
these using a combination of fine lines of silver and actual physical scratches through the paint.

The ESB killstripes feature a subtle fade from a yellow tinged with an orangey shade at the back, to
a more pure yellow at the front. The white thumbprints are also seen here. Another strange feature of
the ESB helmet, but they are visible in screen caps.

A close-up of the dent area. More of the contrasting pale gray can be seen here, along with some
of the pastel weathering. This is of course one of the most recognizable features of Fett's lid.

Finally, a closer view of the rear of the dome. This shows some of the color variation and the grease stains.
This was a 43 day project, the latest of many ESB helmets I've done. I think this is one of the coolest, most iconic costume
pieces in movie history! I just love it.
You can check out a complete start-to-finish of this helmet on my CounterFett Creations Facebook page here if you like:
https://www.facebook.com/pages/CounterFett-Creations/1454779188105078?ref=hl
Thanks for looking!
Eric
