FFXII Judge Gabranth costume build

AxiomUltra

Active Member
Hi all!

For those that don't know this character here is some art based off of the DISSIDIA Gabranth:

lowres2.jpg
lowres.jpg


There are a few cosmetic differences between the RPG and Dissidia, particularly color and some proportion tweaks. I myself prefer the Dissidia proportions so i decided to work off of those. However, I will be using the paint scheme from the original game.

I started by taking photos of myself and modeling a basic 3D model. (This was also done for my ODST but I thought I could do it better this time around)

I used calipers to take measurements and scaled my dummy model to match them in the 3D program I am using. I know that with the boots I bought I stand approximately 73.5 inches (without the helmet) so once that was set then it was only a matter of modeling and scaling the armor parts to look good on it.

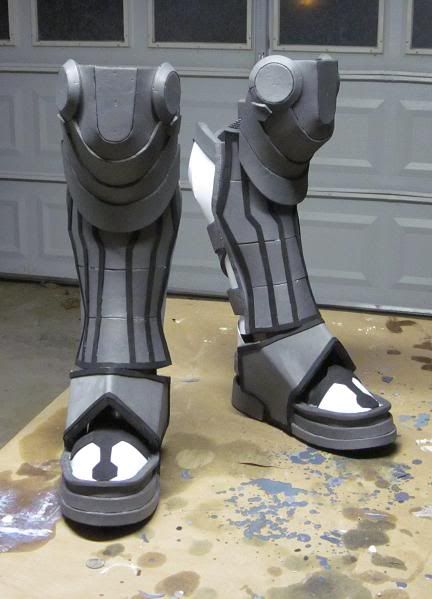
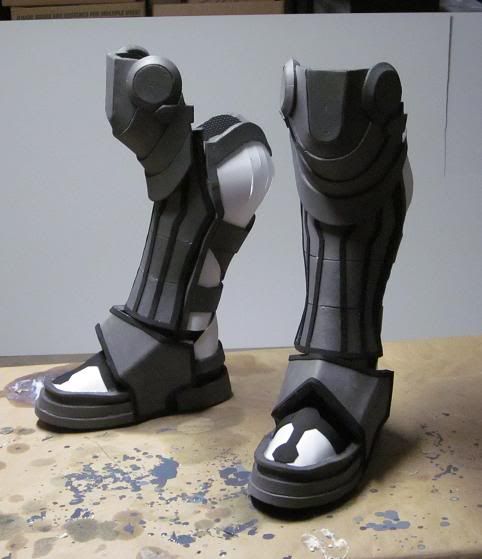
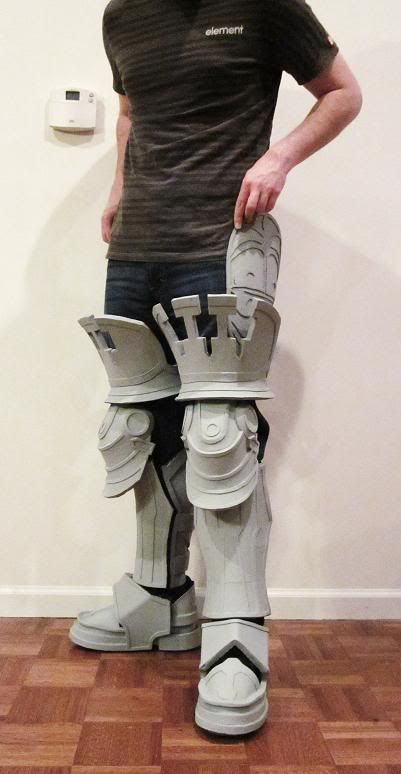
After about 4 weeks of on/off modeling I finally got the basics down. Here is my initial low res armor:

Gabranth_WIP_HughHolder.jpg

not the strongest stance, but it beats t-pose :lol

All of the armor parts fit well over my body type except for the helmet of course :sleep The back of the helmet has a sharp taper that would not fit around my head. It was an easy fix though, I just brought the helmet into ZBrush, imported my head as a sub-tool, and did some shifting to the back of the mesh until it fit around my head.

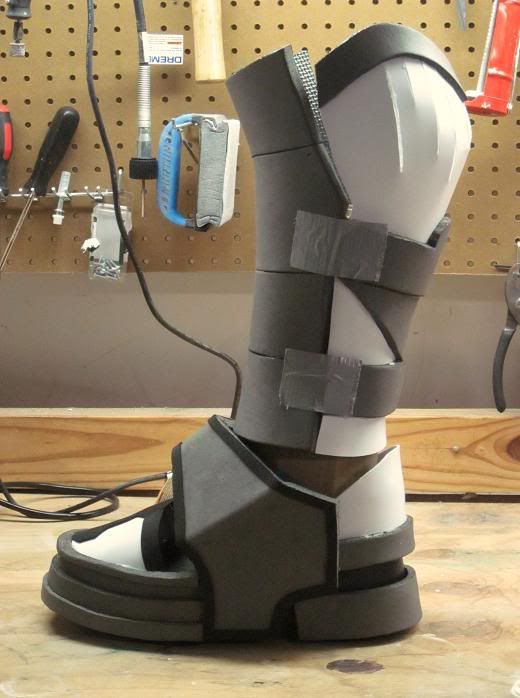
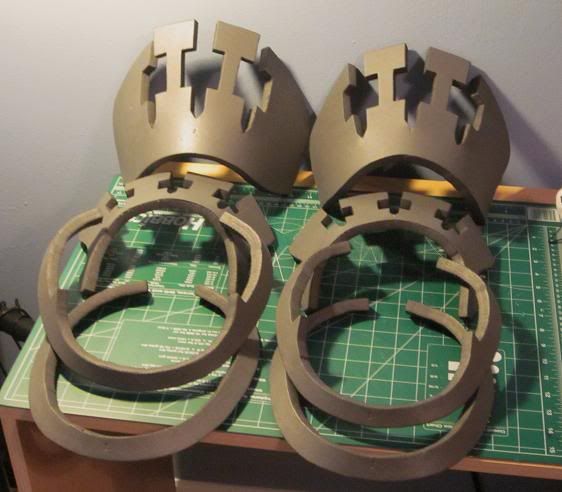
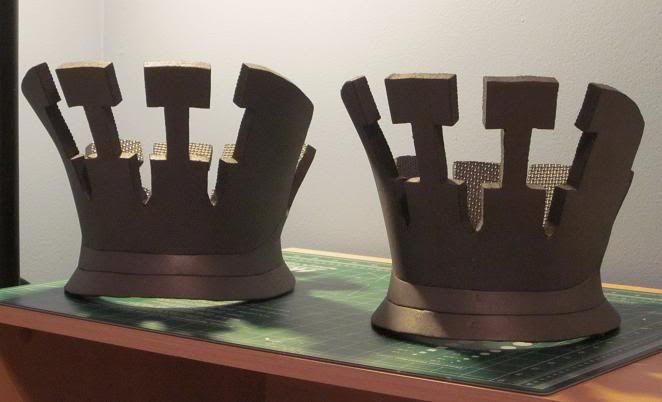
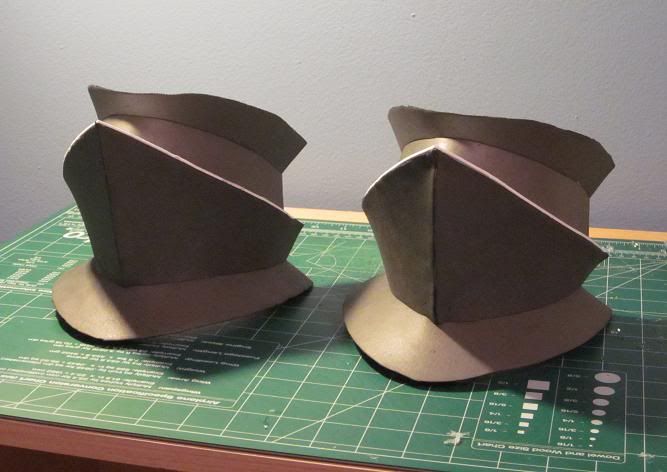
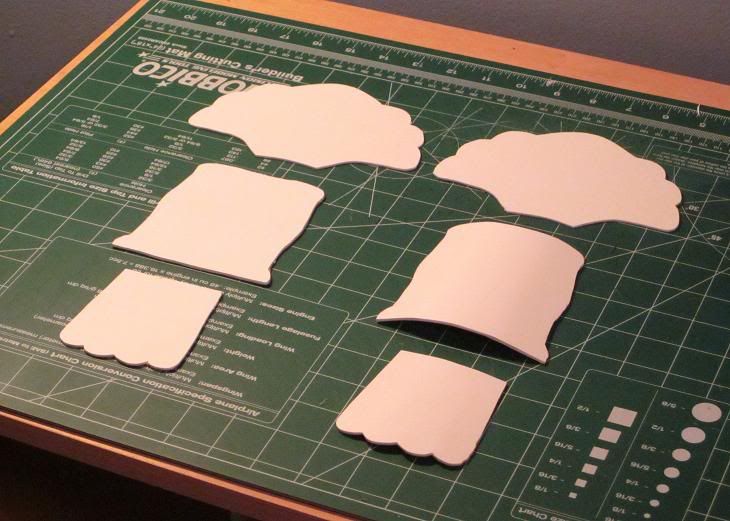
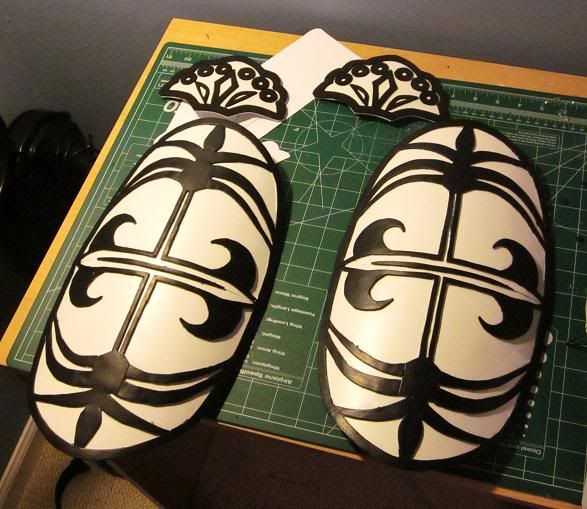
So how am I planning on doing the raised designs and decorative trimming on the armor? The only solution I have come up with so far is to paint the designs on the model with ZBrush and export that texture to use on a pepakura model. The pepakura model will only be a template to trace the designs on the foam and sintra parts that I will use for the armor. Then I'll just use apoxie sculpt within the pattern.

Some parts will be 3D printed, but mostly the little things since I have time to build and I'm trying to furnish a house :) I went ahead and divided up the helmet though:

Gabranth_WIP_Helmet.jpg


Gabranth_WIP_Wireframe.jpg

Wireframe!

That's about it for now. The next couple of weeks will probably consist of minor tweaks here and there as well as break downs of certain parts pertaining to the materials they will be made from.

-Hugh

 
Last edited by a moderator:
Re: Hugh's Judge Gabranth Project

My god, this will be awesome. Question, if you are doing the 3D Model for it, are you going to share any unfolds, or will you need anyone to unfold any of the parts. If so I'm up for the challenge if it's not very high poly unlike the helmet wireframe you have. But with parts of this being 3D printed, it should turn out great with you doing it, it's going to cost a arm and a leg but it should turn out great.
 
Battle Slippers

Well, I started building finally :rolleyes

IMG_1846.jpg


Had some time to build last night and tonight so I got the base of the boots made. I still need to add trim around the larger part and on the toe section before I start sealing the foam.

The base of the boots are cheap slip on dress shoes I had. I considered going with a more traditional boot but since the shin guards will sit so low around my ankles I didn't want to hassle with trimming.

Once I get the shins made the boots should look less like slippers :)
 
Re: Hugh's Judge Gabranth Project

DAMNNN thats badass, u made all in 3d first, why are u making in foam then o_O?

Thanks :)

I always pre-build my work in 3D. As I'm modeling the parts it helps me think about how I am going to build them and how they are going to be worn. I guess I prefer modeling my own work that's why I don't really like using 3D files that others have made.

Sometimes I model for pepakura, but for this project I wanted to try some of the lighter materials that people have been using as opposed to the drawn out fiberglassing/bondo steps. So the 3D side of things remained relatively simple.

In the photos you can see some of the parts are white. Those parts are made from 3mm sintra board that a local sign shop got for me. I am really impressed with the sintra board and how easy it is to shape a sturdy part.

I cut all of the parts out with a scroll saw and heat each part just enough to bend it into shape. I found out that if I heat up the sintra too much to where it's floppy it tends to lose it's original shape
 
Re: Hugh's Judge Gabranth Project

I find myself wanting that model very badly for pepping.

Very badly.
 
Moving onto the shins

Got some work done on the boots tonight. I also started on the shins :)

IMG_1863.jpg


I finally got back home from a mandatory mini-vacation with the future in-laws so I am feeling a bit sluggish getting back into the hang of things.

Added some foam trim to the main armor plates on the boots. The boots on this character don't really have a whole lot going on so I'm learning the quirks of foam and sintra on them.

IMG_1861.jpg


That's about it for tonight, hopefully tomorrow I'll be able to work on the rest of the shin guards.

-Hugh
 
Re: Hugh's Judge Gabranth Project

I wasn't the biggest fan of the story in FF XII but I thought the Judges were the best part of it, all of their suits were really amazing, and your base model is a great representation. The boots look pretty awesome so far, this is going to rock when its done.
 
Herpin' & Derpin'

I'm going to call it an early night. So far this was the most tedious part of the build. Tonight I worked on the back part of one of the shin guards.

Those white areas are sintra, not plastic - and not the easiest things to bend without applying heat but I was able to use a clamp to hold the edges in place.

The seams will be cleaned up with spot putty once I'm done with the other shin and reinforce the whole piece. I apologize for the duct tape but I wanted to preview everything together :)

IMG_1865.jpg


IMG_1866.jpg


IMG_1867.jpg


Thanks for reading

-Hugh
 
Going to just post pics now. If you want to know anything just ask otherwise I'm just going to let the photos speak for themselves. :)

-Hugh

Boot1.jpg


Boot2.jpg


Boot3.jpg


Boot4.jpg
 
looking good.. like really really good. any plans to remove or fill in those cuts across the shins from side to side? since that isnt part of the pattern of the armor?

edit, nevermind i apparently cannot read.. duuuh, sorry
 
Last edited:
Re: Herpin' & Derpin'

The seams will be cleaned up with spot putty once I'm done with the other shin and reinforce the whole piece. I apologize for the duct tape but I wanted to preview everything together :)

Spot putty like the tubes of 3M Glazing & Spot Putty or more like filler? What are you planning to use to reinforce them? I ask because the little tube of red stuff seems very brittle. Am I being to literal or just misunderstanding?
 
Re: Herpin' & Derpin'

Spot putty like the tubes of 3M Glazing & Spot Putty or more like filler? What are you planning to use to reinforce them? I ask because the little tube of red stuff seems very brittle. Am I being to literal or just misunderstanding?

Yeah, I´d say that spot putty is much too brittle when dry and will likely crack at the seams. I´d say that using "acrylic", the kind that you use to seal drywalling joints between wall and ceiling. Flexible and paintable. It might also be possible to use hot glue, there is a flexible kind out there that might be helpful.

I think that using a heat gun might help to create curved pieces, too, eliminating the need to build a curved piece out of single pieces.

You might want to send our member izabel a pm, the queen and king of foam armour building.

Michael
 
Last edited:
Re: Herpin' & Derpin'

I think that using a heat gun might help to create curved pieces, too, eliminating the need to build a curved piece out of single pieces.

He did use a heat gun, you can see it in the glossy foam surface. The problem is that there are curves in three directions there. You cannot take a single piece of foam and curve it into that shape without multiple pieces or cutting and rejoining. It is physically impossible.
 
This thread is more than 10 years old.

Your message may be considered spam for the following reasons:

  1. This thread hasn't been active in some time. A new post in this thread might not contribute constructively to this discussion after so long.
If you wish to reply despite these issues, check the box below before replying.
Be aware that malicious compliance may result in more severe penalties.
Back
Top