tubachris85x
Master Member
Figured I'd post this up since I'm getting closer to finishing it. This is a combined post of my progress up to now:
Here's my formal thread for this build. Shouldn't be too much longer till completion.
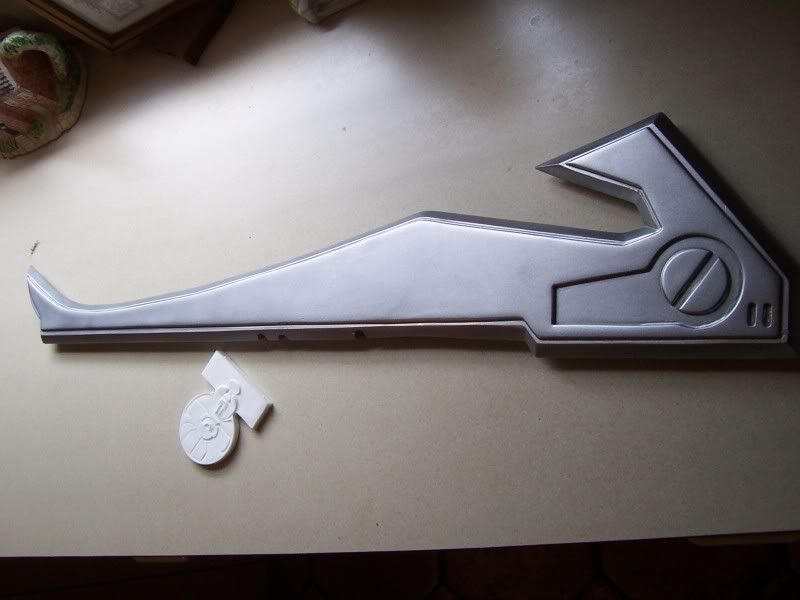
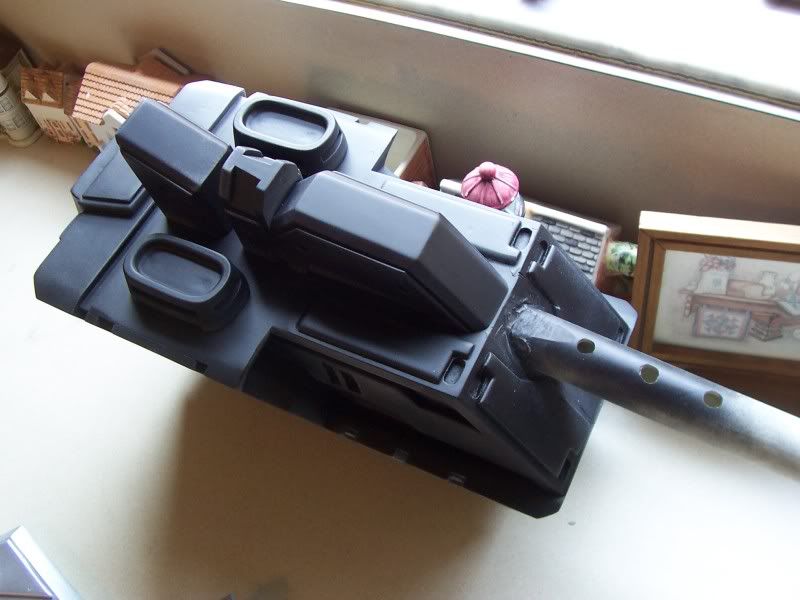
Got the kit not too long ago
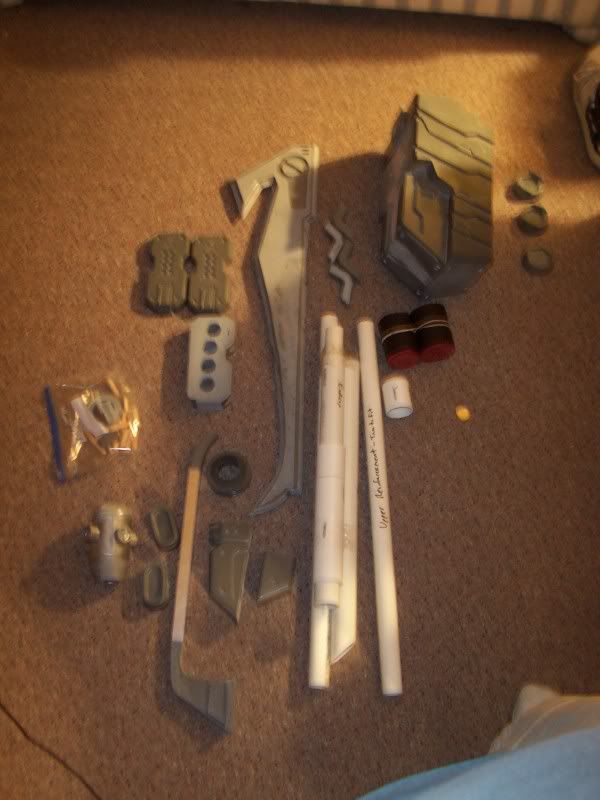
It's just a shy smaller then 1:1 scale, but I still am going to love it when it's done.
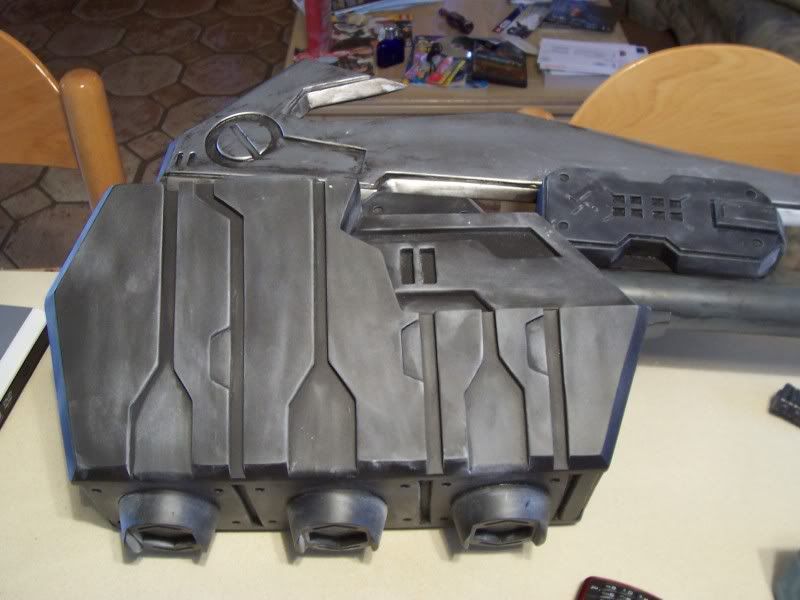
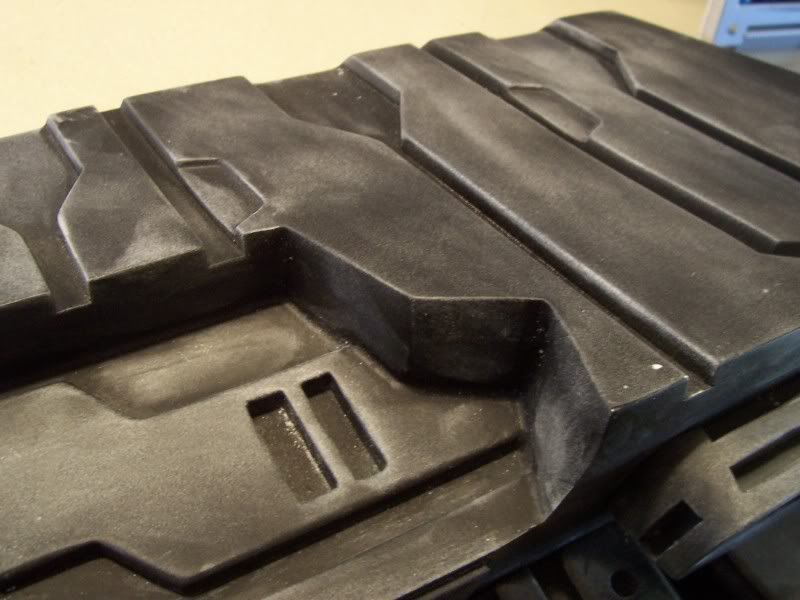
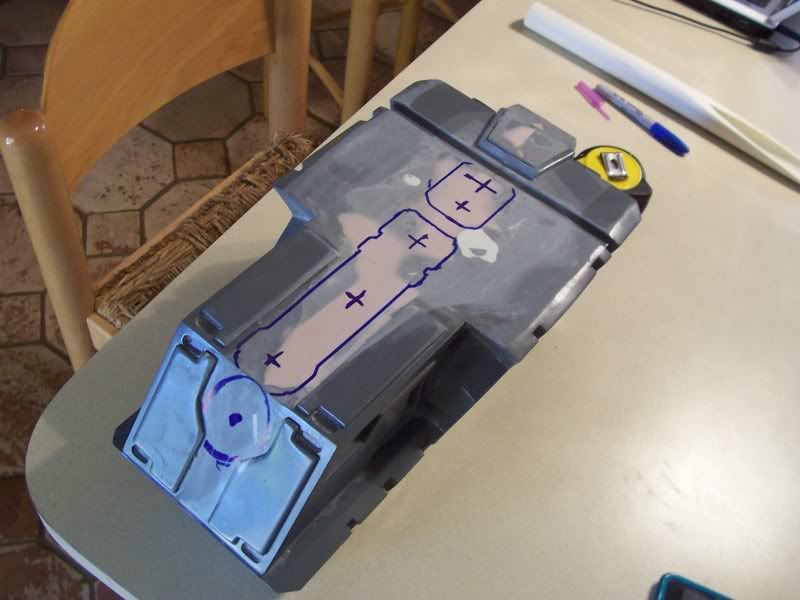
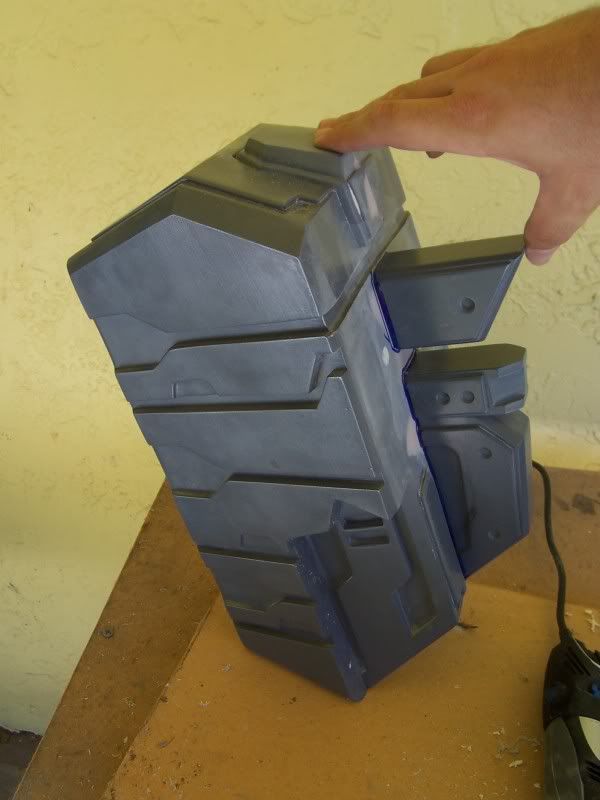
So far, as of now, I have the main body pretty much ready for paint!
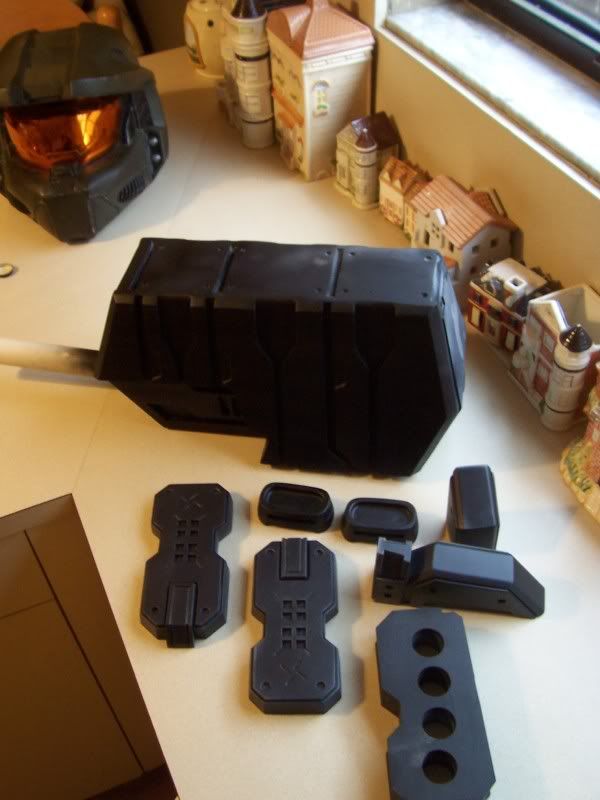
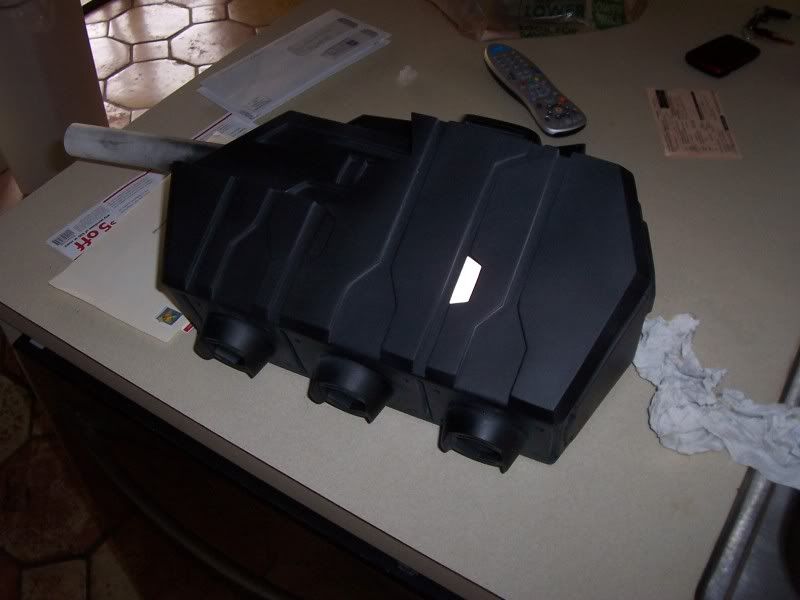
Will be starting on the hammer head today, wish me luck lol
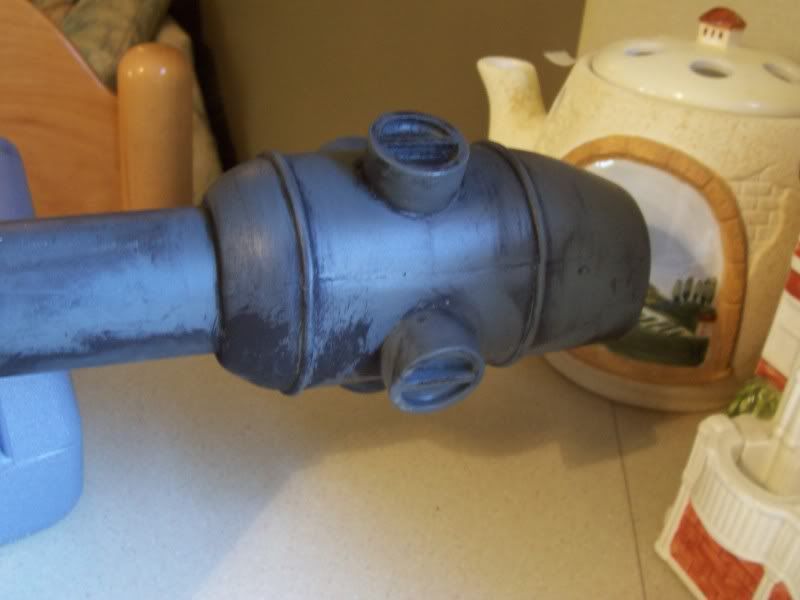
Here we go! Got alot farther with just this! Was freaking out that I wouldn't get this right, but it came out well. I kept remembering what Ithica was saying about getting the angle right or the little resin piece wouldn't fit properly and affect everything else. It's all holding up on it's own at the moment. The next step is to epoxy the stubb piece in correctly and get some resin poured in there.
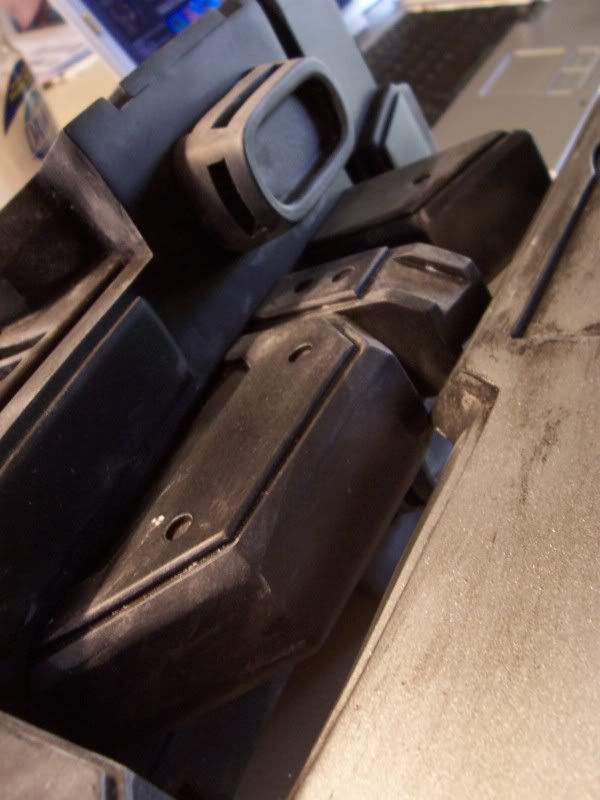
On top of that, got the top details placed (the top one I had to hold, the hole was a little too big lol
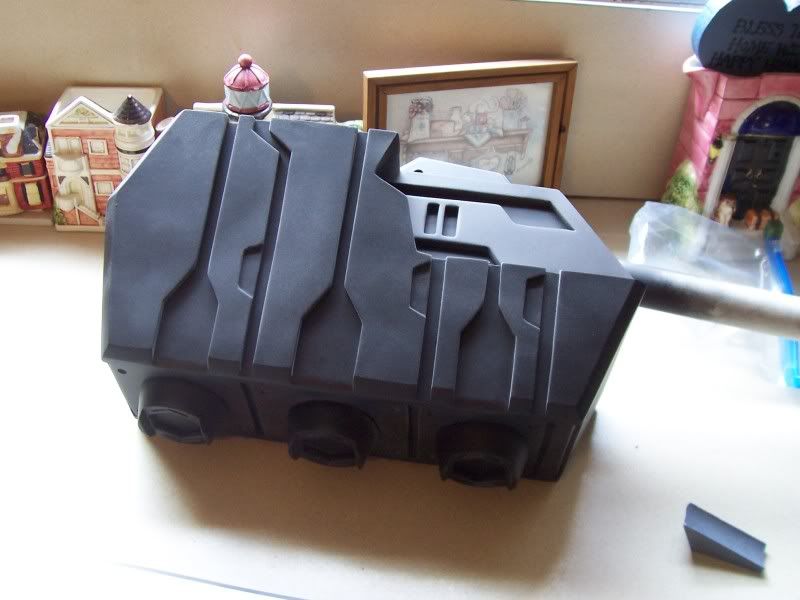
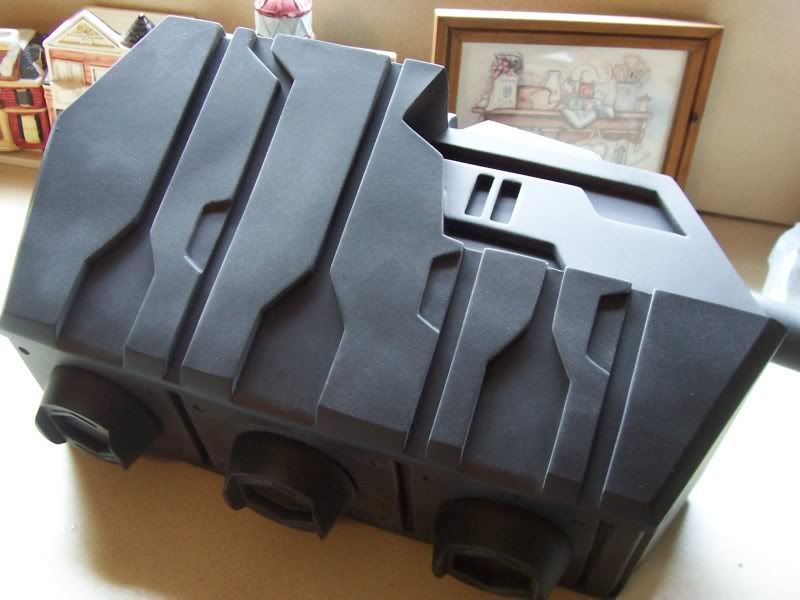
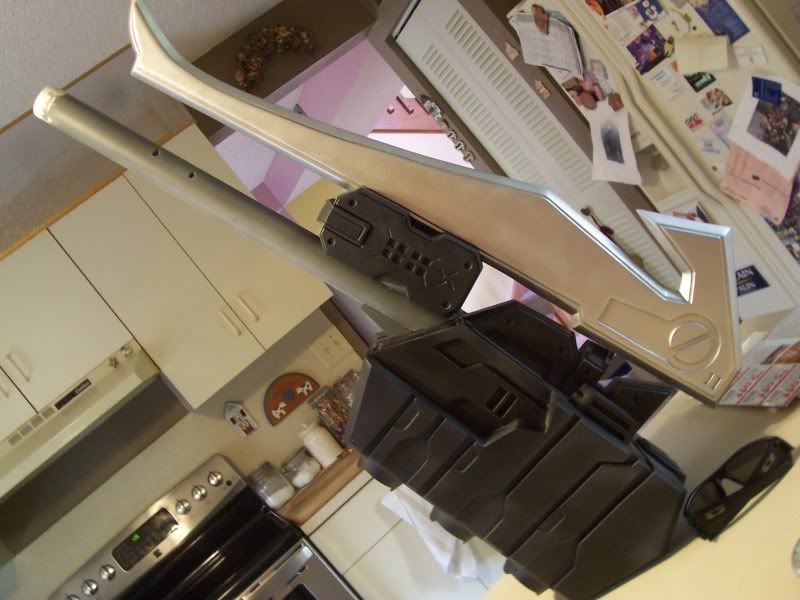
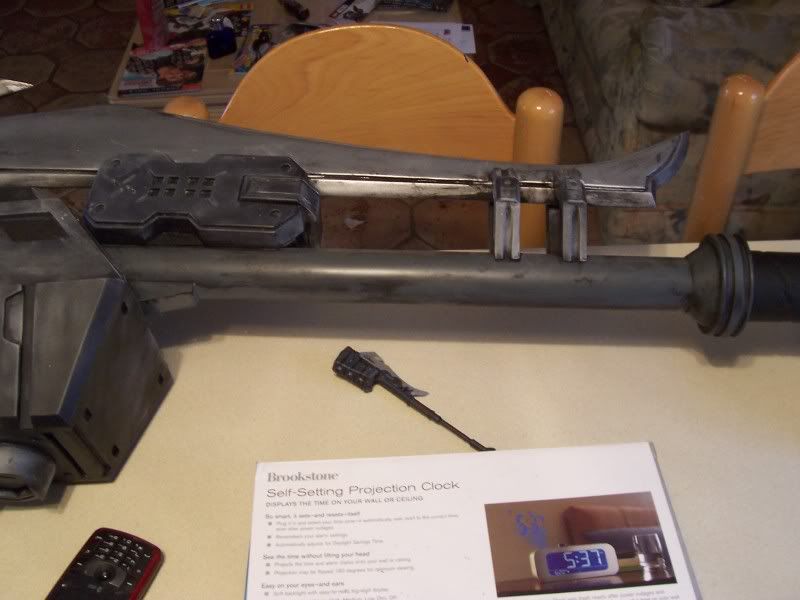
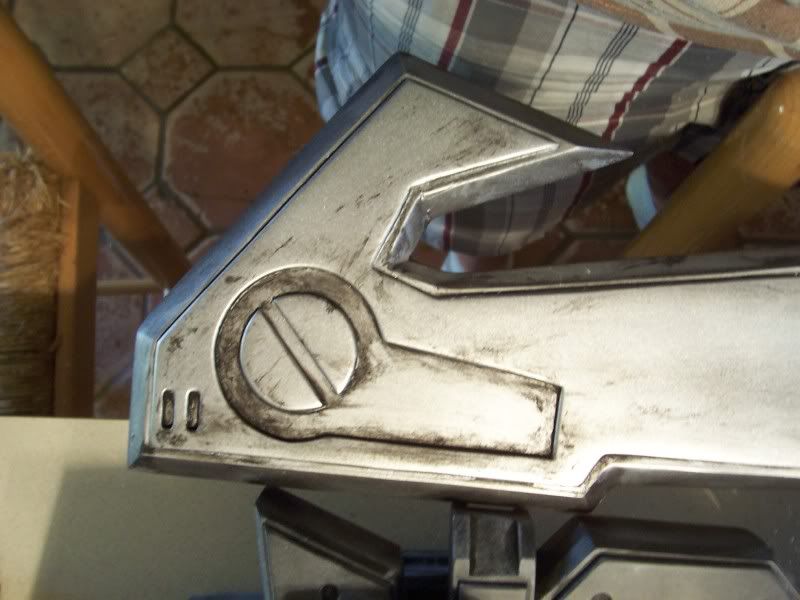
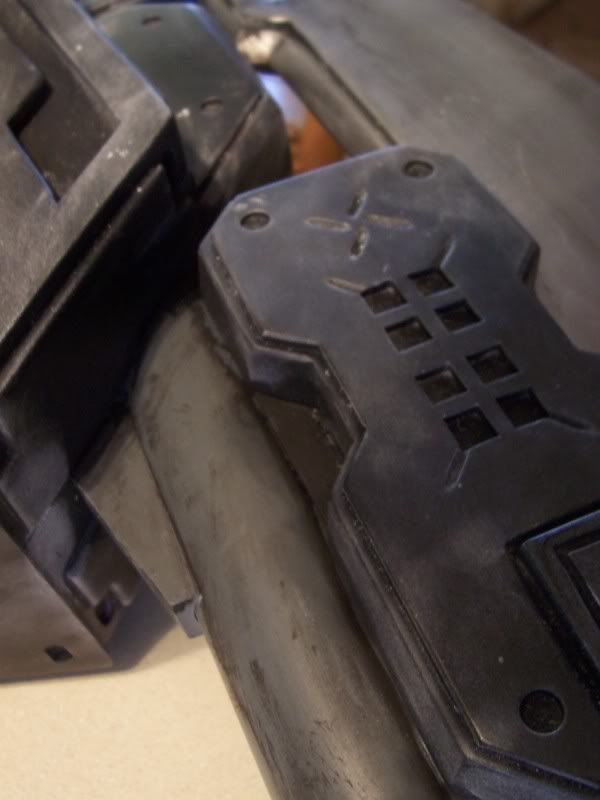
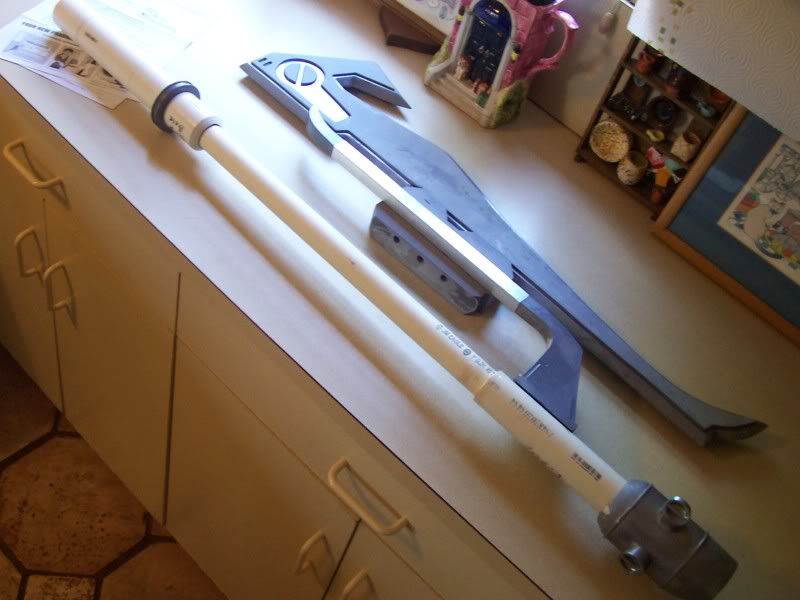
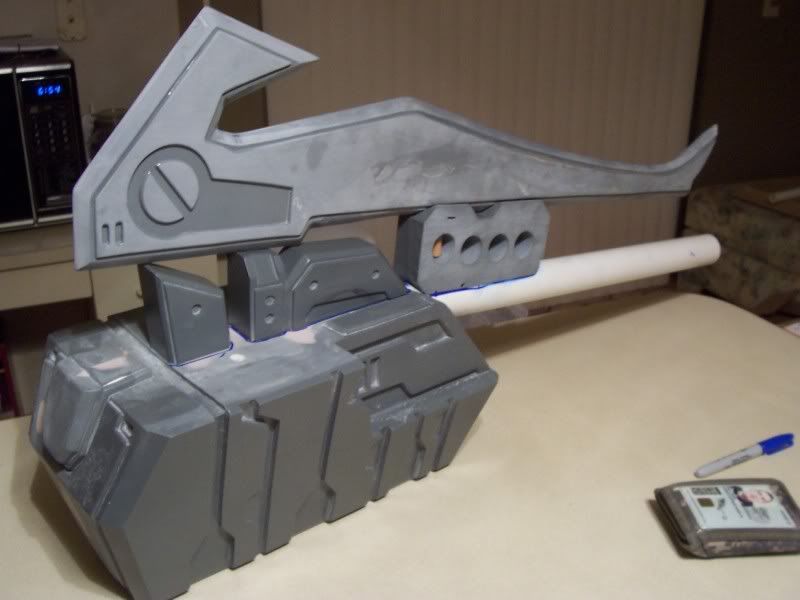
Ok, well here are some pics. As you can see, all the hammer head details are on there to include the blade. All free-standing, so no tape. Not glued either
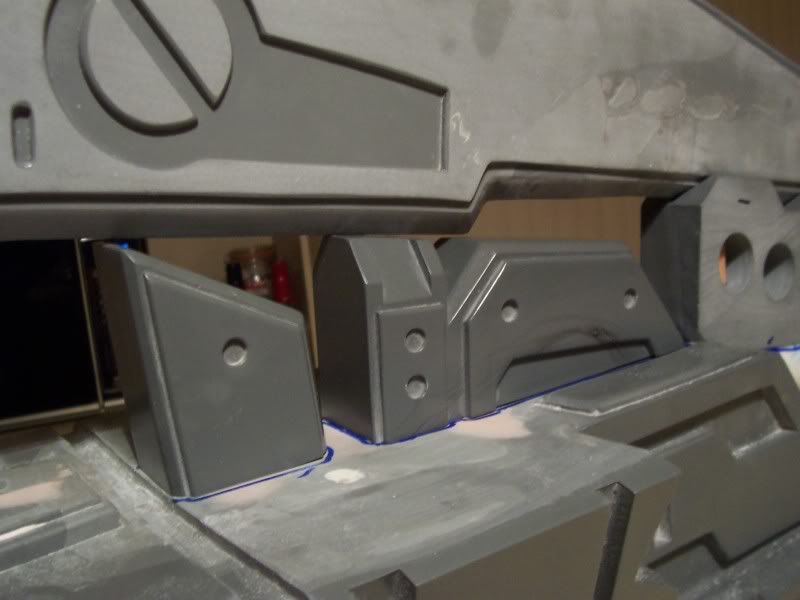
Here is a close up of the backside of the hammer to show the amount of clearance between the blade and the pieces. I fear that the blade is slightly mis-aligned with the center of the hammer head, so I may have to do some tweaking with the blade mount.
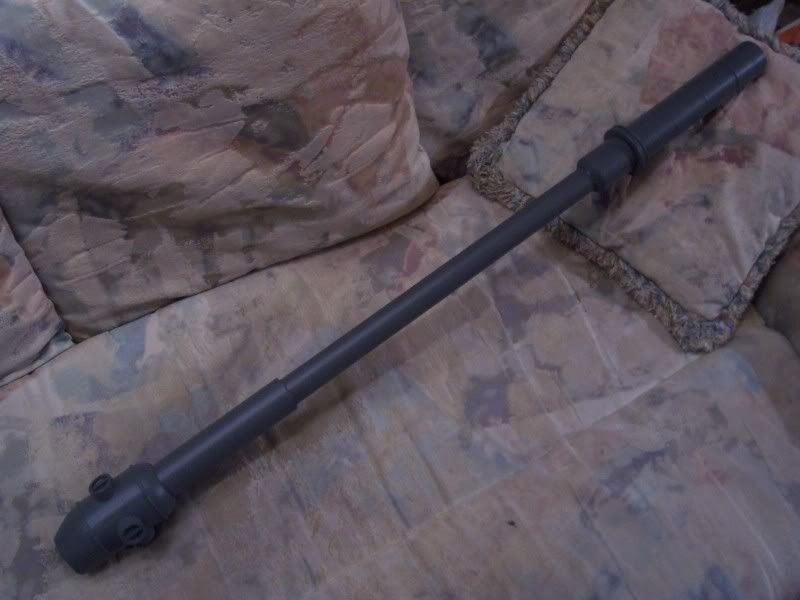
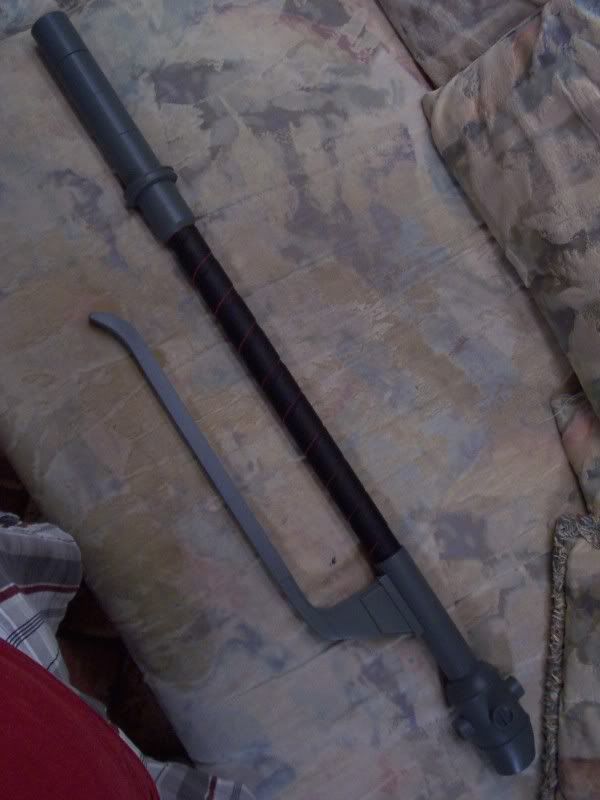
And here is the lower shaft/main body. All grey, and dull coated. Nice and protected. Just need to get the leather on there before I can attach the hand guard, which I still need to paint. After the hammer is assembeled, painted, I'm going to do a black wash over the entire thing, but use brown on the black parts. I'm not gonna paint the blue on this. I'm going to be doing the white portions with white reflective tape though. You'll see when it's finished.
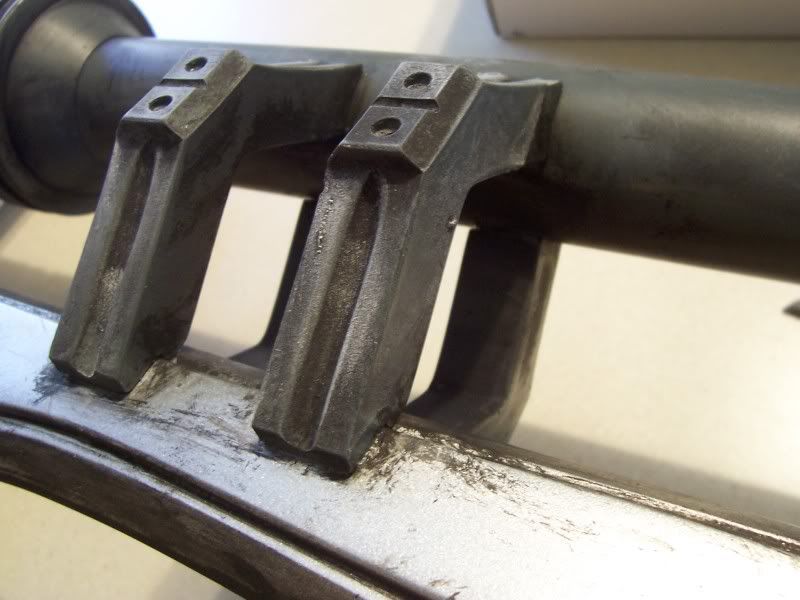
Alright, well after a series of cursing and pulling, I finally got this to a decent level. The end's aren't perfect, but I dont care at this point considering how much of a pain it was. The ends are currently being epoxied down, hence the blue tape
Just gotta do the upper portion later on...
Last one for the night. Although it's all assembled, I'm probably not going to permanently attach the hand guard until the upper shaft's grip is wrapped. The maker also used pinstripping to add details which I may do so myself. I spent time today further cleaning up the hammer head. As I was removing a glob of excess resin, it turned out to be hollow, and opened up a hole in the hammer head (interior is hollow). So I had to fill that sucker up. and clean it up tomorrow. Hoping to be able to get those pieces assembled and painted shortly...
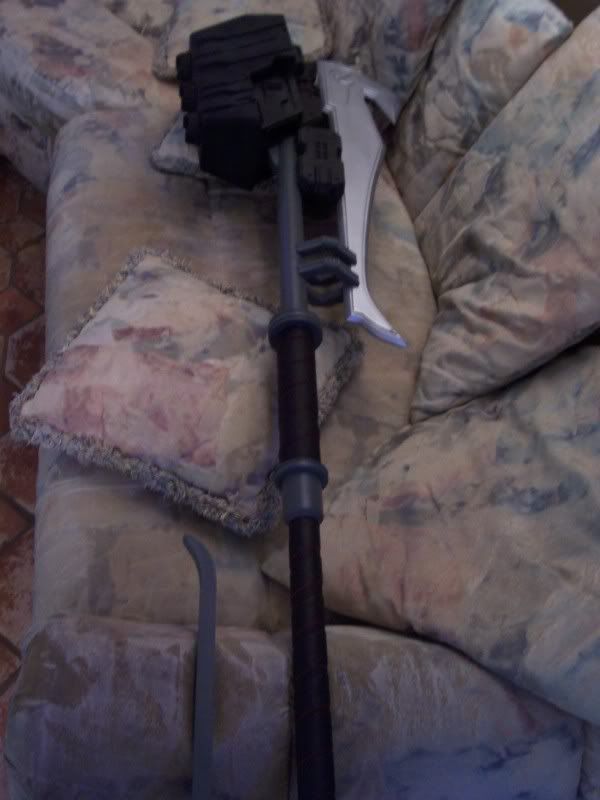
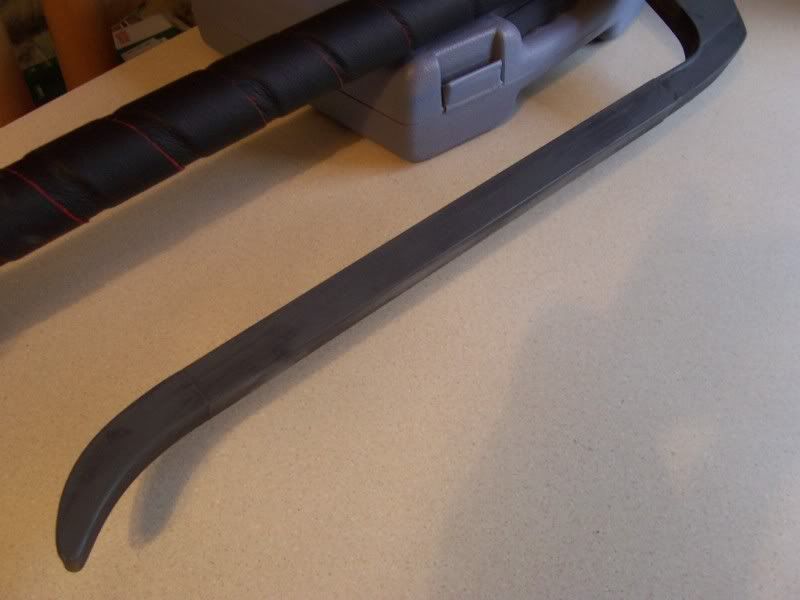
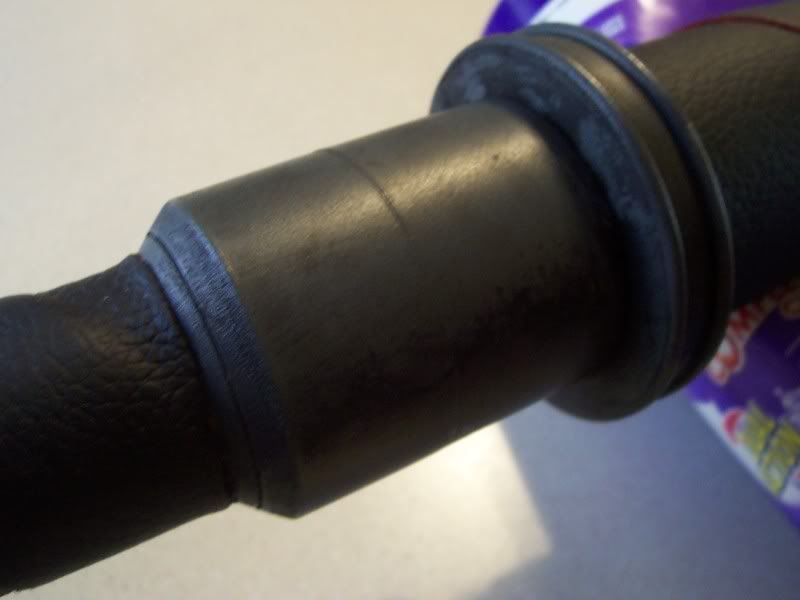
Anyways, here's a pic of the lower shaft, hand guard painted and dull coated. Leather on the bottom is finished.
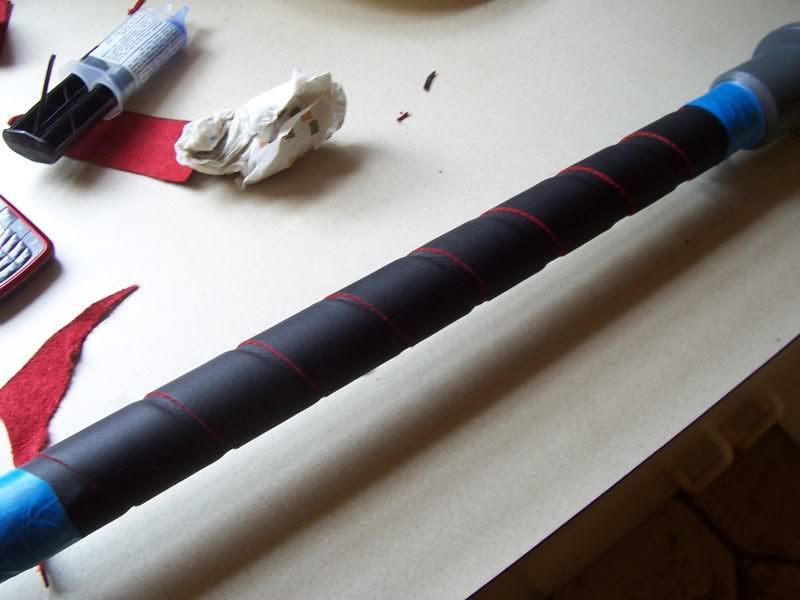
Might leave the red on the leather instead of covering it up...adds some style..
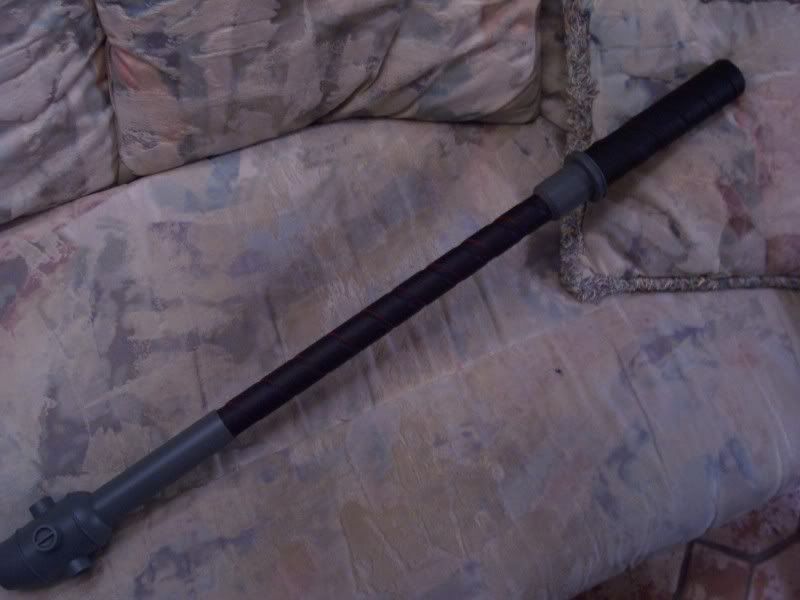
Ok, last hurdle accomplished. Both grips have leather attached and are good to go. Now I can focus on detailing the main body with the pin-stripes and attach the hand guard for good.
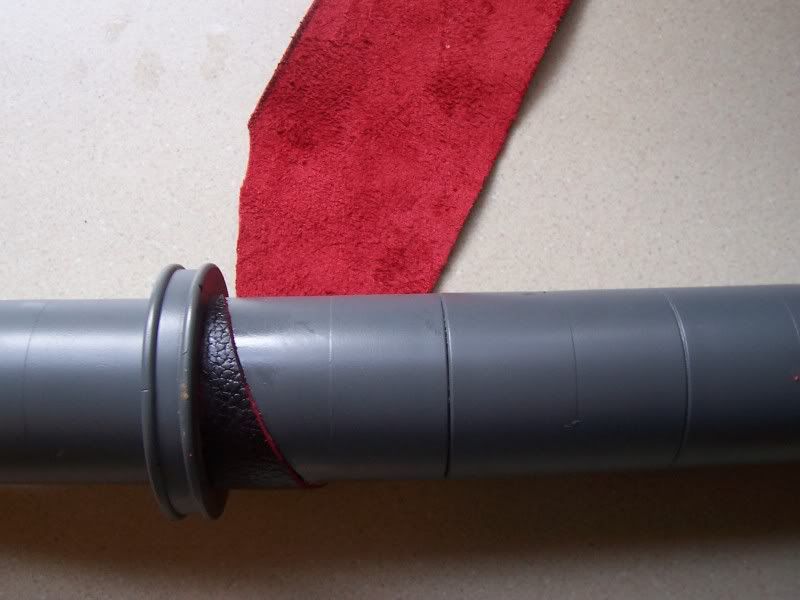
Here's sort of the starting process, figuring the correct angle to cut the leather at the begining..
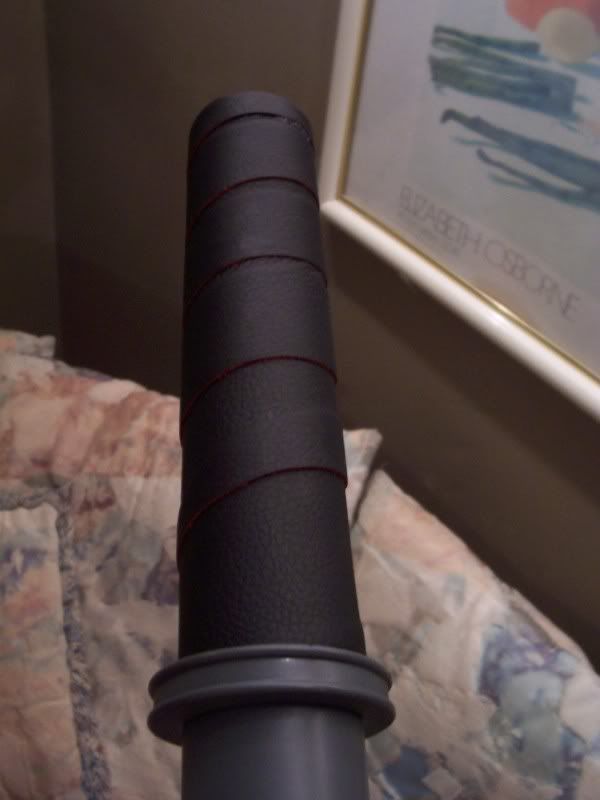
Finished grip
Time to move forward!
More to come!
-TC
Here's my formal thread for this build. Shouldn't be too much longer till completion.
Got the kit not too long ago
It's just a shy smaller then 1:1 scale, but I still am going to love it when it's done.
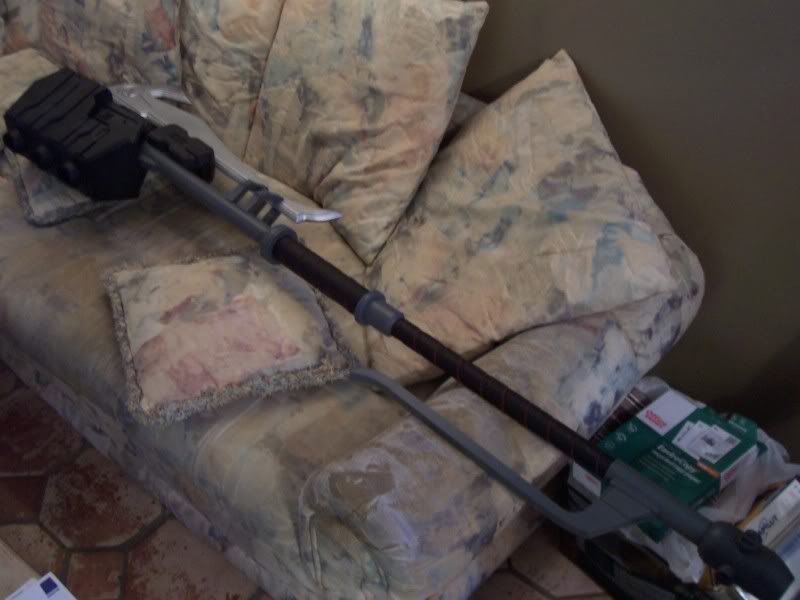
So far, as of now, I have the main body pretty much ready for paint!
Will be starting on the hammer head today, wish me luck lol
Here we go! Got alot farther with just this! Was freaking out that I wouldn't get this right, but it came out well. I kept remembering what Ithica was saying about getting the angle right or the little resin piece wouldn't fit properly and affect everything else. It's all holding up on it's own at the moment. The next step is to epoxy the stubb piece in correctly and get some resin poured in there.
On top of that, got the top details placed (the top one I had to hold, the hole was a little too big lol
Ok, well here are some pics. As you can see, all the hammer head details are on there to include the blade. All free-standing, so no tape. Not glued either
Here is a close up of the backside of the hammer to show the amount of clearance between the blade and the pieces. I fear that the blade is slightly mis-aligned with the center of the hammer head, so I may have to do some tweaking with the blade mount.
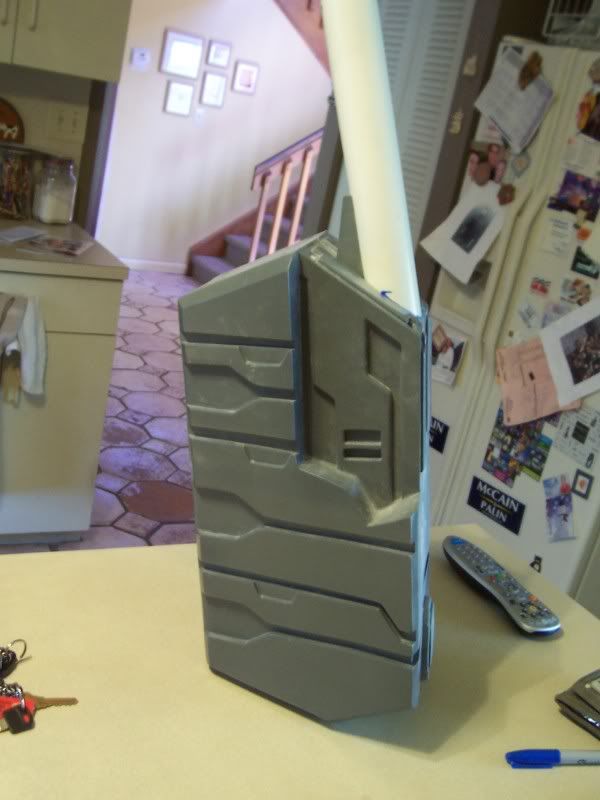
And here is the lower shaft/main body. All grey, and dull coated. Nice and protected. Just need to get the leather on there before I can attach the hand guard, which I still need to paint. After the hammer is assembeled, painted, I'm going to do a black wash over the entire thing, but use brown on the black parts. I'm not gonna paint the blue on this. I'm going to be doing the white portions with white reflective tape though. You'll see when it's finished.
Alright, well after a series of cursing and pulling, I finally got this to a decent level. The end's aren't perfect, but I dont care at this point considering how much of a pain it was. The ends are currently being epoxied down, hence the blue tape
Just gotta do the upper portion later on...
Last one for the night. Although it's all assembled, I'm probably not going to permanently attach the hand guard until the upper shaft's grip is wrapped. The maker also used pinstripping to add details which I may do so myself. I spent time today further cleaning up the hammer head. As I was removing a glob of excess resin, it turned out to be hollow, and opened up a hole in the hammer head (interior is hollow). So I had to fill that sucker up. and clean it up tomorrow. Hoping to be able to get those pieces assembled and painted shortly...
Anyways, here's a pic of the lower shaft, hand guard painted and dull coated. Leather on the bottom is finished.
Might leave the red on the leather instead of covering it up...adds some style..
Ok, last hurdle accomplished. Both grips have leather attached and are good to go. Now I can focus on detailing the main body with the pin-stripes and attach the hand guard for good.
Here's sort of the starting process, figuring the correct angle to cut the leather at the begining..
Finished grip
Time to move forward!
More to come!
-TC
")