ob1al
Sr Member
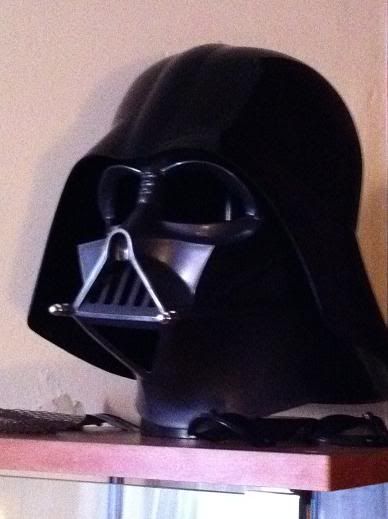
I decided to buy a Rubies 'Supreme' Vader and do the mods, just for a cool project, to give my modelling skills a workout and hopefully end up with a decent enough display item.
I snagged one on eBay and it arrived yesterday.
Today being Saturday, I went to work on it.
Dissembled the eyes, tusks, nose piece, mouth mesh and removed all the velcro.
I then boiled a big pan of water, stuck the neck-flared part of the helmet in it for 5 minutes then pulled the flare in and ran it under cold water from the tap. This seemed to reduce the neck flare a bit.
I then used a sanding bit to chop away all the terrible front-mounted eye lense area.
Next, I used a fine bit to remove the rounded bottoms of the mouth area and squared them off as best I could with a fine file. Ended up with a bit of a ROTJ look eventually.
Next, I went into the dome and removed the inner mount with a steel cutting bit, retaining only a bit of the side wall for stability (when I add the velcro) later down the line. I then cut the mount sides at the top of the faceplate by approx 3" each side, leaving approx 2" in the middle uncut to keep it all together, so I could carefully bend the faceplate mounting downward at an angle and glue/putty it into position. This is to achieve a good dome placement position for display.
Next on the agenda, I used Milliput to resculpt the eye area, nose area (including the three frown marks), right (as we look at it) lower cheek and mouth thickness.
Finally, I built up the nose area to match the screen used prop a little better.
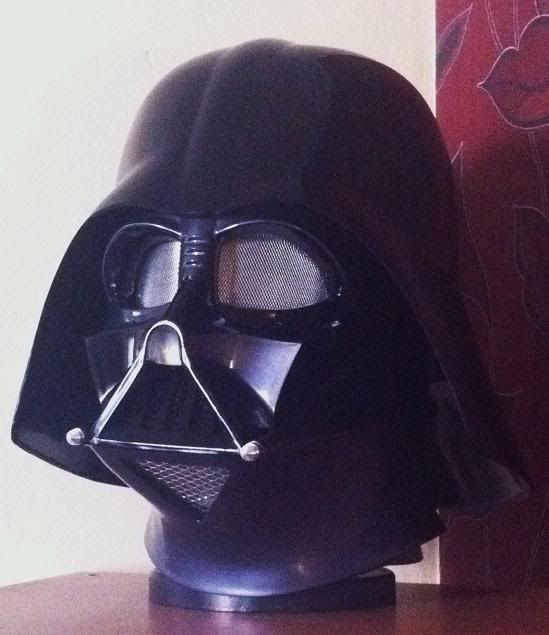
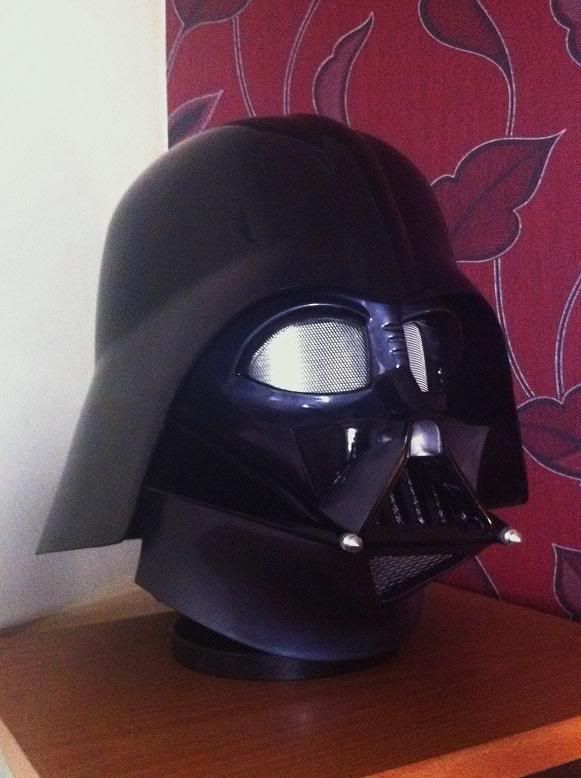
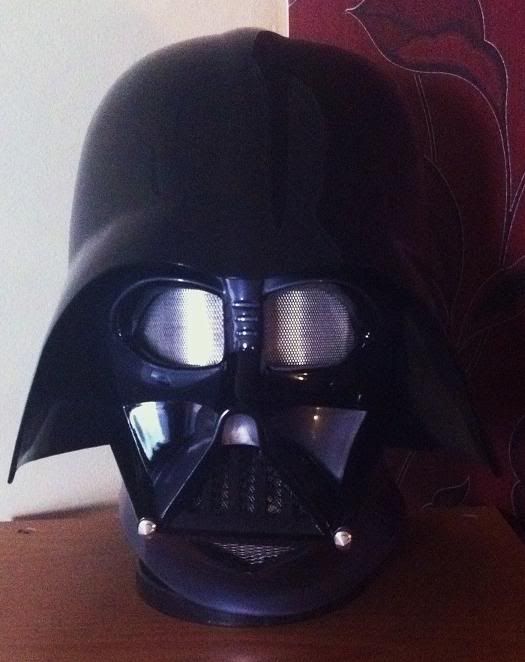
Here's where we stand tonight:

Uploaded with ImageShack.us
I'll give it a day to dry before sanding, priming and painting the facemask. More pics as I progress.
Al
I snagged one on eBay and it arrived yesterday.
Today being Saturday, I went to work on it.
Dissembled the eyes, tusks, nose piece, mouth mesh and removed all the velcro.
I then boiled a big pan of water, stuck the neck-flared part of the helmet in it for 5 minutes then pulled the flare in and ran it under cold water from the tap. This seemed to reduce the neck flare a bit.
I then used a sanding bit to chop away all the terrible front-mounted eye lense area.
Next, I used a fine bit to remove the rounded bottoms of the mouth area and squared them off as best I could with a fine file. Ended up with a bit of a ROTJ look eventually.
Next, I went into the dome and removed the inner mount with a steel cutting bit, retaining only a bit of the side wall for stability (when I add the velcro) later down the line. I then cut the mount sides at the top of the faceplate by approx 3" each side, leaving approx 2" in the middle uncut to keep it all together, so I could carefully bend the faceplate mounting downward at an angle and glue/putty it into position. This is to achieve a good dome placement position for display.
Next on the agenda, I used Milliput to resculpt the eye area, nose area (including the three frown marks), right (as we look at it) lower cheek and mouth thickness.
Finally, I built up the nose area to match the screen used prop a little better.
Here's where we stand tonight:

Uploaded with ImageShack.us
I'll give it a day to dry before sanding, priming and painting the facemask. More pics as I progress.
Al
Last edited: