You are using an out of date browser. It may not display this or other websites correctly.
You should upgrade or use an alternative browser.
You should upgrade or use an alternative browser.
DancinFool - Iron Man Mark 3 Pepakura Foam Templates
- Thread starter Dancin_Fool
- Start date
Kurtis876
Well-Known Member
Here's how I joined mine with some regular screws. Hope this will help you


Hey mate, sorry for the long response, I've been busy with the olympics as well and took some time to take a little break but I'm back now
I used a regular soldering iron too, with a pointy end :

I have to trace the lines quick cause my foam is pretty soft and burns very fast, otherwise I would end up with a big hole in it :lol
I guess you couls try goind slower, depends of the density of the foam you're working with. Just try differents method, you'll find the good pace
Looks really neat so far for the paper fit test, a bit big though but you'll find the right scale
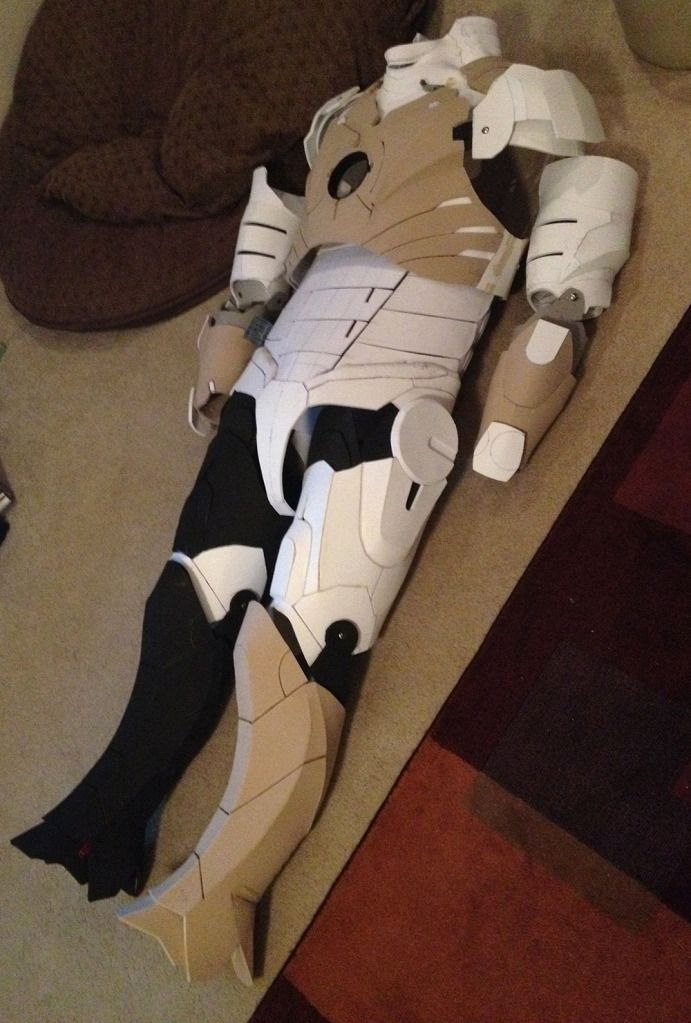
I did a complete fit test the other day and boy I'm disapointed..
The legs came out few inches too short :facepalm
I'm a bit mad cause they actually fit me perfectly (around my thigh) with a nice tight feel, just like the arms. I used the same scale for arms/legs but i guess I should of have use a bit larger one for my legs..
Don't feel like re doing them AT ALL so I'm already worlinkg on lowering the abs/cod to gain the few laking inches
I'm currently gluing the upper thigh pads as I'm writting this post so the big hollow between the legs and cod is goind to be covered, don't worry guys :lol
Scaling is really the most important part of the built so take your time and don't rush it. It makes your suit looking from just nice to awesome
Any way, looks fine from the back though..


ps : Don't mind the silk pyjama, I was too bored to change my under outfit :lol
Thanks man... So u just drew the lines on and just traced them with the soldering iron with no "guide?" I must say aside from your scaling issue, the suit looks awesome... Looks almost seamless! I'm very very impressed with your craftsmanship! Excellent job
MrBibou
Active Member
On some parts like the forearms/chest, you can use the seams of the glued pieces as a "guide" to draw the lines. Sometimes, they do match up perfectly with the MKIII model (use the Hot toy figure or DancinFool 3D rendering to see them) and sometimes, not even a bit :lol
In that case, yeah I had to draw them by hand. I pre-traced them with my exacto knife and then with the soldering iron, just to be sure I wasn't going to mess up an entire piece because I wanted to trace it too fast.
In that case, yeah I had to draw them by hand. I pre-traced them with my exacto knife and then with the soldering iron, just to be sure I wasn't going to mess up an entire piece because I wanted to trace it too fast.
jrpage74
Member
Quick question. I thought I had read this before, but can't find it now. What glue is recommended, High Temp or Low Temp? I thought I read that the low temp was better as you would be less likely to burn yourself. I ask because I bought what was supposed to be a dual temp gun, but the description was wrong and it is a High Temp gun. I have my neck piece ready cut and ready to go, but don't want to screw it up (at least not from the glue temp).
Kurtis876
Well-Known Member
I would suggest you to use your high temp glue sticks cause the low one may risk to melt under sun heat if you're wearing the suit outside.
Try the one you have, the neck is one of the easiest part to do some if you mess it up, it will be easy to do a new one")
Haha yes I second this! I do noootttt recommend starting with the helmet, for example :thumbsup
jrpage74
Member
Well, I got the Neck Seal glued up today. Everything went pretty smooth, except for the back section. I had to improvise once I got to it (last part done). It doesn't look the best, but it is the back. I don't know if I have the heart to cut it tonight to see if it fits well. The template for the base ring fit around pretty well, so I am crossing my fingers. (I used the 1.305785 scale.) :confused
Dancin_Fool
Well-Known Member
Hey Mr. Bibou,
I think the problem with your arm scaling was that you tried to make them fit tightly around your arm. The model is actually designed to be quite loose around the human model arm. I designed it to look quite bulky and armor like. The lower forearm should slide quite high on the upper forearm.
You can get a good idea of what I mean from the reference of all the pieces together. Even still though your build looks great, you can probably make it look cleaner by just extending some of the piees a bit.
MrBibou
Active Member
Hey DF, I understand the armor was meant to be a bit loose but I actually wanted to make it tight and keep a lean look as possible.
The bulky look works for a tall guy; as i'm 5"11' I think it would look better proportionned if the armor is sleek and lean.
I'm probably never going to wear it anyway and keep it as a display piece but it's nice to know it was build especially for me :lol
The bulky look works for a tall guy; as i'm 5"11' I think it would look better proportionned if the armor is sleek and lean.
I'm probably never going to wear it anyway and keep it as a display piece but it's nice to know it was build especially for me :lol
jrpage74
Member
So, I cut and tried on my Neck Seal today. The good news is I could get it on. The bad news is I enjoy breathing easily and swallowing. Tonight was attempt 2 with the scale increased to 1.44. Results...it is done, but I think my first attempt was a little cleaner (much cleaner in the back). Tomorrow will be fitting time, but for now I reflect on todays learned lesson. "Don't Foam Angry".
electraflier
Well-Known Member
Tomorrow will be fitting time, but for now I reflect on todays learned lesson. "Don't Foam Angry".
:lol Let's make the first COROLLARY; Never Pepakura Angry as well!:rolleyes
Isn't that the truth!:angry Too many days I have mentally seen my pepakura piece wadded up in a teeny tiny little ball on the floor near the trash bin!:$
Kurtis876
Well-Known Member
Np mate, thanks
Coming soon...
thanks Mr. for the Hot knife tips... I'm thrilled with the results... This is a quick pic of my first full IM foam build, almost complete. I'll post more in the future. I, like Mr. Bibou, want to finish it before I begin posting alot.
This is done from DF's foam files, with JF custom files, Stealth's chest and back edits of the DF, and several scratch parts that took way too long.
Thanks for the amazing files everyone!
MrBibou
Active Member
You did an amazing job kurtis and at a very fast pace !
I'm back after a week of vacation and with few update pics too
So, as you've seen, the legs I did were way too short so I took my courage in hands and decided to remake them and I actually manage to make them both within a day :lol
Guess It goes way faster once you got the trick :thumbsup
Any way, here a comparison between the old one on the left and the new one on the right (minus the upper thigh extension).

Huge difference right ?
Went from this.. :

.. to this :

I'm just holding the extension piece to see where to glue it but you can clearly see that the new legs looks way better, making me repeat that the scaling process is the most important part of the build :thumbsup
I'm back after a week of vacation and with few update pics too
So, as you've seen, the legs I did were way too short so I took my courage in hands and decided to remake them and I actually manage to make them both within a day :lol
Guess It goes way faster once you got the trick :thumbsup
Any way, here a comparison between the old one on the left and the new one on the right (minus the upper thigh extension).
Huge difference right ?
Went from this.. :
.. to this :
I'm just holding the extension piece to see where to glue it but you can clearly see that the new legs looks way better, making me repeat that the scaling process is the most important part of the build :thumbsup
MrBibou
Active Member
You're too kind, yours looks really well done as well
Here's some test fit !

Looks pretty cool to me now
Still have the gloves and hip pod (probably a new helmet too) and then I'll shape it better with my heat gun and when everything will be good, i'll finally star coating it !
Here's some test fit !
Looks pretty cool to me now
Still have the gloves and hip pod (probably a new helmet too) and then I'll shape it better with my heat gun and when everything will be good, i'll finally star coating it !
Similar threads
- Replies
- 1
- Views
- 771
- Replies
- 2
- Views
- 580
- Replies
- 3
- Views
- 461
- Replies
- 0
- Views
- 1,587
- Replies
- 0
- Views
- 2,540