We used to build a lot of structural shapes like this out of "styrofoam" expanded foam. But it is hard to find it cheap these days, in that kind of bulk. Also, cutting large smooth compound curves can be a bit of a nightmare (I did a 5' long Aladdin's Lamp once working mostly by eye, and it took a week of cutting and sanding).
Sorry...started this post in stream-of-conciousness before I'd thought my answers out properly. So I'm cutting and pasting a severely edited version from here on out.
Here's the deal; what might work is really dependent on the budget, time/labor, shop/tools/access, and above all, how the thing gets used; storage, transport, fly-away, actor safety, rigging, etc., etc.
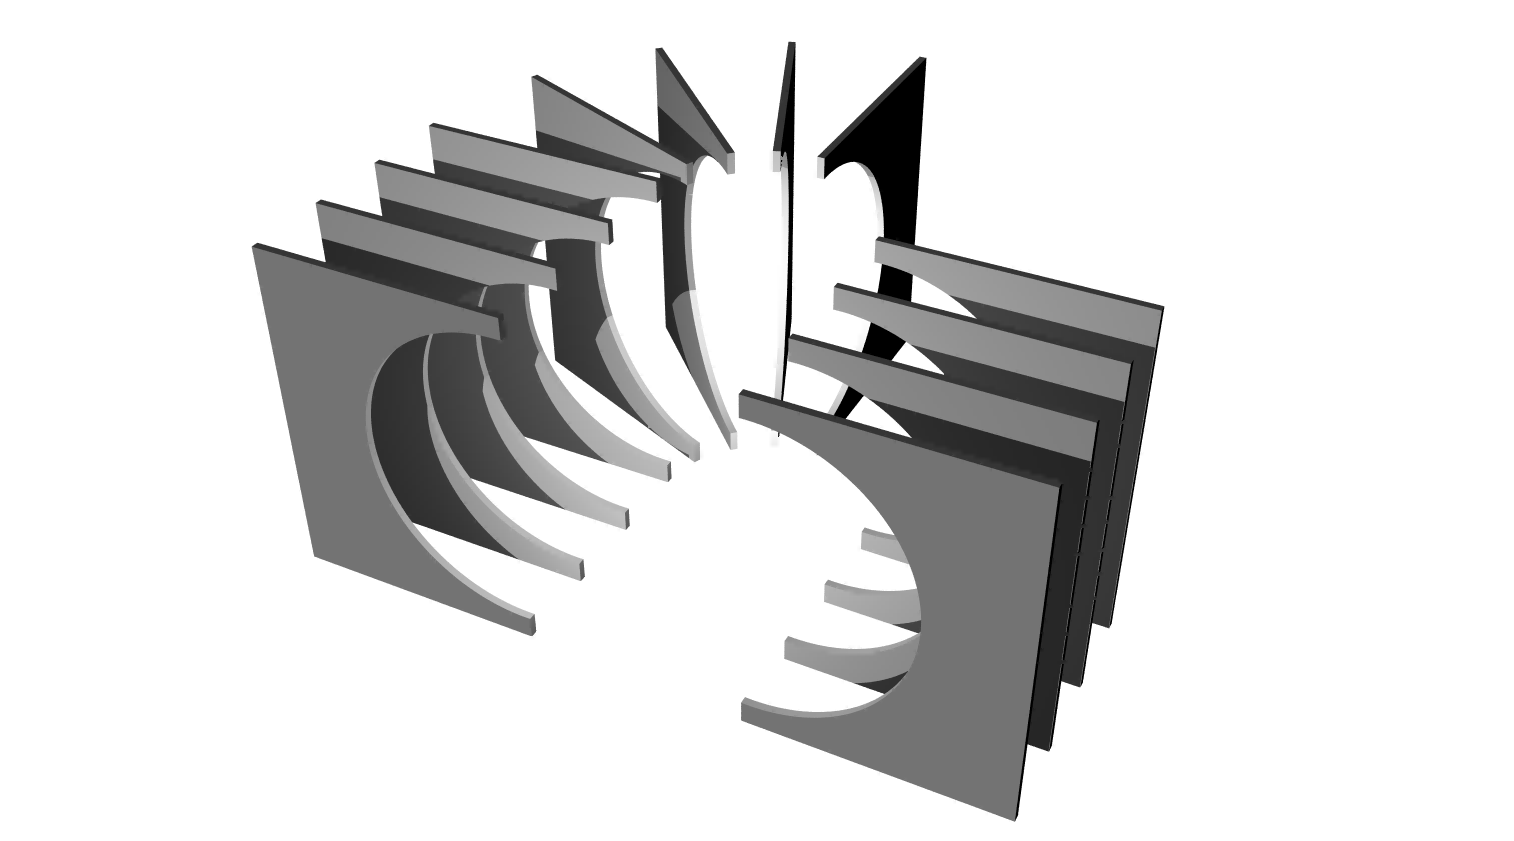
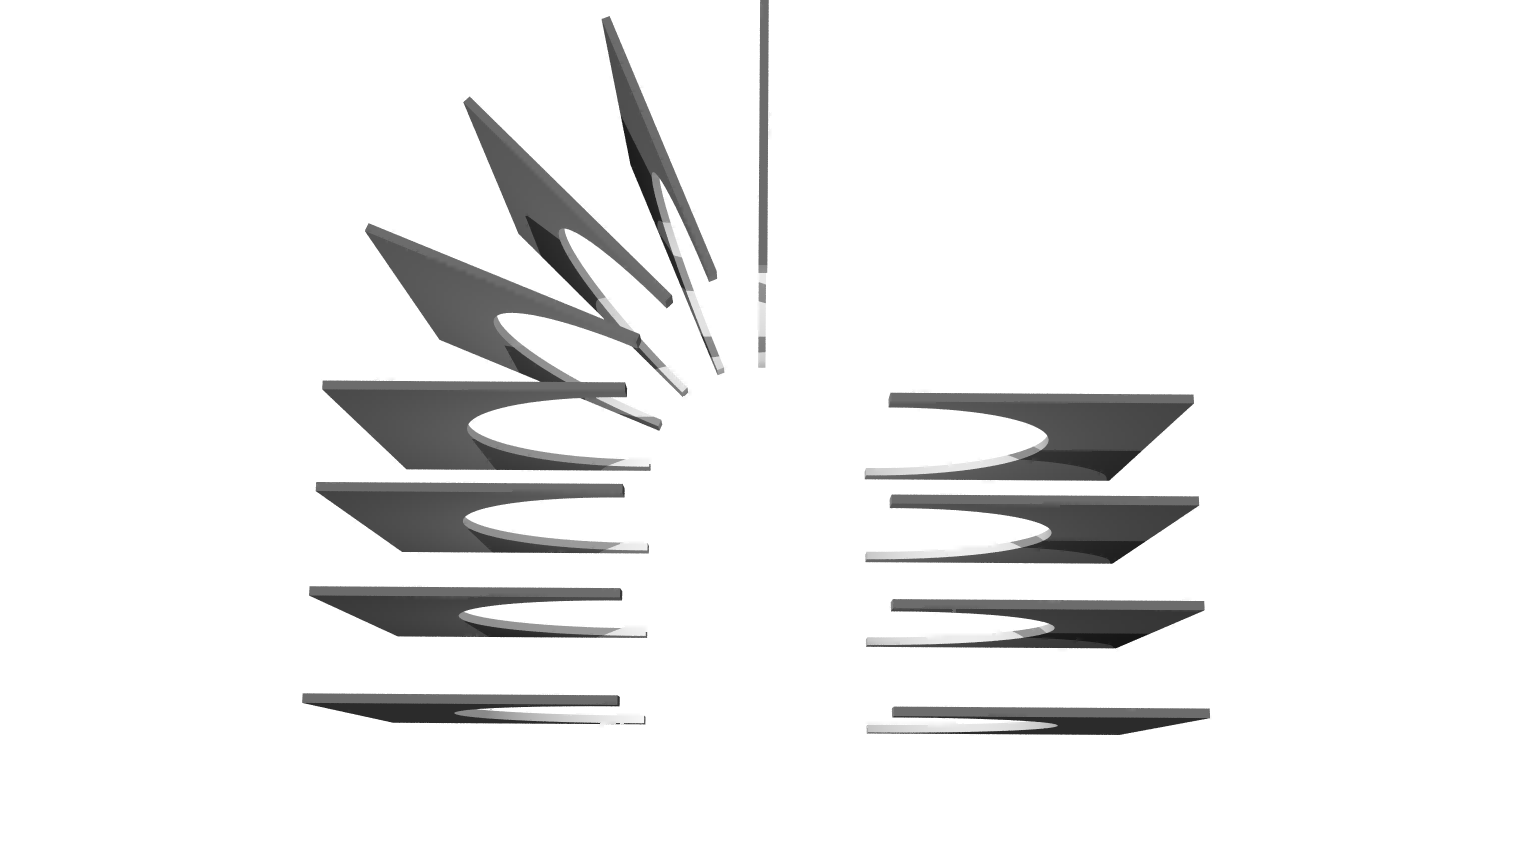
But, hey, I can make a bunch of assumptions, and based on those, tell you the first idea I'd have if I was building what you describe. Which is in essentials the "slice" method described above, with ad-hoc fills and building up to the final surface. Look at how Volpin makes his buckets and similar for the basics of that approach. But here's the thing; the dimensions you've described put us out of the range where a lot of techniques are going to work well, and put you in a zone where, seriously speaking, you need some beef.
Okay, here's the assumptions: you don't have a huge budget, otherwise you'd farm this out to a prop house. You are trying to build with yourself and a handful of helpers, you are working in a garage or basement, you've got under $10K to work with. Other assumptions; the artistic design is firm enough it isn't worthwhile looking at existing shapes, items, or settings that could be re-purposed. There's going to be at least one actor inside the thing, interacting with it. You need to break down for transport from the shop. And there's going to be enough footage shot inside that you need flyaway walls for lighting and camera access.
Given these, this would be my basic scheme:
A welded support structure. One inch square tube will do, and you can hack that structure out with little more than a wire feed buzz box and an abrasive cut-off saw. Quarter-inch bolts with wing nuts allows you to break down for transport and access.
The primary slices are tex-screwed to that structure (the structure is also planned around necessary access points, the break-down lines, and hard points for mounting heavy scenic elements like monitors, chairs, floor, etc.) In the old days we'd scribe these on plywood with tape measures and string, but these days you model the shape in 3d and print out full-sized templates. Heck, if you have the budget, after you slice you send the segments directly to a ShopBot or similar computer-controlled router.
That is, some of your curves are out of ply, ****board, or MDF, are screwed directly to the steel. The others are spaced out between, held there with random chunks of wood jammed in with screws (preferably pneumatic staples) and glue. Think monocoque construction, like airplanes (including balsa-wood model airplanes). You are making an empty framework that describes the curved surface, and provides a guide for the detail carving.
Then you stuff the spaces with whatever will glob in there long enough for a layer of spray foam to set; cardboard, wadded newspaper, chicken wire, etc. Keep the filler well back of the final surface so you don't have to cut into your filler during the final shaping passes. At some arbitrary point of fill-and-smooth, drop a layer of resin (fiberglas optional but recommended) to get a hard working surface. Then move outwards from this tough coat to smoothing coats of bondo, rondo, spackling paste, spot filler, filler primer, etc.; getting closer and closer to the final surface in successive approximation layer by layer (the process pretty much all props go through).
How far you take the smoothing is dependent on the final look and how much of the interior is going to be visible. If you look inside, say, the Apollo CM, there's not a lot of pressure hull visible. Very likely your interior is going to be packed with details and detail objects that, among other things, give the actor something to interact with (they also give you places to hide the seams where you are breaking the thing apart for camera access and for transport from shop to stage.) And it is silly going full detail on places that are going to be invisible.
But you totally have options as you approach final finish to build in seam lines/plate lines, or rivets, or go for glossy smooth. And you can totally paint anywhere from near-chrome to rust-bucket to seashell nacre.
I have to add here...I've built a lot of stage sets, as well as some massive props (worked for a production company doing trade shows and exhibits for a while, among other things) but the only actual film I worked on the set for was a low-budget music video for The Residents.

")