Correcting the Lunar Models 41" Excelsior

That would have to be up to the guy that is rendering the CAD work. We are collaborating on these parts where I provide most of the references, and the final results from back n forth teamwork are up to me, but he is doing all the computer stuff.

He sells some of these works rescaled for the AMT/R2 Excelsior kit (with my full support) - as well as other Trek parts on Shapeways.

Tracy
 
Guess that is Bob's Starship Shop then, as I've got all his Excelsior parts thus far in both the smaller and larger sizes. I'll have to reach out to him again to see if he'll add these new parts to his Shapeways shop, thanks.
 
Discovered the top saucer profile is wrong, so...

Removing the incorrect dome shape...

View attachment 1353795


View attachment 1354023


Removing the excess to reduce the dome down to the proper diameter...

View attachment 1353796


1mm sheet styrene cemented to the base of the dome to rise it back up for a proper profile...

View attachment 1353797


A hole is cut into the new base so resin can be poured in for support...

View attachment 1353798


The resin is poured in increments, then slosh-cast to make sure it goes into all the nooks-n-crannies...

View attachment 1353799


After all the resin is poured in, I taped up the hole so I could hand roto-casted it to make sure all the inner surfaces get a good layer of resin. Before the resin cooked off, I clamped the dome down to a flat surface to ensure the dome didn't warp from the heat of the curing resin inside. At the top of the last image, there is the saucer's profile traced from ILM plans scaled to my project. I will be making a screed blade from that to level out the domes surface.

Tracy

Pictures of that progress to come...

View attachment 1353800
Nice use of trammels!
 
Sorry for the absence.

1/100 scale 707, and a 1/32 scale F-16XL have taken over my attention lately.

That dome was never discarded. Once the corrected lip profile was added, the dome went back on. That's when a screed blade was made from a scaled image of the saucers profile. Layering of fillers were then applied to bring up the profile to where it is now.

All the 3D work is pretty much finished - Thanks to Bob's hard work and letting me drive him nuts with the back-n-forth on the minutia. The only scratch building left to do is the Warp nacelle pylons.

Tracy
 
Thanks to Mike's efforts in roughing out the graphics in my scale. Don't worry, the sensor bands will be a single Flanker Blue-ish solid color. Just testing the arch of the corrected shape of the primary hull.

1687459126904.png


1687459157937.png


The pennants need to be spread apart 1-2mm to fit the Alpha/Numerics

1687459190354.png


The first test for the Warp Pylon Blister.
1687459216223.png


More to come on the 3D printed parts. New discoveries made from images of the NX version of the studio miniature are being implemented into some of the existing parts that were considered finished.

Tracy
 
I appreciate this about you, that I like to think is something I do, too... All you need is something the approximate shape of what you want, and, from there, you can supply all the stubborn determination and elbow grease necessary to turn a pig's ear into a silk purse. I just read through the whole thread again after your previous post, and you are absolutely masterful at this. This may end up being the definitive Excelsior model that isn't pulled from ILM's original molds.
 
Fantastic work! Forgive me but what scale is this again? I am working (slowly) on a 1/537 scale and have yet to work out where I could get some decals from.
 
Fantastic work! Forgive me but what scale is this again? I am working (slowly) on a 1/537 scale and have yet to work out where I could get some decals from.
That is a very interesting question...! *lol* I am one of those who has looked at how the Excelsior maps out to its official length at the time of 467m didn't work -- saucer rim was too narrow for two decks, windows were in all the wrong places, etc. The Deep Space Nine Technical Manual gave us a length of a bit over 511m, but there are issues with how that length was arrived at (goofiness with book layout and misinterpretations by people who weren't told).

People with even more time to nerd out over this have banged their heads against it for years, assessing things like the TSFS bridge set versus the 'bubble' bridge on top of the original version of the model, windows, the upper limit of possibility based on the size of the Spacedock door it exits through in that film to pursue Enterprise, which we see in comparison to that opening and its size is known (although debate over the size of the TOS and TMP Enterprises is another matter)... The aired/screened material is little help, as it has given us deck locations and MSDs that just don't work.

The end result is that the ship needs to be somewhere between the old official 467m (which it can't be) and the maximum estimated 700m of the Enterprise-B MSD (which it also can't be). Some have objected, pointing out that the Enterprise-D is only 642m long, but it was rebutted that a great deal of the Excelsior's length is the warp engines, and that's not a good indicator of overall volume, given the much more compact engines of later starship generations. Me, I go by the saucer rim. Upscaling by 15% to keep up with the required size increase of the Enterprise (both versions), and then about another 10 percent to get things to line up better. Others, using similar methods, have arrived at similar figures. So a current "idealized" estimate would put the Excelsior somewhere in the 543m-590m range.

Given all the changes Vidar has made to the LM model, I think we'll need to wait until he's done to get the final length of this version. But my vague estimate, based on the changes he's made to the engines and saucer and going by the "corrected" size of the "real" ship, above, would put his in the vicinity of 1:500, which is a nice, common battleship model scale.
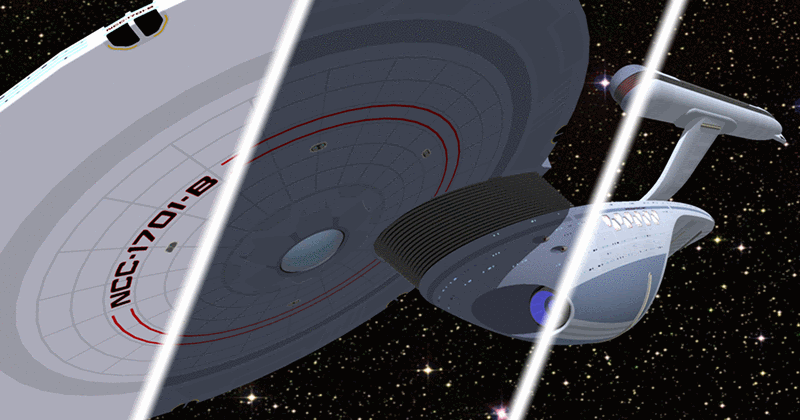
Yes I seem to remember talk a long time ago when the LM Excelsior came out that it was around 1/500 scale, if so I’d be curious to see how those decals might potentially line up on my model, which as I say is a ballpark 1/537.
 
While working on the graphics for what I call the "Egyptian Neckless", I discovered that the chines on the superstructure master were asymmetric. To fix this problem I scaled up the NX studio model to my scale and made a parchment paper template to make two identical chine templates out of thin sheet styrene. The templates would ensure both chines are not only the same shape, but the same length.

Here the chine templates are secured into place.
1688845061420.png


The ends had styrene backs cemented on them to ensure equal lengths.
1688845182172.png


I applied the apoxie dough and sculpted into place using the templates as a guide. After curing, I sanded back any material to match the templates to create matching chines. Wish I had thought of this technique the first time. Now they are a close as you can get doing it by hand.
1688845411054.png


Templets removed.
1688846130722.png


Back to planning out the "Neckless". It'll either be a big arse decal, or a multi-layered set of masks.

Tracy
 
Last edited:
Reviewing my progress, I recall making separate templates off the studio model to create the new shapes of the chines in that resin part. Looks like the studio model is asymmetric and I copied it.
Well, now they're identical. ;-)

Tracy
 
Final work on a few of the masters in-work. Since the top half of the saucer's profile was corrected, the bottom of the superstructure master has to be corrected to fit the saucer. Here, I put down a sheet of aluminum foil to protect the master. I then sprayed the surface with mold release. Form Air sculpting dough was applied to the edges of the superstructure master where contact was not meeting the saucer. It was firmly pressed onto the saucer allowing excess to squeeze out around the edges. The dough was sculpted in and the excess was removed.
I'm giving it a day to cure, then I'll remove the superstructure from the saucer. Hopefully the mold release will do its job and the aluminum foil will just peel off.

1689213300237.png
 
No way to put it. I screwed up!

I assumed the superstructure was dead center over the saucer's center. While plotting the deflector grid details, I discovered the bridge would have sat an inch off center to starboard if I hadn't discovered it before pulling the parts.

All this work from above had to be ground and cleaned off the master so I could start over.

The leading edge of the superstructure had an established center while shaping the front. The raised platform that the bridge sits on - the same. The saucer master also had an established center from fixing the saucer's upper profile earlier. To align all three levels, I drilled pin holes into the superstructure, the platform, as well as the center of the dome of the saucer master. Using a straight pin as an axis to maintain alignment, I was able to correctly re-sculpt in the superstructure's base to match the saucer's profile.

Crisis obverted!

The results without showing the work all over again...

1690261658142.png


1690261615259.png
 
Last edited:

Your message may be considered spam for the following reasons:

If you wish to reply despite these issues, check the box below before replying.
Be aware that malicious compliance may result in more severe penalties.
Back
Top