Converting the Bandai AT-ST into a 1:2 Studio Scale replica

MonsieurTox

Master Member
Hello,

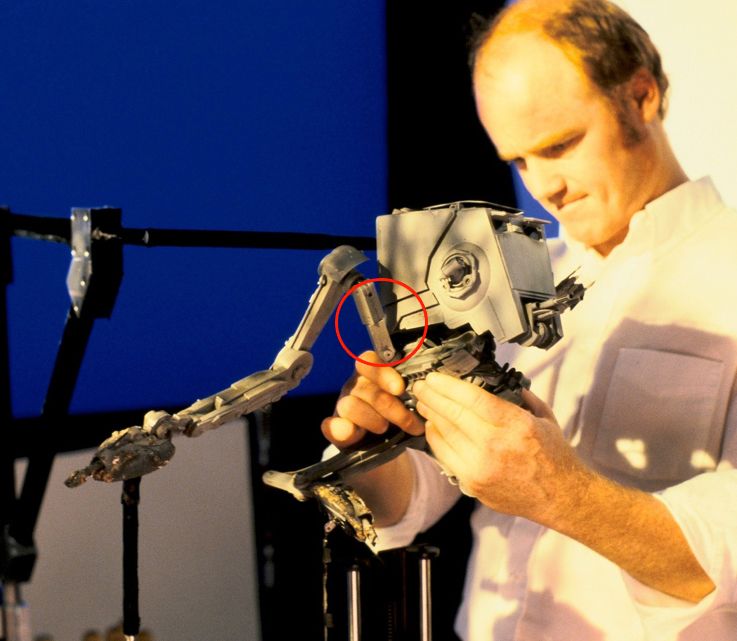
In this thread I will show how I'm correcting the Bandai AT-ST to match the filming go-motion miniatures.
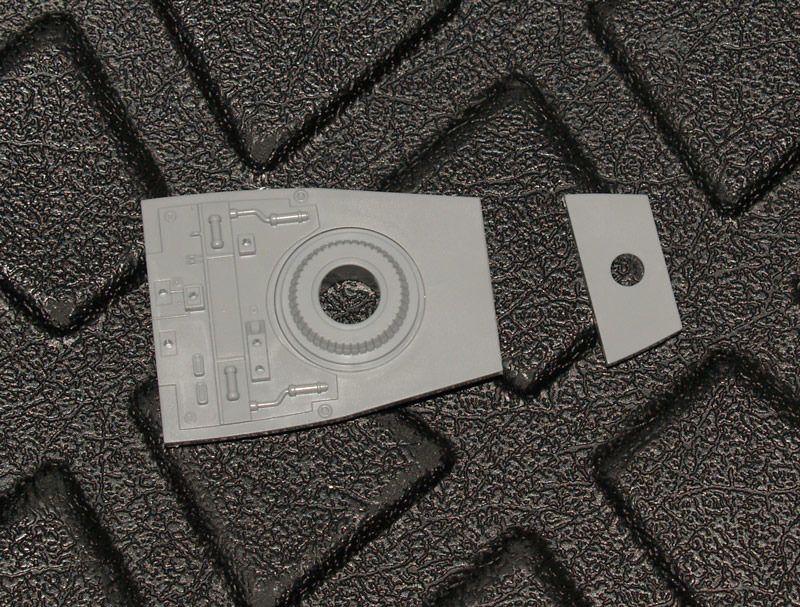
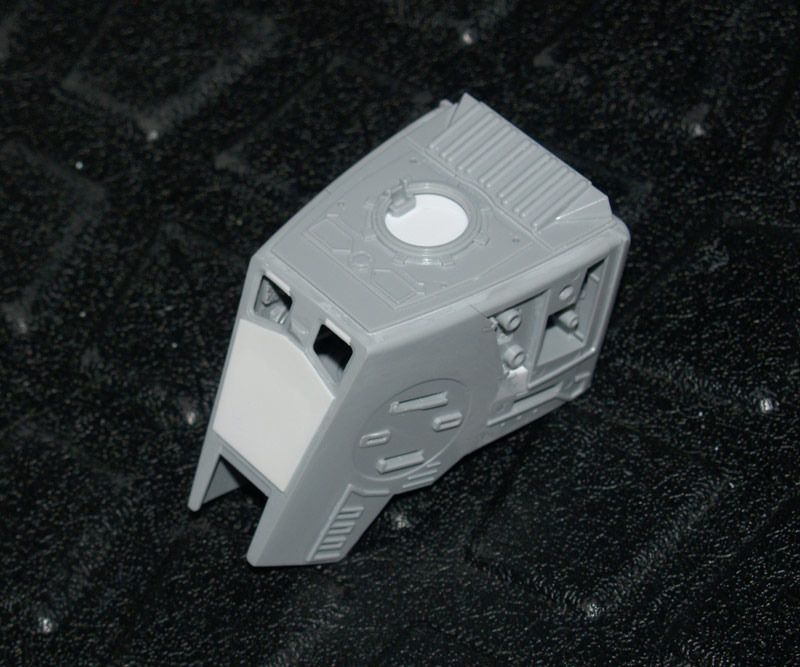
First the head :

I sanded the sides to get an inward curve like the filming mini, sides are straight on the Bandai.

I also removed the front armor panel because it way too thick.


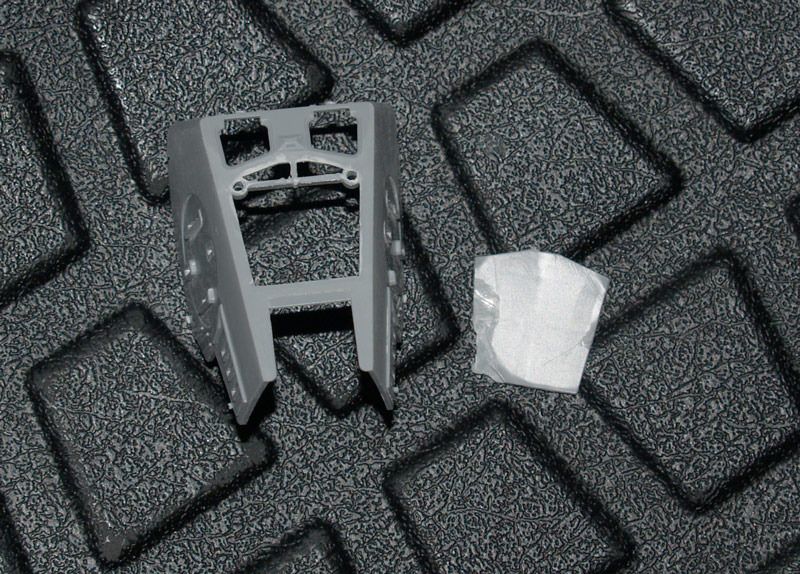
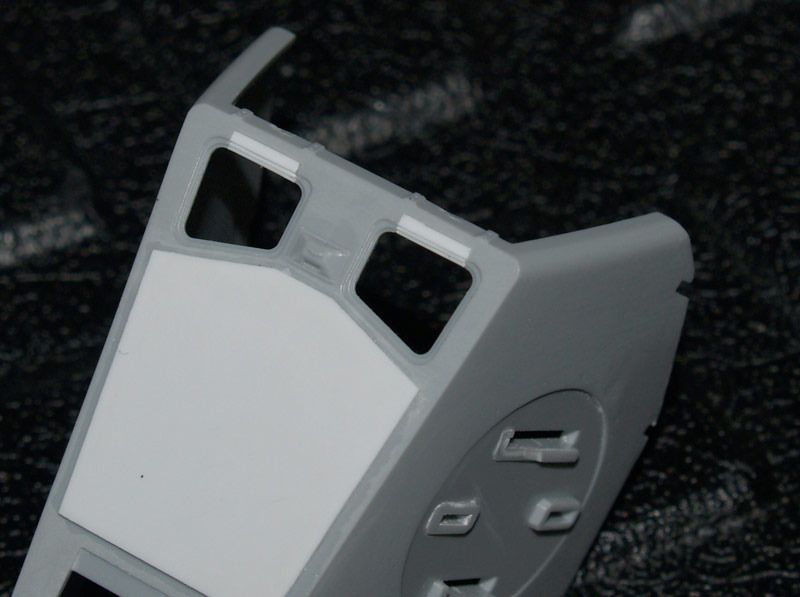
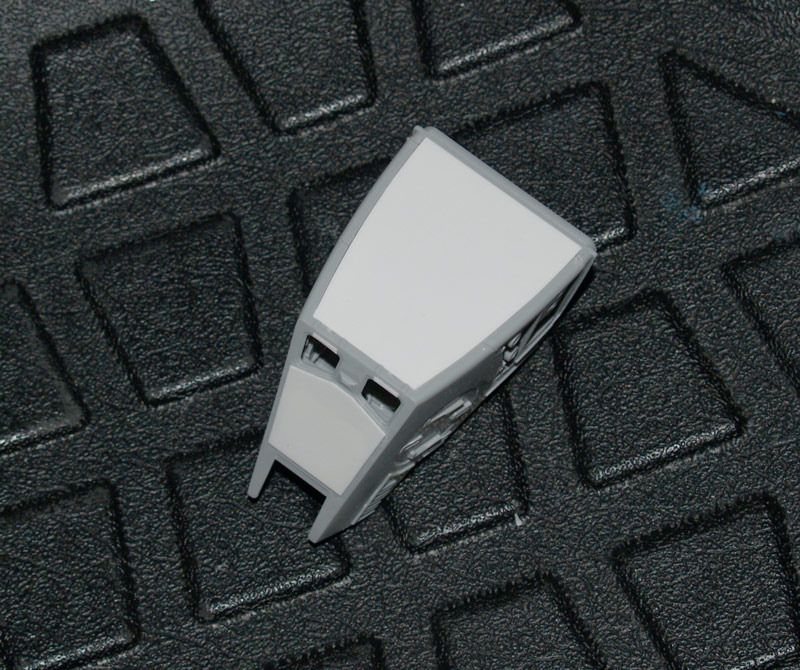
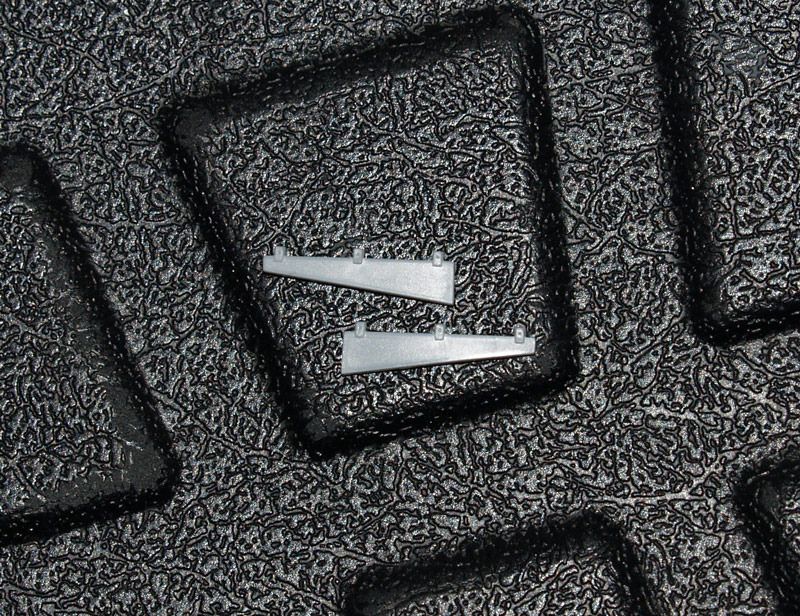
I made a new one from 0.5mm styrene :


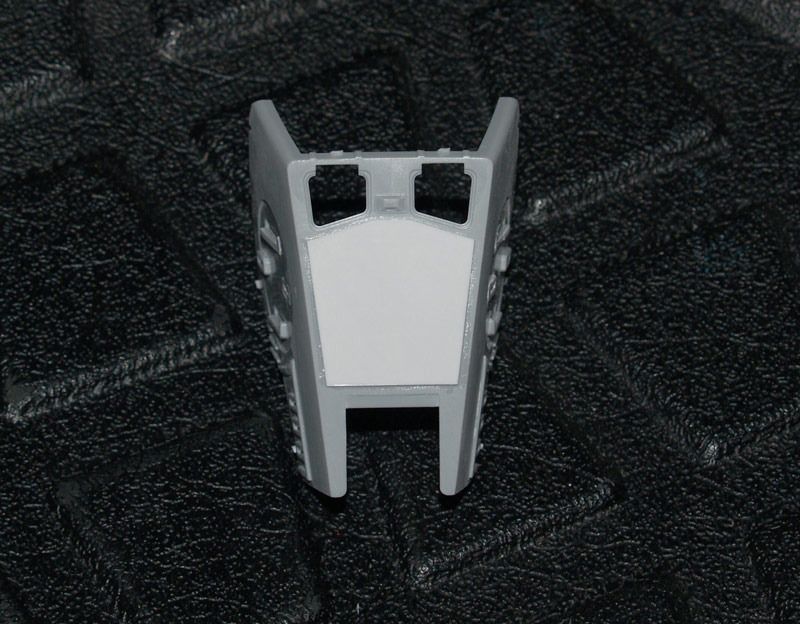
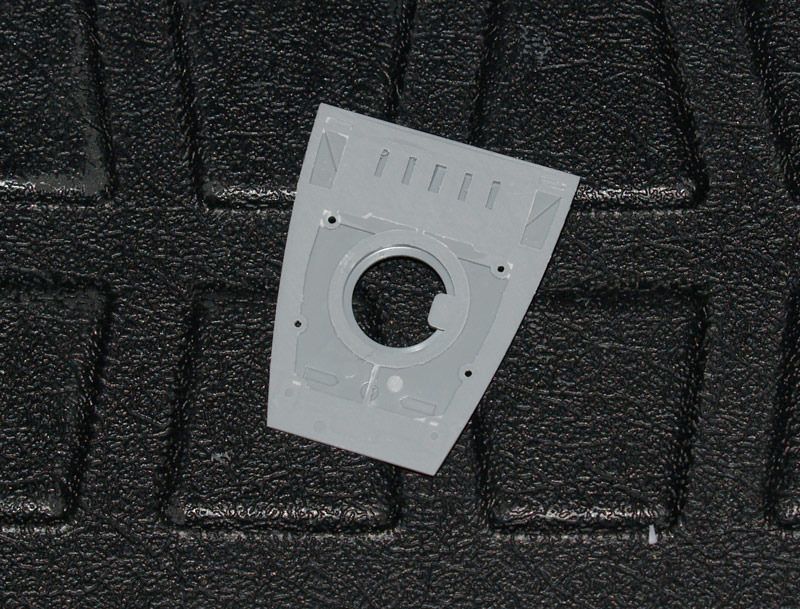
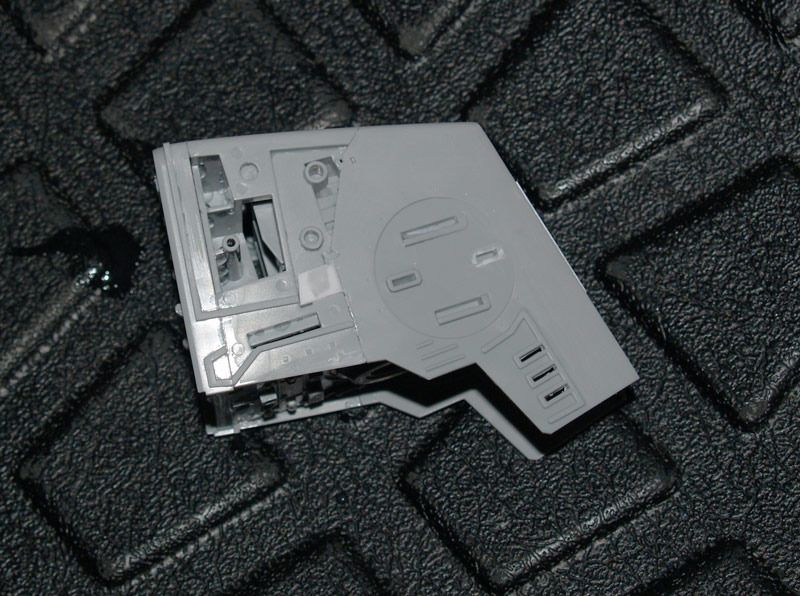
I recreated the missing "steps" of the eye cutouts. No need to do a great job here, it will be covered by the hatches glued into the open position at a later stage :


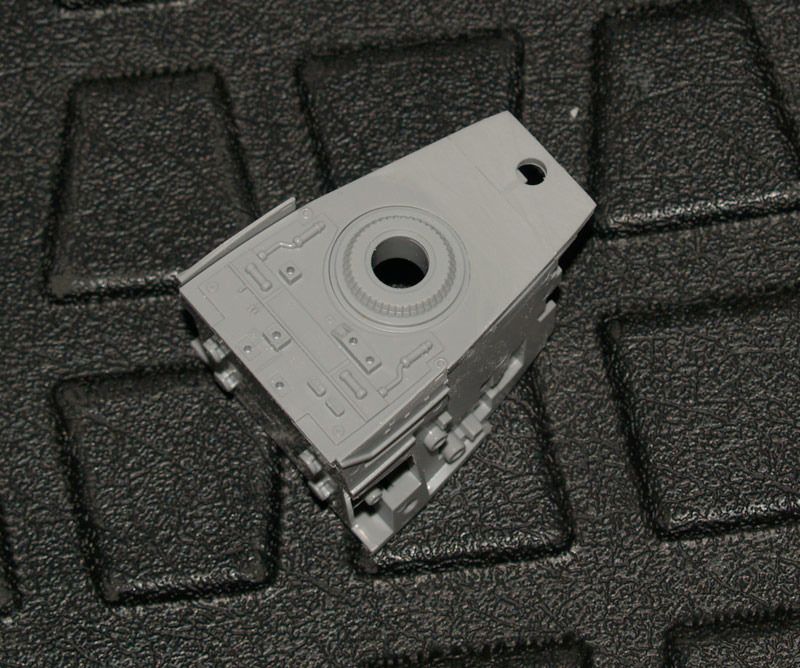
The plate of the underside of the head should be level. For some reason they created a big step on which sits the chin gun. This is not correct. I cut the front of the plate and glued it back at the same level (had to shorten the front to get a good fit inside the head)


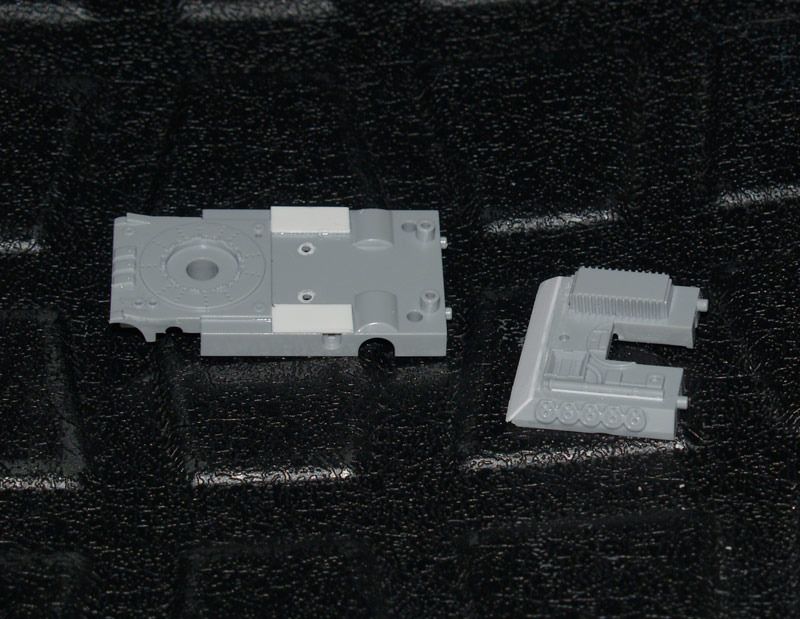
Since I'm recreating the filming miniature, I don't care about the interior and I don't plan to get the roof removeable. So I filled the top with styrene :


Sanded flat the upper detail plate :


And glued it in place :


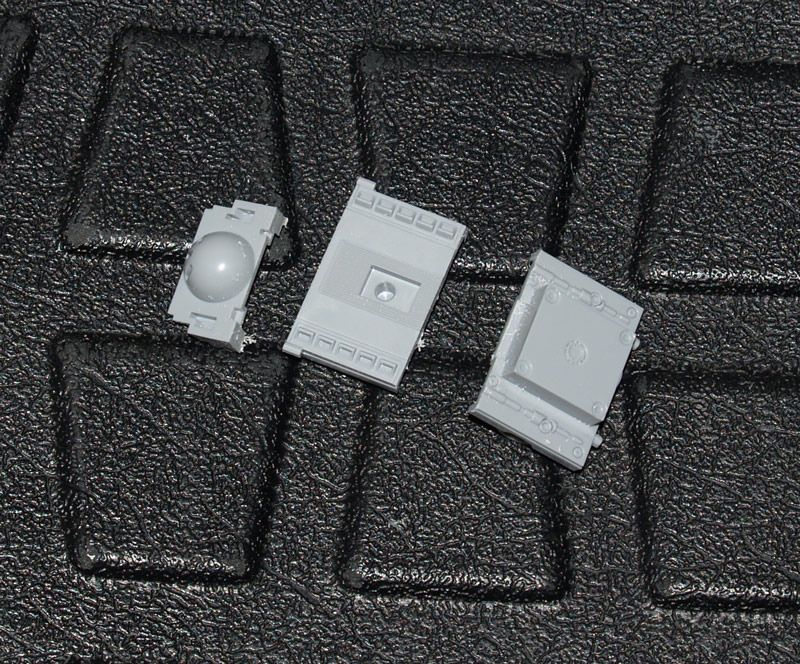
I removed those 2 armor plates, the should be half the thickness so I sanded the back :


I used small 1.5mm styrene pieces to fill a void. This is something not well engineered on this kit because once you put the side armor panels in place there is a visible gap.


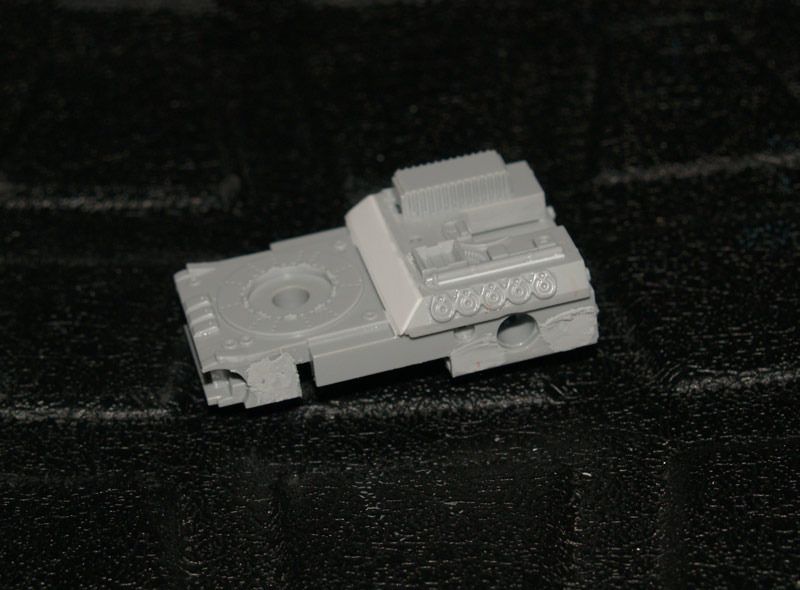
Now the chassis. It is way off. The best thing would be to build a whole new one from scratch. I decided to used the kit parts and do the best choices to match the original even it won't be 100% perfect.

Locator pins are removed, strips are added and the angle of the front plate of the "hood" is corrected. You can also noticed at the very front of the chassis that I removed one of the 4 square details. There are only 3 on the filming miniature.


Lower chassis is cut in 3. For some reasons they made the rear and middle part level while the middle part should be taller. The big radiator is missing (the thing that looks like a heatsink). There's only some raised lines where it should be... I'll build it later.


Lower front and rear sections are glued to the upper chassis part (sorry for the blood). The hood is glued a tad more forward. Actually proportions of the chassis are off, it should be a tad shorter :


More to come soon.
 
Very interesting to see what it takes to turn this into a correctly proportioned studio model, especially by someone with your skills and knowledge of the filming models.

I wonder why some things are so different. Do you think the differences are due to compromises made in the desire to keep the number of parts/molds/master patterns down or did they mix features from various model references/live action props/paintings, or a bit of both? Or did they just wing it? Or maybe some of the changes were to accomodate the poseability of it, but still keep it somewhat sturdy?
 
Interesting thread.
I'm still not sure where you sanded the sides of the head though.

Can you do the ankle joints next please!

Keith.
 
really interesting to see your thoughts about this model , im not quite sure what you mean by "I sanded the sides to get an inward curve like the filming mini"
i cant see the difference from the pictures .
have you had a look at the tie fighter model ? i would be interested in your thoughts on that one , how does it scale up compared to your version for example ,
what would you change ,( if anything )to make a more accurate version ?
 
This thread is really helpful for me to build my Bandai AT-ST and I really like what you've done on the steps of the head. How did you do that?
Which version is this AT-ST going to be? I'd want to see the Euro version since I don't have any reference of the back side. Please do the tie fighter too!
 
Very interesting to see what it takes to turn this into a correctly proportioned studio model, especially by someone with your skills and knowledge of the filming models.

I wonder why some things are so different. Do you think the differences are due to compromises made in the desire to keep the number of parts/molds/master patterns down or did they mix features from various model references/live action props/paintings, or a bit of both? Or did they just wing it? Or maybe some of the changes were to accomodate the poseability of it, but still keep it somewhat sturdy?

I have no idea why. However I figured out why they created a step for the chin gun mount to sit on, that's because the underside plate of the head is put at a wrong angle on the kit. Too late to modify that on mine !


really interesting to see your thoughts about this model , im not quite sure what you mean by "I sanded the sides to get an inward curve like the filming mini"
i cant see the difference from the pictures .
have you had a look at the tie fighter model ? i would be interested in your thoughts on that one , how does it scale up compared to your version for example ,
what would you change ,( if anything )to make a more accurate version ?

The curve is barely visible. It can be seen on the pic I posted showing the styrene roof, put a ruler on the side and you'll see what I mean.
No I did not bought the TIE Fighter and I won't, from the pictures I saw, it looks good, however once again it looks like some of the cockpit greeblies have been modeled after the Nice-N TIE cockpit which is wrong for most of the parts.

This thread is really helpful for me to build my Bandai AT-ST and I really like what you've done on the steps of the head. How did you do that?
Which version is this AT-ST going to be? I'd want to see the Euro version since I don't have any reference of the back side. Please do the tie fighter too!

Kaoru, I just glued strip of styrene of various thickness to create those steps.
Not sure which version it will be, maybe a generic one with the best from both models ! :))

There are some pics of the back of the Euro AT-ST in the blu ray disks :


If you don't mind me asking, how should the bottom head plate be fitted then?
If there should be no step, then i want to remove it. Does that mean it needs to be fitted following the bottom lines of the sides of the head? Sloping down towards the front in other words.

Keith.
 
Kaoru, I just glued strip of styrene of various thickness to create those steps.
Not sure which version it will be, maybe a generic one with the best from both models ! :))

There are some pics of the back of the Euro AT-ST in the blu ray disks :

Thanks Julien!
But didn't you say that you couldn't share the Euro pics?lol I really like the way you made the steps with styrene sheets.
By the way, there is a photo that shows AT-ST parts next to a finished AT-ST in SW chronicles book.
Are they pyro models?
 
Thanks Julien!
But didn't you say that you couldn't share the Euro pics?lol I really like the way you made the steps with styrene sheets.
By the way, there is a photo that shows AT-ST parts next to a finished AT-ST in SW chronicles book.
Are they pyro models?

I can't share the pic I cropped the other day, this one is from the blu ray so a aimable to anyone :)
Yes this is a pyro in the chronicles pic you are refeering to.
 
You had to say kitchen didn't you. I feel bad now as i should be working on my kitchen, not star wars models.

I can't find any photos that show how the feet tilt from side to side, so i'm not sure where to cut. Can you help with this?
Also, should the base of the head fit in at an angle sloping downwards, so there is no need for the step for the gun mount?

Keith.
 
This photo might help. Unfortunately it's the only one I have so it may not show up too well however it looks as though there is a join line 2/3's from the front to the back in the armature under the feet.

10923581_662426217202178_3756334169786343743_n.jpg
 
Another home-run on that one Mr. Tox...well, these transfos are making it closer to what it's suppose to look like:cool
 
Its ok, i have figured out how the feet tilt.
Also, i cut off the front of the heads bottom section to remove the step where the gun mount hole is. I then glued the bottom section in without using the locator pegs, infact i left the cockpit floor and dash panel out to reduce weight. I sloped the bottom section downwards towards the front to make up for the missing step, so its accurate now.
I reworked the gun mount too, so you see less of it above and at the sides of the front guns. Looks a lot better!

Thanks for the photo Junk Pilot.

Keith.
 
Also the tilt of the entire leg is because of the split in this limb:


Phil%20Tippet%20amp%20AT-ST.jpg


....still not seeing how to tilt the feet though


J
 
This thread is more than 8 years old.

Your message may be considered spam for the following reasons:

  1. This thread hasn't been active in some time. A new post in this thread might not contribute constructively to this discussion after so long.
If you wish to reply despite these issues, check the box below before replying.
Be aware that malicious compliance may result in more severe penalties.
Back
Top