Leonidas280
New Member
Hey all!
First off, thank you for all of the content on this forum!
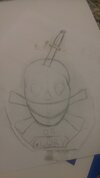
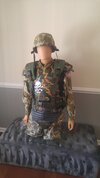
I started this journey last fall with Rob over at Chefs Creations and since its arrival a few weeks ago, it's been a pleasure to build this kit with my son. Big thanks to BigbisonT for his youtube tutorials. My dad brought this movie home in the 80's on VHS, and like most of you, I still regard it as the best movie ever made. Building a set of armor has been a goal of mine, and so far a great experience! If anyone has any questions about the process, please let me know. It's a Hudson theme.
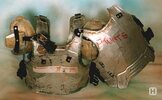
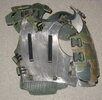
Chef sends them with minimal clean up so that was awesome! Great correspondence with Rob throughout the process and following delivery!
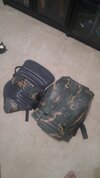
Colors are the same as referenced in BigBisonT's videos on youtube. "hiding the crimes" is definitely established in the later phases of weathering. Used the liquid stove polish from Amazon for the first weathering layer.
On top of one of the pics is a piece of production-made Aliens armor from Terry English for color reference. The colors are still spot on.
More to follow.
First off, thank you for all of the content on this forum!
I started this journey last fall with Rob over at Chefs Creations and since its arrival a few weeks ago, it's been a pleasure to build this kit with my son. Big thanks to BigbisonT for his youtube tutorials. My dad brought this movie home in the 80's on VHS, and like most of you, I still regard it as the best movie ever made. Building a set of armor has been a goal of mine, and so far a great experience! If anyone has any questions about the process, please let me know. It's a Hudson theme.
Chef sends them with minimal clean up so that was awesome! Great correspondence with Rob throughout the process and following delivery!
Colors are the same as referenced in BigBisonT's videos on youtube. "hiding the crimes" is definitely established in the later phases of weathering. Used the liquid stove polish from Amazon for the first weathering layer.
On top of one of the pics is a piece of production-made Aliens armor from Terry English for color reference. The colors are still spot on.
More to follow.
Attachments


Last edited: