You are using an out of date browser. It may not display this or other websites correctly.
You should upgrade or use an alternative browser.
You should upgrade or use an alternative browser.
Chewbacca Build (WIP-lot's of pics)
- Thread starter jweger77
- Start date
schphgochi
New Member
amazing work! I can't believe you've never done this before. :thumbsup
ditto....
this looks like the work of a pro...
Thanks everyone! And we absolutely will Terry! You know it!
To today's progress..I'll be going the full ecoflex mask route. That way if I need/want to change the skin/hair it would be easier down the road. For release I picked up some candle making release in an aerosol can from Hobby lobby. I demolded the sculpt this morning. The release worked perfectly. toughest part was taking out my lifecast..had to dig out a lot of clay to get that out. Once that was out i just pulled the sides away from the edges of the mold and it came right out. The only damage to the sculpt was the undercut areas in the nostrils. Release was excellent..there's zero clay stuck to the fiberglass! The bondo/resin mix worked perfectly as a gelcoat as well.

Sculpt after demold, more damage done after moving it home

Fiberglass negative. Came out great!
Inside of the fiberglass negative has been filled with 1/4" layer of clay with some thicker areas around/in the nose. Tonight I laid in a layer of fiberglass to form the back of the mold. Once this is done I can inject the liquid ecoflex to create the skin layer of the mask.
Waiting three hours til it cures will drive me nuts...looks like it's time for bed.
To today's progress..I'll be going the full ecoflex mask route. That way if I need/want to change the skin/hair it would be easier down the road. For release I picked up some candle making release in an aerosol can from Hobby lobby. I demolded the sculpt this morning. The release worked perfectly. toughest part was taking out my lifecast..had to dig out a lot of clay to get that out. Once that was out i just pulled the sides away from the edges of the mold and it came right out. The only damage to the sculpt was the undercut areas in the nostrils. Release was excellent..there's zero clay stuck to the fiberglass! The bondo/resin mix worked perfectly as a gelcoat as well.

Sculpt after demold, more damage done after moving it home

Fiberglass negative. Came out great!
Inside of the fiberglass negative has been filled with 1/4" layer of clay with some thicker areas around/in the nose. Tonight I laid in a layer of fiberglass to form the back of the mold. Once this is done I can inject the liquid ecoflex to create the skin layer of the mask.
Waiting three hours til it cures will drive me nuts...looks like it's time for bed.
Rion
New Member
Awesome. Loving all the progress pics. The Bowcaster is all kinds of badassery.
I've always wanted to make a Wookie costume, but never seem to have the time or $$. One of these days...
In the meantime, I'm subscribing to your thread in hopes of learning the process and what goes into it. :thumbsup
I've always wanted to make a Wookie costume, but never seem to have the time or $$. One of these days...
In the meantime, I'm subscribing to your thread in hopes of learning the process and what goes into it. :thumbsup
Thanks Rion! In the grand scheme of things, Chewie is not a terribly expensive costume to do. That is if you can make things on your own. When I did my Vader, I spent $800-900 on the entire thing. Snowtrooper $350 or so...Chewie will probably be a little less than or about the same as Vader. It's just a matter of time. I just have the benefit of not working during the winter so I've got nothing but time to work on it for a couple of months.
Happy following!
Happy following!
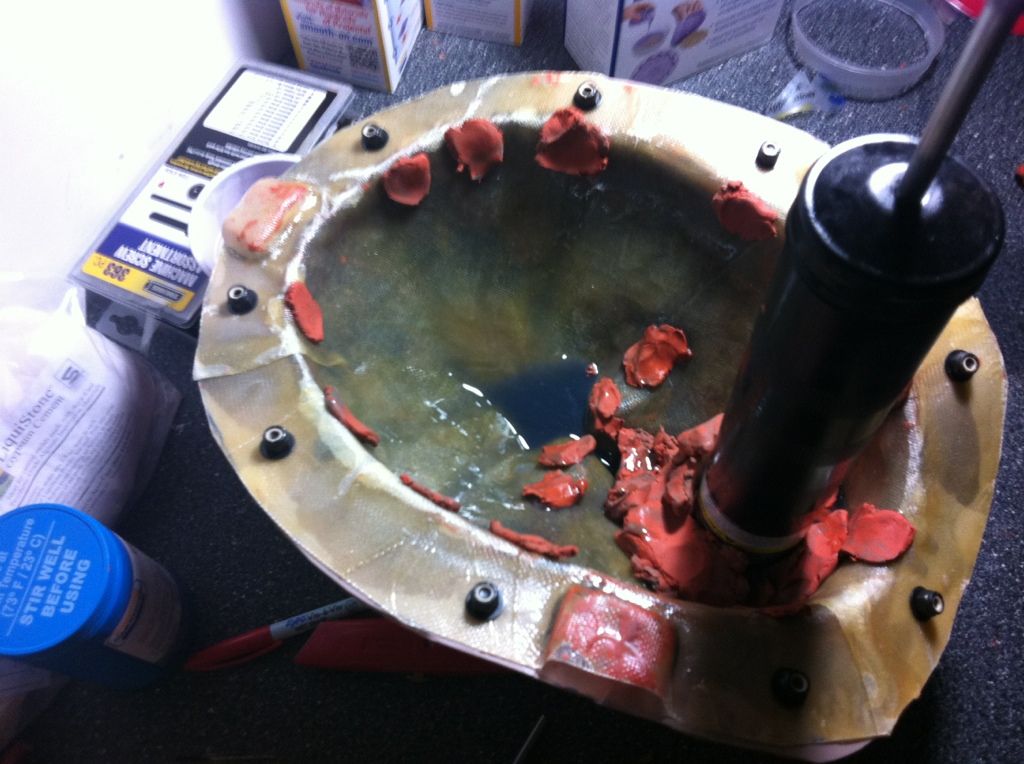
Busy last 24 hrs with the project. Last night i laid in a 1/4" layer of clay in thr negative fiberglass mold to create the void for the ecoflex Next I fiberglassed the back of the skin mold.

This morning I cleaned up the fiberglass on both, drilled out for bolts, added vent holes, and picked up an oil pump to used to inject the ecoflex into the mold.
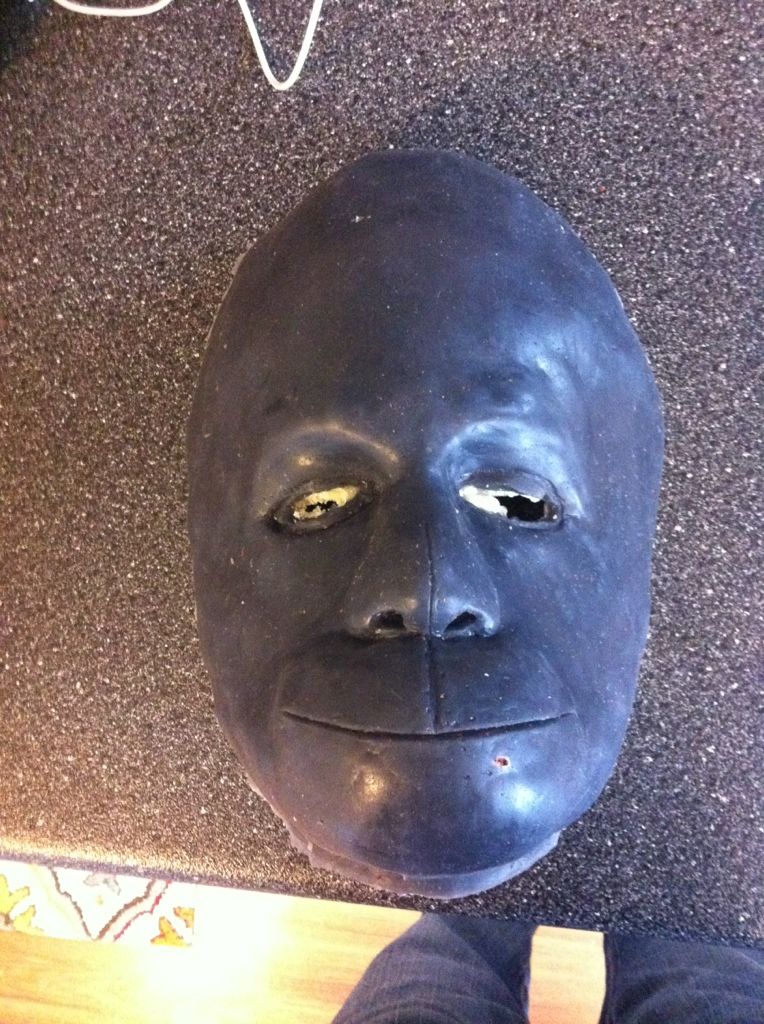
Then came time to run a part. Mixed up the ecoflex with some black tint, added to the injection gun and filled the mold, closing off each vent hole as they started to weep.

Then came the worst part; waiting the 4 hrs for the ecoflex to cure. I'm very pleased with the outcome!

Up next, painting the skin around the mouth, darkening up the nose...oh yeah..the underskull!

This morning I cleaned up the fiberglass on both, drilled out for bolts, added vent holes, and picked up an oil pump to used to inject the ecoflex into the mold.
Then came time to run a part. Mixed up the ecoflex with some black tint, added to the injection gun and filled the mold, closing off each vent hole as they started to weep.

Then came the worst part; waiting the 4 hrs for the ecoflex to cure. I'm very pleased with the outcome!

Up next, painting the skin around the mouth, darkening up the nose...oh yeah..the underskull!
Started out this morning to create the underskull. So, I placed the ecoflex skin back into the negative mold of it. The took my lifecast bust, filled in the undercuts (under nose, lips, eyelids, etc with clay) and placed the lifecast in the mold on top of the ecoflex taking care to line up the eyes and nose. And final part of prep, wrapped the face up in cling wrap to eliminate the myriad of other small undercuts around the bust.
Then I poured in the expanding foam into the void and kept pressure on the lifecast to keep it from shifting.

After allowing the foam to cure until it was hard, yet a touched flexible I removed the mold, skin and foam as a single unit from the bust. I pulled it off early so that it still had a bit of flex to it.
Rear of the mask/underskull

Skin peeled up to show the underskull underneath.

Finished underskull and skin.

Then I poured in the expanding foam into the void and kept pressure on the lifecast to keep it from shifting.

After allowing the foam to cure until it was hard, yet a touched flexible I removed the mold, skin and foam as a single unit from the bust. I pulled it off early so that it still had a bit of flex to it.
Rear of the mask/underskull

Skin peeled up to show the underskull underneath.

Finished underskull and skin.

Did a bunch of trimming of the underskull and thinking about how to best cut the jaw from the skull. Also did a quick bit of painting as well. Mixed the silpig pigment with the ecoflex and painted it on, drying each layer with the hair dryer on low. Worked great and it's still very flexible!


Cut the jaw into the underskull this afternoon. Quickly taped up the jaw and glued in a rubber band just to test it out! Spent more time thinking about where to cut the jaw than actually doing it. Looks like my placement is okay!
At the end of the video is a quick Chewie sound played through the beginnings of the sound system for him. More to come on that at another time!
http://s752.photobucket.com/albums/xx165/jweger77/Chewbacca%20Mask%20Build/?action=view¤t=4A8CAA51-3E1C-4052-AC71-25332E186EFE-4206-000003077C587849.mp4
At the end of the video is a quick Chewie sound played through the beginnings of the sound system for him. More to come on that at another time!
http://s752.photobucket.com/albums/xx165/jweger77/Chewbacca%20Mask%20Build/?action=view¤t=4A8CAA51-3E1C-4052-AC71-25332E186EFE-4206-000003077C587849.mp4
SlimeTime13
Well-Known Member
have you seen those motorized gorilla Halloween masks?
it would be cool to some how put one of those inside of your make!!
looks great btw
it would be cool to some how put one of those inside of your make!!
looks great btw
SlimeTime13
Well-Known Member
meant to say mask
Thanks Slimetime13, ive seen those vids too pretty cool. Im gonna keep it like the original. Much appreciated! Here's a vid of the face in motion(sans snarl! How does my eye depth look?
BB0EBFE2-2910-4D69-B605-6D1B5E532613-5633-000003D2558C9CC2.mp4 video by jweger77 | Photobucket
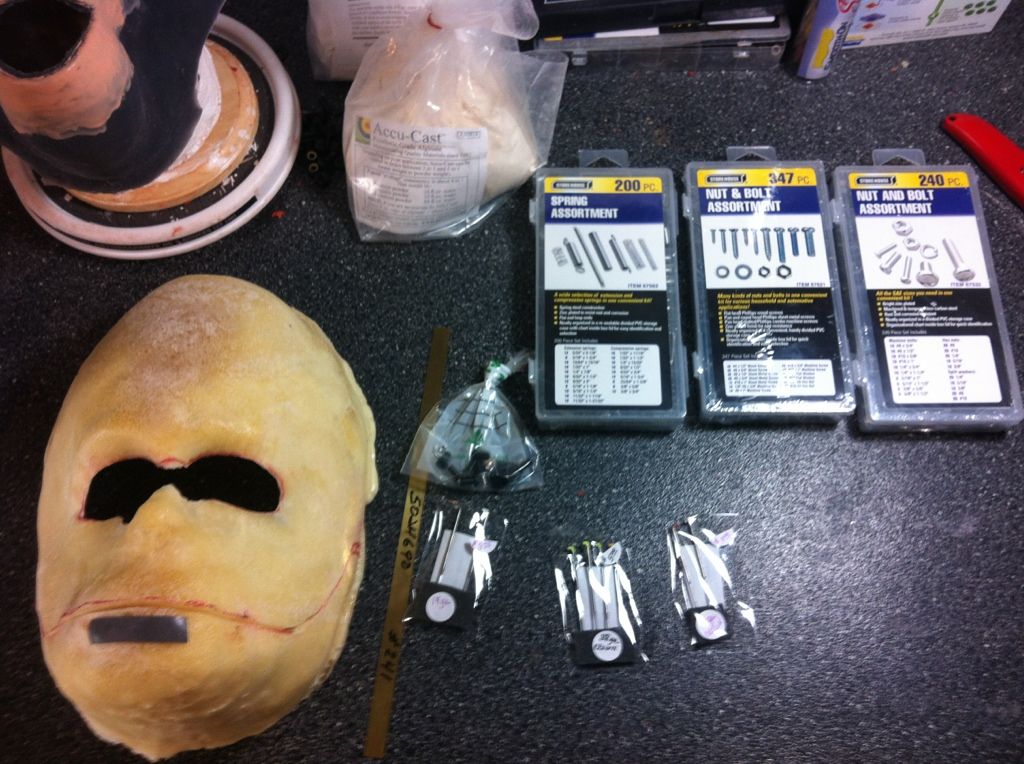
Here's the roughed in hardware.

BB0EBFE2-2910-4D69-B605-6D1B5E532613-5633-000003D2558C9CC2.mp4 video by jweger77 | Photobucket
Here's the roughed in hardware.

SlimeTime13
Well-Known Member
looks very good
Similar threads
- Replies
- 17
- Views
- 1,873
- Replies
- 53
- Views
- 5,720
- Replies
- 8
- Views
- 600
- Replies
- 0
- Views
- 379

