Captain American Civil War Build (Suit complete-ish! Pictures to come)

Re: Captain American Civil War Build (Overshirt Complete, Next: Pants

Pants are done! This post is gonna be a big one since I basically sped through 60% of the construction since my last post. But now I'm about where I should be schedule-wise so I can relax a slight amount as I begin the remaining accessories.

Up first was making the panels at the back of the knee and setting them in. This was probably the hardest to find references of and I had to use a mix of slightly out of focus side shots from the set, and shots of the toy replica to figure out the shape. I think I ultimately got it right though, or at least close enough for a detail that's not immediately visible. After that was all embossed, I also made the remaining bottom half of the leg and the one pentagon-ish shaped panel and attached all of that to the existing pants legs.

pants 1.jpgpants 2.jpg

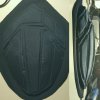
Next was my least favorite part of making Cap pants, the kneepads. I already had a pretty good pattern, but it took me a while to sew as I figured out the best construction order. Ultimately what I did was sew together the individual panels, then emboss them like that, and finally fold/pin the excess, which was then pinned onto the jumbo spandex base and topstitched in place. This ended up being the most precise and efficient method for me, despite still taking a while. The same process was used for the bigger section of the kneepad.

pants 3.jpgpants 4.jpg

After the kneepads were fully constructed, I set them into the pants by folding/pinning the edges of the pants panels, lining them up with the seam lines of the kneepads, and pinning those in place. Think of it like the same way I did the actual kneepads cordura sections. I had previously marked the seamlines on the face side of the spandex by basting along the chalk line on the back side. Once the kneepads were pinned in place and top-stitched down, I carefully removed the basted stitch.

Next I had to close up the pant leg which presented an interesting challenge. The way I patterned the pants, the section at the abck of knee wrapped all the way around from the sides of the kneepad with no break. But, the regular side seams of the pants still existed. This created an interesting problem where I had to sew the exposed part of the knee-back panels, into the gap in the other side of the pants. If it sounds confusing, that's because it was. You can see how I eventually managed to sew it all in place and topstitch it to secure, but it's a bit messier than a lot of my other seams. Thankfully, it's also the least visible area as it's on the inside of the pant legs. Aaaand then just for funsies, I pinned the first completed leg to my mannequin to check how everything lined up and looked.

pants 5.jpgpants 6.jpgpants 7.jpg

Home-stretch. After constructing both legs, I added the zipper. I have a kind of unorthodox method for installing zippers that comes from the fact I don't actually know how to do it properly. But, after wrestling a bit I was able to get it into the fly, and I think it actually came out better than the zipper on my AoU pants! I also made a liner for the pants using leftover jumbo spandex and ponte from previous projects, just so that I didn't have to wear leggings underneath again. Cordura is very scratchy against bareflesh, especially thighs. After finishing the liner, I realized that I needed to undo the topstitching at the zipper panels to slide the liner behind them though. This is because the liners go all the way up to the fly seam, but that would also cover one side of the zipper as is. So I popped open those seams, inserted the liner, and quickly topstitched them back up (those seams actually ended up even cleaner than the ones in the photo below).

pants 8.jpgpants 9.jpg

Last steps not worth documenting, hemming the waistband and cuffs with simple topstitching, and adding snaps to connect the pants to the undershirt. So I'll just end it with a few shots of the pants laid out on my table, and a picture of me wearing the suit so far testing it for...mobility. Yeah, that's what I'm doing.

pants 10.jpgpants 11.jpgpants 12.jpgdab.jpg
 
Last edited:
Re: Captain American Civil War Build (Pants Complete, time for spats!

I managed to get the patterning for the gaiters done in two nights! That's a record for me considering making a gaiter pattern consists of a lot of confusion, re-pinning, pricking myself, and cursing under my breath.

To start the pattern, I took two big pieces of muslin and pinned them around one of my boots. This boot actually still has the gaiter from my AoU suit, as that gives me a good references for how tall I want it to be, where the middle points of the back and front are, and the curvature of the bottom opening. It also makes it's slightly bigger than the boot which'll accommodate the inside space that's lost due to the thickness difference between a single layer of muslin and fully-lined gaiters made of pleather and cordura.

After I got it all pinned, I traced out my seams and curves with sharpie, cut that apart, and transferred it to cardstock. I made a second tracing to keep separate so that I don't have to start from scratch next time I want to pattern gaiters. I traced the cardstock back onto muslin, sewed up the front and pinned the back around the boot. Satisfied with the fit (I removed the gaiter from underneath this time), I roughed out the seams of the non-leather stripe running down the front, as well as the line where the open flaps of the gaiter overlap on the outside. Cut that apart, transferred it all to paper,and added extensions for the gaiters 'chastity panel' at the overlap and the tabs that extend under the boot. I'll be connecting those tabs with elastic strap just to keep it simple.

gaiter 1.jpggaiter 2.jpggaiter 3.jpg

With the main body of the gaiters patterned, I need to pattern all the straps holding it closed. There are 4 straps on each gaiter, 3 equidistant straps that encircle the entire gaiter, and one small strap that holds the bottom of the gaiters together. I picked up some 3/4" and 1/2" buckles on my way home for this to make the patterning easier. This process is a lot of trial and error and guesswork for getting the fight and proportions right, and basically just comes down to experimenting. I did the mini-strap first, hashing out the general lengths needed for the strap that holds the buckle and the strap that goes into the buckles. I test those pieces out in cardstock and once I have a set I like, I trace out the shape on the body pattern to mark their placement on the pleather later. Same process for the bigger straps, although that also came with the added challenge of needing to adjust the lengths of each strap so that when buckle, the ends would more or less look the same length. Yay visual illusions! I didn't pattern the main length of the straps as those will be webbing as opposed to pleather and trying to determine the lengths of those with a flat pattern probably won't be accurate. Once I construct the bodies of the gaiters, I can velcro them shut around my leg and figure out a good total length for those straps.

gaiter 4.jpggaiter 5.jpggaiter 6.jpggaiter 7.jpg
 
Re: Captain American Civil War Build (Pants Complete, time for spats!

I'm about halfway done with the gaiters labor-wise, since I got the main bodies put together this past weekend. Construction of these was pretty straight-forward. I assembled the middle segmented cordura piece, and sewed the inner and front-outer pleather panels to it. Cordura was topstitched under the pleather to keep it flat. Then the back-outer panel was attached to the inner panel, with that seam topstitched as well. These 4 pieces make up the shell.

boot 1.jpgboot 3.jpgboot 2.jpg

Before making the liner, I tested the fit on the shells on the boots I'll be using. I pinned the outer-flaps on the inside at about the point where they overlaps, turned it inside out and dropped it onto the boots. Fit is pretty good with a few wrinkles, but those'll be smoothed out by the liner.

boot 5.jpgboot 4.jpg

The liner for this was made entirely from cordura and in the same order/way as the shell. The shell and liner were pinned and sewn together, with the edge of the flap that tucks underneath left open to turn it right side out. After sewing and turning, I slowly flattened and pinned all the edges and topstitched along all the edges. The open edge was turned into itself, pinned and sewn last to close it all up. The topstitching thing was a bit messier, but it's not exposed when worn. Lastly, I added some velcro to the flaps to hold the bootcover closed for test-fitting. There's still a bit of wrinkle when closed, so I might loosen the overlapping point just a bit to remedy that. But aside from that, all that needs to be added is the elastic strap that goes under the boot, and the straps that keep the bootcover buckled together.

boot 6.jpgboot 7.jpgboot 8.jpg

Sorry for this one being a bit bland! The bootcovers for the CW suit are relatively simple compared to the AoU ones, and I wanted to give some kind of update, but also didn't want to just flood you guys with pictures of black fabrics sewn together with black thread!
 
Re: Captain American Civil War Build (Pants Complete, time for spats!

I hope you can tell by my continual liking of your posts that I think this is coming along splendidly! Awesome as usual!
 
Re: Captain American Civil War Build (Pants Complete, time for spats!

The gaiters are done! I'm really happy because my goal was to have the entire main outfit and at least one accessory completed by end of August and I just barely made that! This means I've got about 5 or 6 weeks for the gloves, belt, harness, and all the pieces that have to be molded and casted. Should be just enough time I hope.

To add all the strapping to the gaiters, I started with the smallest parts first. I wanted to test a new method for reinforcing pleather, so doing the small pieces first made it so that if it didn't work I wouldn't have wasted a lot of materials. First picture shows the general progress. Cut the straps out of cordura, use spray adhesive to attach those to the back of pleather, then when it's dry the pleather around the cordura and add the necessary holes with a leather punch. To attach them buckle-strap to the gaiter, I sewed down the side of the strap that folds under first, then inserted the buckle and sewed to top part down to secure it. The other strap I just sewed down right away. Another thing is that while the buckle straps which fold in half are just 1 layer each of cordura and pleathr, the actual belt straps are 2 layers. Basically I'd make two of the cordura/leather pieces, and sew those assemblies together with the cordura sides touching. This gives the added thickness necessary to make the strap as sturdy as leather, especially a strap as small as this. Then I just quickly added the strap that goes under the boot. I decided to do the same pleather/cordura thing because elastic wasn't necessary due to the way the gaiter opens.

boot 1.jpgboot 2.jpgboot 3.jpg

With my new method a great success aesthetically AND structurally, I moved onto the primary straps for the gaiters! I started with the buckle side first using the same method I used for the small buckle. The second picture illustrates what I meant by sewing down the bottom side first. When I inserted the buckles and sewed the top down, I left one side open so that the straps could be inserted. The actual webbing part was just some 1.5" nylon webbing with 1" webbing laid on top to produce the same look as the CW gaiters. I attached them with a generous amount of spray adhesive; even if it wouldn't permanently hold it would be good enough til the straps were sewn down. Then I just inserted them into the buckle straps and sewed that final edge down to seal it together. Also, I used spare webbing from a previous project to measure how long the straps would have to be to for the other pleather end to sit where I wanted.

boot 4.jpgboot 5.jpgboot 6.jpgboot 7.jpgboot 8.jpg

Making the other end of the straps was just simple repetition of the same process. 6 tab sides total were needed, so that'd be 12 pleather and cordura sections, sewn together the same as the smaller tab strap but with the open end for the webbing. To save some time I actually only made the first 6 of the pleather and cordura pieces, after gluing those together I layered some scraps of pleather and cordura, sewed the constructed tabs down to those, and then just cut around. Took a lot less time than fully making all 12 sides. Same thing as before, inserted the webbing strap, sewed down the open edge. The final touch was to add a few belt loops to the front and back of the bootcover to hold the straps in place. These were made from whatever remaining scraps of pleather/cordura I had at my table.

boot 9.jpgboot 10.jpgboot 11.jpg

And lastly, views of the completed gaiters on my boots from each side! Next up, gloves!

boot 12.jpgboot 13.jpgboot 14.jpgboot 15.jpg
 
Re: Captain American Civil War Build (Gaiters complete, glove time!

Sorry for the long delay between updates! I had a bit of a stall in work over labor day weekend, but I caught up and am actually almost done with the gloves! The left-hand glove is done and the right-hand one needs to be finished and documented. But I thought I'd upload WIP pics of the patterning and initial construction to split it up. Only reason I didn't document the second half is because that involved attached the thumb and fingers which I...wasn't sure if if I could do well yet haha.

So to start, I needed a mockup. I cut apart an old pair of leather gloves to make a base pattern which I transferred to cardstock. These pictures are not that. These pictures are of the pleather mockup I made using that pattern. In retrospect, it probably would've made more sense to just use the initial glove as my mockup for drawing because it already fit well. Also, the wristband part is from some XCoser cap gloves I ordered previously.

glove 1.jpgglove 2.jpg

With my mockup made, I drew out the seams and details onto the glove while wearing it (thank god I remember to make it for my non-dominant hand!). Once I had a sketch I liked, I cut apart the mockup and finalized my paper pattern. I've since adjusted the pattern very slightly (trimming off a few excess spots), but otherwise it's about the same.

glove 3.jpgglove 4.jpgglove 5.jpg

Now for the really nerve-wracking part, assembling the actual glove.I decided the best way to do it for stability's sake was to make the glove top a cordura base with all the pleather parts topstitched on top of it. I cut out my base glovetops, and first thing I did was add the ribbing pattern. I toyed around a bunch of different ways but what you see is the method I eventually settled on, sandwiching the plastic tube from inside a pen between the cordura and topstitching along that! The ribs aren't grouped as closely as I'd like, but it does the job well enough. The main key I realized was to make it so the tube isn't tightly sandwiched between so that the top-layer is actually just a bit snug and retain the tube shape afterwards.

After adding the ribbing, I attached the pleather tips of the fingers to start building my layers. These were just cut out from the pleather, held in place with spray-adhesive, and topstitched into place. The pleather also folds over to seal the tips. And to finish off the glovetops, I added the bigger pleather panel that covers most of the back of the hand. The bottom edge of the pleather is actually folded over and seated on top of the ribbing's excess as it's just a straight line and easy to fold. Then I stitched around that shaped opening, then the top edges, and lastly the knuckle holes were cut into the pleather and stitched around. That last part is probably the part I'm least proud of since frankly they look a bit messy up close. At standing distance and photography distance it looks fine and won't matter, but the perfectionist in me can't help but twitch haha

glove 6.jpgglove 7.jpgglove 8.jpgglove 9.jpg

Alright, hopefully I'll have the 2nd glove documented and completed by Friday so see y'all then!
 
Re: Captain American Civil War Build (Gaiters complete, glove time!

Gloves are done! And this actually puts me very slightly ahead of schedule, yay! Took plenty of photos for finishing them up, although I apologize in advance that my words might not be as informative as articulating how gloves are sewn together is difficult.

Deciding the order to construct this in was pretty difficult because I don't have a sewing machine designed for gloves, and I' terrible at hand-sewing. So I needed to come up with a way to sew these things with my regular sewing machine as much as possible. I started with the thumb tube since that made the most sense. Because of the weird strip that runs up it, I needed to prep the thumb piece and the palm piece for the pleather section to be sewn on. I sewed them partially together to allow that (the pleather strip runs along the thumb right up to the top part of the glove), but left the rest unsewn since that would come later. Then I just very carefully lined up the different edges of the thumb piece and the pleather strip and also topstitched the top edge of the strip to close it up once it was attached. the other side of the thumb was sewn together normally and if you look closely you can see the seam at the top part of the thumb tube. I had to do the topstitching by hand as the closed tube was too small to put through the machine, but that only took a few minutes thankfully.

glove 1.jpgglove 2.jpgglove 3.jpg

With the thumb tube assembled, I needed to fully set it into the palm piece. I ended up doing this by pinning and sewing just an inch or so at a time since the curvature of the seam is so drastic and small. It took a while, but was still much quicker than me trying to stitch it by hand. I also added a second dart/seam to the other side of the thumb tube just to trim up the size a bit. After the thumb and palm were connected, it needed to be attached to the large pleather part of the glove's bottom. That pleather section is actually both pleather and cordura to give it so extra durability. There is seam allowance on the bottom and sides, but not at the ring surrounded the cordura. This was so that I could just line up the pieces and topstitch them together in one shot (double line because the design calls for it). Trying to sew them together normally and then flipping it over to topstitching would create an insane amount of bulk and be really difficult. With the bottom side done, it's topstitched onto the top of the glove in much the seam way as the angles of the edges line up exactly.

glove 4.jpgglove 5.jpgglove 6.jpg

With the main body of the glove ready, I needed to add the fourchettes which are the strips of fabric that run along the sides of your fingers. To be honest, I don't think I could explain how to do this very well but there are tons of online guides and it's a lot less difficult than it would seem. I added the fourchettes to the top of the glove first because I wanted to make sure those seams would look good in case the other side proved more difficult to do. Thankfully though, it the bottom side went just as smoothly. I forgot to include a picture of what it looks like inside out, but once the fourchettes are attached you'd just need to close up the remaining side seam and turn the glove right side out. But, before doing that I actually had to doubleback and add the wristband extension that I forgot to do beforehand. This was just a strip of pleather sewn onto a strip of cordura that makes it so the entire glove has a supporting wristband extending to the sae length as that strip of cordura you see below the ribbing.

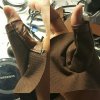
After that was added, I went back, closed up the side seam, turned the glove right side out, and did some topstitching by hand along the side to flatten the seam allowances. This took a while and was painful because of so many thick layers. With that bit of suffering done though, I just had the home stretch of making the actual wristband of the gloves. I cut out an 18" x 2" strip of cordura, and tacked that to the back of my pleather with spray adhesive. I cut around the cordura and then ran the glued together strips through the machine for two rows of topstitching. With my wrist-strap complete, I just handstitched it onto the glove to anchor it (I used pins along the existing seams to test out where the strap should begin and end) and added some velcro in the needed spots.

glove 7.jpgglove 8.jpgglove 10.jpgglove 9.jpg

And with all that done, here's the final product! Still a bit messy and I have no idea how thumb tubes are supposed to look, but they're definitely passable considering one's always gonna be behind a shield anyway.

glove 11.jpgglove 14.jpgglove 13.jpgglove 12.jpg
 
Re: Captain American Civil War Build (Gloves done, belt next)

So the WIP updates are gonna be a little odd for the next week. My original plan was to make the belt, followed by the harness, and lastly to smooth, mold, and cast whatever resin/rubber bits are needed at the end. But, something happened. I found a pleather that works better for the belt and harness than the pleather I used for the gloves. Unfortunately, it's from an online store and I won't get 2 yards I ordered until Monday. So, in the meantime I figured I'd finish patterning both the belt and harness, cut out the craft foam pieces from both that I'll need, AND the fabric pieces that sit on top of the leather panels, and depending on how quickly I finish that, begin sanding and molding the cast pieces.

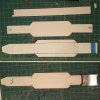
What I got done first was the pattern for the belt, the pouches, and the craft foam parts for the belt. The belt for the CW is basically the same shape, just proportioned differently in relation to the details of the actual suit. I started by making the bottom-most layer by measuring around the waist of the entire suit to get my total width. That came out to around 41" so I bumped that up to 43" for safety. Then, I measure around the suit to determine how long each section of the belt was (the middle section, the wider section, and the back section). Lastly, I measured the open space in the back of my buckle to determine the base width, and then added 1.5" to get the width for the wider panel. With all these measurements in hand, I used my trusty ruler and sharpie to draw out half of the base layer and cut it out. Making the second layer was way easier as all I needed to do was trace the first layer onto the cardstock, and then use my seam allowance ruler to mark 1/4" in on the top and bottom sides. The second layer is also shorter than the bottom layer so I placed that endpoint about 3/4" back from where the ends of the bottom-layer start to slope.

belt 1.jpgbelt 2.jpg

The last section of the belt that needed to be patterned was the cloth/webbing strap that runs down the middle. This was actually pretty easy though since it's basically a straight strap with a cut out at the end. I also patterned this as I won't be using webbing strap for this, but instead I'll be using a brown denim with a very visible twill to it that should simulate the look of webbing while allowing me to add cutouts like that by topstitching the edges. With those three pieces pattern, I just did a basic lineup/test using the buckle to see if it looked good. WIth that done, I needed the patterns for the pouches. These were also relatively simple as I remembered how to do it from my AoU build. I made the pattern for the sides first, choosing their length according to the needed length of each pouch when closed and cut off the ends to round them off. I measured for the main body of the pouch by using some twine to measure around the side pieces, marking my beginning and ending points with a sharpie. Once two spots are marked, I just have to line them up against and ruler and that gicves me my measurement!

belt 3.jpgbelt 4.jpg

With the pattern more or less done, I then transferred them over to craft foam to get my base pieces. Michaels ran out of the big rolls so I had to make sure with a 10pack of smaller sheets, which is why the longer belt layers are split into multiple pieces. Once those were cut out, I just did a quick test fit on the mannequin by taping the top layer to the bottom layer. The pieces connecting the belt at the back was just a quickly measured and cut piece to make up for the gap between the total length of the main belt parts, and the total needed size (41" vs 43"). To my surprise, the belt was actually a bit loose and I had to cinch it in so it would hang properly (but without stretching the craft foam!). This ended up reducing the total size of the belt by an itch, so that it came out to 42" total. To adjust for that I simply sharpied new connecting points onto the foam so I wouldn't forget later. With all that done, I'll be switching to patterning and cutting out foam for the harness!

belt 5.jpgbelt 6.jpgbelt 7.jpgbelt 8.jpg
 
Re: Captain American Civil War Build (Gloves done, belt next)

Oh wow! Good spot, but I think I'll be fine using my AoU boots though haha. Or at least, I don't have the spare cash to afford another pair of boots or boot soles at the moment :p
 
Re: Captain American Civil War Build (Gloves done, belt next)

The belt is done! And, actually pretty quickly to be honest. I ended up not having to do my weird new crafting schedule because the nice people at fabric.com managed to ship my stuff out right away and got it to me Friday! Which was just in time for having all the other pieces ready, like the fabric I used for the "webbing" sections which had to be dyed, cut and sewn. That being said, these pictures are posted in the order of how I would normally progress with this belt, but now necessarily how I actually did.

The base belt is the easiest part for me because it's largely just gluing, lots and lots of gluing. And by now I have a lot of experience with gluing pleather around craft foam to simulate leather. It's a pretty simple progression. I do the base panel first, giving about 1" allowance on each side so I have plenty of pleather to glue down. I also make sure to pull it as taut as I can without warping or folding the craft foam itself, you get a feel for it eventually. I also made the back band that holds it together, with a quickly sewn section of the burgundy cordra since it looks like theres either a dark red or brown fabric section on the back. I like the red just for the little extra color it adds.

I make the next layer of the belt the same way, but also add topstitching around the edges once it's done and then glue it to the base layer with barge. I do it this way because trying to sew through BOTH layers with my machine would be a nightmare and barge holds just as well, the stitching is just for aesthetics. I also add some velcro to attach the back panel to the main belt. And last addition is the fabric section that sits on top which is simple to sew aside from the cut out at one end. The bucket wasnt glued on yet and was just placed to space the section properly since they actually end AT the buckle instead of running underneath to reduce bulk.

belt 1.jpgbelt 2.jpgbelt 3.jpgbelt 4.jpg

And now the REAL workhorse for this part of the project, the pouches. The pouches were a struggle for me last year and I ended up having to fudge it a bit. The end result were pouches that looked good, but weren't functional or super sturdy and this year I wanted them to be both. One thing that made this significantly easier is how well this pleather sews even after its been wrapped around craft foam and glued in place with barge. Seriously, if you ever need good-looking and easy to sew brown pleather, Swavelle/Milll Creek pleather from fabric.com is amazing. Okay shameless plug over. Anyway, the pouches are three main parts, a long panel which makes the body and two side strips. I made the main panels the same way the belt is made, pleather on craft foam, topstitching, custom "webbing" made from fabric. The side panels I patterned by using the AoU belt pattern from TheFoamCave that I bought last year and just adjusted the size for what I needed. I sewed one side of each side panel to the main bodies with my machine to get it started.

belt 5.jpgbelt 6.jpgbelt 7.jpg

The rest of the stripes were sewn in by hand which took a while (1 hour total per pouch so about 5 hours of hand-sewing). I did it this way because looking at pictures of the belt, It looks like the sides of the panels are attached by just topstitching which would make sense on account of the hole leather thing. There was also a very specific way that the sides rounded out and divoted inwards that I wanted to repliace. I think sewing these in by hand, while time consuming, also achieved the look I was going for. It also resulted in something that was sturdy and functional (even though they're too small for things like my phone and wallet). But hey, I can stick candy and cash and business cards or something in there! The other thing that sewing them inwards like this solved was an issue I ran into with my AoU belt where the sides of the pouches poofed out a LOT. I ended up having to stuff them with craft foam to fill them enough to stretch the sides flat. No such tricks necessary hear.

PS, I called this the workhouse because it required handstitching and I am terrible and slow at handstitching.

belt 8.jpgbelt 9.jpgbelt 10.jpg

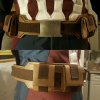
And lastly, just some nice shots of the mostly completed belt with PannausProps' belt buckle attached! This was just affixed with an even coat of epoxy on the back and pressed into place for a few minutes.

belt 11.jpgbelt 12.jpg
 
Re: Captain American Civil War Build (Gloves done, belt next)

Can't wait to see it all together!

It's definitely getting close to that time! Once the harness is done I'll show how it all looks assembled on the mannequin, but I'll be saving the actual full suit up for after the casted pieces are attached!
 
Re: Captain American Civil War Build (Gloves done, belt next)

Did the harness in one shot! And by one shot I mean inbetween real life obligations the past week. But hey, it's done. I forgot to take pictures of the base pattern when I made it, but I basically just removed a strap from my AoU harness and traced it. I did some modifying of it to make it fit a little better with the CW suit (and to adjust the shape a bit), but the pattern originally comes from a PDF pattern that SMP Designs made and has for free download on his website. So, check that out as a start point.

After I had my base pattern, I cut out the foam parts for the leather layer. On the pattern I had marked a spot to line up with the snap on the suits shoulders, so I popped a hole in the foam and added the other part of the snap with some pleather sandwiched inbetween for stability. Then I taped the foam pieces together, clipped them around the back buckle (courtesy of Pannaus Props) to test fit it.

harness 1.jpgharness 2.jpgharness 3.jpgharness 4.jpg

With the foam bases done I coated them in pleather the same way I did the belt. The only other layer is the fabric/webbing on top so that was next up. I patterned it by tracing the pattern for the baselayer and measuring/sketching the fabric portions within that. I decided to separate it into 3 pieces at the points where the bar tabs were as it'd be easier to work with. After cutting those patterns out, I checked them for proportions against the pleather bases. As a last step, I worked out how long the sections would have to be if they were straight instead of curved and redrew them according to that. This is because the fabric parts on the harness have consistent horizontal lines despite being curved. The fabric I use has just enough stretch to make this possible. That's also why it was split into three pieces, so I'd be curving 3 shorter sections instead of one long one.

harness 5.jpgharness 6.jpgharness 7.jpgharness 8.jpg

Making the fabric sections was quick work as it was just tracing and sewing them like the fabric parts for the belt. The topmost section has a slanted cutout that narrows it as that's how the straps are designed on the actual movie suit. If you look closely, youll see the strap goes from being the same width as the buckle, to a width matching the inner dimensions of the buckle. There's also a picture of the suit on display at the Arclight movie theater where one of the buckles is broken, revealing the divot in the strap. After fitting the buckle to the strap and checking to make sure it's the right length, I glue it down to the pleather using barge cement. I had marked where the bar tabs are placed using masking tape to help guide me. The same is done for the section at the other end of the strap. The last section added makes up the middle that curves under the arm. This is the longest and most difficult to curve and as you can see, it has a few rumpled sections. I let this slide as it's under the arm anyway and most likely won't be seen that much. With all 3 sections attached (and their positions doublechecked using one of my bartabs), I used epoxy to glue the straps together around the harness buckle. You can see my very high-tech method of securing the folded over straps as the glue dries.

harness 9.jpgharness 10.jpgharness 11.jpgharness 12.jpg

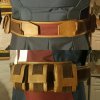
And lastly, just a few shots of the harness sitting on the suit itself. This actually finishes off the sewing and "leatherwork" portion of the suit, so all that's left is molding and casting all the plastic and rubber parts. I'll document that process a bit as I do it this week just to show my way of doing it. But, other than that I'm very close to the finish line and couldn't be happier!

harness 13.jpgharness 14.jpgharness 15.jpgharness 16.jpg
 
Re: Captain American Civil War Build (Sewing complete, molding/casting time)

Hey everyone, sorry for the long radio silence! So, I think it's decently obvious that I did not finish the casting work Sunday. I have it almost complete as the only remaining casted piece are the chest starbursts in rubber which should be done tonight. I am going to be working right up to the wire of NYCC though, as I still need to make my shoulder bells (craft foam and pleather since the modeling fell through), and finish modifying my shield. I've neglected to take many photos unfortunately, so I'll post up the shots I did take during the mold-making and casting process.

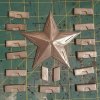
First picture shows the process of making my initial mold for the star, bar tabs, and belt greeble. I actually ended up remaking the molds which is what the 2nd picture is. This because I forgot I was making a 1-part mold, and didnt NEED to use a clay bed. In fact, the clay bed ended up causing my mold to be off-level, and my first few test casts were slanted to a point itd be easier to remold them rather than sand the back flat. Last picture shows my successful pulls of the star, bar tabs, and greebles after I cleaned them and polished them with some fine steel wool. I'm probably going to go over them again with extra fine steel wool just to a pull a little more shine out.

mold 1.jpgmold 2.jpgmold 6.jpg

Inbetween waiting for molds and casts to cure, I started doing some mod work on my Legends shield. I REALLY wanted my shield to have the clawk marks from T'chala's attack and I figured trying it out on my plastic Legends shield was better than attempting it on my much more expensive Art Funk shield. I marked my lines by placing my finger tips about where the scratch starts, marking that with sharpie, and then doing the same for the end of the slash. Really good ref photos of the scene where Cap drops the shield, as well as being able to check the bluray of the fight scene, helped a lot with this. Once I traced out the slashes in sharpie to make sure they look good, I put duct tape inbetween and around each line to serve as a barrier. The slashes were carved in using my dremel and a thin cutting blade. This took more effort than I thought since it didn't want to bite into the plastic at first. Once I got the general lines figured out, I evened out the depth using a hand file with a thin edge. Then I sanded around the claw marks to remove excess material that had melted a bit and to smooth it out, started at 120 grit, to 220, to 400. Not pictured, but I also removed all the rivets from the back so that I could sand that down smooth as well, the holes will be filled with spare resin after the shield is glued back together.

mold 3.jpgmold 4.jpgmold 5.jpg
 
This thread is more than 3 years old.

Your message may be considered spam for the following reasons:

  1. This thread hasn't been active in some time. A new post in this thread might not contribute constructively to this discussion after so long.
If you wish to reply despite these issues, check the box below before replying.
Be aware that malicious compliance may result in more severe penalties.
Back
Top