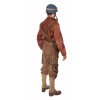
Captain America (Steve Rogers) Leather Jacket - The Avengers.

Finished the goggles today. Had the most trouble with the bridge piece that connects both eye pieces together. The shape of the goggles are fairly different and don't meet up closer together like the ones in the film so the bridge had to be made longer. Ended up molding the shape with blu-tack and then wrapped it in tinfoil and glued it in place. Not my first choice but it ended up working alright. I got the elastic fabric that wraps around the helmet from Walmart, and the whole thing is size-adjustable. Overall I'm not crazy about the bridge piece because it sticks out like a sore thumb in some lighting conditions, but it'll do for now, or I may just take it off and leave it without a bridge. The other thing in these photos that isn't screen accurate are the green chin straps which should match the tan A-yokes instead, but I don't think anybody will be complaining about that.
When I revisit this costume, I plan on creating a new foam template for the goggles' backing allowing me to put the lenses closer together and therefor have a shorter bridge.
Goggles2.JPG Goggles3.JPG

EDIT: Instead of using that nasty blu-tack and tinfoil bridge, I ended up just cutting some metal from an old duct and glueing that in place. It's much simpler, but fits the look of the goggles much better. I'm currently looking at getting some screen accurate goggles replicated via 3D printers, so I'll keep everyone updated if I make any advances with that. When starting this build I was thinking of buying some replica AN-6530's as many people do, but I'd rather not spend $150 just on them, or do what Dan THEMAN did and cut a larger nose section out of the goggles, it makes that nose part more screen accurate, but you still have the rest of the goggles that aren't as accurate...and you just spent $150.
Goggles4.JPG
 
Last edited:
For attaching the shield to my back, I decided that there needed to be 2 main focuses; 1) the shield needs easily be taken on and off and; 2) not inhibit my motion, as I would mainly be wearing this at the Central Canadian Comic Con. I decided that I would go with a leather purse strap (found a good one for $2.00) and also purchased two easy-peel hooks that I would attach to the back of the shield. However instead of using the hooks I ended up just putting the strap through the two handles and attaching it together. The only problem this poses is that the pull of the purse strap is put directly onto the screws that hold the handles in place. When I was attaching the handles one of the screws fell out even after it was in all the way, so I ended up making a new hole for it. The screws are only about 3/4" long so they don't go all the way through the shield which was very important. I've tested it quite a bit and it seems to stay in place very well, fingers crossed. The strap is also adjustable so I can either wear the shield higher up on my back or lower down.
shield5.JPG photo 2 (2).JPG

I also thought I'd show the boots I'll be wearing. Most of them will be hidden behind the leggings so it doesn't matter too much that they're a bit shorter than legit ww2 paratrooper jump boots. They're not screen accurate, but they are brown leather combat boots so they'll do just fine.
boots.JPG
 
Last edited:
I also just found a picture that confirms my suspicion that not only are the general purpose straps used in the suspenders, but they cut the top portion going down the back of the suspenders and replaced them entirely with general purpose straps. They also replaced the D ring from the gp straps with the hook ends up the original suspenders. I won't be cutting my suspenders for this, yet, but it's certainly interesting. I've been looking for a rear shot of the suspenders for a while. If you did your standard 1936 suspenders like this they'd probably be the most accurate ones out there, I just don't want to cut up my new suspenders.

steve27.jpg
 
Last edited:
Just finished working on the paratrooper pants. I found a decent pair of cargo pants from a second hand store and cut up an old pair of darker coloured pants to make up the knee patches and leg tie. I also put some black snaps on the pouches on each leg to make them more legit. Finally I dyed the pants with everything else but put them in a bit afterwards because I didn't want them to go super brown. So unlike the film mine offer more contrast between the jacket and pants, which I think looks better. You can't tell the pants were dyed in the picture for some reason, but they're actually much darker. There are a few dissimilarities between mine and the ones in the film, such as the leg pouches being a bit smaller and mine have zippers going up a portion of the leg. But I think I pulled them off.
pants.JPG

I've also been working on the undershirt. I was having some trouble with the stripes on the bottom portion, so I think I'm just going to leave it as is. The jacket completely covers that area anyways so I don't think it matters right now. I'm also going to redo the star as the one I have is too small. Basically it's just made of craft foam and covered in white cotton and then the pattern is sewn over top.
shirt.JPG
 
Completed the suspenders for the most part. Instead of cutting the actual suspenders as I suspect they did for the film, I just placed the gp straps over top and sewed them in various places. I then attached the end of one of the straps to the right strap as seen in the movie.
For the film they would have had to use 3 gp straps, 2 for the suspenders and one for the end sewn to the right shoulder on the suspenders. However I was able to just use 2, because the end of one of the suspenders was used as the right shoulder bit and for the end of the other strap I just folded it behind.
For the most part, this is the most accurate setup I've seen, although to be even more accurate you would need to keep the ends of both gp straps and instead of the D rings substitute the hooks from the suspenders.
photo 1 (2).JPG photo 2 (3).JPG photo 3.JPG photo 4.JPG
 
Very nice posting and you are going for a very accurate recreation. I just wanted to pass along a couple of things that I did and worked very well.

When I created my shield I also used plywood. I used two planks of 1/4 inch plywood. I found a wooden dinner chair that had a curved back. I soaked both of the plywood sheets in a bathtub for an hour or so and then stacked them on the curved chair back... I used two c-clamps on either end and pulled the middle of the plywood sheets down to the chair back. It provided a great curve. I let it sit and dry over night. When dried, the plywood retained part of the curve. I picked up some t-type screw anchors and placed them through the inside of the curve plywood at the locations of the strap mounting points. Then glued the two pieces together. The t-type screw anchors are supported between and two panels and again I used the c-clamps to get the correct curve in the blank... the watered curve does not hold the proper shape but it readies the wood for the second and correct curve. Once the glue dries, the curve is fixed and becomes part of the structure. I then cut the shape of the shield with a saber saw. Next I used fiberglass resin to paint the shield to seal the wood and primed and sanding it smooth (a little filling putty helps). I did not paint the shield but went to a banner store and purchased sheets of red, white, and blue and gold vinyl. Cutting the stripes, and stars was very easy with an knife. Applying the vinyl was very easy... they have a solution that you can put on to help you align everything... spend a little time talking to the people that do this for a living. They will likely give you a couple of helpful hints.

Since I used the t-type screw anchors, attaching the straps is very easy and can be removed and modified with ease. I also include "d" rings for two reason. The first is so the shield can be hung on the wall without impacting the straps... but also for hanging on my back. I made two small strap that attach to the "d-rings" on the shield and then on the M-1936 suspenders. I have been to a couple of conventions and this works very well. Very quick to hang on back and can be easily taken off for requested photos. I have become very quick at the entire process and the straps are short enough that they can't be seen if you are having a photo taken (If I am going to walk around holding the shield I can remove the straps as they are attached by leather straps using simple snaps). I also made one strap longer than the other so the shield hangs on my back the same way it does in the movie photos.

Anyway, looking to see your costume completed... it reminds me of putting mine together -- which was my first build.
 
Ok so far your suspenders look the most screen accurate. Can you give a little more detail on how you made them and what pieces you bought and from where great job though.
 
Back
Top