dstlouis28
Member
This is my first post on this forum. After admiring the efx Captain America shield and not wanting to spend $600 to buy it I decided to embark on my own Captain America Shield build. My primary hope and goal was that I could make a quality product that comes close to the officially licensed replica prop made by efx. First of all I must give Valor most (or ALL) of the credit for what I deem a very successful build as his original 2011 shield build thread was my primary source, Additionally many others on this forum were great resources as well. While I feel I am very happy with what the finished product has become I believe I learned a great deal from the project and could do much better in the future by doing some things in slightly different ways. Additionally any advice or comments are welcome.
Unfortunately as I had not been able to locate my good camera for the past few weeks most photos were taken on an older Verizon flip phone that uses an awful file upload system to actually access any photos taken. As I am currently sitting in a Canadian hotel room for work purposes, due to high roaming charges I don't currently have access to many of the progress photos that help illustrate the process I went through on this project. However I have nothing better to do than start a tread to share the project I have spent the past 2 weeks doing.
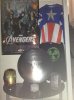
I will attach a few progress and completion photos to this post as well as some drawings I created In a CAD program to aid my build. I will try to post better progress photos later this week after I return to the states and can get the rest of the images off of my phone.
As I stated earlier I started with information attained from Valor's 2011 post but made some slight modifications. My steps are listed below:
.


Unfortunately as I had not been able to locate my good camera for the past few weeks most photos were taken on an older Verizon flip phone that uses an awful file upload system to actually access any photos taken. As I am currently sitting in a Canadian hotel room for work purposes, due to high roaming charges I don't currently have access to many of the progress photos that help illustrate the process I went through on this project. However I have nothing better to do than start a tread to share the project I have spent the past 2 weeks doing.
I will attach a few progress and completion photos to this post as well as some drawings I created In a CAD program to aid my build. I will try to post better progress photos later this week after I return to the states and can get the rest of the images off of my phone.
As I stated earlier I started with information attained from Valor's 2011 post but made some slight modifications. My steps are listed below:
- I began with the Flexible flyer Sled. I first found the centerpoint and then using a jig saw and a relatively steady hand I cut it to a 24” circle. I choose 24” because that is the size of the efx prop. Additionally the proportions were easy to get by overlaying an image of the efx prop in CAD and properly scaling it to get the proper proportions based on a 24” diameter.
- I striped the paint with a paint stripper recommended by my local true value hardware store. The Front of the shield stripped almost effortlessly, I poured the stuff on the front of the sled and the paint basically bubbled up, I was able to effortlessly scrape off the re mainder of the paint. But the back side was a pain. The problem I had was using a cheaper stripping product the night before that did not completely strip all layers of the original paint leaving only a very thin layer on the metal that was very difficult to remove. The name of the stripper I used escapes me currently. However if anyone wants it I will post a more thorough listing of exact products and supplies used at a later date.
- I created a template to etch some grooves into the metal with a nail. The template was constructed with a leather belt taped to a paint stick. I drilled holes at the necessary groove locations, front & back. I also used this same template to create the spinning effect with the metal stripping pad.
- I used the stripping pad to give the metal I would cut the star from the brushed look and I then cut the star out. I started with Valor’s template initially but placed the image into the CAD program I used and resized as needed to fit my design. After cutting out the star I used ¼” painters tape and wrapped the perimeter. Then I scored in the “rivet” marks with a circle template, the backside of a drill bit, and an x-acto knife. Next I used the painters tape as a guide and with a steel ruler as a straight edge I scored the perimeter of the star.
- Next I started the back strap bracket assemblies. The back strap bracket assemblies were designed to match the basic proportions of the efx prop with asymmetrical back strap assemblies to be held left handed. I cut the rear bracket/strap assemblies using a drill, some clamps, and a jig saw. This was a slow process but with some patience worked quite well. I decided to use 16 gauge sheet metal for the rear bracket components since it was getting clear coated and fastened to metal. I decided the advantage of aluminum was not significant enough when the rest of the shield was made from standard carbon steel anyway. If I make a spun aluminum shield in the future I would defiantly use aluminum for the brackets. I then bent the bracket assemblies to the contour of the shield and used ¼-20 T-nuts w/ S.S. washers to provide a 1/8” space between the main (2) main brackets and the (4) belt harnesses. I finished this off W/ ½” X 1/420 S.S. screws and matching S.S. finishing washers. Note: that rather than making (4) additional belt loops to connect to the bracket assemblies at the perimeter of the shield I choose to notch slotted holes at these locations to loop the belt to. I then provided a 15 degree bends in the bracket assemblies. This is in no-way screen accurate but was a simple solution to providing belt loops and minimizing extra parts.
- The Leather strapping was made from (2) wrangler belts purchased at Wal-Mart that were cut into (6) parts and fastened together with #6-32 T-nuts W/. 3/8”x#6-32 S.S. screws and S.S. finishing washers.
- I later began painting the shield with the metal cast paints. Here I made my first big mistake. I began with the Red. I should have started with the blue first. I later taped off the red and a area ¼” smaller than my star and painted the blue.
- I then adhered the star I had cut out with JB weld per the manufactures recommendation. It worked great. However I feel I should not have done this until after clear coating as during my aggressive polishing I did later I caused a slight bending of one of the star edges where I had not quite gotten the JB Weld all the way to the tip of the star point. I was fortunately able to remove the bend so that it is not noticeable to anyone unless I point it out. I am still on the fence if this was a mistake in my JB Weld job or if I should have waited to adhere the star until after the clear coat and polish. Any advice on this would be appreciated.
- Next mistake: I was worried that going over the metal with a gloss clear coat would cause it to be too shiny as I wanted a Matte finish similar to what was seen in CATWS and the Avengers, as well as on the efx replica, however I was wrong. I used Rustoleum clear coat matte over the bare metal to dull the shine for a few coats before starting with the Rustoleum clear gloss over the painted finish. It worked to dull the shine but I think it worked too well. I should have just used the gloss and I think it would have turned out better. It looks silver and the metal shine don’t show through quite as well as I had hoped.
- I used the 3M mounting tape & jb weld to attach the back strap assemblies to the shield.
- I adhered the Stark Industries placard purchased from Brother Foster on etsy to the center of the shield
.